NetBeans has a modular architecture where each module is created as an NBM. OSGi is another popular modular system for Java applications and used by GlassFish to provide a light-weight Java EE 6 compliant application server.
There are a lot of similarities between NBM and OSGi:
- Runtime container manages lifecycle and dependencies of modules
- Both are packaged as JAR, metadata stored in META-INF/MANIFEST.MF and some other information
- Runtime starts up, read meta information and sets up dependencies
- Every module has its own class loader loading explicitly declared dependencies only
The following presentation explain the similarities and differences between NBM and OSGi very clearly:
Netigso provides a bridge between NBM and OSGi bundles. Using Netigso, NetBeans 6.9 allows you to choose between creating a NBM or an OSGi bundle.
This Tip Of The Day (TOTD) shows how to create an OSGi bundle using NetBeans and deploy in GlassFish.
- Download and Install NetBeans 6.9 latest nightly build from here.
- Create a new NetBeans module by selecting "New Project…" and picking the values as shown in the image below:
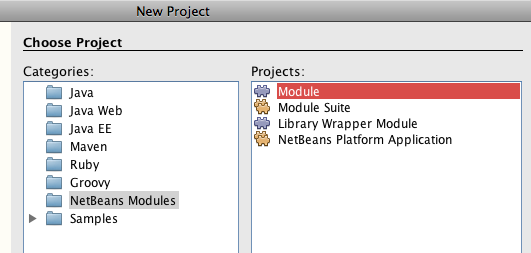
and click on "Next >".
- The module can be created either stand-alone or added to a suite (more on this later). For now, lets create a stand-alone module as shown below:
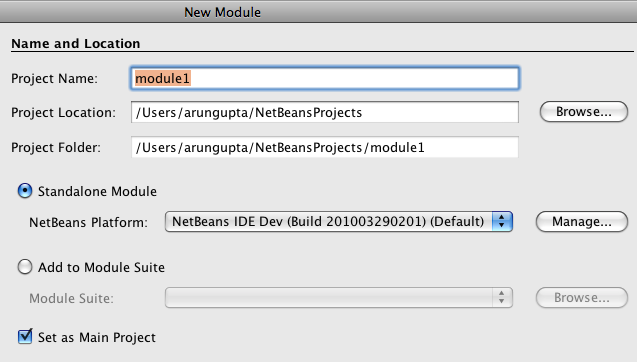
and click on "Next >".
- On the bundle configuration page, specify the options as shown below:
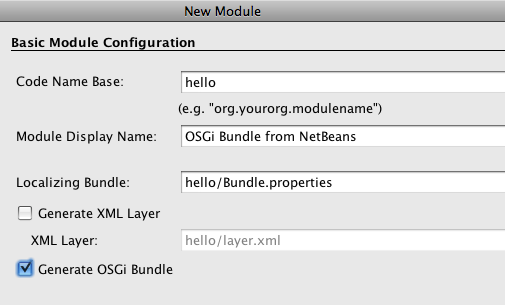
and click on "Finish". "Code Name Base" is name of the base package. Notice "Generate OSGi Bundle" is selected which is what will generate the OSGi bundle instead of NBM. The generated directory structure looks like:
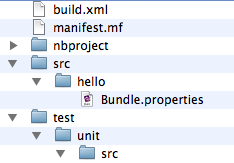
The "manifest.mf" looks like:
Manifest-Version: 1.0
Bundle-Localization: hello/Bundle
Bundle-Name: %OpenIDE-Module-Name
Bundle-SymbolicName: hello
Bundle-Version: 1.0 - Right-click on "Source Packages", select "New", "Installer / Activator …" as shown below:

Take the default values as shown below:
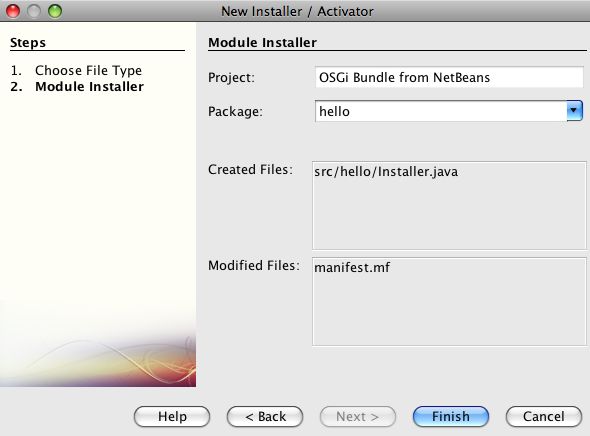
and click on "Finish". The generated source code looks like:
/*
* To change this template, choose Tools | Templates
* and open the template in the editor.
*/
package hello;
import org.osgi.framework.BundleActivator;
import org.osgi.framework.BundleContext;
/**
* Manages a bundle's lifecycle. Remember that an activator is optional and
* often not needed at all.
*/
public class Installer implements BundleActivator {
public void start(BundleContext c) throws Exception {
}
public void stop(BundleContext c) throws Exception {
}
}
The code that needs to be executed during starting and stopping this OSGi bundle can now be added to "start" and "stop" methods respectively. To keep it simple, add the following line to "start" method:
System.out.println("OSGi Bundle from NetBeans: Started");and the following to "stop" method:
System.out.println("OSGi Bundle from NetBeans: Stopped"); - Right-click on the project and select "Create NBM" as shown below:
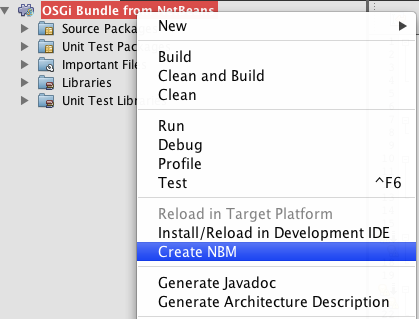
This creates "hello.jar" in the "build" directory of project.
- Fire up your GlassFish as "asadmin start-domain" and copy "hello.jar" to "glassfishv3/glassfish/domains/domain1/autodeploy/bundles" directory to deploy the bundle. It shows a log statement as:
[#|2010-04-02T18:37:07.001-0700|INFO|glassfishv3.0|javax.enterprise.system.std.com.sun.enterprise.v3.services.impl|_ThreadID=24;_ThreadName={felix.fileinstall.poll=5000, felix.fileinstall.bundles.new.start=true, service.pid=org.apache.felix.fileinstall.b3dcd962-8b41-4669-858b-7c2e7d32d5c8, felix.fileinstall.dir=/Users/arungupta/tools/glassfish/v3/final/glassfishv3/glassfish/domains/domain1/autodeploy/bundles/, felix.fileinstall.filename=org.apache.felix.fileinstall-autodeploy-bundles.cfg, service.factorypid=org.apache.felix.fileinstall, felix.fileinstall.debug=1};|OSGi Bundle from NetBeans: Started|#]
The message printed from our generated bundle is highlighted in the bold. TOTD #118 shows other ways to manage OSGi bundles in GlassFish.
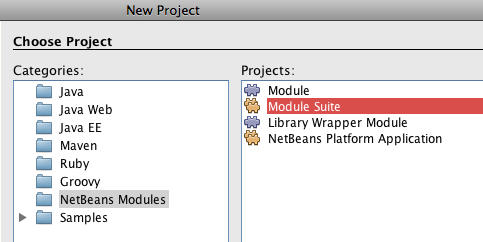
If you’d like to create multiple OSGi bundles that are related to each other then you create a "Module Suite" as shown below:
Multiple modules can be added by right-clicking on "Modules"
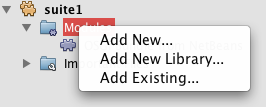
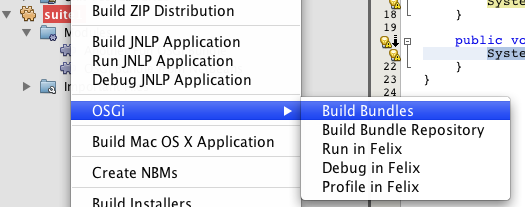
and either creating a new module or adding an existing one. Make sure to check "Generate OSGi Bundle" for the newly created bundle as well. Once the modules are added, then you can right-click on the suite, select "OSGi" and build all the modules in the suite together by selecting "Build Bundles" as shown below:
All the modules are now created in "/build/cluster/modules" directory of your suite.
Clicking on "Build Bundle Repository" creates an OSGi Bundle Repository (a federated repository of bundles).
UPDATED (Apr 8, 2010): Adding Maven-based OSGi functionality from NetBeans based upon a user comment, thanks Petr!
NetBeans also allows Maven-based OSGi projects to be easily created. This allows you to create pure-OSGi bundles without any NBM "fluff".
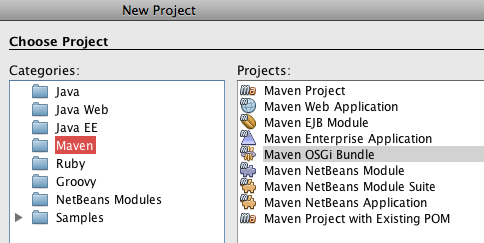
- Create a new Maven project and select "Maven OSGi Bundle":
and click on "Next >".
- Enter the project details as:
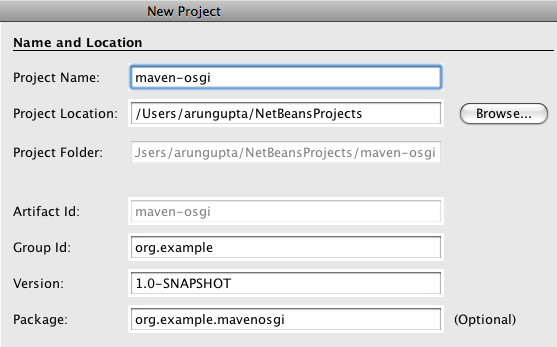
and click on "Finish".
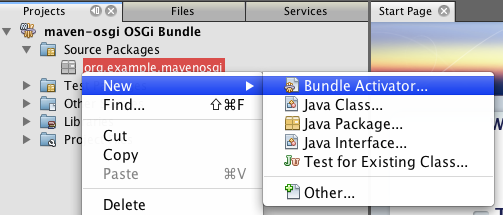
- Expand "Source Packages", right click on the generated package and select "New", "Bundle Activator …":
Take the defaults as shown below:
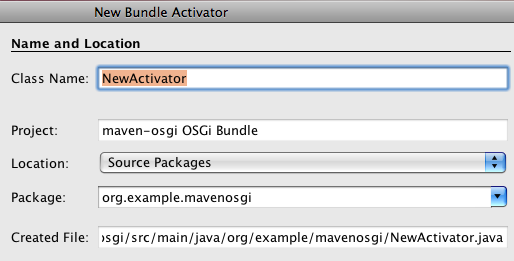
and click on "Finish".
- The generated code looks like:
import org.osgi.framework.BundleActivator;
import org.osgi.framework.BundleContext;
/**
*
* @author arungupta
*/
public class NewActivator implements BundleActivator {
public void start(BundleContext context) throws Exception {
//TODO add activation code here
}
public void stop(BundleContext context) throws Exception {
//TODO add deactivation code here
}
}
Add add the following line to "start" method:
System.out.println("OSGi Bundle from NetBeans/Maven: Started");and the following to "stop" method:
System.out.println("OSGi Bundle from NetBeans/Maven: Stopped"); - Right-click the project and select "Clean and Build" to build "target/maven-osgi-1.0-SNAPSHOT.jar" in your project directory. This bundle can now be dropped in "glassfish/domains/domain1/autodeploy/bundles" to see a message like:
[#|2010-04-08T11:54:09.721-0700|INFO|glassfishv3.0|javax.enterprise.system.std.com.sun.enterprise.v3.services.impl|_ThreadID=24;_ThreadName={felix.fileinstall.poll=5000, felix.fileinstall.bundles.new.start=true, service.pid=org.apache.felix.fileinstall.b3dcd962-8b41-4669-858b-7c2e7d32d5c8, felix.fileinstall.dir=/Users/arungupta/tools/glassfish/v3/final/glassfishv3/glassfish/domains/domain1/autodeploy/bundles/, felix.fileinstall.filename=org.apache.felix.fileinstall-autodeploy-bundles.cfg, service.factorypid=org.apache.felix.fileinstall, felix.fileinstall.debug=1};|OSGi Bundle from NetBeans/Maven: Started|#]
And the generated manifest looks like:
Manifest-Version: 1.0
Export-Package: org.example.mavenosgi;uses:="org.osgi.framework"
Built-By: arungupta
Tool: Bnd-0.0.357
Bundle-Name: maven-osgi OSGi Bundle
Created-By: Apache Maven Bundle Plugin
Bundle-Version: 1.0.0.SNAPSHOT
Build-Jdk: 1.6.0_17
Bnd-LastModified: 1270752743664
Bundle-ManifestVersion: 2
Bundle-Activator: org.example.mavenosgi.NewActivator
Import-Package: org.example.mavenosgi,org.osgi.framework;version="1.5"
Bundle-SymbolicName: org.example.maven-osgi
Technorati: totd netbeans glassfish osgi nbm module
- TOTD #126: Creating an OSGi bundles using Eclipse and deploying in GlassFish
- TOTD #160: OSGi bundles not auto-starting in GlassFish 3.1 ?
- TOTD #118: Managing OSGi bundles in GlassFish v3 – asadmin, filesystem, telnet console, web browser, REST, osgish
- TOTD #127: Embedding GlassFish in an existing OSGi runtime – Eclipse Equinox
- TOTD #36: Deploy OSGi bundles in GlassFish using maven-bundle-plugin
Hi
Is it any similar way to do this OSGi Stuff in eclipse?
I want to use Felix only to integrate with existing product.
Thanks,
Anurag
Comment by Anurag — June 15, 2010 @ 3:40 am
Anurag,
Are you looking for:
http://blogs.sun.com/arungupta/entry/totd_126_creating_an_osgi
?
Comment by Arun Gupta — June 15, 2010 @ 4:26 pm