Thanks to @dmueller for inspiring this blog entry and @FarahJuma for keeping WildFly cartridge continuously updated!
Java EE 7 hands-on lab has been delivered at several conferences, meetups, Java User Groups, and other venues around the world. It provides instructions for a typical 3-tier application using several technologies in the Java EE 7 platform, such as WebSocket 1.0 (JSR 356), Batch Applications (JSR 352), JSON-P 1.0 (JSR 353), JAX-RS 2.0 (JSR 339), JMS 2.0 (JSR 343), CDI 1.1 (JSR 346), JPA 2.1 (JSR 338), and many more. The self-paced instructions allows the attendees to learn the design patterns in Java EE 7, and be productive right away.
This lab can be built using NetBeans, JBoss Tools/Eclipse, or IntelliJ. The deployment can be done on WildFly or GlassFish.
Do you want to get a taste of the application without trying out all the steps ? You can download the solution and deploy on application server of your choice.
Don’t have time for downloading and installing your application server ? OpenShift is your answer!
OpenShift provides an open source hybrid cloud application platform by Red Hat. It enables polyglot applications to be deployed on a public, private, and a hybrid cloud very easily. It provides an extensible cartridge-based architecture that allows a wide range of functionality such as frameworks, databases, monitoring services, or connectors to external backends to be easily added. WildFly cartridge allows you to start a WildFly instance in OpenShift Online.
This Tech Tip shows how to deploy Java EE 7 hands-on lab solution easily on WildFly cartridge on OpenShift.
- Register for a free OpenShift account.
- Login to OpenShift Console.
- Create a new WildFly application using the quickstart. Take the defaults, or change the name to whatever you want, and click on “Create Application”. The following page is shown:
 The default application page looks like:
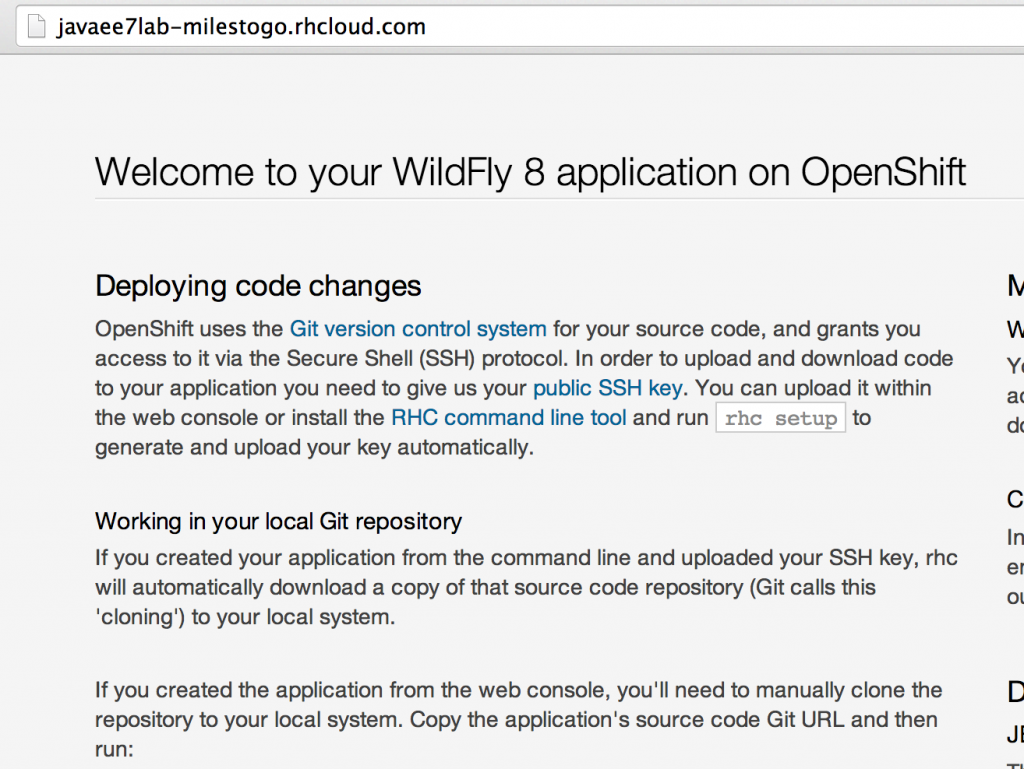
- Clone the workspace using the credentials shown for your application.
- Delete the generated “src” directory and copy the “src” from solution.
123456789javaee7lab> <strong>git rm -rf src</strong>rm 'src/main/java/.gitkeep'rm 'src/main/resources/.gitkeep'rm 'src/main/webapp/images/jbosscorp_logo.png'rm 'src/main/webapp/index.html'rm 'src/main/webapp/snoop.jsp'javaee7lab> <strong>cp -r ~/Downloads/movieplex7/src .</strong> - Commit and push the changes to restart the cartridge:
1234567891011121314151617181920212223242526272829303132333435363738394041424344454647484950515253545556575859606162636465666768697071727374757677787980818283848586878889javaee7lab> <strong>git add src</strong>javaee7lab> <strong>git commit src -m"updating source directory with Java EE 7 lab contents"</strong>[master f6f24ec] updating source directory with Java EE 7 lab contents53 files changed, 3955 insertions(+), 584 deletions(-)delete mode 100644 src/main/java/.gitkeepcreate mode 100644 src/main/java/org/javaee7/movieplex7/batch/SalesBean.javacreate mode 100644 src/main/java/org/javaee7/movieplex7/batch/SalesProcessor.java. . .create mode 100644 src/main/webapp/chat/websocket.jscreate mode 100644 src/main/webapp/client/addmovie.xhtmlcreate mode 100644 src/main/webapp/client/movie.xhtmlcreate mode 100644 src/main/webapp/client/movies.xhtmldelete mode 100644 src/main/webapp/images/jbosscorp_logo.pngdelete mode 100644 src/main/webapp/index.htmlcreate mode 100644 src/main/webapp/index.xhtmlcreate mode 100644 src/main/webapp/points/points.xhtmlcreate mode 100644 src/main/webapp/resources/css/cssLayout.csscreate mode 100644 src/main/webapp/resources/css/default.cssdelete mode 100644 src/main/webapp/snoop.jspjavaee7lab> <strong>git push</strong>warning: push.default is unset; its implicit value is changing inGit 2.0 from 'matching' to 'simple'. To squelch this messageand maintain the current behavior after the default changes, use:git config --global push.default matchingTo squelch this message and adopt the new behavior now, use:git config --global push.default simpleSee 'git help config' and search for 'push.default' for further information.(the 'simple' mode was introduced in Git 1.7.11. Use the similar mode'current' instead of 'simple' if you sometimes use older versions of Git)Counting objects: 81, done.Delta compression using up to 8 threads.Compressing objects: 100% (65/65), done.Writing objects: 100% (76/76), 25.06 KiB | 0 bytes/s, done.Total 76 (delta 38), reused 0 (delta 0)remote: Stopping wildfly cartremote: Sending SIGTERM to wildfly:146819 ...remote: Building git ref 'master', commit f6f24ecremote: Found pom.xml... attempting to build with 'mvn -e clean package -Popenshift -DskipTests'remote: Apache Maven 3.0.4 (r1232336; 2012-12-18 14:36:37-0500)remote: Maven home: /usr/share/java/apache-maven-3.0.4remote: Java version: 1.7.0_55, vendor: Oracle Corporationremote: Java home: /usr/lib/jvm/java-1.7.0-openjdk-1.7.0.55/jreremote: Default locale: en_US, platform encoding: ANSI_X3.4-1968remote: OS name: "linux", version: "2.6.32-431.20.3.el6.x86_64", arch: "i386", family: "unix"remote: [INFO] Scanning for projects...remote: [INFO]remote: [INFO] ------------------------------------------------------------------------remote: [INFO] Building javaee7lab 1.0remote: [INFO] ------------------------------------------------------------------------remote: Downloading: http://mirror1.ops.rhcloud.com/nexus/content/groups/public/org/apache/maven/plugins/maven-clean-plugin/2.4.1/maven-clean-plugin-2.4.1.pom. . .remote: Downloaded: http://mirror1.ops.rhcloud.com/nexus/content/groups/public/xpp3/xpp3_min/1.1.4c/xpp3_min-1.1.4c.jar (25 KB at 204.8 KB/sec)remote: Downloaded: http://mirror1.ops.rhcloud.com/nexus/content/groups/public/org/codehaus/plexus/plexus-utils/3.0.8/plexus-utils-3.0.8.jar (227 KB at 2077.0 KB/sec)remote: [INFO] Packaging webappremote: [INFO] Assembling webapp [javaee7lab] in [/var/lib/openshift/53ab65bee0b8cdf9d1000354/app-root/runtime/repo/target/javaee7lab]remote: [INFO] Processing war projectremote: [INFO] Copying webapp resources [/var/lib/openshift/53ab65bee0b8cdf9d1000354/app-root/runtime/repo/src/main/webapp]remote: [INFO] Webapp assembled in [508 msecs]remote: [INFO] Building war: /var/lib/openshift/53ab65bee0b8cdf9d1000354/app-root/runtime/repo/deployments/ROOT.warremote: [INFO] ------------------------------------------------------------------------remote: [INFO] BUILD SUCCESSremote: [INFO] ------------------------------------------------------------------------remote: [INFO] Total time: 51.727sremote: [INFO] Finished at: Wed Jun 25 22:23:46 EDT 2014remote: [INFO] Final Memory: 10M/152Mremote: [INFO] ------------------------------------------------------------------------remote: Preparing build for deploymentremote: Deployment id is 026b1012remote: Activating deploymentremote: Deploying WildFlyremote: Starting wildfly cartremote: Found 127.11.132.129:8080 listening portremote: Found 127.11.132.129:9990 listening portremote: CLIENT_MESSAGE: Could not connect to WildFly management interface, skipping deployment verificationremote: -------------------------remote: Git Post-Receive Result: successremote: Activation status: successremote: Deployment completed with status: success75b5640..f6f24ec master -> master


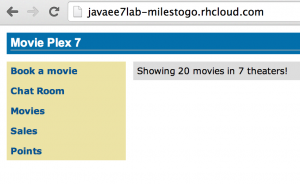
Refreshing the page at javaee7lab-milestogo.rhcloud.com now shows the application deployed successfully:
Simple, isn’t it ?
Try it and let us know your feedback!
Tech Tip #21 also talks about how to get started with WildFly in OpenShift and JBoss Developer Studio.


- Tweet
-

Hi Arun, I did not understand where is the database in this case, could you please help me to understand? Thanks a lot!
WildFly comes with an in-memory database and that is being used for this deployment. You can certainly configure the app to use a separate database.
Hi Arun, yes, I saw, sorry for not have checked better before asking. Thanks a lot for your support!