Tag Archives: openshift

Couchbase Cloud Recipes – Pick your favorite!

Couchbase 4.x Quick Installation provide instructions to install Couchbase on your local machine.

Would you like to run Couchbase 4.x in cloud? There are plenty of recipes available!

Couchbase Cloud Recipes

Looking for detailed instructions on Couchbase Cloud Recipes?

  • Digital Ocean
  • Jelastic
  • OpenShift
  • Docker
  • BigStep
  • Vagrant
  • Kubernetes
  • Joyent Triton
  • Amazon Web Services
  • Microsoft Azure
  • CoreOS and Kubernetes

Read more about it in Couchbase Cloud Deployments. Are there any other cloud/hosting solution where you you would like to see Couchbase running? Did I miss one where Couchbase already runs?

How is your experience of running Couchbase in the cloud?

Couchbase partners provide a complete list of partners.

As always, talk to us using StackOverflow or Forums.

Couchbase on OpenShift 3

OpenShift is Red Hat’s open source PaaS platform. OpenShift 3 provides a holistic experience of running your applications using Docker and Kubernetes. In a classic Red Hat way, all the work is done in the open source at OpenShift Origin. This also drives the next major release of OpenShift Online and OpenShift Enterprise.

OpenShift 3 using Docker and Kubernetes for container orchestration makes it really simple to bring any products that have a Docker image to run with minimal effort. This blog explains how to get started with Couchbase on OpenShift 3.

OpenShift-logoCouchbase Logo

Getting Started with OpenShift 3

  • Download the latest Vagrant box (1.1 as of this writing) and Vagrantfile from: openshift.org/vm/. Copy them in the same directory.Vagrantfile is configured for 2GB memory and can be updated if you need to run more containers. OpenShift Master, Node, Docker Registry, and other components run inside the VM.This blog was written using Vagrant 1.7.4 and VirtualBox 5.0.10r104061.
  • Add the Vagrant Box:
  • Start the Virtual Machine:

Download and Configure OpenShift 3 Client

  • Download Mac 64-bit client tools (gem install rhc is for v2 only) from openshift.org/vm/ and extract them a in directory. The listing looks like:
  • Verify the client version:
  • Remove ~/.kube/configor rename to something else.
  • Login to OpenShift:

Create Couchbase Application in OpenShift 3

  • Create a new Couchbase instance:
    arungupta/couchbase is used as it uses Couchbase REST API to preconfigure the Couchbase server with:

    • Memory and index quota
    • Query, Data, and Index service
    • Username and password credentials
    • Install travel-sample bucket

    This sample bucket will be used later for querying data.

  • Check the status of deployment:

  • Find the list of Pods:

  • Get more details about the Couchbase pod:

Query Couchbase Sample Bucket

  • Log into the Vagrant box:

  • Find a list of all the running containers:

    Search for Couchbase container:

    Get the id for our container:

  • Get IP address of the Pod where Couchbase server is running:

  • Use the IP address shown above to start Couchbase Query CLI:

  • Query the sample bucket:

Enjoy!

This blog shows the very basics of getting started with Couchbase on OpenShift 3. Future blogs will show:

  • How to deploy an application to OpenShift and use this Couchbase
  • How to make this application accessible outside OpenShift
  • How to scale Couchbase in OpenShift
  • Possibly some other interesting items that come along

Do you have a suggestion on what you’d like to see?

Read more about Couchbase 4.1:

  • What’s New in Couchbase Server 4.1
  • Download Couchbase Server 4.1
  • Couchbase Server documentation
  • Talk to us on Couchbase Forums
  • Follow @couchbasedev or @couchbase

WildFly 9 on NetBeans, Eclipse, IntelliJ, OpenShift, and Maven (Tech Tip #86)

wildfly9-banner

WildFly 9 CR1 was recently released. Lots of cool features are included:

  • Intelligent load balancing
  • HTTP/2 and SPDY support
  • A new offline CLI mode
  • Graceful single node shutdown
  • A new Servlet-only distribution

And this is above the usual Java EE 7 compliance!

This blog is a quick check to verify that it works in all three major IDEs and OpenShift.

WildFly 9 and NetBeans

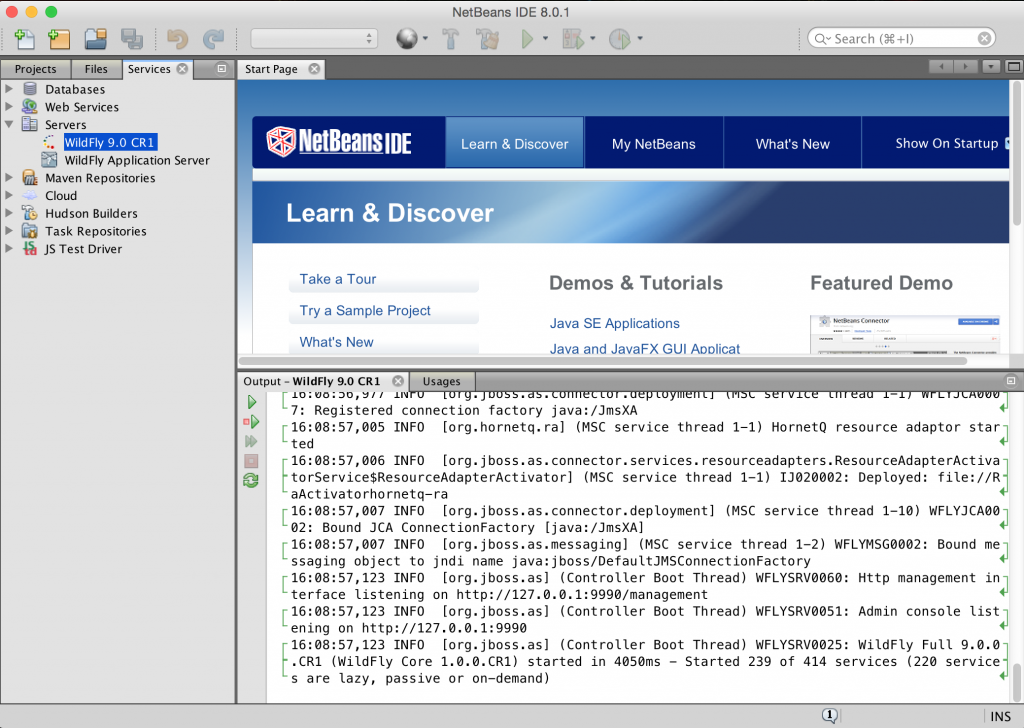
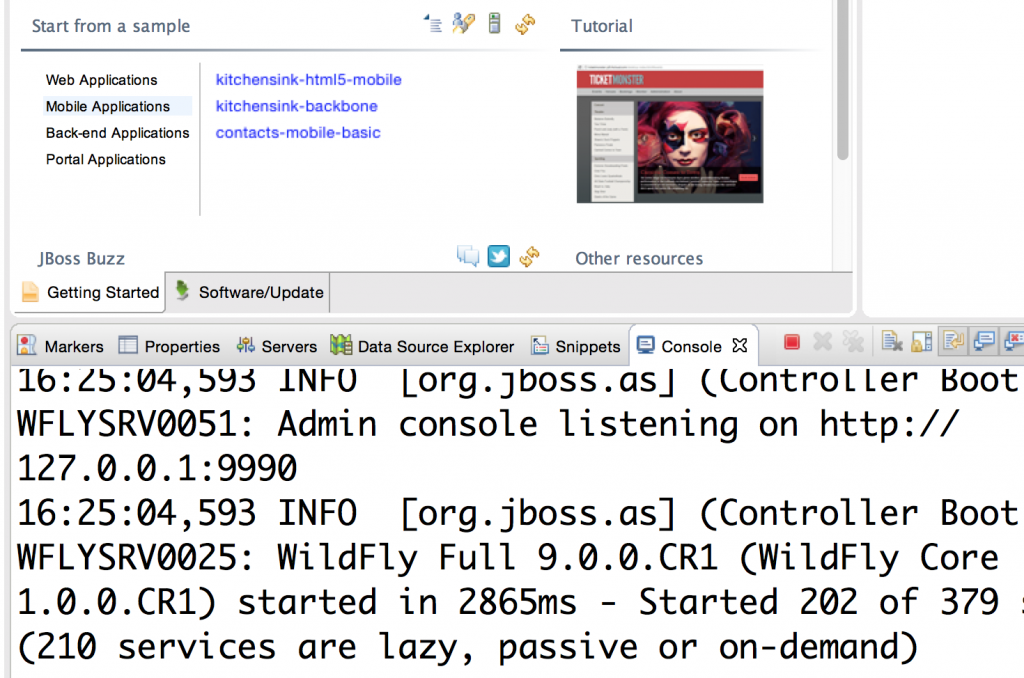
Lets start with NetBeans 8.0.x first. The screenshot shows WildFly 9 CR1 configured in NetBeans and started. The log is shown in the console.

WildFly 9 CR1 on NetBeans

Complete instructions to setup WildFly in NetBeans are in NetBeans 8 and WildFly 8.

WildFly 9 and Eclipse

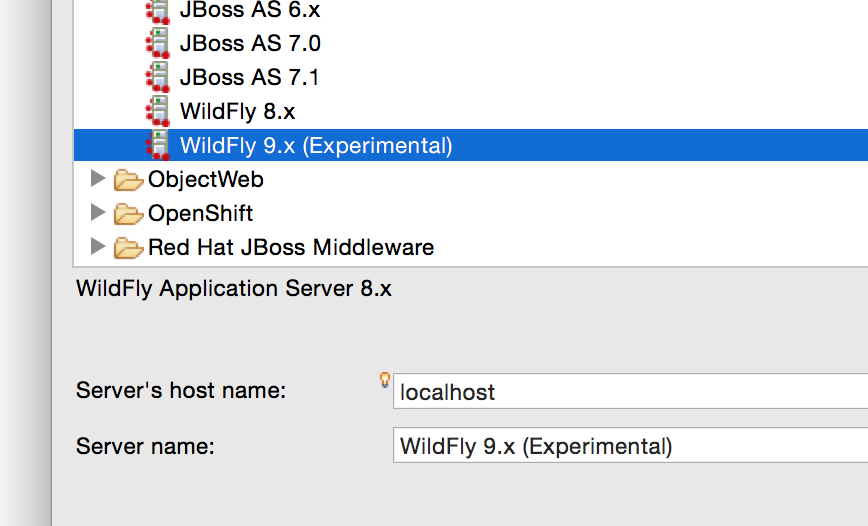
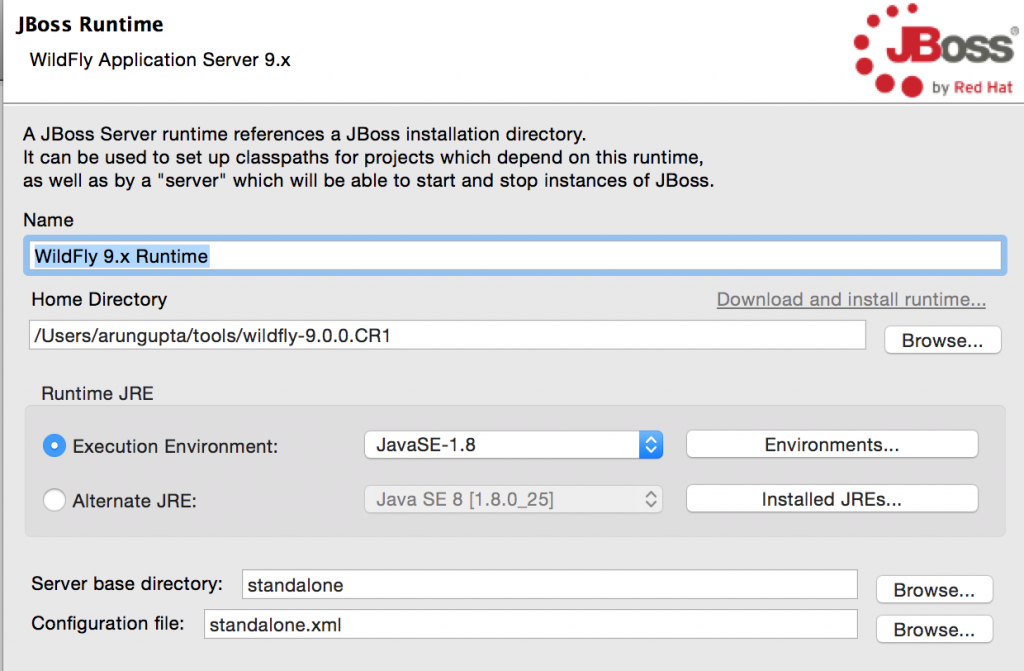
Getting Started with JBoss Tools and WildFly 8 shows how to configure WildFly with JBoss Tools. Here are the series of snapshots that shows configuring WildFly 9 in JBoss Tools with Eclipse Mars M6.

A new experimental runtime …

WildFly 9 CR1 Experimental

Specify the directory …

WildFly 9 CR1 Eclipse New Runtime

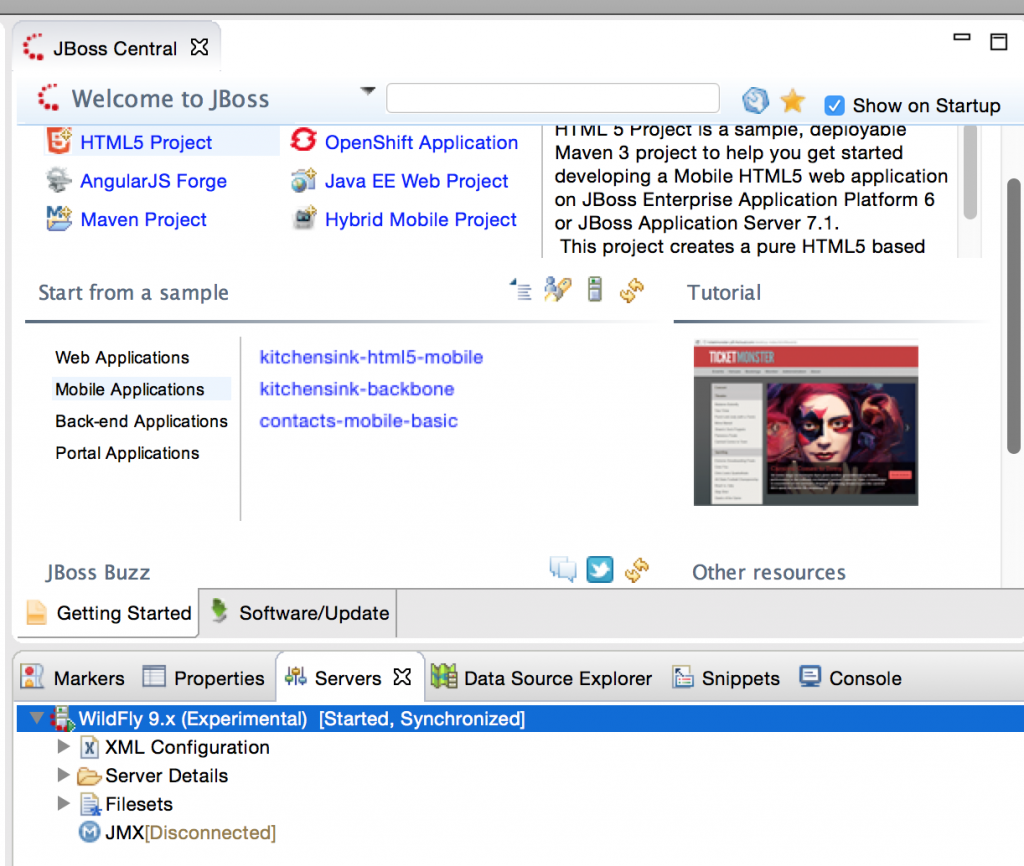
Now WildFly 9 is configured as a Server in Eclipse …

WildFly 9 CR1 Eclipse Servers

And finally the server is up and running …

WildFly 9 CR1 Eclipse Console

Complete details, including download and update center coordinates, are explained at JBoss Tools Alpha 2 for Eclipse Mars.

WildFly 9 and IntelliJ

WildFly 8 and IntelliJ IDEA Screencast provide complete details on how to setup IntelliJ with WildFly. The snapshot below shows WildFly 9 configured in IntelliJ 14.1.2.

WildFly 9 CR1 with IntelliJ 14

WildFly 9 and OpenShift

Creating an OpenShift application is pretty straightforward as well:

This creates a new application and uses WildFly 9 as the underlying application server. Complete details about the OpenShift cartridge are at github.com/openshift-cartridges/openshift-wildfly-cartridge/tree/wildfly-9. You can find about how to create an OpenShift application with an existing application, how to connect to this WildFly instance using JBoss CLI.

WildFly 8 CR1 on OpenShift also provide more details.

WildFly 9 and Maven

WildFly Maven Plugin  provide the latest information about how to get started with WildFly Maven plugin.

But you just need to fire up a WildFly server as:

And then deploy the Java EE 7 Movieplex application as:

And the plugin definition is very simple:

Enjoy!

OpenShift v3: Getting Started with Java EE 7 using WildFly and MySQL (Tech Tip #73)

OpenShift OriginOpenShift is Red Hat’s open source PaaS platform. OpenShift v3 (due to be released this year) will provide a holistic experience on running your microservices using Docker and Kubernetes. In a classic Red Hat way, all the work is done in the open source at OpenShift Origin. This will also drive the next major release of OpenShift Online and OpenShift Enterprise.

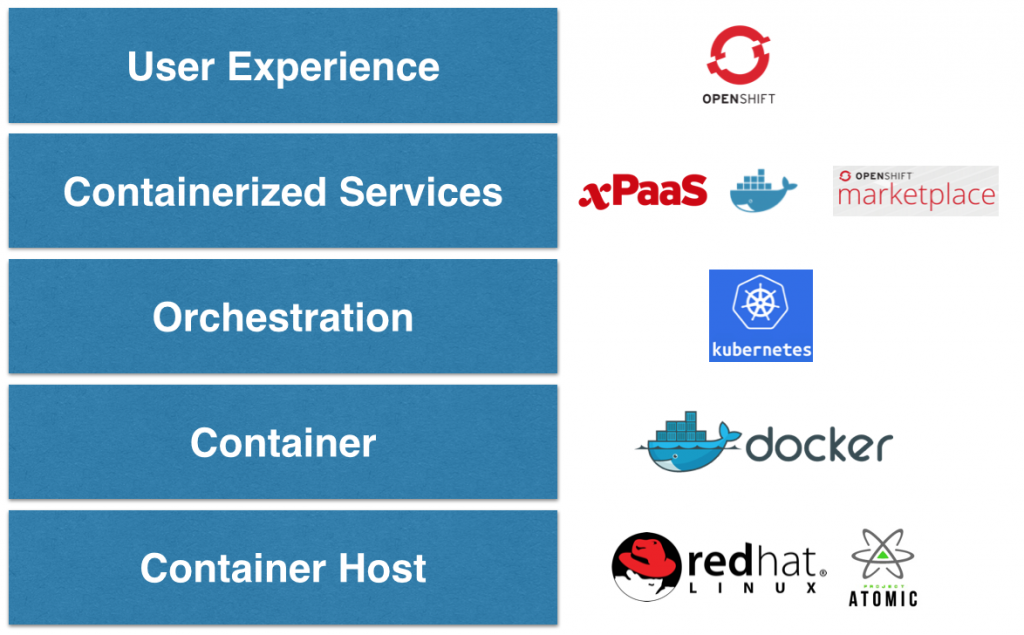
OpenShift v3 uses a new platform stack that is using plenty of community projects where Red Hat contributes such as Fedora, Centos, Docker, Project Atomic, Kubernetes, and OpenStack. OpenShift v3 Platform Combines Docker, Kubernetes, Atomic and More explain this platform stack in detail.

OpenShift v3 Stack

This tech tip will explain how to get started with OpenShift v3, lets get started!

Getting Started with OpenShift v3

Pre-built binaries for OpenShift v3 can be downloaded from Origin at GitHub. However the simplest way to get started is to run OpenShift Origin as a Docker container.

OpenShift Application Lifecycle provide complete details on what it takes to run a sample application from scratch. This blog will use those steps and adapt them to run using boot2docker VM on Mac. And in the process we’ll also deploy a Java EE 7 application on WildFly which will be accessing database on a separate MySQL container.

Here is our deployment diagram:

OpenShift v3 WildFly MySQL Deployment Strategy

  • WildFly and MySQL are running on separate pods.
  • Each of them is wrapped in a Replication Controller to enable simplified scaling.
  • Each Replication Controller is published as a Service.
  • WildFly talks to the MySQL service, as opposed to directly to the pod. This is important as Pods, and IP addresses assigned to them, are ephemeral.

Lets get started!

Configure Docker Daemon

  1. Configure the docker daemon on your host to trust the docker registry service you’ll be starting. This registry will be used to push images for build/test/deploy cycle.
    • Log into boot2docker VM as:
    • Edit the file
      This will be an empty file.
    • Add the following name/value pair:
      Save the file, and quit the editor.

    This will instruct the docker daemon to trust any docker registry on the 172.30.17.0/24 subnet.

Check out OpenShift v3 and Java EE 7 Sample

  1. Download and Install Go and setup GOPATH and PATH environment variable. Check out OpenShift origin directory:

    Note the directory where its checked out. In this case, its ~/workspaces/openshift.

    Build the workspace:

  2. Check out javaee7-hol workspace that has been converted to a Kubernetes application:

    This is also done in ~/workspaces/openshift directory.

Start OpenShift v3 Container

  1. Start OpenShift Origin as Docker container:

    Note ~/workspaces/openshift directory is mounted as /workspaces/openshift volume in the container. Some additional volumes are mounted as well.

    Check that the container is running:

  2. Log into the container as:

  3. Install Docker registry in the container by giving the following command:

  4. Confirm that the registry is running by getting the list of pods:

    osc is OpenShift Client CLI and allows to create and manage OpenShift projects. Some of the kubectl commands can also be using this script.

  5. Confirm the registry service is running. Note the actual IP address may vary:

  6. Confirm that the registry service is accessible:

    And look for the output:

Access OpenShift v3 Web Console

  1. OpenShift Origin server is now up and running. Find out the host’s IP address using boot2docker ip and open http://<IP addresss of boot2docker host>:8444 to view OpenShift Web  Console in your browser.For example, the console is accessible at https://192.168.59.103:8444/ on this machine.
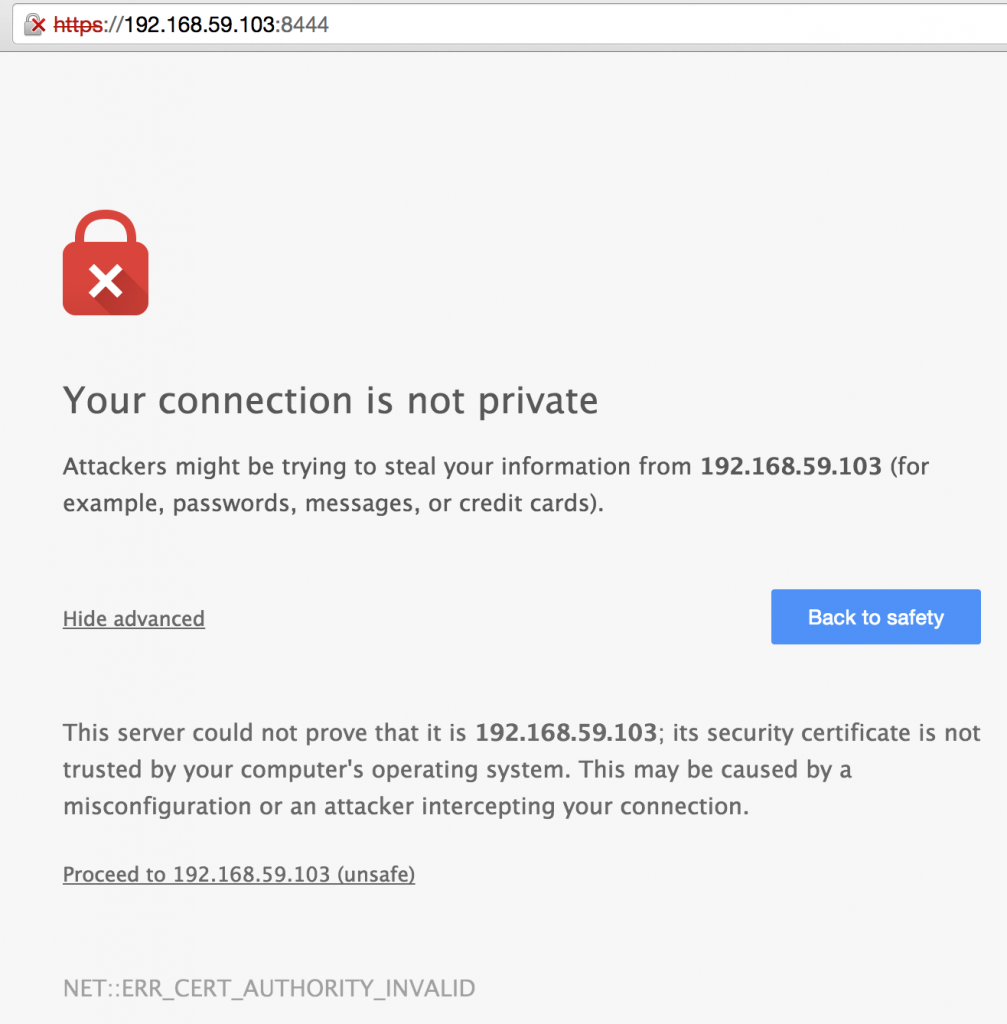
    OpenShift Origin Browser Certificate

    You will need to have the browser accept the certificate at https://<host>:8444 before the console can consult the OpenShift API. Of course this would not be necessary with a legitimate certificate.

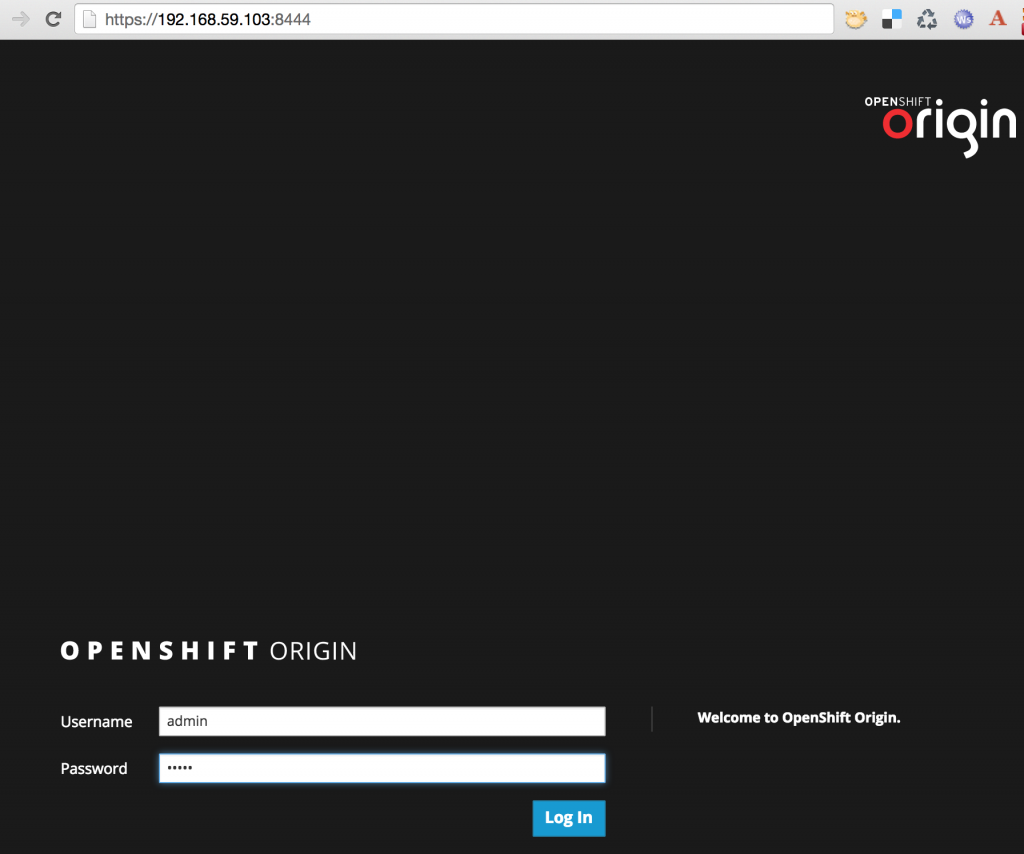
  2. OpenShift Origin login screen shows up. Enter the username/password as admin/admin:
    OpenShift Origin Login Screen

    and click on the “Log In” button. The default web console looks like:

    OpenShift v3 Web Console Default

Create OpenShift v3 Project

  1. Use project.json from github.com/openshift/origin/blob/master/examples/sample-app/project.json in the OpenShift v3 container and create a test project as:

    Refreshing the web console now shows:

    OpenShift Origin Test Project

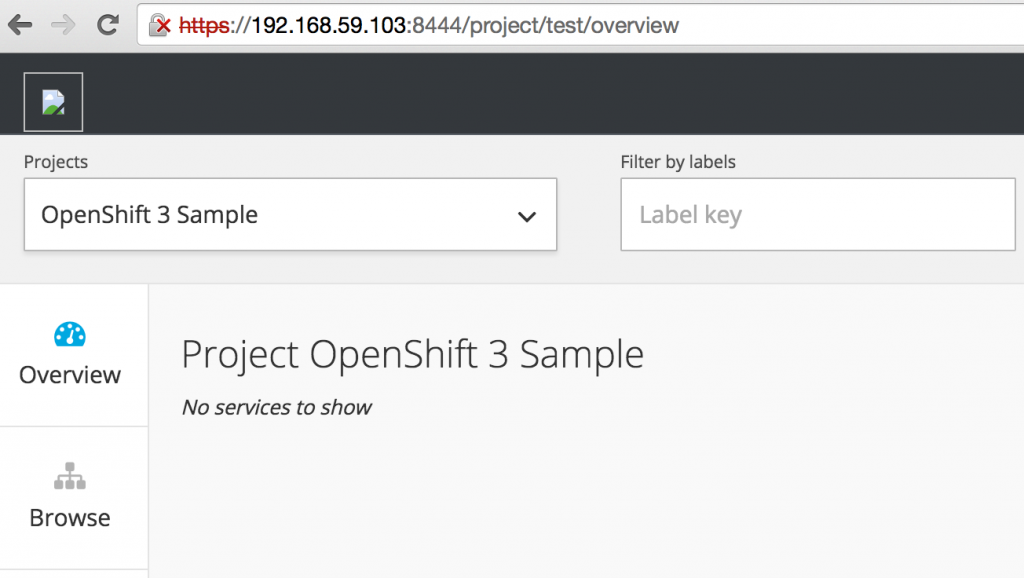
    Clicking on “OpenShift 3 Sample” shows an empty project description:

    OpenShift v3 Empty Project

  2. Request creation of the application template:

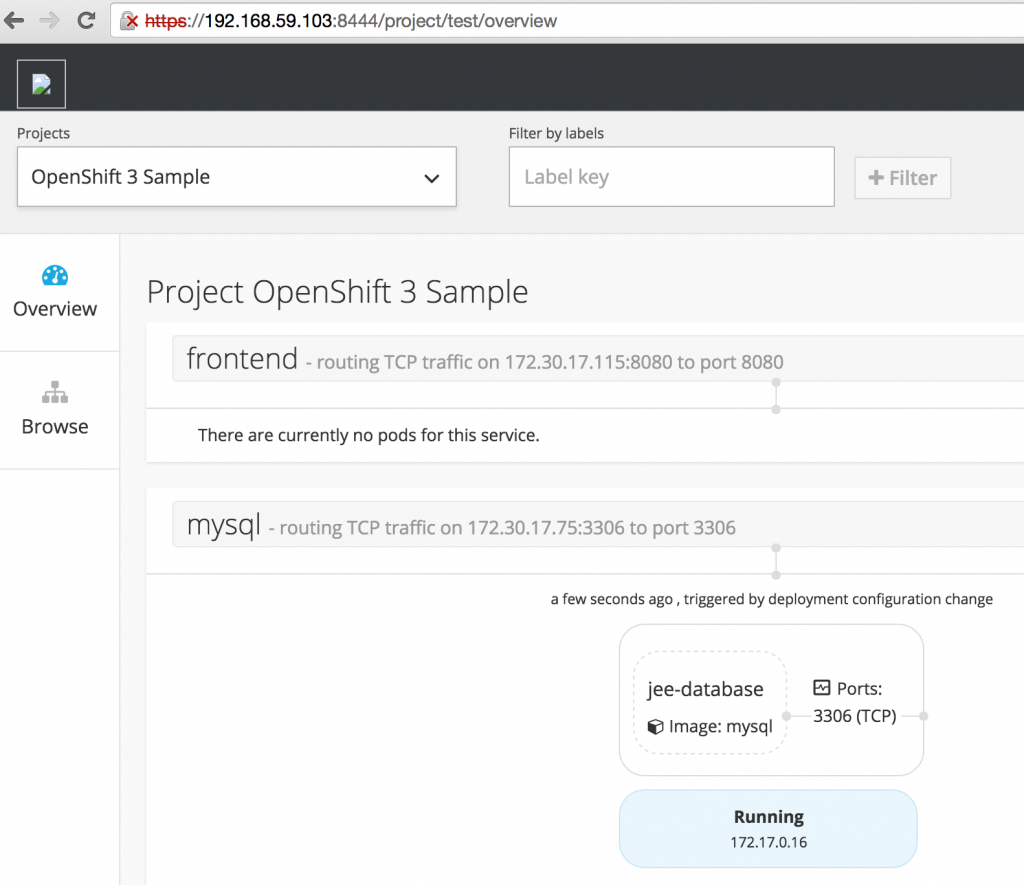
  3. Web Console automatically refreshes and shows:

    OpenShift v3 Java EE 7 Default Project

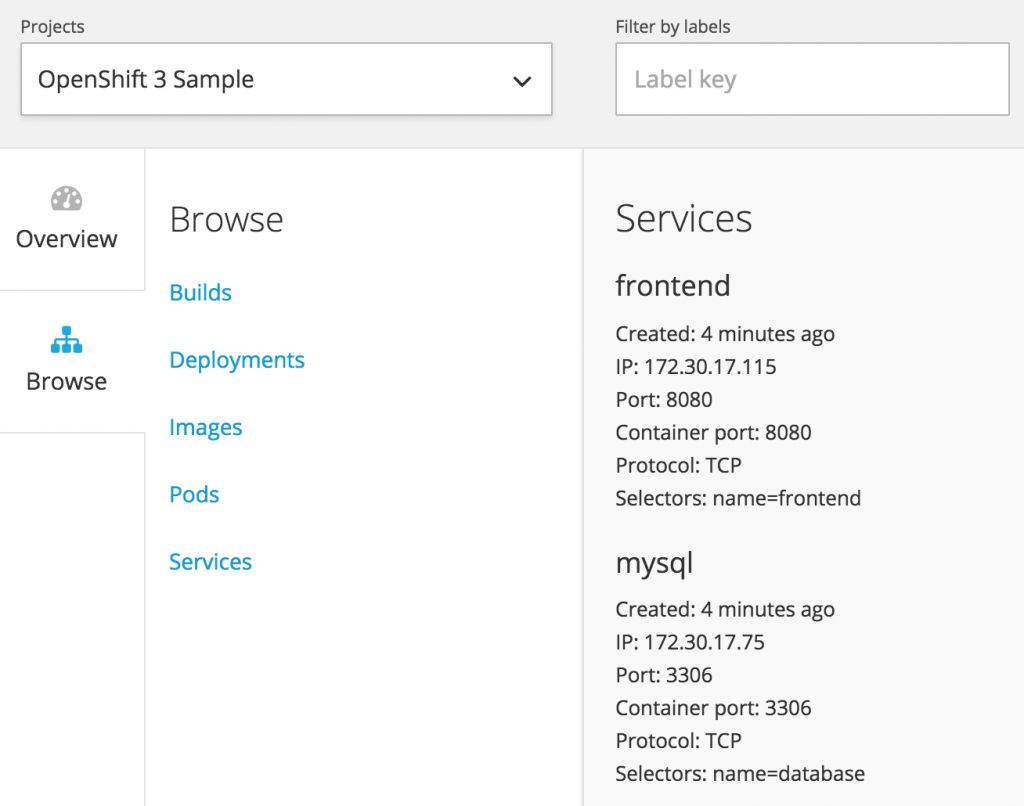
    The list of services running can be seen as:

    OpenShift v3 Java EE 7 Project Services

Build the Project

  1. Trigger an initial build of your project:

  2. Monitor the builds and wait for the status to go to “complete” (this can take a few minutes):

    You can add the –watch flag to wait for updates until the build completes:

    Wait for the STATUS column to show Complete. It will take a few minutes as all the components (WIldFly, MySQL, Java EE 7 application) are provisioned.  Effectively, their new Docker images are created and pushed to the local registry that was started earlier.

    Hit Ctrl+C to stop watching builds after the status changes to Complete.

  3. Complete log of the build can be seen as:

  4. Check for the application pods to start:

    Note, that the “frontend” and “database” pods are now running.

  5. Determine IP of the “frontend” service:

  6. Access the application at http://<IP address of “frontend”>:8080/movieplex7-1.0-SNAPSHOT should work. Note the IP address may (most likely will) vary. In this case, it would be http://172.30.17.115:8080/moviexplex7-1.0-SNAPSHOT.The app would not be accessible yet, as some further debugging is required to configure firewall on Mac when OpenShift v3 is used as Docker container. Until we figure that out, you can do docker ps in your boot2docker VM to see the list of all the containers:

    And then login to the container associated with frontend as:

    This will log in to the Docker container where you can check that the application is deployed successfully by giving the following command:

    This will print the index.html page from the application which has license at the top and rest of the page after that.

    Now once the firewall issue is resolved, this page will then be accessible on host Mac as well.

Lets summarize:

  • Cloned the OpenShift Origin and Java EE 7 sample repo
  • Started OpenShift v3 as Docker container
  • Loaded the OpenShift v3 Web Console
  • Create an OpenShift v3 project
  • Loaded Java EE 7 application template
  • Triggered a build, which deployed the application

Here are some troubleshooting tips if you get stuck.

Enjoy!

Reactive HTML presentations using Reveal.js, Gist, and OpenShift (Tech Tip #69)

Reveal.js is an HTML-base presentation framework. You just need a browser with CSS 3D transforms. That means Chrome, Firefox, Safari, Opera, and IE 10-11 are supported. It also provides a nice fallback for other legacy browsers. Check out a live demo yourself.

This Tech Tip will show how to create Reveal.js-based presentations easily using Gist and OpenShift.

Why Gist?

This allows to separate presentation layer (Node.js on OpenShift) and data layer (HTML source on Gist), and also keep them distributed. You may not be able to show demos using this, at least yet, but at least you don’t need to worry about laptop crashes. You can certainly keep the source for your presentation any where you like, such as github or some other repo, but will need to change the templating framework accordingly.

Why OpenShift?

Full setup of Reveal.js require installation of Node.js, Grunt, and some other dependencies. And even then your slides are only locally available. To keep it completely distributed, its important to have Node.js and other dependencies running in the cloud. OpenShift is an open-source polyglot PaaS from Red Hat that allows Node.js to be run in the cloud. You can certainly choose any other Node.js hosting environment as well but this is what I feel most comfortable with.

Meet Gist-Reveal.it

Ryan (@ryanj) created Gist-Reveal.it an open source slideshow templating service that makes it easy to create, edit, present, and share Reveal.js slides on the web.

A cool feature of this framework on how one browser can be configured as broadcaster and all others as receivers. This allows the presenter (or broadcaster) to share the slides URL and allow the viewers (or receivers) to follow the slides along on their own favorite device. This could be very useful in a conference setting particularly.

Gist-powered Reveal.js slideshows provide a quick introduction to setup. This Tech Tip will use Gist-Reveal.it + OpenShift and show you how to setup your own personal hosting environment for beautiful HTML slides.

Lets get started!

  • Sign up for OpenShift at openshift.com/app/account/new. No credit card and free account gives you 3 gears where each gear is 1GB disk and 0.5 GB memory. A free gear is enough to host your web front end for Reveal.js.
  • Sample slides are available at slides-milestogo.rhcloud.com. Click on the button on bottom-left to create a new OpenShift application. This application will clone the source code from gist-reveal.it and use that as the basis for the newly created application.
  • Create a new gist and copy the unique ID assigned to it. For example, for the gist created at gist.github.com/arun-gupta/9ac2cea40c302986a8e3 the unique id is “9ac2cea40c302986a8e3”.
  • Register a new API key on GitHub at github.com/settings/applications. Note down the “Client ID” and “Client Secret”. Leave “Authorization callback URL” empty, everything else is straight forward.
  • Install OpenShift CLI tools and set them up. Setup a few environment variables for the OpenShift application:
    Replace <CLIENT_SECRET>, <CLIENT_ID>, and <GIST_ID> with your specific values. Also note, “slides” is the application that is used in this blog. If your OpenShift application name is different then use that instead.

    REVEAL_SOCKET_SECRET is an environment variable that is used by the templating framework to look for a special value to identify the broadcaster (or the presenter). This value needs to be kept secret and not shared with others. A browser can be made as a broadcaster by accessing the following URL

    Accessing this URL stores this token in browser’s local storage. Make sure to change the URL to reflect your particular application and domain on OpenShift. For example, application name in this case is “slides” and domain is “milestogo”.

Other configuration values are explained at github.com/ryanj/gist-reveal.it#application-config. Complete documentation about the framework is at github.com/ryanj/gist-reveal.it.

Enjoy!

Thanks to Ryan (@ryanj) for helping me setup the environment.

I’m waiting which conference will be the first one to provide Gist-Reveal themes :-)

Java EE Workflows on OpenShift (Tech Tip #64)

This webinar shows how create a Java EE workflow on OpenShift using WildFly, JBoss Tools, Forge, Arquillian, and OpenShift. Specifically it talks about:

  • How a Java EE application can be easily developed using JBoss Developer Studio and deployed directly to OpenShift
  • Set up Test and Production instances on OpenShift
  • Enable Jenkins to provide Continuous Integration
  • Run the tests on Test and push the WAR to Production

More detailed blog entries are at:

And a lot more at blog.arungupta.me/tag/openshift/.

Enjoy!

Deployment Pipeline for Java EE 7 with WildFly, Arquillian, Jenkins, and OpenShift (Tech Tip #56)

Tech Tip #54 showed how to Arquillianate (Arquillianize ?) an existing Java EE project and run those tests in remote mode where WildFly is running on a known host and port. Tech Tip #55 showed how to run those tests when WildFly is running in OpenShift. Both of these tips used Maven profiles to separate the appropriate Arquillian dependencies in “pom.xml” and <container> configuration in “arquillian.xml” to define where WildFy is running and how to connect to it.

This tip will show how to configure Jenkins in OpenShift and invoke these tests from Jenkins. This will create deployment pipeline for Java EE.

Lets see it in action first!

Configuration required to connect from Jenkins on OpenShift to a WildFly instance on OpenShift is similar to that required for  connecting from local machine to WildFly on OpenShift. This configuration is specified in “arquillian.xml” and we can specify some parameters which can then be defined in Jenkins.

On a high level, here is what we’ll do:

  • Use the code created in Tech Tip #54 and #55 and add configuration for Arquillian/Jenkins/OpenShift
  • Enable Jenkins
  • Create a new WildFly Test instance
  • Configure Jenkins to run tests on the Test instance
  • Push the application to Production only if tests pass on Test instance

Lets get started!

  1. Remove the existing boilerplate source code, only the src directory, from the WildFly git repo created in Tech Tip #55.
  2. Set a new remote to javaee7-continuous-delivery repository:
  3. Pull the code from new remote:
    This will bring all the source code, include our REST endpoints, web pages, tests, updated “pom.xml” and “arquillian.xml”. The updated “pom.xml” has two new profiles.
    Few points to observe here:

    1. “openshift” profile is used when building an application on OpenShift. This is where the application’s WAR file is created and deployed to WildFly.
    2. A new profile “jenkins-openshift” is added that will be used by the Jenkins instance (to be enabled shortly) in OpenShift to run tests.
    3. “arquillian-openshift” dependency is the same as used in Tech Tip #55 and allows to run Arquillian tests on a WildFly instance on OpenShift.
    4. This profile refers to “jenkins-openshift” container configuration that will be defined in “arquillian.xml”.

    Updated “src/test/resources/arquillian.xml” has the following container:

    This container configuration is similar to the one that was added in Tech Tip #55. The only difference here is that the domain name, application name, and the SSH user name are parametrized. The value of these properties is defined in the configuration of Jenkins instance and allows to run the test against a separate test node.

  4. Two more things need to be done before changes can be pushed to the remote repository. First is to create a WildFly Test instance which can be used to run the tests. This can be easily done as shown:

    Note the domain here is milestogo, application name is mywildflytest, and SSH user name is 546e3743ecb8d49ca9000014. These will be passed to Arquillian for running the tests.

  5. Second is to enable and configure Jenkins.In your OpenShift Console, pick the “mywildfly” application and click on “Enable Jenkins” link as shown below:techtip56-enable-jenkinsRemember this is not your Test instance because all the source code lives on the instance created earlier.Provide the appropriate name, e.g. jenkins-milestogo.rhcloud.com in my case, and click on “Add Jenkins” button. This will provision a Jenkins instance, if not already there and also configure the project with a script to build and deploy the application. Note down the name and password credentials.
  6. Use the credentials to login to your Jenkins instance.Select the appropriate build, “mywildfly-build” in this case. Scroll down to the “Build” section and add the following script right after “# Run tests here” in the Execute Shell:

    Click on “Save” to save the configuration. This will allow to run the Arquillian tests on the Test instance. If the tests pass then the app is deployed. If the tests fail, then none of the steps after that step are executed and so the app is not deployed.

  7. Lets push the changes to remote repo now:

    The number of dots indicate the wait for a particular task and will most likely vary for different runs.  And Jenkins console (jenkins-milestogo.rhcloud.com/job/mywildfly-build/1/console) shows the output as:

    Log files for Jenkins can be viewed as shown:

    This shows the application was successfully deployed at mywildfly-milestogo.rhcloud.com/index.jsp and looks like as shown:

    techtip56-mywildfly-output-tests-passing

Now change “src/main/webapp/index.jsp” to show a different heading. And change  “src/test/java/org/javaee7/sample/PersonTest.java” to make one of the tests fail. Doing “git commit” and “git push” shows the following results on command line:

The key statement to note is that deployment is halted after the tests are failing. And you can verify this by revisiting mywildfly-milestogo.rhcloud.com/index.jsp and check that the updated “index.jsp” is not visible.

In short, tests pass, website is updated. And tests fail, the website is not updated. So you’ve built a simple deployment pipeline for Java EE 7 using WildFly, OpenShift, Arquillian, and Jenkins!

Arquillian tests on a WildFly instance hosted on OpenShift (Tech Tip #55)

Tech Tip #54 explained how to enable Arquillian for an existing Java EE project. In that tip, the tests were run against a locally installed WildFly server. Would the same adapter work if this WildFly instance was running on OpenShift ? No!

Because the security constraints and requirement of a PaaS, as opposed to a localhost, are different. Lets take a look at what’s required to run our tests in javaee7-continuous-delivery on a WildFly instance hosted on OpenShift.

Lets get started!

  1. As explained in Tech Tip #52, create a WildFly application on OpenShift as shown:
    Note down the ssh user name from the log. This is the part before @ in the value corresponding to SSH to.
  2. Until FORGEPLUGINS-177 is resolved, we need to manually add maven profile and provide container configuration information in “arquillian.xml”. Add the following <profile> to “pom.xml”:
    This is using arquillian-openshift container and referring to arquillian-wildfly-openshift configuration that will be matched with the appropriate container in “arquillian.xml”.

    So this is how the updated “arquillian.xml” look:

    Note the new <container> with the qualifier arquillian-wildfly-openshift. It provides information about where the server is located and some other configuration properties. The sshUserName property value should be the same from the WildFly instance created earlier.

  3. That’s it, now you can run the test against the WildFly instance on OpenShift:

The complete source code is available at github.com/arun-gupta/javaee7-continuous-delivery.

Enjoy!

Slides from Nuts and Bolts of WebSocket at #Devoxx 2014

Peter Moskovits from Kaazing (@peterm_kaazing) and I gave a university talk at Devoxx 2014 on Nuts and Bolts of WebSocket. The slides are now available at:

The entire session is recorded and will be made available on parleys.com in the coming weeks/months.

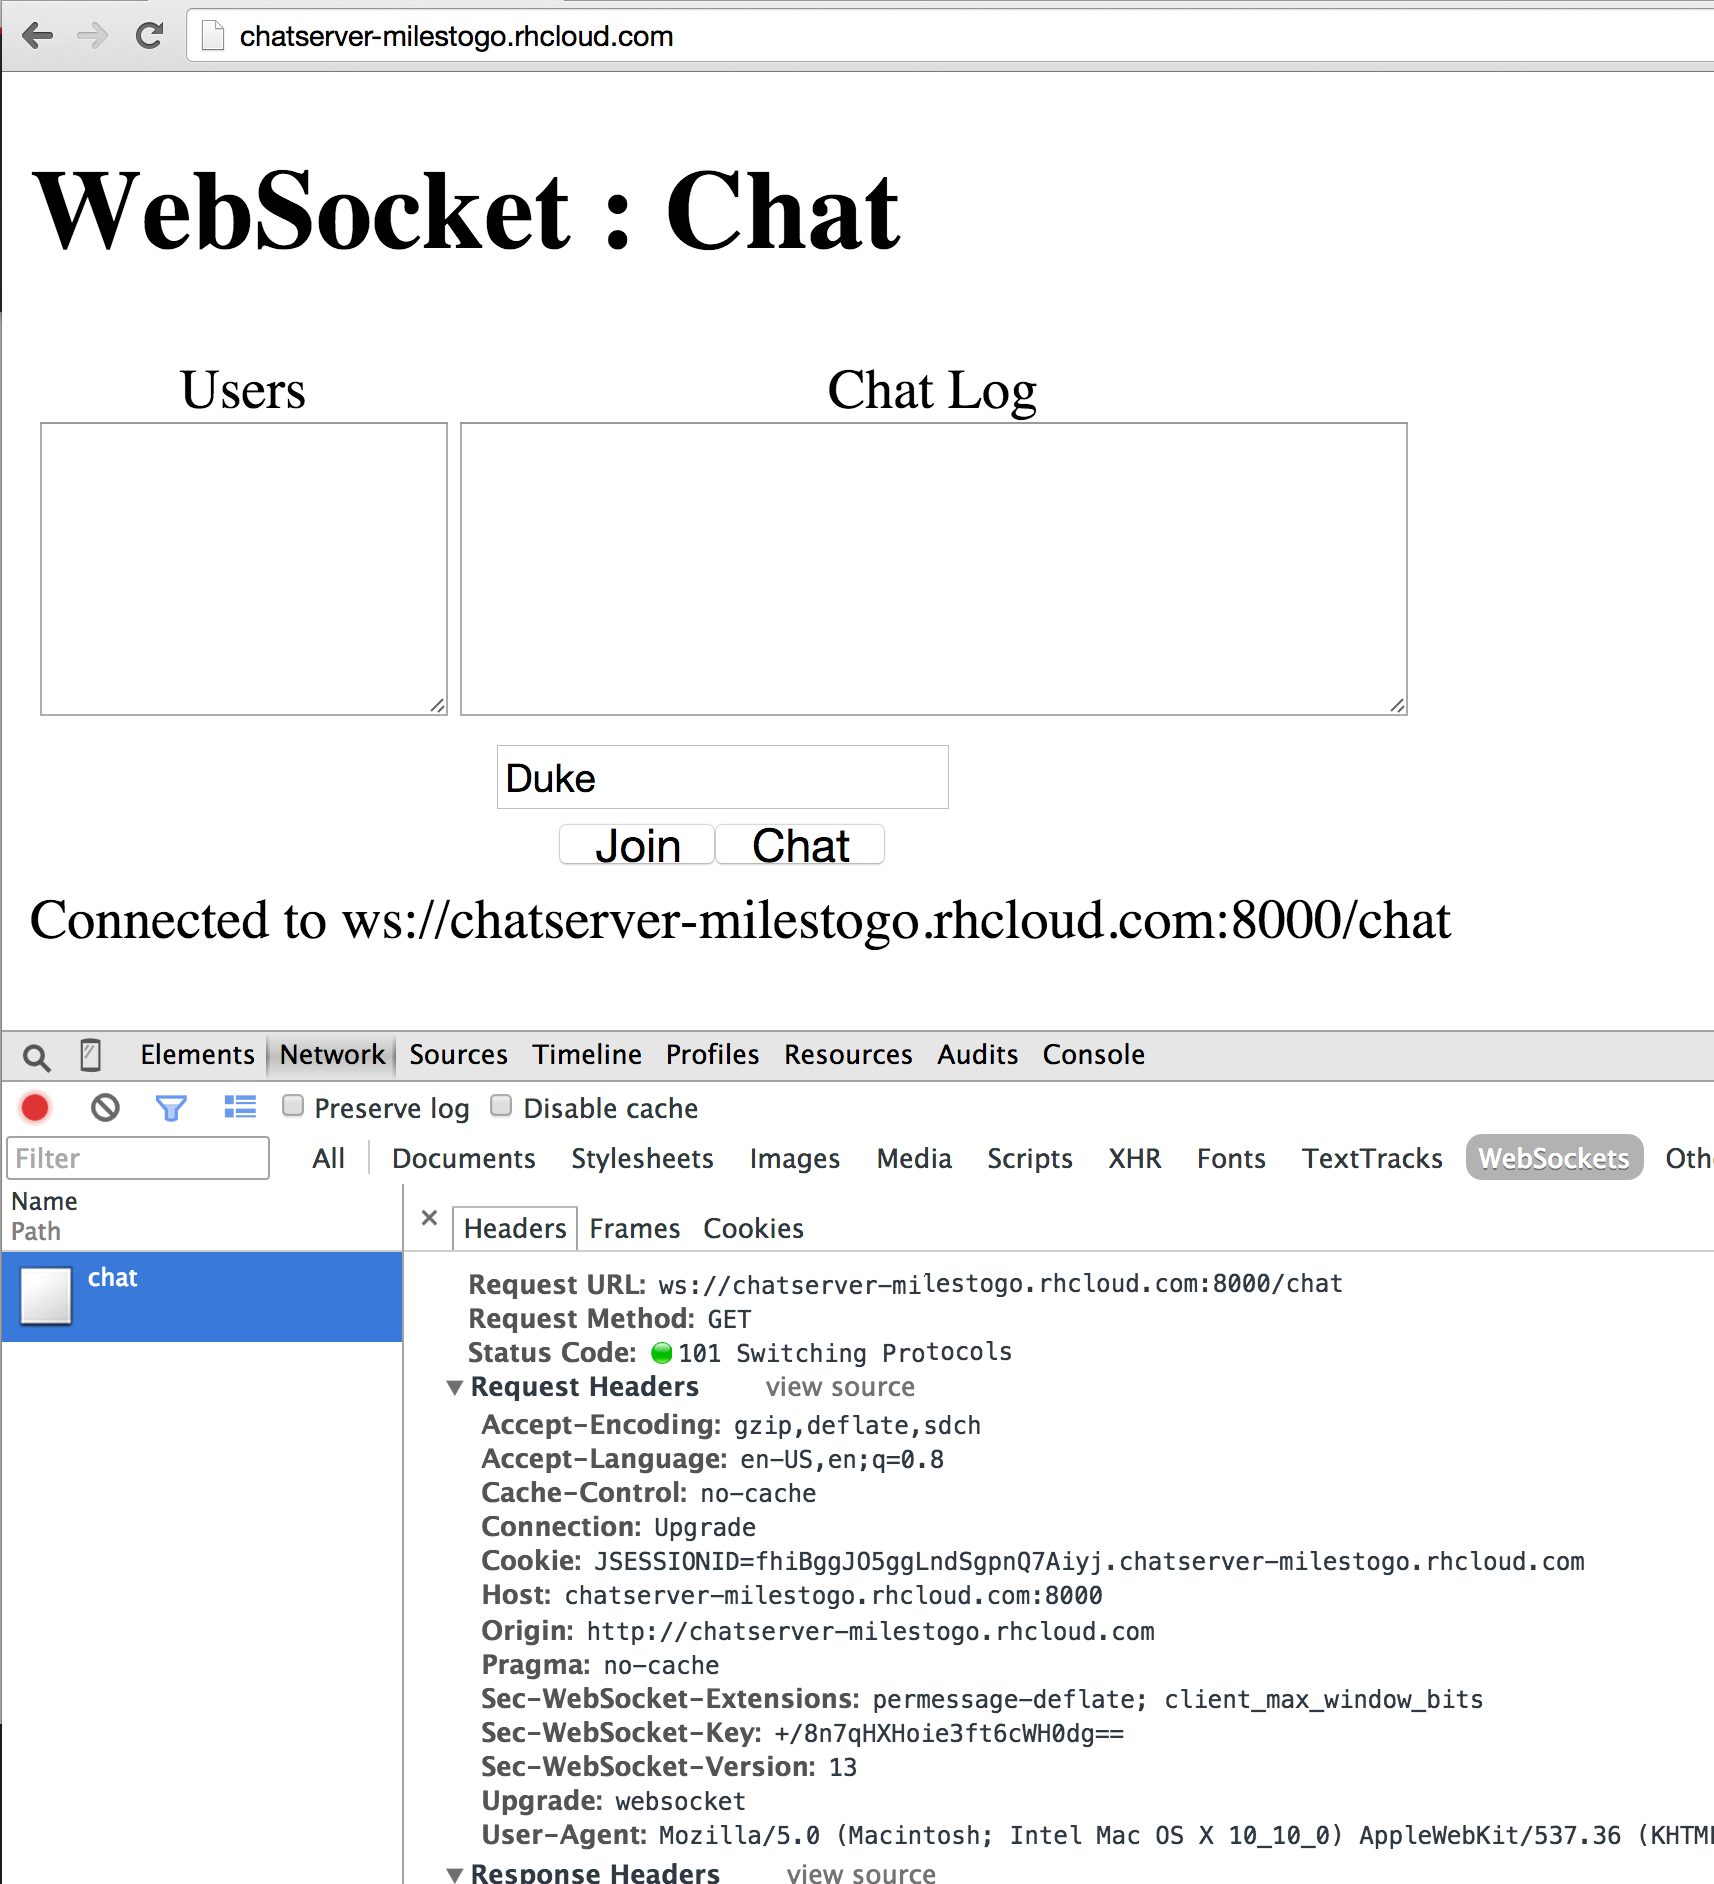
The complete script for the demo is available at github.com/arun-gupta/nuts-and-bolts-of-websocket (including pointers to the demos). Most of the demos are anyway available at the following links:

Positive feedback from twitter overall:

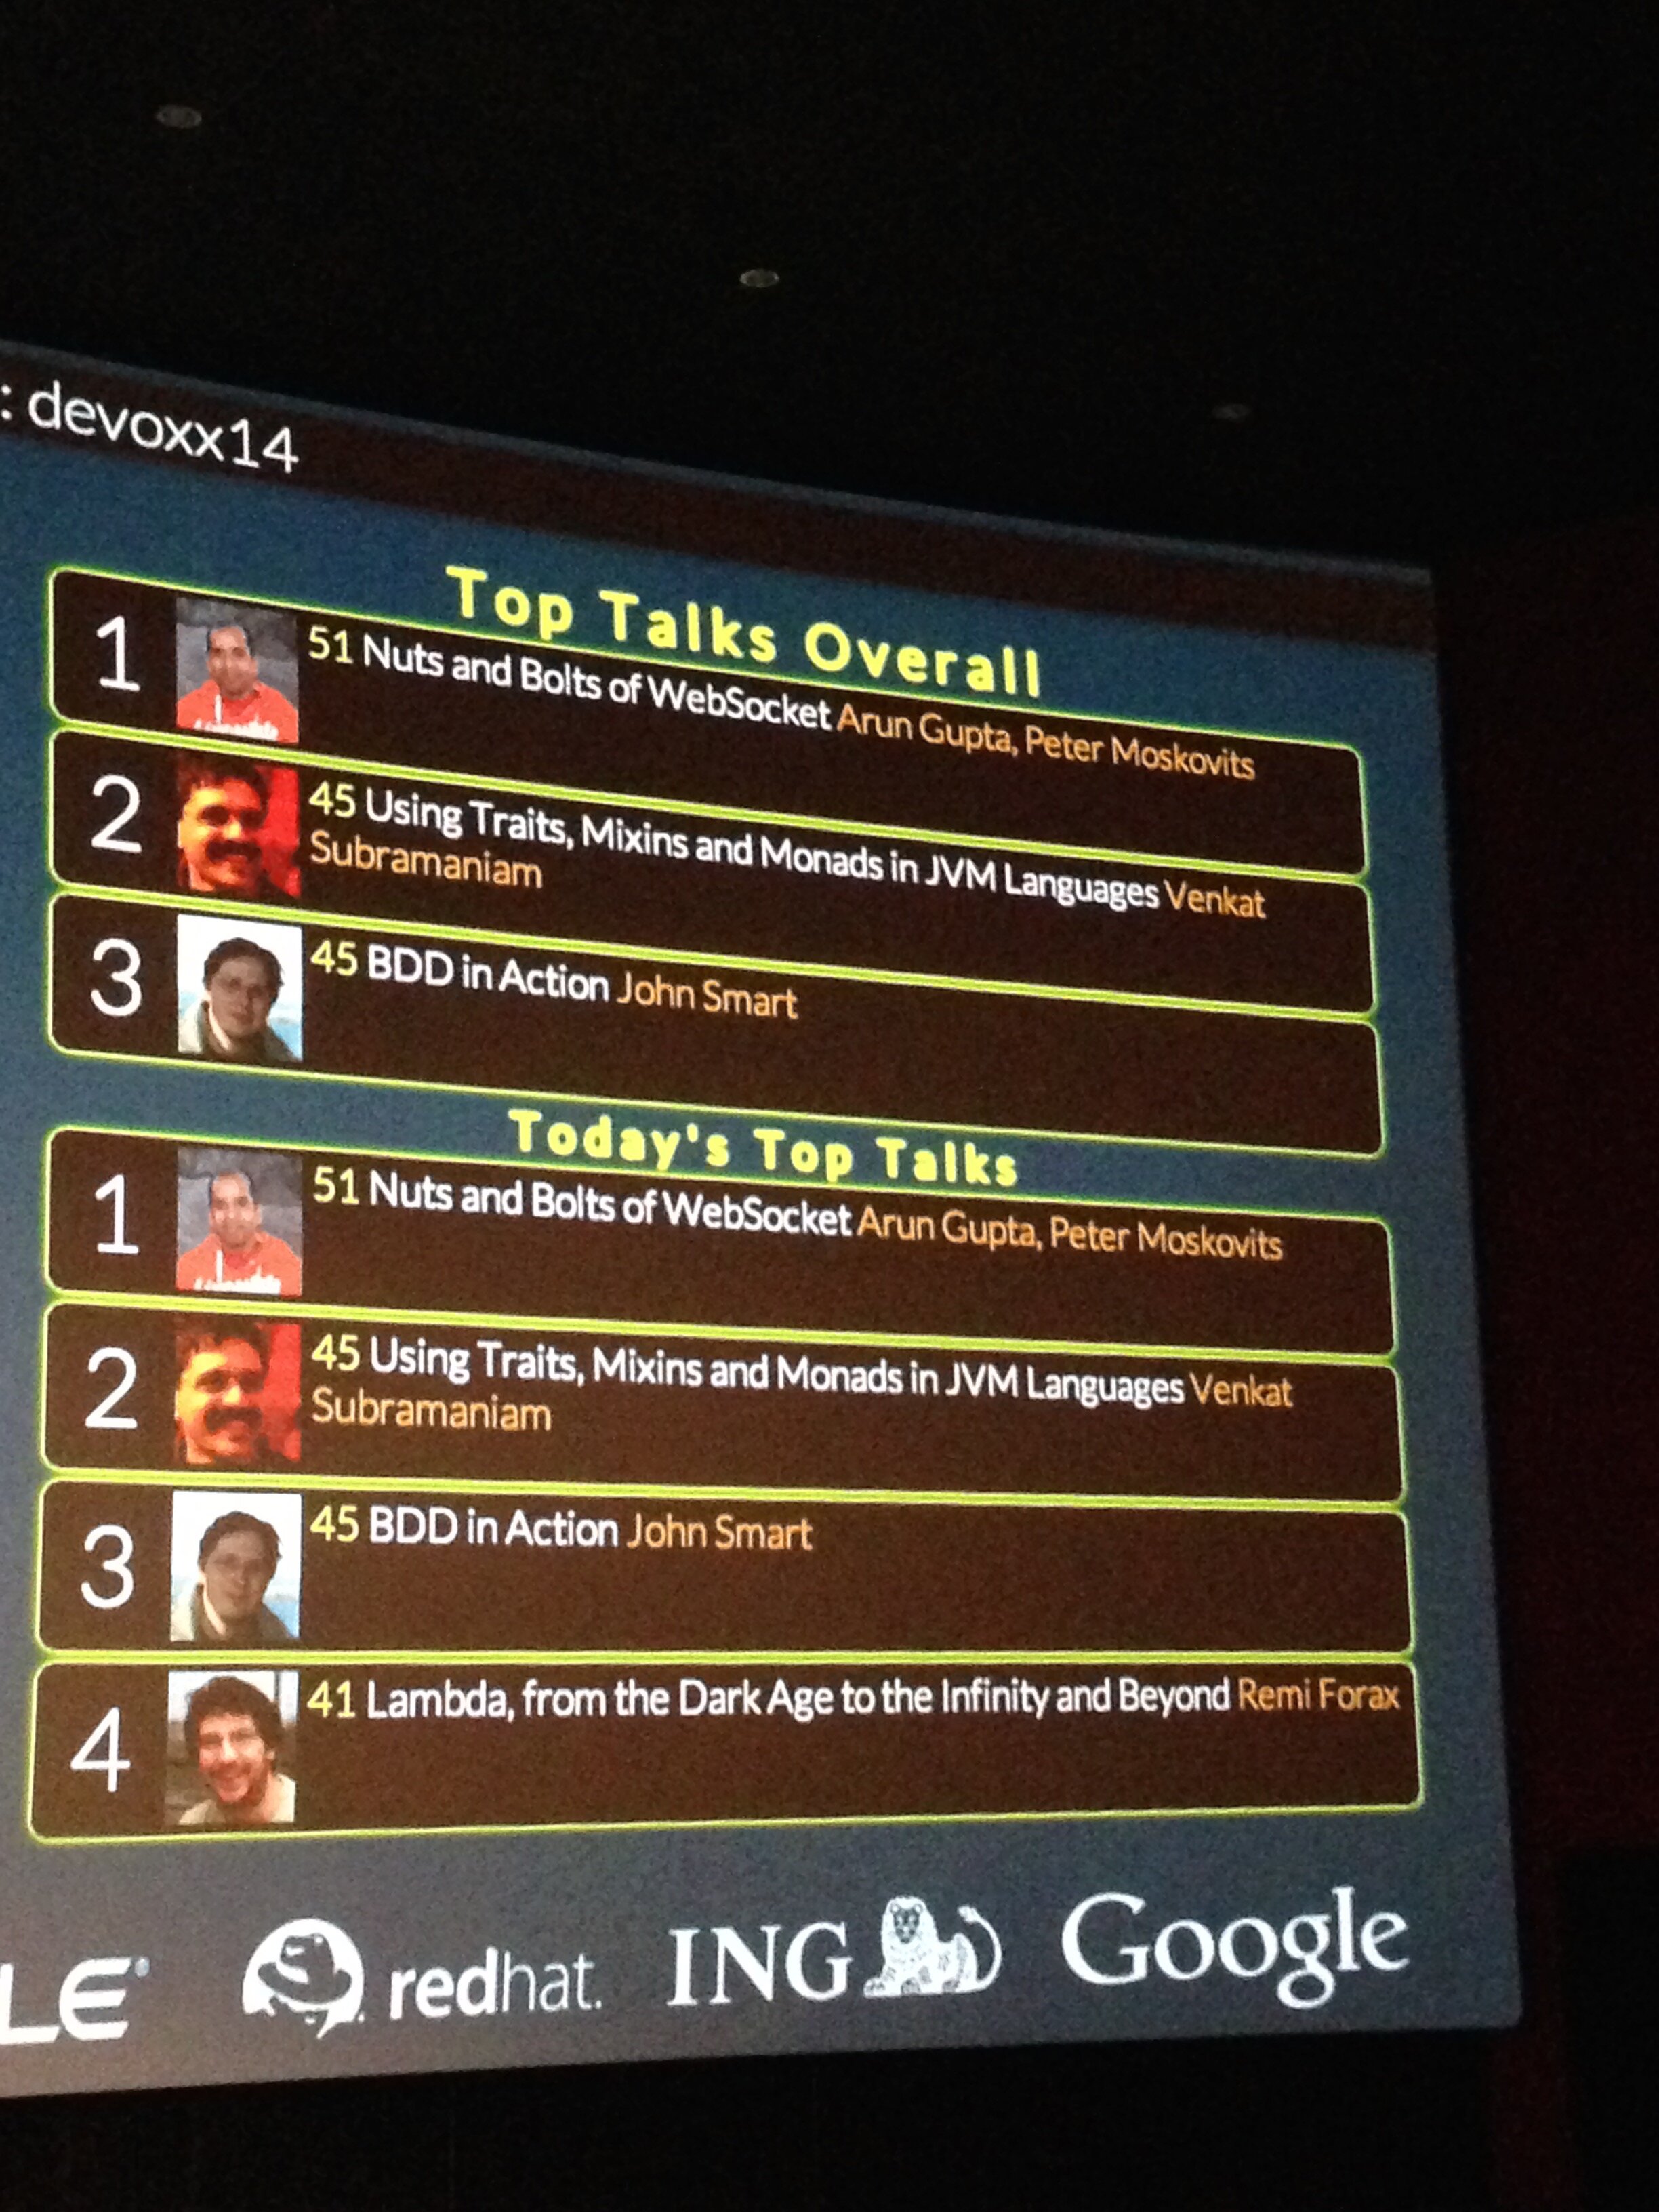
And it was rated the top talk for the day until 6pm:

devoxx14-websocket-talk-rank

With Red Hat spirit, “the more you share, the more you grow”, share the slides and demos all over and spread the love!

Happy Devoxx!