Containers, Microsoervices, and NoSQL provide an awesome threesome for building your modern applications. These applications need to be agile, meet constantly evolving customer demands, be pervasive, and should work across mobile, web and IoT platforms.
This blog will explain a simple microservices stack using WildFly Swarm, Docker, and Couchbase. Complete code and instructions in this blog are documented at: github.com/arun-gupta/wildfly-swarm-couchbase.
Let’s understand the key components of this stack first!
![]()
WildFly Swarm allows to package and run JavaEE applications by packaging them with just enough of the server runtime to java -jar your application. With built-in service discovery, single sign-on using Keycloak, monitoring using Hawkular, and many more features, WildFly Swarm provides all the necessary components to develop your microservice.

Docker for Mac provides native support for running Docker containers on Mac OSX. It relies upon Hypervisor.framework in OSX. Docker engine runs in an Alpine Linux distribution on top of an xhyve Virtual Machine, and even the VM is managed by Docker. There is no need for Docker Machine or VirtualBox, and it integrates with OSX security sandbox model. DockerCon 2016 removed the private beta restriction from Docker for Mac, and so its available for everybody now.
![]()
NoSQL provides the agility and flexibility of schema-less databases. This allows the application to evolve independently and rapidly without going through cumbersome database migrations. Couchbase offers true horizontal scaling with homogenous architecture, as opposed to non-scalable master/slave architecture. It also offers auto-sharding, SQL-like query language for JSON (N1QL), mobile database and synchronization with the backend server, and much more.
The complete sample application in this blog is at: github.com/arun-gupta/wildfly-swarm-couchbase.
WildFly Swarm Application
Let’s look at the Java EE REST endpoint:
|
1
2
3
4
5
6
7
8
9
10
11
12
13
14
15
16
17
18
19
20
|
package com.couchbase.wildfly.swarm;
. . .
@Path("airline")
public class AirlineResource {
@Inject Database database;
@GET
public String getAll() {
N1qlQuery query = N1qlQuery.simple("SELECT * FROM `travel-sample` LIMIT 10");
N1qlQueryResult result = database.getBucket().query(query);
return result.allRows().toString();
}
. . .
}
|
It uses standard JAX-RS annotation to convert a POJO into a REST endpoint. Couchbase Java API provide a fluent API and used N1QL statement to query the documents and return the results. The N1QL statement returns the first 10 elements from the query result. Learn more about N1QL syntax in this interactive tutorial.
Database abstraction is defined as:
|
1
2
3
4
5
6
7
8
9
10
11
12
13
14
15
16
17
18
19
20
21
22
23
24
25
26
27
28
29
30
31
32
33
|
package com.couchbase.wildfly.swarm;
. . .
@Singleton
@Startup
public class Database {
CouchbaseCluster cluster;
Bucket bucket;
public CouchbaseCluster getCluster() {
if (null == cluster) {
String couchbaseURI = System.getenv("COUCHBASE_URI");
if (null == couchbaseURI) {
System.err.println("WARING: No COUCHBASE_URI specified, defaulting to localhost");
couchbaseURI = "localhost:8093";
}
System.out.println("Couchbase endpoint: " + System.getenv("COUCHBASE_URI"));
cluster = CouchbaseCluster.create(couchbaseURI);
}
return cluster;
}
public Bucket getBucket() {
if (null == bucket) {
bucket = getCluster().openBucket("travel-sample");
}
return bucket;
}
}
|
This is a singleton EJB that is eagerly initialized. It uses Couchbase Java SDK to connect to Couchbase. Database endpoint can be specified using the COUCHBASE_URI environment variable.
Next up is pom.xml for configuring the WildFly Swarm and Couchbase Java Client:
|
1
2
3
4
5
6
7
8
9
10
11
12
13
14
15
16
17
18
19
20
21
22
23
24
25
26
27
28
29
30
31
32
33
34
|
<dependencyManagement>
<dependencies>
<dependency>
<groupId>org.wildfly.swarm</groupId>
<artifactId>bom</artifactId>
<version>${version.wildfly-swarm}</version>
<type>pom</type>
<scope>import</scope>
</dependency>
</dependencies>
</dependencyManagement>
<dependencies>
<dependency>
<groupId>javax</groupId>
<artifactId>javaee-web-api</artifactId>
<version>7.0</version>
<scope>provided</scope>
</dependency>
<dependency>
<groupId>org.wildfly.swarm</groupId>
<artifactId>jaxrs-cdi</artifactId>
</dependency>
<dependency>
<groupId>org.wildfly.swarm</groupId>
<artifactId>ejb</artifactId>
</dependency>
<dependency>
<groupId>com.couchbase.client</groupId>
<artifactId>java-client</artifactId>
<version>2.2.5</version>
</dependency>
</dependencies>
|
It uses WildFly Swarm “bill of materials” to pull in all the dependencies. Only the specific dependencies needed for the build are specified in <dependencies>. These are then packaged in the “fat jar”.
WildFly Swarm Maven plugin is used to package and run the application:
|
1
2
3
4
5
6
7
8
9
10
11
12
13
14
15
16
17
18
19
|
<plugin>
<groupId>org.wildfly.swarm</groupId>
<artifactId>wildfly-swarm-plugin</artifactId>
<version>${version.wildfly-swarm}</version>
<executions>
<execution>
<goals>
<goal>package</goal>
</goals>
</execution>
</executions>
<configuration>
<environment>
<COUCHBASE_URI>${COUCHBASE_URI}</COUCHBASE_URI>
</environment>
</configuration>
</plugin>
|
COUCHBASE_URI is used to read the host of where Couchbase database server is running.
Run Couchbase Server
Run the Couchbase server using Docker for Mac:
|
1
2
3
|
docker run -d --name db -p 8091-8093:8091-8093 -p 11210:11210 arungupta/couchbase
|
The arungupta/couchbase is built upon the standard Couchbase image and uses Couchbase REST API to configure the server.
Wait for a couple of minutes for the sample bucket to be populated with the JSON documents.
Invoke the Couchbase CLI tool cbq create a primary index on the sample bucket:
|
1
2
3
|
docker run -it --link db:db arungupta/couchbase cbq -u Administrator -p password -engine http://db:8093 -s "create primary index `travel-sample-primary-index` on `travel-sample`;"
|
This will show the output as:
|
1
2
3
4
5
6
7
8
9
10
11
12
13
14
15
16
17
18
|
Connected to : http://db:8093/. Type Ctrl-D or \QUIT to exit.
Path to history file for the shell : /root/.cbq_history
{
"requestID": "d0b2e4dd-b702-49e2-971c-a4c640ddb498",
"signature": null,
"results": [
],
"status": "success",
"metrics": {
"elapsedTime": "3.154540272s",
"executionTime": "3.154493281s",
"resultCount": 0,
"resultSize": 0
}
}
|
This output shows that result of creating index was successful.
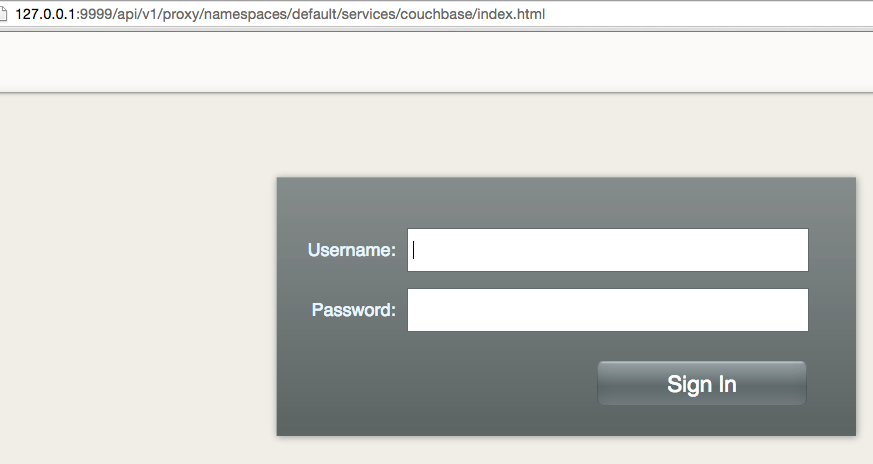
One of the advantages of running Docker for Mac is that all the containers are accessible at localhost. This means Couchbase Web Console can be accessed at localhost:8091.

This screen ensures that Couchbase is configured correctly.
Run WildFly Swarm Microservice
Package and run the self-contained microservice as:
|
1
2
3
|
mvn wildfly-swarm:run
|
If Couchbase is running on a different host, then the command will change to:
|
1
2
3
|
mvn -DCOUCHBASE_URI=<IP> wildfly-swarm:run
|
It shows the output as:
|
1
2
3
4
5
6
7
8
9
10
11
12
13
14
15
16
17
18
19
20
21
22
23
24
25
26
27
28
29
30
31
32
33
34
|
[INFO] Scanning for projects...
[INFO]
[INFO] ------------------------------------------------------------------------
[INFO] Building nosql-microservices 1.0-SNAPSHOT
[INFO] ------------------------------------------------------------------------
[INFO]
. . .
2016-06-27 22:21:47,170 WARN [org.jboss.as.dependency.private] (MSC service thread 1-6) WFLYSRV0018: Deployment "deployment.nosql-microservices.war" is using a private module ("org.jboss.jts:main") which may be changed or removed in future versions without notice.
2016-06-27 22:21:47,203 INFO [org.jboss.weld.deployer] (MSC service thread 1-1) WFLYWELD0003: Processing weld deployment nosql-microservices.war
2016-06-27 22:21:47,542 INFO [org.hibernate.validator.internal.util.Version] (MSC service thread 1-1) HV000001: Hibernate Validator 5.2.3.Final
2016-06-27 22:21:47,600 INFO [org.jboss.as.ejb3.deployment] (MSC service thread 1-1) WFLYEJB0473: JNDI bindings for session bean named 'Database' in deployment unit 'deployment "nosql-microservices.war"' are as follows:
java:global/nosql-microservices/Database!com.couchbase.wildfly.swarm.Database
java:app/nosql-microservices/Database!com.couchbase.wildfly.swarm.Database
java:module/Database!com.couchbase.wildfly.swarm.Database
java:global/nosql-microservices/Database
java:app/nosql-microservices/Database
java:module/Database
2016-06-27 22:21:47,731 INFO [org.jboss.weld.deployer] (MSC service thread 1-3) WFLYWELD0006: Starting Services for CDI deployment: nosql-microservices.war
2016-06-27 22:21:47,758 INFO [org.jboss.weld.Version] (MSC service thread 1-3) WELD-000900: 2.3.2 (Final)
2016-06-27 22:21:47,780 INFO [org.wildfly.extension.undertow] (MSC service thread 1-1) WFLYUT0018: Host default-host starting
2016-06-27 22:21:47,788 INFO [org.jboss.weld.deployer] (MSC service thread 1-8) WFLYWELD0009: Starting weld service for deployment nosql-microservices.war
2016-06-27 22:21:48,180 INFO [stdout] (ServerService Thread Pool -- 10) Couchbase endpoint:
2016-06-27 22:21:48,275 INFO [com.couchbase.client.core.CouchbaseCore] (ServerService Thread Pool -- 10) CouchbaseEnvironment: {sslEnabled=false, sslKeystoreFile='null', sslKeystorePassword='null', queryEnabled=false, queryPort=8093, bootstrapHttpEnabled=true, bootstrapCarrierEnabled=true, bootstrapHttpDirectPort=8091, bootstrapHttpSslPort=18091, bootstrapCarrierDirectPort=11210, bootstrapCarrierSslPort=11207, ioPoolSize=8, computationPoolSize=8, responseBufferSize=16384, requestBufferSize=16384, kvServiceEndpoints=1, viewServiceEndpoints=1, queryServiceEndpoints=1, searchServiceEndpoints=1, ioPool=NioEventLoopGroup, coreScheduler=CoreScheduler, eventBus=DefaultEventBus, packageNameAndVersion=couchbase-jvm-core/1.2.5 (git: 1.2.5), dcpEnabled=false, retryStrategy=BestEffort, maxRequestLifetime=75000, retryDelay=ExponentialDelay{growBy 1.0 MICROSECONDS, powers of 2; lower=100, upper=100000}, reconnectDelay=ExponentialDelay{growBy 1.0 MILLISECONDS, powers of 2; lower=32, upper=4096}, observeIntervalDelay=ExponentialDelay{growBy 1.0 MICROSECONDS, powers of 2; lower=10, upper=100000}, keepAliveInterval=30000, autoreleaseAfter=2000, bufferPoolingEnabled=true, tcpNodelayEnabled=true, mutationTokensEnabled=false, socketConnectTimeout=1000, dcpConnectionBufferSize=20971520, dcpConnectionBufferAckThreshold=0.2, queryTimeout=75000, viewTimeout=75000, kvTimeout=2500, connectTimeout=5000, disconnectTimeout=25000, dnsSrvEnabled=false}
2016-06-27 22:21:48,829 INFO [com.couchbase.client.core.node.Node] (cb-io-1-1) Connected to Node localhost
2016-06-27 22:21:49,035 INFO [com.couchbase.client.core.config.ConfigurationProvider] (cb-computations-1) Opened bucket travel-sample
2016-06-27 22:21:49,415 INFO [org.jboss.resteasy.resteasy_jaxrs.i18n] (ServerService Thread Pool -- 10) RESTEASY002225: Deploying javax.ws.rs.core.Application: class com.couchbase.wildfly.swarm.MyApplication
2016-06-27 22:21:49,438 INFO [org.wildfly.extension.undertow] (ServerService Thread Pool -- 10) WFLYUT0021: Registered web context: /
2016-06-27 22:21:49,457 INFO [org.jboss.as.server] (main) WFLYSRV0010: Deployed "nosql-microservices.war" (runtime-name : "nosql-microservices.war")
|
Now the application can be accessed as:
|
1
2
3
|
curl http://localhost:8080/webresources/airline
|
And a formatted output looks like:
|
1
2
3
4
5
6
7
8
9
10
11
12
13
14
15
16
17
18
19
20
21
22
23
24
25
26
27
28
29
|
[
{
"travel-sample": {
"country": "United States",
"iata": "Q5",
"callsign": "MILE-AIR",
"name": "40-Mile Air",
"icao": "MLA",
"id": 10,
"type": "airline"
}
},
. . .
{
"travel-sample": {
"country": "France",
"iata": "A5",
"callsign": "AIRLINAIR",
"name": "Airlinair",
"icao": "RLA",
"id": 1203,
"type": "airline"
}
}
]
|
So you built a simple microservice using WildFly Swarm accessing a Couchbase database running as a Docker container.
Now, ideally this WildFly Swarm service should be packaged as a Docker image and then that Docker image would serve as the service. A Maven profile with the name docker is already added to pom.xml but issue #3 is making that scenario fail.
Microservices References
- docs.docker.com
- WildFly Swarm
- Getting Started with NoSQL
- GitHub Repo: github.com/arun-gupta/wildfly-swarm-couchbase
Source: blog.couchbase.com/2016/june/microservices-wildfly-swarm-docker-couchbase