![]()
If you’ve not followed the Minecraft/Bukkit saga over the past few months, Bukkit and CraftBukkit downloads were taken down by DMCA because a developer (@wolvereness) wanted Mojang to open up. Mojang (@vubui) posted an official statement in their forums. The general feeling is that @wolvereness left the Bukkit community hanging, and Mojang is not responsible for this debacle.
One of my friends (@ryanmichela), and a contributor to Bukkit, prepared a slide deck explaining the unfortunate debacle:
Anyway, leaving all the gory details behind, this blog will show how to get started with Bukkit 1.8.3.
What?
You just said, Bukkit was shutdown by DMCA.
 Hail Spigot for reviving Bukkit, and updating to 1.8.3!
Its still not clear how did Spigot get around DMCA shutdown but the binaries seem to be available again, at least for now.
As a refresher, Bukkit is the API used by developers to make plugins. CraftBukkit is the modified Minecraft server that can understand plugins made by the Bukkit API.
Minecraft Server Hosting on OpenShift already explained how to setup a Minecraft server on OpenShift. This Tech Tip will show how to get a Minecraft server running on Google Cloud.
Lets get started!
Get Started with Google Cloud

- Sign up for a free trial at cloud.google.com. This gives you credit of $300, which should be pretty decent to begin with.
Create and Configure Google Compute Engine
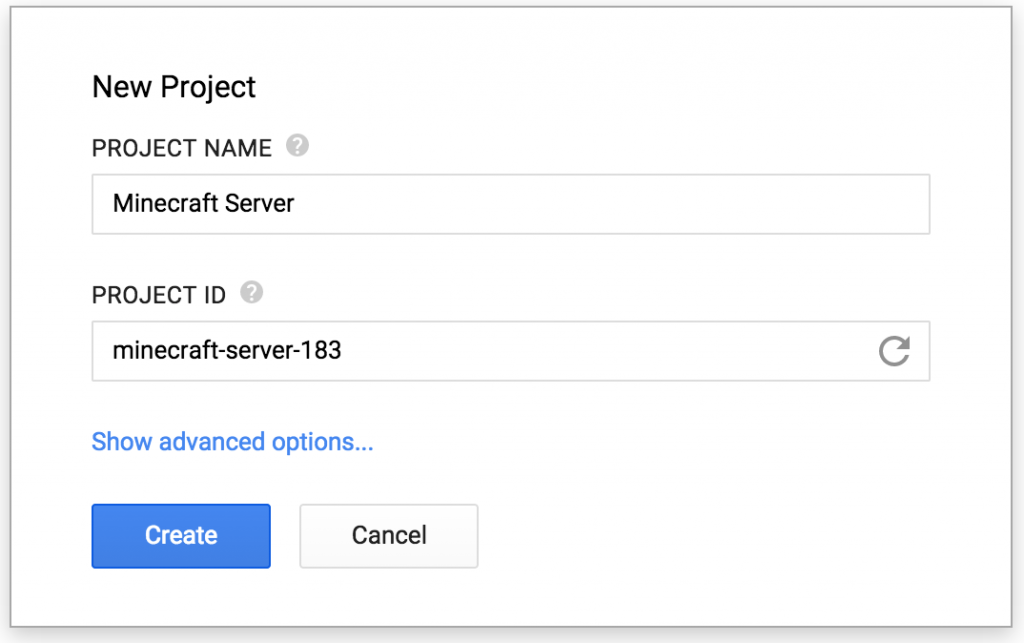
- Go to console.developers.google.com and create a new project by specifying the values as shown:
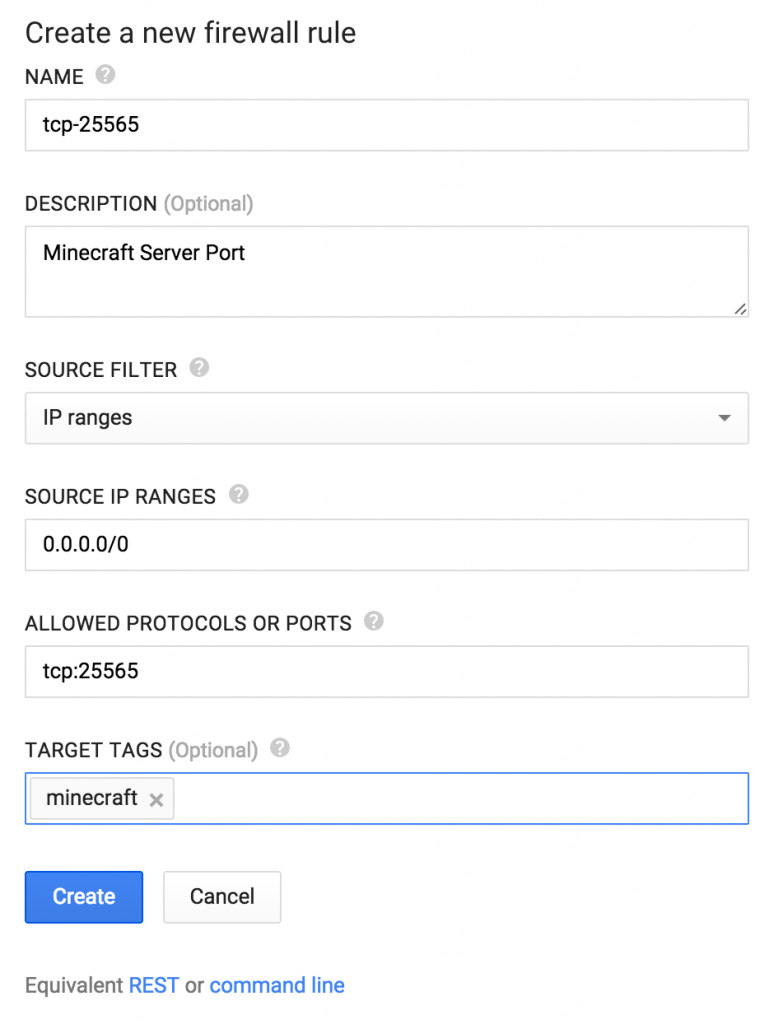
- In console.developers.google.com, go to “Compute”, “Compute Engine”, “Networks”, “default”, “New firewall rule” and enter the values as shown and click on “Create”.
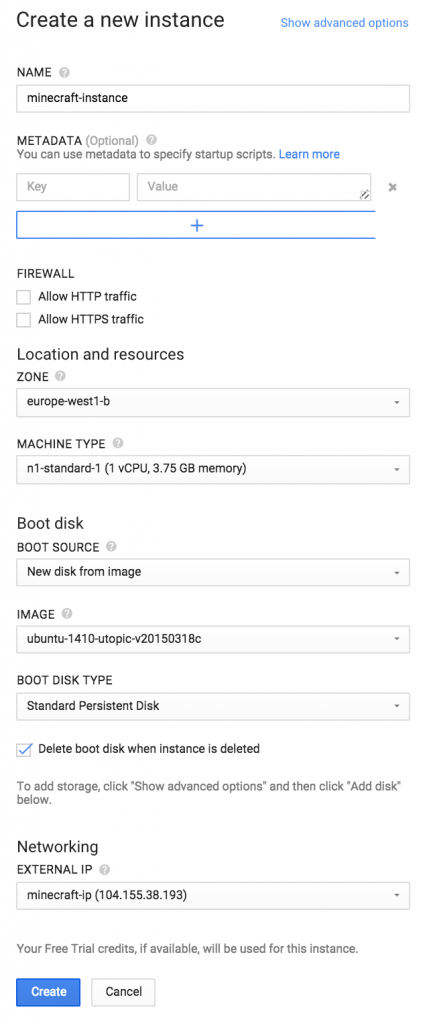
- In the left menu bar, click on “VM Instances” under “Compute Engine”, “Create instance”. Take everything default except:
- Provide a name as “minecraft-instance”
- Change Image to Ubuntu 14.10.
- Change External IP to “New static IP address” and fill in the details. IP address is automatically assigned.
Exact values are shown here:
And click on “Create”.
Note down the IP address, this will be used later to connect from Minecraft launcher.
- Click on the newly created instance, “Add tags”, and specify “minecraft” tag. Exact same tag on the VM instance and Firewall rule ensures that the rule is applied to the appropriate instance.
Install JDK, Git, and Spigot
In console.developers.google.com, select the recently created instance, click on “SSH”, “Open in browser window”. The software is installed in the shell window.
Install JDK
|
1
2
3
4
5
|
sudo add-apt-repository ppa:webupd8team/java
sudo apt-get update
sudo apt-get install oracle-java8-installer
|
|
1
2
3
4
|
Caused by: javax.net.ssl.SSLException: java.lang.RuntimeException: Unexpected error: java.security.InvalidAlgorit
hmParameterException: the trustAnchors parameter must be non-empty
|
Install Git
|
1
2
3
|
sudo apt-get install git
|
Install Spigot
Download and Install Spigot
|
1
2
3
4
|
wget https://hub.spigotmc.org/jenkins/job/BuildTools/lastSuccessfulBuild/artifact/target/BuildTools.jar
java -jar BuildTools.jar --rev 1.8
|
A successful completion of this task shows the following message:
|
1
2
3
4
5
6
7
|
Success! Everything compiled successfully. Copying final .jar files now.
Copying craftbukkit-1.8-R0.1-SNAPSHOT.jar to /home/arun_gupta_gmail_com/.
- Saved as craftbukkit-1.8.jar
Copying spigot-1.8-R0.1-SNAPSHOT.jar to /home/arun_gupta_gmail_com/.
- Saved as spigot-1.8.jar
|
Start Minecraft Server on Google Cloud
Run the server as:
|
1
2
3
|
java -jar craftbukkit-1.8.jar
|
This will generate “eula.txt”. Accept license agreement by giving the following command:
|
1
2
3
|
sed -i -- 's/false/true/g' eula.txt
|
Run server as:
|
1
2
3
|
screen -dmS minecraft java -server -jar craftbukkit-1.8.jar
|
This will start the CraftBukkit 1.8 server in background.
Connect to Minecraft Server from the Client
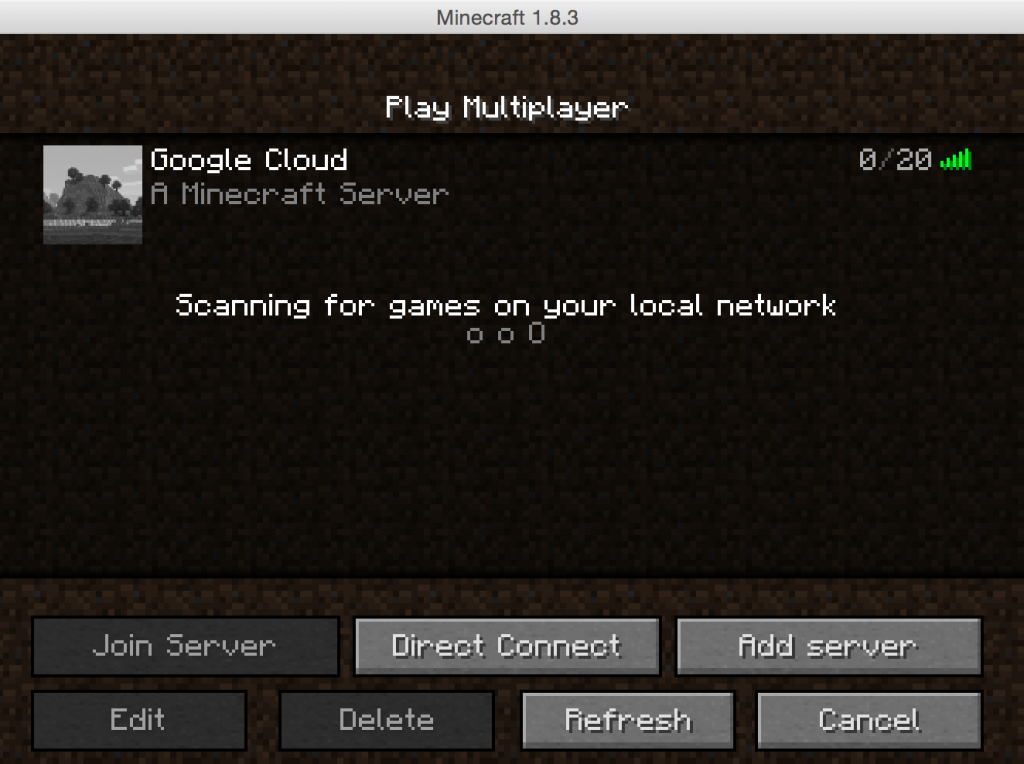
Launch Minecraft client and create a new Minecraft server as:
Clicking on Done shows:
Now your client can connect to the Minecraft server running on Google Cloud.
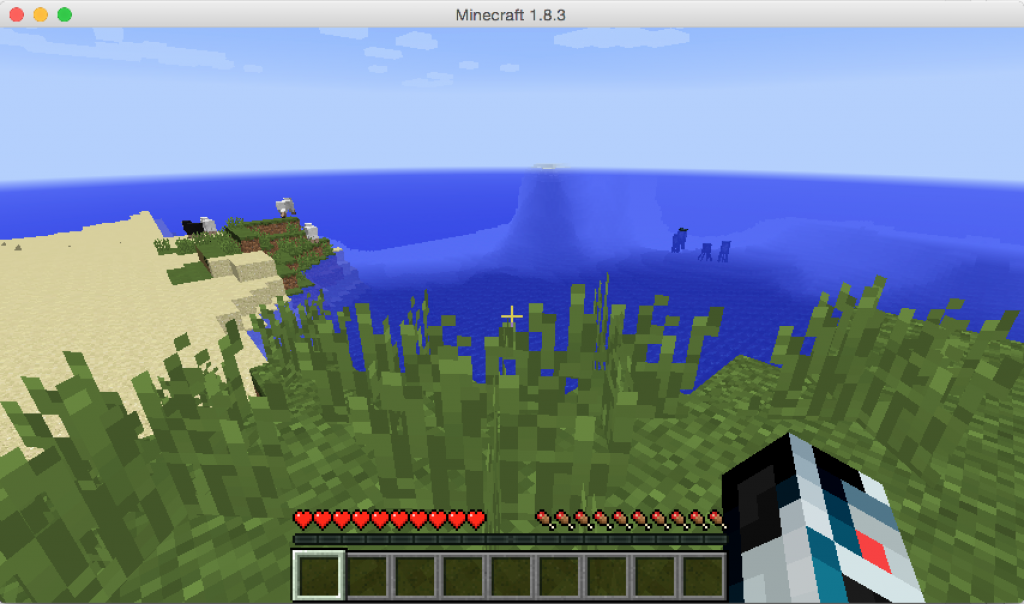
The server is now live. Add 104.155.38.193 to your Minecraft launcher and put some Google resources to test 
I was hoping to provide a script that can be run using Google Cloud SDK but the bundled CLI seems to have some issues creating the project. CLI equivalent for other commands can be easily seen from the console itself.
Enjoy and happy Minecrafting!

