This blog is part of a multi-part blog series that shows how to run your applications on Kubernetes. It will use the Couchbase, an open source NoSQL distributed document database, as the Docker container.
The first part (Couchbase on Kubernetes) explained how to start the Kubernetes cluster using Vagrant. The second part (Kubernetes on Amazon) explained how run that setup on Amazon Web Services.
This third part will show:
- How to setup and start the Kubernetes cluster on Google Cloud
- Run Docker container in the Kubernetes cluster
- Expose Pod on Kubernetes as Service
- Shutdown the cluster
Here is a quick overview:
Let’s get into details!
Getting Started with Google Compute Engine provide detailed instructions on how to setup Kubernetes on Google Cloud.
Download and Configure Google Cloud SDK
There is a bit of setup required if you’ve never accessed Google Cloud on your machine. This was a bit overwhelming and wish can be simplified.
- Create a billable account on Google Cloud
- Install Google Cloud SDK
- Configure credentials: gcloud auth login
- Create a new Google Cloud project and name it
couchbase-on-kubernetes - Set the project:
gcloud config set project couchbase-on-kubernetes - Set default zone:
gcloud config set compute/zone us-central1-a - Create an instance:
gcloud compute instances create example-instance --machine-type n1-standard-1 --image debian-8 - SSH into the instance:
gcloud compute ssh example-instance - Delete the instance:
gcloud compute instances delete example-instance
Setup Kubernetes Cluster on Google Cloud
Kubernetes cluster can be created on Google Cloud as:
|
1
2
3
4
|
set KUBERNETES_PROVIDER=gce
./cluster/kube-up.sh
|
Make sure KUBERNETES_PROVIDER is either set to gce or not set at all.
By default, this provisions a 4 node Kubernetes cluster with one master. This means 5 Virtual Machines are created.
If you downloaded Kubernetes from github.com/kubernetes/kubernetes/releases, then all the values can be changed in cluster/aws/config-default.sh.
Starting Kubernetes on Google Cloud shows the following log. Google Cloud SDK was behaving little weird but taking the defaults seem to work:
|
1
2
3
4
5
6
7
8
9
10
11
12
13
14
15
16
17
18
19
20
21
22
23
24
25
26
27
28
29
30
31
32
33
34
35
36
37
38
39
40
41
42
43
44
45
46
47
48
49
50
51
52
53
54
55
56
57
58
59
60
61
62
63
64
65
66
67
68
69
70
71
72
73
74
75
76
77
78
79
80
81
82
83
84
85
86
87
88
89
90
91
92
93
94
95
96
97
98
99
100
101
102
103
104
105
106
107
108
109
110
111
112
113
114
115
116
117
118
119
120
121
122
123
124
125
126
127
128
129
130
131
132
133
134
135
136
137
138
139
140
141
142
143
144
145
146
147
148
149
150
151
152
153
154
155
156
157
158
159
160
161
162
163
164
165
166
167
168
169
170
171
172
173
174
175
176
177
178
179
180
181
182
183
184
185
|
./kubernetes/cluster/kube-up.sh
... Starting cluster using provider: gce
... calling verify-prereqs
You have specified individual components to update. If you are trying
to install new components, use:
$ gcloud components install alpha
Do you want to run install instead (y/N)?
Your current Cloud SDK version is: 99.0.0
Installing components from version: 99.0.0
┌──────────────────────────────────────────────┐
│ These components will be installed. │
├───────────────────────┬────────────┬─────────┤
│ Name │ Version │ Size │
├───────────────────────┼────────────┼─────────┤
│ gcloud Alpha Commands │ 2016.01.12 │ < 1 MiB │
└───────────────────────┴────────────┴─────────┘
For the latest full release notes, please visit:
https://cloud.google.com/sdk/release_notes
Do you want to continue (Y/n)?
╔════════════════════════════════════════════════════════════╗
╠═ Creating update staging area ═╣
╠════════════════════════════════════════════════════════════╣
╠═ Installing: gcloud Alpha Commands ═╣
╠════════════════════════════════════════════════════════════╣
╠═ Creating backup and activating new installation ═╣
╚════════════════════════════════════════════════════════════╝
Performing post processing steps...done.
Update done!
You have specified individual components to update. If you are trying
to install new components, use:
$ gcloud components install beta
Do you want to run install instead (y/N)?
Your current Cloud SDK version is: 99.0.0
Installing components from version: 99.0.0
┌─────────────────────────────────────────────┐
│ These components will be installed. │
├──────────────────────┬────────────┬─────────┤
│ Name │ Version │ Size │
├──────────────────────┼────────────┼─────────┤
│ gcloud Beta Commands │ 2016.01.12 │ < 1 MiB │
└──────────────────────┴────────────┴─────────┘
For the latest full release notes, please visit:
https://cloud.google.com/sdk/release_notes
Do you want to continue (Y/n)?
╔════════════════════════════════════════════════════════════╗
╠═ Creating update staging area ═╣
╠════════════════════════════════════════════════════════════╣
╠═ Installing: gcloud Beta Commands ═╣
╠════════════════════════════════════════════════════════════╣
╠═ Creating backup and activating new installation ═╣
╚════════════════════════════════════════════════════════════╝
Performing post processing steps...done.
Update done!
All components are up to date.
... calling kube-up
Your active configuration is: [default]
Project: couchbase-on-kubernetes
Zone: us-central1-b
Creating gs://kubernetes-staging-9479406781
Creating gs://kubernetes-staging-9479406781/...
+++ Staging server tars to Google Storage: gs://kubernetes-staging-9479406781/devel
+++ kubernetes-server-linux-amd64.tar.gz uploaded (sha1 = 1ff42f7c31837851d919a66fc07f34b9dbdacf28)
+++ kubernetes-salt.tar.gz uploaded (sha1 = f307380ad6af7dabcf881b132146fa775c18dca8)
Looking for already existing resources
Starting master and configuring firewalls
Created [https://www.googleapis.com/compute/v1/projects/couchbase-on-kubernetes/zones/us-central1-b/disks/kubernetes-master-pd].
NAME ZONE SIZE_GB TYPE STATUS
kubernetes-master-pd us-central1-b 20 pd-ssd READY
Created [https://www.googleapis.com/compute/v1/projects/couchbase-on-kubernetes/regions/us-central1/addresses/kubernetes-master-ip].
Created [https://www.googleapis.com/compute/v1/projects/couchbase-on-kubernetes/global/firewalls/default-default-ssh].
Created [https://www.googleapis.com/compute/v1/projects/couchbase-on-kubernetes/global/firewalls/kubernetes-master-https].
NAME NETWORK SRC_RANGES RULES SRC_TAGS TARGET_TAGS
default-default-ssh default 0.0.0.0/0 tcp:22
NAME NETWORK SRC_RANGES RULES SRC_TAGS TARGET_TAGS
kubernetes-master-https default 0.0.0.0/0 tcp:443 kubernetes-master
+++ Logging using Fluentd to gcp
./kubernetes/cluster/../cluster/../cluster/gce/util.sh: line 434: @: unbound variable
./kubernetes/cluster/../cluster/../cluster/gce/util.sh: line 434: @: unbound variable
./kubernetes/cluster/../cluster/../cluster/gce/util.sh: line 434: @: unbound variable
./kubernetes/cluster/../cluster/../cluster/gce/util.sh: line 434: @: unbound variable
Created [https://www.googleapis.com/compute/v1/projects/couchbase-on-kubernetes/global/firewalls/default-default-internal].
NAME NETWORK SRC_RANGES RULES SRC_TAGS TARGET_TAGS
default-default-internal default 10.0.0.0/8 tcp:1-65535,udp:1-65535,icmp
Created [https://www.googleapis.com/compute/v1/projects/couchbase-on-kubernetes/global/firewalls/kubernetes-minion-all].
NAME NETWORK SRC_RANGES RULES SRC_TAGS TARGET_TAGS
kubernetes-minion-all default 10.244.0.0/16 tcp,udp,icmp,esp,ah,sctp kubernetes-minion
Created [https://www.googleapis.com/compute/v1/projects/couchbase-on-kubernetes/zones/us-central1-b/instances/kubernetes-master].
NAME ZONE MACHINE_TYPE PREEMPTIBLE INTERNAL_IP EXTERNAL_IP STATUS
kubernetes-master us-central1-b n1-standard-1 10.128.0.2 104.197.213.249 RUNNING
Creating minions.
./kubernetes/cluster/../cluster/../cluster/gce/util.sh: line 434: @: unbound variable
./kubernetes/cluster/../cluster/../cluster/gce/util.sh: line 434: @: unbound variable
Attempt 1 to create kubernetes-minion-template
WARNING: You have selected a disk size of under [200GB]. This may result in poor I/O performance. For more information, see: https://developers.google.com/compute/docs/disks/persistent-disks#pdperformance.
Created [https://www.googleapis.com/compute/v1/projects/couchbase-on-kubernetes/global/instanceTemplates/kubernetes-minion-template].
NAME MACHINE_TYPE PREEMPTIBLE CREATION_TIMESTAMP
kubernetes-minion-template n1-standard-1 2016-03-03T14:01:14.322-08:00
Created [https://www.googleapis.com/compute/v1/projects/couchbase-on-kubernetes/zones/us-central1-b/instanceGroupManagers/kubernetes-minion-group].
NAME ZONE BASE_INSTANCE_NAME SIZE TARGET_SIZE INSTANCE_TEMPLATE AUTOSCALED
kubernetes-minion-group us-central1-b kubernetes-minion 4 kubernetes-minion-template
Waiting for group to become stable, current operations: creating: 4
Waiting for group to become stable, current operations: creating: 4
Waiting for group to become stable, current operations: creating: 4
Waiting for group to become stable, current operations: creating: 4
Waiting for group to become stable, current operations: creating: 4
Waiting for group to become stable, current operations: creating: 4
Waiting for group to become stable, current operations: creating: 3
Group is stable
MINION_NAMES=kubernetes-minion-1hmm kubernetes-minion-3x1d kubernetes-minion-h1ov kubernetes-minion-nshn
Using master: kubernetes-master (external IP: 104.197.213.249)
Waiting for cluster initialization.
This will continually check to see if the API for kubernetes is reachable.
This might loop forever if there was some uncaught error during start
up.
Kubernetes cluster created.
cluster "couchbase-on-kubernetes_kubernetes" set.
user "couchbase-on-kubernetes_kubernetes" set.
context "couchbase-on-kubernetes_kubernetes" set.
switched to context "couchbase-on-kubernetes_kubernetes".
user "couchbase-on-kubernetes_kubernetes-basic-auth" set.
Wrote config for couchbase-on-kubernetes_kubernetes to /Users/arungupta/.kube/config
Kubernetes cluster is running. The master is running at:
https://104.197.213.249
The user name and password to use is located in /Users/arungupta/.kube/config.
... calling validate-cluster
Waiting for 4 ready nodes. 0 ready nodes, 0 registered. Retrying.
Waiting for 4 ready nodes. 0 ready nodes, 2 registered. Retrying.
Waiting for 4 ready nodes. 0 ready nodes, 3 registered. Retrying.
Waiting for 4 ready nodes. 0 ready nodes, 4 registered. Retrying.
Waiting for 4 ready nodes. 3 ready nodes, 4 registered. Retrying.
Waiting for 4 ready nodes. 3 ready nodes, 4 registered. Retrying.
Found 4 node(s).
NAME LABELS STATUS AGE
kubernetes-minion-1hmm kubernetes.io/hostname=kubernetes-minion-1hmm Ready 1m
kubernetes-minion-3x1d kubernetes.io/hostname=kubernetes-minion-3x1d Ready 52s
kubernetes-minion-h1ov kubernetes.io/hostname=kubernetes-minion-h1ov Ready 1m
kubernetes-minion-nshn kubernetes.io/hostname=kubernetes-minion-nshn Ready 1m
Validate output:
NAME STATUS MESSAGE ERROR
controller-manager Healthy ok nil
scheduler Healthy ok nil
etcd-0 Healthy {"health": "true"} nil
etcd-1 Healthy {"health": "true"} nil
Cluster validation succeeded
Done, listing cluster services:
Kubernetes master is running at https://104.197.213.249
GLBCDefaultBackend is running at https://104.197.213.249/api/v1/proxy/namespaces/kube-system/services/default-http-backend
Heapster is running at https://104.197.213.249/api/v1/proxy/namespaces/kube-system/services/heapster
KubeDNS is running at https://104.197.213.249/api/v1/proxy/namespaces/kube-system/services/kube-dns
KubeUI is running at https://104.197.213.249/api/v1/proxy/namespaces/kube-system/services/kube-ui
Grafana is running at https://104.197.213.249/api/v1/proxy/namespaces/kube-system/services/monitoring-grafana
InfluxDB is running at https://104.197.213.249/api/v1/proxy/namespaces/kube-system/services/monitoring-influxdb
|
There are a couple of unbound variables and a WARNING message, but that didn’t seem to break the script.
Google Cloud Console shows:
Five instances are created as shown – one for master node and four for worker nodes.
Run Docker Container in Kubernetes Cluster on Google Cloud
Now that the cluster is up and running, get a list of all the nodes:
|
1
2
3
4
5
6
7
8
|
./kubernetes/cluster/kubectl.sh get no
NAME LABELS STATUS AGE
kubernetes-minion-1hmm kubernetes.io/hostname=kubernetes-minion-1hmm Ready 47m
kubernetes-minion-3x1d kubernetes.io/hostname=kubernetes-minion-3x1d Ready 46m
kubernetes-minion-h1ov kubernetes.io/hostname=kubernetes-minion-h1ov Ready 47m
kubernetes-minion-nshn kubernetes.io/hostname=kubernetes-minion-nshn Ready 47m
|
It shows four worker nodes.
Create a Couchbase pod:
|
1
2
3
4
|
./kubernetes/cluster/kubectl.sh run couchbase --image=arungupta/couchbase
replicationcontroller "couchbase" created
|
Notice, how the image name can be specified on the CLI. This command creates a Replication Controller with a single pod. The pod uses arungupta/couchbase Docker image that provides a pre-configured Couchbase server. Any Docker image can be specified here.
Get all the RC resources:
|
1
2
3
4
5
|
./kubernetes/cluster/kubectl.sh get rc
CONTROLLER CONTAINER(S) IMAGE(S) SELECTOR REPLICAS AGE
couchbase couchbase arungupta/couchbase run=couchbase 1 48s
|
This shows the Replication Controller that is created for you.
Get all the Pods:
|
1
2
3
4
5
|
./kubernetes/cluster/kubectl.sh get po
NAME READY STATUS RESTARTS AGE
couchbase-s8v9r 1/1 Running 0 1m
|
The output shows the Pod that is created as part of the Replication Controller.
Get more details about the Pod:
|
1
2
3
4
5
6
7
8
9
10
11
12
13
14
15
16
17
18
19
20
21
22
23
24
25
26
27
28
29
30
31
32
33
34
35
36
37
38
39
40
41
42
43
44
45
46
|
./kubernetes/cluster/kubectl.sh describe po couchbase-s8v9r
Name: couchbase-s8v9r
Namespace: default
Image(s): arungupta/couchbase
Node: kubernetes-minion-3x1d/10.128.0.3
Start Time: Thu, 03 Mar 2016 14:53:36 -0800
Labels: run=couchbase
Status: Running
Reason:
Message:
IP: 10.244.3.3
Replication Controllers: couchbase (1/1 replicas created)
Containers:
couchbase:
Container ID: docker://601ee2e4c822814c3969a241e37c97bf4d0d209f952f24707ab308192d289098
Image: arungupta/couchbase
Image ID: docker://298618e67e495c2535abd17b60241565e456a4c9ee96c923ecf844a9dbcccced
QoS Tier:
cpu: Burstable
Requests:
cpu: 100m
State: Running
Started: Thu, 03 Mar 2016 14:54:46 -0800
Ready: True
Restart Count: 0
Environment Variables:
Conditions:
Type Status
Ready True
Volumes:
default-token-frsd7:
Type: Secret (a secret that should populate this volume)
SecretName: default-token-frsd7
Events:
FirstSeen LastSeen Count From SubobjectPath Reason Message
───────── ──────── ───── ──── ───────────── ────── ───────
1m 1m 1 {kubelet kubernetes-minion-3x1d} implicitly required container POD Pulled Container image "gcr.io/google_containers/pause:0.8.0" already present on machine
1m 1m 1 {scheduler } Scheduled Successfully assigned couchbase-s8v9r to kubernetes-minion-3x1d
1m 1m 1 {kubelet kubernetes-minion-3x1d} implicitly required container POD Created Created with docker id c1de9da87f1e
1m 1m 1 {kubelet kubernetes-minion-3x1d} spec.containers{couchbase} Pulling Pulling image "arungupta/couchbase"
1m 1m 1 {kubelet kubernetes-minion-3x1d} implicitly required container POD Started Started with docker id c1de9da87f1e
29s 29s 1 {kubelet kubernetes-minion-3x1d} spec.containers{couchbase} Pulled Successfully pulled image "arungupta/couchbase"
29s 29s 1 {kubelet kubernetes-minion-3x1d} spec.containers{couchbase} Created Created with docker id 601ee2e4c822
29s 29s 1 {kubelet kubernetes-minion-3x1d} spec.containers{couchbase} Started Started with docker id 601ee2e4c822
|
Expose Pod on Kubernetes as Service
Now that our pod is running, how do I access the Couchbase server?
You need to expose it outside the Kubernetes cluster.
The kubectl expose command takes a pod, service or replication controller and expose it as a Kubernetes Service. Let’s expose the replication controller previously created and expose it:
|
1
2
3
4
|
./kubernetes/cluster/kubectl.sh expose rc couchbase --target-port=8091 --port=8091 --type=LoadBalancer
service "couchbase" exposed
|
Get more details about Service:
|
1
2
3
4
5
6
7
8
9
10
11
12
13
14
15
16
17
18
19
|
./kubernetes/cluster/kubectl.sh describe svc couchbase
Name: couchbase
Namespace: default
Labels: run=couchbase
Selector: run=couchbase
Type: LoadBalancer
IP: 10.0.37.150
LoadBalancer Ingress: 104.197.118.35
Port: <unnamed> 8091/TCP
NodePort: <unnamed> 30808/TCP
Endpoints: 10.244.3.3:8091
Session Affinity: None
Events:
FirstSeen LastSeen Count From SubobjectPath Reason Message
───────── ──────── ───── ──── ───────────── ────── ───────
2m 2m 1 {service-controller } CreatingLoadBalancer Creating load balancer
1m 1m 1 {service-controller } CreatedLoadBalancer Created load balancer
|
The Loadbalancer Ingress attribute gives you the IP address of the load balancer that is now publicly accessible.
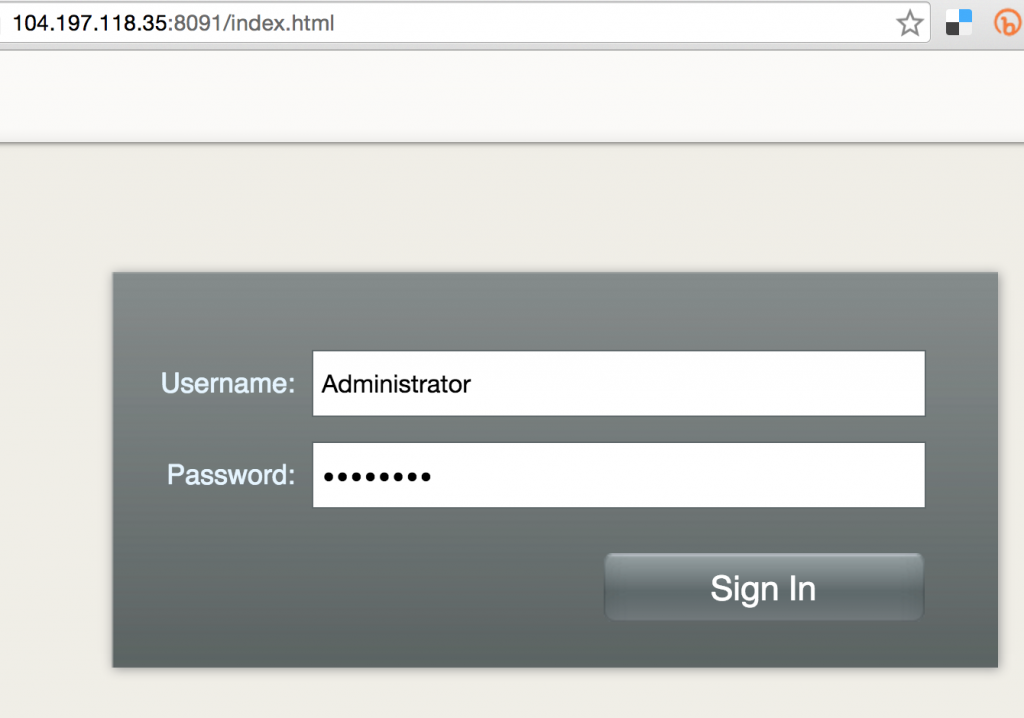
Wait for 3 minutes to let the load balancer settle down. Access it using port 8091 and the login page for Couchbase Web Console shows up:
Enter the credentials as “Administrator” and “password” to see the Web Console:

And so you just accessed your pod outside the Kubernetes cluster.
Shutdown Kubernetes Cluster
Finally, shutdown the cluster using cluster/kube-down.sh script.
|
1
2
3
4
5
6
7
8
9
10
11
12
13
14
15
16
17
18
19
20
21
22
23
24
25
26
27
28
29
30
31
32
33
34
35
36
37
38
39
40
41
42
43
|
./kubernetes/cluster/kube-down.sh
Bringing down cluster using provider: gce
You have specified individual components to update. If you are trying
to install new components, use:
$ gcloud components install alpha
Do you want to run install instead (y/N)?
All components are up to date.
You have specified individual components to update. If you are trying
to install new components, use:
$ gcloud components install beta
Do you want to run install instead (y/N)?
All components are up to date.
All components are up to date.
Your active configuration is: [default]
Project: couchbase-on-kubernetes
Zone: us-central1-b
Bringing down cluster
Deleted [https://www.googleapis.com/compute/v1/projects/couchbase-on-kubernetes/zones/us-central1-b/instanceGroupManagers/kubernetes-minion-group].
Deleted [https://www.googleapis.com/compute/v1/projects/couchbase-on-kubernetes/global/instanceTemplates/kubernetes-minion-template].
Updated [https://www.googleapis.com/compute/v1/projects/couchbase-on-kubernetes/zones/us-central1-b/instances/kubernetes-master].
Deleted [https://www.googleapis.com/compute/v1/projects/couchbase-on-kubernetes/zones/us-central1-b/instances/kubernetes-master].
Deleted [https://www.googleapis.com/compute/v1/projects/couchbase-on-kubernetes/global/firewalls/kubernetes-master-https].
Deleted [https://www.googleapis.com/compute/v1/projects/couchbase-on-kubernetes/global/firewalls/kubernetes-minion-all].
Deleting routes kubernetes-ad3beb92-e18b-11e5-8e71-42010a800002
Deleted [https://www.googleapis.com/compute/v1/projects/couchbase-on-kubernetes/global/routes/kubernetes-ad3beb92-e18b-11e5-8e71-42010a800002].
Deleted [https://www.googleapis.com/compute/v1/projects/couchbase-on-kubernetes/regions/us-central1/addresses/kubernetes-master-ip].
property "clusters.couchbase-on-kubernetes_kubernetes" unset.
property "users.couchbase-on-kubernetes_kubernetes" unset.
property "users.couchbase-on-kubernetes_kubernetes-basic-auth" unset.
property "contexts.couchbase-on-kubernetes_kubernetes" unset.
property "current-context" unset.
Cleared config for couchbase-on-kubernetes_kubernetes from /Users/arungupta/.kube/config
Done
|
Enjoy!
Source: http://blog.couchbase.com/2016/march/kubernetes-cluster-google-cloud-expose-service



 Hail Spigot for reviving Bukkit, and updating to 1.8.3!