Miles to go …

November 18, 2010

TOTD #150: Collection of GlassFish, NetBeans, JPA, JSF, JAX-WS, EJB, Jersey, MySQL, Rails, Eclipse, and OSGi tips

This is the 150th tip published on this blog so decided to make it a collection of all the previous ones. Here is a tag cloud (created from wordle.net/create) from title of all the tips:

As expected GlassFish is the most prominent topic. And then there are several entries on NetBeans, JRuby/Rails, several Java EE 6 technologies like JPA, JAX-WS, JAX-RS, EJB, and JSF, and more entries on Eclipse, OSGi and some other tecnhologies too. Here is a complete collection of all the tips published so far:

  • #149: How to clean IntelliJ cache, preferences, etc on Mac OS X ?
  • #148: JPA2 Metamodel Classes in NetBeans 7.0 – Writing type-safe Criteria API
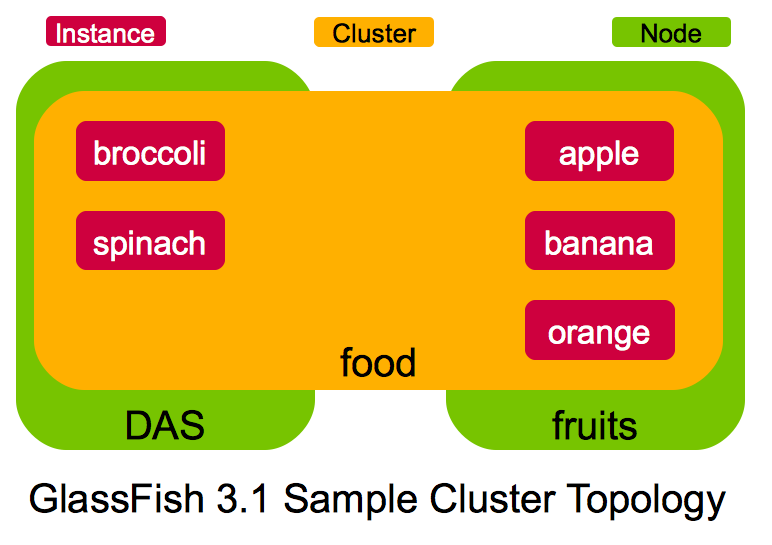
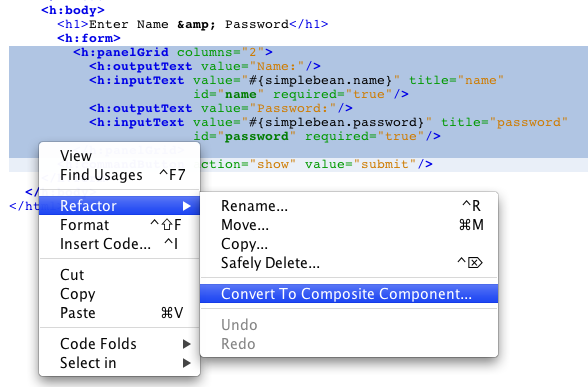
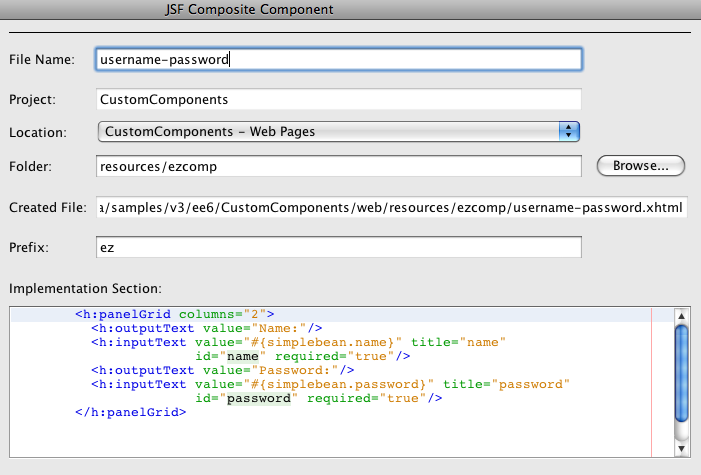
  • #147: Java Server Faces 2.0 Composite Components using NetBeans – DRY your code
  • #146: Understanding the EJB 3.1 Timer service in Java EE 6 – Programmatic, Deployment Descriptor, @Schedule
  • #145: CDI Events – a light-weight producer/consumer in Java EE 6
  • #144: CDI @Produces for container-managed @Resource
  • #143: Retrieve Twitter user timeline using using Jersey and OAuth
  • #142: GlassFish 3.1 – SSH Provisioning and Start/Stop instance/cluster on local/remote machines
  • #141: Running GlassFish 3.1 on Ubuntu 10.04 AMI on Amazon EC2
  • #140: Moving GlassFish Installation – Referenced file does not exist "osgi-main.jar"
  • #139: Asynchronous Request Processing using Servlets 3.0 and Java EE 6
  • #138: GlassFish 3.1 Milestone 1 – Clustering and Application Versioning Demos
  • #137: Asynchronous EJB, a light-weight JMS solution – Feature-rich Java EE 6
  • #136: Default Error Page using Servlets 3.0 – Improved productivity using Java EE 6
  • #135: JSF2 Composite Components using NetBeans IDE – lightweight Java EE 6
  • #134: Interceptors 1.1 in Java EE 6 – What and How ?
  • #133: JPA2 (JPQL & Criteria), JavaDB, and embedded GlassFish – perfect recipe for testing
  • #132: Servlets 3.0 in Embedded GlassFish Reloaded – lightweight Java EE 6
  • #131: Dynamic OSGi services in GlassFish – Using ServiceTracker
  • #130: Invoking a OSGi service from a JAX-WS Endpoint – OSGi and Enterprise Java
  • #129: Managed Beans 1.0 in Java EE 6 – What and How ?
  • #128: EJBContainer.createEJBContainer: Embedded EJB using GlassFish v3
  • #127: Embedding GlassFish in an existing OSGi runtime – Eclipse Equinox
  • #126: Creating an OSGi bundles using Eclipse and deploying in GlassFish
  • #125: Creating an OSGi bundles using NetBeans and deploying in GlassFish
  • #124: OSGi Declarative Services in GlassFish – Accessed from a Java EE client
  • #124: Using CDI + JPA with JAX-RS and JAX-WS
  • #123: f:ajax, Bean Validation for JSF, CDI for JSF and JPA 2.0 Criteria API – all in one Java EE 6 sample application
  • #122: Creating a JPA Persistence Unit using NetBeans 6.8
  • #121: JDBC resource for MySQL and Oracle sample database in GlassFish v3
  • #120: Deployment Descriptor-free Java EE 6 application using JSF 2.0 + EJB 3.1 + Servlets 3.0
  • #119: Telnet to GlassFish v3 with NetBeans 6.8 – "Could not open connection to the host"
  • #118: Managing OSGi bundles in GlassFish v3 – asadmin, filesystem, telnet console, web browser, REST, osgish
  • #117: Invoke a JAX-WS Web service from a Rails app deployed in GlassFish
  • #116: GlassFish v3 Administration using JavaFX front-end – JNLP available
  • #115: GlassFish in Eclipse – Integrated Bundle, Install Stand-alone or Update Existing plugin
  • #114: How to enable Java Console in Mac OS X, Windows, … ?
  • #113: JavaFX front-end for GlassFish v3 Administration – Using REST interface
  • #112: Exposing Oracle database tables as RESTful entities using JAX-RS, GlassFish, and NetBeans
  • #111: Rails Scaffold for a pre-existing table using Oracle and GlassFish
  • #110: JRuby on Rails application using Oracle on GlassFish
  • #109: How to convert a JSF managed bean to JSR 299 bean (Web Beans) ?
  • #108: Java EE 6 web application (JSF 2.0 + JPA 2.0 + EJB 3.1) using Oracle, NetBeans, and GlassFish
  • #107: Connect to Oracle database using NetBeans
  • #106: How to install Oracle Database 10g on Mac OS X (Intel) ?
  • TOTD #105: GlassFish v3 Monitoring – How to monitor a Rails app using asadmin, JavaScript, jConsole, REST ?
  • #104: Popular Ruby-on-Rails applications on GlassFish v3 – Redmine, Typo, Substruct
  • #103: GlassFish v3 with different OSGi runtimes – Felix, Equinox, and Knoplerfish
  • #102: Java EE 6 (Servlet 3.0 and EJB 3.1) wizards in Eclipse
  • #101: Applying Servlet 3.0/Java EE 6 “web-fragment.xml” to Lift – Deploy on GlassFish v3
  • #100: Getting Started with Scala Lift on GlassFish v3
  • #99: Creating a Java EE 6 application using MySQL, JPA 2.0 and Servlet 3.0 with GlassFish Tools Bundle for Eclipse
  • #98: Create a Metro JAX-WS Web service using GlassFish Tools Bundle for Eclipse
  • #97: GlassFish Plugin with Eclipse 3.5
  • #96: GlassFish v3 REST Interface to Monitoring and Management – JSON, XML, and HTML representations
  • #95: EJB 3.1 + Java Server Faces 2.0 + JPA 2.0 web application – Getting Started with Java EE 6 using NetBeans 6.8 M1 & GlassFish v3
  • #94: A simple Java Server Faces 2.0 + JPA 2.0 application – Getting Started with Java EE 6 using NetBeans 6.8 M1 & GlassFish v3
  • #93: Getting Started with Java EE 6 using NetBeans 6.8 M1 & GlassFish v3 – A simple Servlet 3.0 + JPA 2.0 app
  • #92: Session Failover for Rails applications running on GlassFish
  • #91: Applying Java EE 6 "web-fragment.xml" to Apache Wicket – Deploy on GlassFish v3
  • #90: Migrating from Wicket 1.3.x to 1.4 – "Couldn’t load DiskPageStore index from file" error
  • #89: How to add pagination to an Apache Wicket application
  • #88: How add pagination to Rails – will_paginate
  • #87: How to fix the error undefined method `new’ for "Rack::Lock":String caused by Warbler/JRuby-Rack ?
  • #86: Getting Started with Apache Wicket on GlassFish
  • #85: Getting Started with Django Applications on GlassFish v3
  • #84: Using Apache + mod_proxy_balancer to load balance Ruby-on-Rails running on GlassFish
  • #83: Eclipse Tools Bundle for GlassFish 1.0 – Now Available!
  • #82: Getting Started with Servlet 3.0 and EJB 3.1 in Java EE 6 using NetBeans 6.7
  • #81: How to use nginx to load balance a cluster of GlassFish Gem ?
  • #80: Sinatra CRUD application using Haml templates with JRuby and GlassFish Gem
  • #79: Getting Started with Sinatra applications on JRuby and GlassFish Gem
  • #78: GlassFish, EclipseLink, and MySQL efficient pagination using LIMIT
  • #77: Running Seam examples with GlassFish
  • #76: JRuby 1.2, Rails 2.3, GlassFish Gem 0.9.3, ActiveRecord JDBC Adapter 0.9.1 – can they work together ?
  • #75: Getting Started with Grails using GlassFish v3 Embedded
  • #74: JRuby and GlassFish Integration Test #5: JRuby 1.2.0 RC2 + Rails 2.x.x + GlassFish + Redmine
  • #73: JRuby and GlassFish Integration Test #4: JRuby 1.2.0 RC2 + Rails 2.2.x + GlassFish v2 + Warbler
  • #72: JRuby and GlassFish Integration Test #3: JRuby 1.2.0 RC2 + Rails 2.2.x + GlassFish v3
  • #71: JRuby and GlassFish Integration Test #2: JRuby 1.2.0 RC1 + Rails 2.2.x + GlassFish v3 Prelude
  • #70: JRuby and GlassFish Integration Test# 1: JRuby 1.2.0 RC1 + Rails 2.2.x + GlassFish Gem
  • #69: GlassFish High Availability/Clustering using Sun Web Server + Load Balancer Plugin on Windows Vista
  • #68: Installing Zones in Open Solaris 2008/11 on Virtual Box
  • #67: How to front-end a GlassFish Cluster with Apache + mod_jk on Mac OSX Leopard ?
  • #66: GlassFish Eclipse Plugin 1.0.16 – Install v3 Prelude from the IDE
  • #65: Windows 7 Beta 1 Build 7000 on Virtual Box: NetBeans + Rails + GlassFish + MySQL
  • #64: OpenSolaris 2008/11 using Virtual Box
  • #63: jmx4r gem – How to manage/monitor your Rails/Merb applications on JRuby/GlassFish ?
  • #62: How to remotely manage/monitor your Rails/Merb applications on JRuby/GlassFish using JMX API ?
  • #61: How to locally manage/monitor your Rails/Merb applications on JRuby/GlassFish using JMX ?
  • #60: Configure MySQL 6.0.x-alpha to NetBeans 6.5
  • #59: How to add Twitter feeds to blogs.sun.com ? + Other Twitter Tools
  • #58: Jersey and GlassFish – how to process POST requests ?
  • #57: Jersey Client API – simple and easy to use
  • #56: Simple RESTful Web service using Jersey and Embeddable GlassFish – Text and JSON output
  • #55: How to build GlassFish v3 Gem ?
  • #54: Java Server Faces with Eclipse IDE
  • #53: Scaffold in Merb using JRuby/GlassFish
  • #52: Getting Started with Merb using GlassFish Gem
  • #51: Embedding Google Maps in Java Server Faces using GMaps4JSF
  • #50: Mojarra 2.0 EDR2 is now available – Try them with GlassFish v3 and NetBeans 6.5
  • #49: Converting a JSF 1.2 application to JSF 2.0 – @ManagedBean
  • #48: Converting a JSF 1.2 application to JSF 2.0 – Facelets and Ajax
  • #47: Getting Started with Mojarra 2.0 nightly on GlassFish v2
  • #46: Facelets with Java Server Faces 1.2
  • #45: Ajaxifying Java Server Faces using JSF Extensions
  • #44: JDBC Connection Pooling for Rails on GlassFish v3
  • #43: GlassFish v3 Build Flavors
  • #42: Hello JavaServer Faces World with NetBeans and GlassFish
  • #41: How I created transparent logo of GlassFish using Gimp ?
  • #40: jQuery Autcomplete widget with MySQL, GlassFish, NetBeans
  • #39: Prototype/Script.aculo.us Autcomplete widget with MySQL, GlassFish, NetBeans
  • #38: Creating a MySQL Persistence Unit using NetBeans IDE
  • #37: SQLite3 with Ruby-on-Rails on GlassFish Gem
  • #36: Writing First Test for a Rails Application
  • #35: Rails Database Connection on Solaris
  • #34: Using Felix Shell with GlassFish
  • #33: Building GlassFish v3 Workspace
  • #32: Rails Deployment on GlassFish v3 from NetBeans IDE
  • #31: CRUD Application using Grails – Hosted on GlassFish and MySQL
  • #30: CRUD Application using Grails – Hosted on Jetty and HSQLDB
  • #29: Enabling "Available Plugins" tab in NetBeans IDE
  • #28: Getting Started with Rails 2.0 Scaffold
  • #27: Configurable Multiple Ruby Platforms in NetBeans 6.1 M1
  • #26: Overriding Database Defaults in Rails 2.0.2
  • #25: Rails application with PostgreSQL database using NetBeans
  • #24: Getting Started with Rails 2.0.x in JRuby 1.0.3 and JRuby 1.1RC1
  • #23: JavaFX Client invoking a Metro endpoint
  • #22: Java SE client for a Metro endpoint
  • #21: Metro 1.1 with GlassFish v2 UR1 and NetBeans 6
  • #20: How to create a new jMaki widget ?
  • #19: How to Add Metro Quality-of-Service to Contract-First Endpoint ?
  • #18: How to Build The GlassFish v3 Gem for JRuby ?
  • #17: Backing Up your Blog Posts on Roller
  • #16: Optimizing Metro Stubs by locally packaging the WSDL
  • #15: Delete/Update Row from Database using jMaki Data Table
  • #14: How to generate JRuby-on-Rails Controller on Windows (#9893)
  • #13: Setup Mongrel for JRuby-on-Rails applications on Windows
  • #12: Invoking a Java EE 5 Web service endpoint from JRuby
  • #11: Setup Mongrel cluster for JRuby-on-Rails applications on Unix
  • #10: Consuming JSON and XML representations generated by a Jersey endpoint in a jMaki Table widget
  • #9: Using JDBC connection pool/JNDI name from GlassFish in Rails Application
  • #8: Generating JSON using JAXB annotations in Jersey
  • #7: Switch between JRuby and CRuby interpreter in NetBeans 6
  • #6: Difference between Ruby Gem and Rails Plugin
  • #5: Loading data from beans in jMaki widgets
  • #4: How to convert a Session EJB to a Web service ?
  • #3: Using JavaDB with JRuby on Rails
  • #2: Change the endpoint address on a pre-generated Web services Stub
  • #1: SOAP Messaging Logging in Metro

Just for fun, here is another tag cloud:

You can access all the tips here. And keep those suggestions coming!

Technorati: totd glassfish netbeans jpa jsf jaxws jersey mysql rails osgi eclipse

Share and Enjoy:
  • Print
  • Digg
  • Sphinn
  • del.icio.us
  • Facebook
  • Google Bookmarks
  • DZone
  • StumbleUpon
  • Technorati
  • Twitter
  • Slashdot

August 4, 2010

TOTD #143: Retrieve Twitter user timeline using using Jersey and OAuth

Filed under: glassfish, totd, webservices — arungupta @ 10:12 pm

The Basic Authentication for authorizing with Twitter API will be turned off on Aug 16th. After that OAuth will be the only way to invoke the API.

Beginner’s guide to OAuth provide an excellent explanation to OAuth. The typical analogy for OAuth is a "valet key" to the car which is a stripped down version of your regular key. These keys are meant for valet drivers who don’t need to open trunk or glove compartment and don’t need to drive the car for longer distance. So even though they have access to the entire car but are restricted to the limited functionality.

OAuth is used to share your resources (photos, videos, bank accounts, etc) stored on one site with another site without having to share your username and password. The site storing the resources is "Service Provider", the site requesting the access is "Consumer", you are the "User", "Tokens" are "valet key" that provide required access to the resources.

This Tip Of The Day (TOTD) explains how Jersey, the Reference Implementation for JAX-RS, provides seamless support for OAuth by creating a simple desktop application that retrieves user timeline on Twitter using OAuth. This blog is going to combine the instructions outlined in Understanding the guts of Twitter’s OAuth for client apps and Using Jersey client OAuth support with Smugmug to achieve that.

Lets get started!

  1. Create a Maven project as:

    mvn -DarchetypeVersion=1.0 -DgroupId=org.glassfish.samples -DarchetypeArtifactId=maven-archetype-quickstart -Dversion=1.0-SNAPSHOT -DarchetypeGroupId=org.apache.maven.archetypes -Dpackage=org.glassfish.samples.twitter -DartifactId=twitter
    
  2. Update the generated "pom.xml" with the following fragments:
    <repositories>
      <repository>
        <id>glassfish-repository</id>
        <name>Java.net Repository for Glassfish</name>
        <url>http://download.java.net/maven/2/</url>
      </repository>
    </repositories>
    <dependencies>
      <dependency>
        <groupId>junit</groupId>
        <artifactId>junit</artifactId>
        <version>3.8.1</version>
        <scope>test</scope>
      </dependency>
      <dependency>
        <groupId>com.sun.jersey</groupId>
        <artifactId>jersey-client</artifactId>
        <version>1.1.3-SNAPSHOT</version>
      </dependency>
      <dependency>
        <groupId>com.sun.jersey</groupId>
        <artifactId>jersey-json</artifactId>
        <version>1.1.3-SNAPSHOT</version>
      </dependency>
      <dependency>
        <groupId>com.sun.jersey.oauth</groupId>
        <artifactId>oauth-signature</artifactId>
        <version>1.1.2-ea-SNAPSHOT</version>
      </dependency>
      <dependency>
        <groupId>com.sun.jersey.oauth</groupId>
        <artifactId>oauth-client</artifactId>
        <version>1.1.2-ea-SNAPSHOT</version>
       </dependency>
    </dependencies>
    <build>
      <plugins>
        <plugin>
          <groupId>org.apache.maven.plugins</groupId>
          <artifactId>maven-compiler-plugin</artifactId>
          <version>2.0.2</version>
          <configuration>
            <source>1.6</source>
            <target>1.6</target>
          </configuration>
        </plugin>
      </plugins>
     </build>
    

    The Jersey dependencies add the core Jersey libraries and OAuth functionality in Jersey.

  3. Register your app with Twitter – Register your application with Twitter by clicking on Register a new application >>. The complete list of registered applications can be seen at Applications using Twitter. Select "Client" as the app type, select "Yes, use Twitter for login" and leave the "Callback URL" empty. The registration gives you "consumer key" and "consumer secret". These are used to obtain temporary credentials (or request tokens) from Twitter.
  4. Obtain Twitter OAuth credentials – Each OAuth request is an HTTP request with "Authorization" header specifying the information by OAuth service provider. Jersey provides a OAuthClientFilter to add this header to the outbound client request. Twitter API Wiki explains the authentication as multiple step process for desktop applications. Each step involves sending some parameters to twitter and getting a result back and the intent of each method/request is clearly explained in Understanding the guts of Twitter’s OAuth for client apps. In our case, each request is created by using Jersey Client API and attaching OAuthClientFilter and is explained next.

    1. Request temporary credentials, a.k.a request token, from Twitter using oauth/request_token.

      1. In "App.java", create an instance of Jersey client in the constructor and attach a LoggingFilter to dump inbound/outbound messages as:

        public App() {
            // Create a Jersey client
            client = Client.create();
        
            client.addFilter(new LoggingFilter());
        }
        
      2. Request temporary credentials by adding the following method:

        public void getRequestToken() {
            client.removeAllFilters();
        
            // Create a resource to be used to make Twitter API calls
            WebResource resource = client.resource(REQUEST_TOKEN_URL);
        
            // Set the OAuth parameters
            OAuthSecrets secrets = new OAuthSecrets().consumerSecret(CONSUMER_SECRET);
            OAuthParameters params = new OAuthParameters().consumerKey(CONSUMER_KEY).
                    signatureMethod("HMAC-SHA1").version("1.0");
            // Create the OAuth client filter
            OAuthClientFilter oauthFilter =
                    new OAuthClientFilter(client.getProviders(), params, secrets);
        
            // Add the filter to the resource
            resource.addFilter(oauthFilter);
        
            // make the request and print out the result
            System.out.println(resource.get(String.class));
        }
        

        Note, "OAuthClientFilter" is used to populate the "Authorization" header instead of handcrafting it. The REQUEST_TOKEN_URL is "http://twitter.com/oauth/request_token", CONSUMER_SECRET and CONSUMER_KEY are the values obtained from registering your application.

      3. Edit "AppTest.java" and change "testApp" method such that it looks like:

        public void testApp() {
            App app = new App();
            app.getRequestToken();
        }
        
      4. Obtain the temporary credentials by running this application as:

        mvn test
        

        and see an output as:

        oauth_token=REQUEST_OAUTH_TOKEN&oauth_token_secret=REQUEST_OAUTH_TOKEN_SECRET&oauth_callback_confirmed=true
        

        REQUEST_OAUTH_TOKEN, a temporary token, is used to authorize on twitter.com.

    2. Authorize the user and obtain PIN

      1. Go to "https://twitter.com/oauth/authorize?oauth_token=REQUEST_OAUTH_TOKEN" in a browser window.
      2. If not already logged in, enter your twitter credentials and click "Allow".
      3. Copy the PIN.
    3. Request permanent credentials, a.k.a access token, from Twitter using oauth/access_token.

      1. Request permanent credentials by adding the following method in "App.java"

        public void getAccessToken() {
                client.removeAllFilters();
        
                // Set the OAuth parameters
                OAuthSecrets secrets = new OAuthSecrets().consumerSecret(CONSUMER_SECRET);
                OAuthParameters params = new OAuthParameters().consumerKey(CONSUMER_KEY).
                        signatureMethod("HMAC-SHA1").
                        version("1.0").
                        token(REQUEST_OAUTH_TOKEN).
                        verifier(PIN);
                // Create the OAuth client filter
                OAuthClientFilter oauthFilter =
                        new OAuthClientFilter(client.getProviders(), params, secrets);
        
                // Create a resource to be used to make Twitter API calls
                WebResource resource = client.resource(ACCESS_TOKEN_URL);
        
                // Add the filter to the resource
                resource.addFilter(oauthFilter);
        
                // make the request and print out the result
                System.out.println(resource.get(String.class));
            }
        

        REQUEST_OAUTH_TOKEN is the temporary token obtained earlier, ACCESS_TOKEN_URL is "https://twitter.com/oauth/access_token".

        Notice, REQUEST_OAUTH_TOKEN and PIN are now added to the OAuthClientFilter.

      2. Invoke this method by editing "AppTest.java" as:

        public void testApp() {
             App app = new App();
        //     app.getRequestToken();
             app.getAccessToken();
        }
        
      3. Obtain the permanent credentials by running this application as:

        mvn test
        

        and see an output as:

        oauth_token=ACCESS_OAUTH_TOKEN&oauth_token_secret=ACCESS_OAUTH_TOKEN_SECRET&user_id=USER_ID&screen_name=USER_NAME
        

        ACCESS_OAUTH_TOKEN is the authorized token that can be used for making any future requests, USER_ID and USER_NAME are identifiers for the user who signed in on twitter.com. 

  5. Get the last 20 status messages for the user from Twitter

    1. Add the following method in "App.java:
      public void getUserTimeline() {
          client.removeAllFilters();
      
          // Set the OAuth parameters
          OAuthSecrets secrets = new OAuthSecrets().consumerSecret(CONSUMER_SECRET);
          OAuthParameters params = new OAuthParameters().consumerKey(CONSUMER_KEY).
                  signatureMethod("HMAC-SHA1").
                  version("1.0").
                  token(ACCESS_OAUTH_TOKEN);
          // Create the OAuth client filter
          OAuthClientFilter oauthFilter =
                  new OAuthClientFilter(client.getProviders(), params, secrets);
      
          // Create a resource to be used to make Twitter API calls
          WebResource resource = client.resource(USER_TIMELINE_URL);
      
          // Add the filter to the resource
          resource.addFilter(oauthFilter);
      
          // Parse the JSON array
          JSONArray jsonArray = resource.get(JSONArray.class);
          List<String> statuses = new ArrayList<String>();
      
          try {
              for (int i = 0; i < jsonArray.length(); i++) {
                  JSONObject jsonObject = (JSONObject) jsonArray.get(i);
                  StringBuilder builder = new StringBuilder();
                  builder.append(jsonObject.getString("text")).
                          append(jsonObject.getString("created_at"));
                  statuses.add(builder.toString());
              }
          } catch (JSONException ex) {
              Logger.getLogger(App.class.getName()).log(Level.SEVERE, null, ex);
          }
      }
      

      USER_TIMELINE_URL is "http://api.twitter.com/1/statuses/user_timeline.json". The "getTimelineElements" method can be updated to pick other elements from the return JSON object. The complete JSON schema for the response is described here.

    2. Edit "AppTest.java" as:

      public void testApp() {
          App app = new App();
      //    app.getRequestToken();
      //    app.getAccessToken();
          app.getUserTimeline();
      }
      
    3. Finally get the last 20 status updates by giving the command:

      mvn test
      

      and see the output similar to:

      Running org.glassfish.samples.twitter.AppTest
      [Developing OSGi-Enabled Java EE Applications- http://bit.ly/aOim34 (via
      @JavaOneConf) #javaone10Wed Aug 04 23:53:13 +0000 2010, Google Wave goes
       bye bye (via @google:)Update on Google Wave http://bit.ly/bIoDWAWed Aug
       04 21:16:07 +0000 2010, @gdaniels Yeah, I expected #wave to bye bye as
       well, but this is fairly quick!Wed Aug 04 21:15:41 +0000 2010,
      

And that’s it!

This Tip Of The Day explained how to use Jersey to retrieve last 20 status messages that a user posted on twitter. Here are some other future possible additions:

  • POST status update
  • Integrate Search API using OAuth (is it possible ?)
  • Integrate Streaming API (need more investigation)
  • Create a web-base client that automatically redirects the user from application to twitter.com and then back to the application.

Jersey and OAuth wiki provides more details about how to use OAuth with Jersey.

Technorati: totd jaxrs jersey restful webservices oauth twitter glassfish

Share and Enjoy:
  • Print
  • Digg
  • Sphinn
  • del.icio.us
  • Facebook
  • Google Bookmarks
  • DZone
  • StumbleUpon
  • Technorati
  • Twitter
  • Slashdot

June 26, 2010

TOTD #142: GlassFish 3.1 – SSH Provisioning and Start/Stop instance/cluster on local/remote machines

Filed under: glassfish, totd — arungupta @ 8:00 am

GlassFish 3.1 Milestone 2 enables SSH provisioning that allows you to create, start, stop, and delete a cluster spanning multiple instances on local and remote machines from the Domain Administration Server (DAS). This Tip Of The Day (TOTD) builds upon TOTD #141 and explains how you can create such a cluster on Amazon EC2 with Ubuntu 10.04. Carla also blogged about a similar scenario here.

The cluster topology created is shown below:

The key points shown in the topology are:

  • It consists of DAS and a remote machine "fruits" (shown in green color)
  • There is one cluster "food" spanning these two machines (shown in yellow color)
  • DAS has "broccoli" and "spinach" instances (shown in red color)
  • "fruits" has "apple", "banana", and "orange" instances (shown in red color)

Amazon EC2 assigned the public IP address of "ec2-184-72-12-163.us-west-1.compute.amazonaws.com" to DAS and "ec2-184-72-17-228.us-west-1.compute.amazonaws.com" to the remote machine. These IP addresses are used in the command invocations below.

Lets get started!

  1. Configure SSH between DAS and the remote machine – More details about SSH key setup here.

    1. Copy the keypair  generated in TOTD #141 (ec2-keypair.pem) to DAS as:

      ~/.ec2 >scp -i /Users/arungupta/.ec2/ec2-keypair.pem /Users/arungupta/.ec2/ec2-keypair.pem \\
      [email protected]
      ec2-keypair.pem 100% 1751 1.7KB/s 00:00
      

      Notice, the public IP address of DAS is specified here. This key will be used to copy the private keys generated in next step to the remote machine.

    2. Generate a private/public key pair on DAS as:

      ubuntu@ip-10-160-47-196:~$ ssh-keygen -t dsa
      Generating public/private dsa key pair.
      Enter file in which to save the key (/home/ubuntu/.ssh/id_dsa):
      Enter passphrase (empty for no passphrase):
      Enter same passphrase again:
      Your identification has been saved in /home/ubuntu/.ssh/id_dsa.
      Your public key has been saved in /home/ubuntu/.ssh/id_dsa.pub.
      The key fingerprint is:
      0a:b8:cd:8c:a0:7f:3d:00:9e:ec:ac:06:a1:f1:2f:cb ubuntu@ip-10-160-47-196
      The key's randomart image is:
      +--[ DSA 1024]----+
      | |
      | |
      | |
      |o .. |
      |o*.o. S |
      |+.=*.. . |
      |ooo.+o. |
      | ++ o o |
      |o.E+ . |
      +-----------------+
      
    3. Copy the generated public to ".ssh" directory of the remote machine as:

      ubuntu@ip-10-160-142-175:~/.ssh$ scp -i ec2-keypair.pem id_dsa.pub \\
      [email protected]:.ssh/authorized_keys2
      
    4. Make sure the ssh connection works between DAS and remote machine without specifying any key or passphrase as shown below:

      ssh [email protected]
      
  2. Install "sun-java6-jdk" and "unzip" package and GlassFish on DAS and remote machine as explained in TOTD #141. In short:

    ssh -i /Users/arungupta/.ssh/ec2-keypair.pem [email protected]
    sudo add-apt-repository "deb http://archive.canonical.com/ lucid partner"
    sudo apt-get update
    sudo apt-get install sun-java6-bin sun-java6-jre sun-java6-jdk
    sudo update-java-alternatives -s java-6-sun
    sudo apt-get install unzip
    wget http://dlc.sun.com.edgesuite.net/glassfish/3.1/promoted/glassfish-3.1-b06.zip
    unzip glassfish-3.1-b06.zip
    
  3. Start GlassFish on DAS and remote machine as:

    export ENABLE_REPLICATION=true
    export PATH=~/glassfishv3/bin:$PATH
    asadmin start-domain --verbose &
    
  4. Create the cluster and instances by issuing the following commands on the DAS

    1. Create the cluster as:

      ubuntu@ip-10-160-142-175:~$ asadmin create-cluster food
      [#|2010-06-25T22:11:27.604+0000|INFO|glassfish3.1|org.hibernate.validator.util.Version|
      _ThreadID=23;_ThreadName=http-thread-pool-4848(2);|Hibernate Validator bean-validator-3.0-JBoss-4.0.2_03|#]
      
      [#|2010-06-25T22:11:27.638+0000|INFO|glassfish3.1|org.hibernate.validator.engine.
      resolver.DefaultTraversableResolver|_ThreadID=23;_ThreadName=http-thread-pool-4848(2);|
      Instantiated an instance of org.hibernate.validator.engine.resolver.JPATraversableResolver.|#]
      
      Command create-cluster executed successfully.
      
    2. Create a node on the remote machine as:

      ubuntu@ip-10-160-142-175:~3$ asadmin create-node-ssh --nodehost \\
      ec2-184-72-17-228.us-west-1.compute.amazonaws.com --nodehome /home/ubuntu/glassfishv3 fruits
      
      Command create-node-ssh executed successfully.
      
    3. List all the nodes as:

      ubuntu@ip-10-160-142-175:~$ asadmin list-nodes
      localhost
      fruits
      
      Command list-nodes executed successfully.
      
    4. Create two instances ("broccoli" and "spinach") on DAS as:

      ubuntu@ip-10-160-142-175:~$ asadmin create-instance --cluster=food \\
      --systemproperties AJP_INSTANCE_NAME=broccoli:AJP_INSTANCE_PORT=19090 broccoli
      [#|2010-06-25T23:22:02.891+0000|INFO|glassfish3.1|javax.enterprise.system.tools.admin
      .com.sun.enterprise.v3.admin.cluster|_ThreadID=103;_ThreadName=http-thread-pool-4848(2);|
      Creating instance broccoli on localhost|#]
      
      [#|2010-06-25T23:22:03.750+0000|INFO|glassfish3.1|null|_ThreadID=30;_ThreadName=stdout;|
      Using DAS host localhost and port 4848 from existing das.properties for nodeagent
      ip-10-160-142-175. To use a different DAS, create a new nodeagent by specifying a
      new --nodeagent name with the correct values for --host and --port.|#]
      
      [#|2010-06-25T23:22:03.785+0000|INFO|glassfish3.1|null|_ThreadID=30;_ThreadName=stdout;|
      Command _create-instance-filesystem executed successfully.|#]
      
      Command create-instance executed successfully.
      ubuntu@ip-10-160-142-175:~$ asadmin create-instance --cluster=food \\
      --systemproperties AJP_INSTANCE_NAME=spinach:AJP_INSTANCE_PORT=19091 spinach
      [#|2010-06-25T23:22:24.813+0000|INFO|glassfish3.1|javax.enterprise.system.tools.admin.
      com.sun.enterprise.v3.admin.cluster|_ThreadID=106;_ThreadName=http-thread-pool-4848(5);|
      Creating instance spinach on localhost|#]
      
      [#|2010-06-25T23:22:25.636+0000|INFO|glassfish3.1|null|_ThreadID=32;_ThreadName=stdout;|
      Using DAS host localhost and port 4848 from existing das.properties for nodeagent
      ip-10-160-142-175. To use a different DAS, create a new nodeagent by specifying a
      new --nodeagent name with the correct values for --host and --port.|#]
      
      [#|2010-06-25T23:22:25.672+0000|INFO|glassfish3.1|null|_ThreadID=32;_ThreadName=stdout;|
      Command _create-instance-filesystem executed successfully.|#]
      
      Command create-instance executed successfully.
      

      The AJP_INSTANCE_NAME and AJP_INSTANCE_PORT properties will be used by mod_jk in a subsequent blog.

    5. Create three instances ("apple", "banana", and "orange") on the remote machine as:

      ubuntu@ip-10-160-142-175:~$ asadmin create-instance --cluster=food --node=fruits \\
      --systemproperties AJP_INSTANCE_NAME=apple:AJP_INSTANCE_PORT=19090 apple
      [#|2010-06-25T23:23:33.208+0000|INFO|glassfish3.1|javax.enterprise.system.tools.admin.
      com.sun.enterprise.v3.admin.cluster|_ThreadID=104;_ThreadName=http-thread-pool-4848(3);|
      Creating instance apple on fruits|#]
      
      [#|2010-06-25T23:23:35.682+0000|INFO|glassfish3.1|javax.enterprise.system.tools.admin.
      com.sun.enterprise.v3.admin.cluster|_ThreadID=104;_ThreadName=http-thread-pool-4848(3);|
      Command _create-instance-filesystem executed successfully.
      |#]
      
      Command create-instance executed successfully.
      ubuntu@ip-10-160-142-175:~$ asadmin create-instance --cluster=food --node=fruits \\
      --systemproperties AJP_INSTANCE_NAME=banana:AJP_INSTANCE_PORT=19091 banana
      [#|2010-06-25T23:23:59.697+0000|INFO|glassfish3.1|javax.enterprise.system.tools.admin.
      com.sun.enterprise.v3.admin.cluster|_ThreadID=102;_ThreadName=http-thread-pool-4848(1);|
      Creating instance banana on fruits|#]
      
      [#|2010-06-25T23:24:01.500+0000|INFO|glassfish3.1|javax.enterprise.system.tools.admin.
      com.sun.enterprise.v3.admin.cluster|_ThreadID=102;_ThreadName=http-thread-pool-4848(1);|
      Using DAS host ip-10-160-142-175.us-west-1.compute.internal and port 4848 from
      existing das.properties for nodeagent ip-10-160-142-20. To use a different DAS,
      create a new nodeagent by specifying a new --nodeagent name with the correct
      values for --host and --port.
      Command _create-instance-filesystem executed successfully.
      |#]
      
      Command create-instance executed successfully.
      ubuntu@ip-10-160-142-175:~$ asadmin create-instance --cluster=food --node=fruits \\
      --systemproperties AJP_INSTANCE_NAME=orange:AJP_INSTANCE_PORT=19092 orange
      [#|2010-06-25T23:24:13.286+0000|INFO|glassfish3.1|javax.enterprise.system.tools.admin.
      com.sun.enterprise.v3.admin.cluster|_ThreadID=105;_ThreadName=http-thread-pool-4848(4);|
      Creating instance orange on fruits|#]
      
      [#|2010-06-25T23:24:15.089+0000|INFO|glassfish3.1|javax.enterprise.system.tools.admin.
      com.sun.enterprise.v3.admin.cluster|_ThreadID=105;_ThreadName=http-thread-pool-4848(4);|
      Using DAS host ip-10-160-142-175.us-west-1.compute.internal and port 4848 from
      existing das.properties for nodeagent ip-10-160-142-20. To use a different DAS,
      create a new nodeagent by specifying a new --nodeagent name with the correct
      values for --host and --port.
      Command _create-instance-filesystem executed successfully.
      |#]
      
      Command create-instance executed successfully.
      
  5. Start the cluster

    1. List all instances as:

      ubuntu@ip-10-160-142-175:~3$ asadmin list-instances
      broccoli not running
      spinach not running
      apple not running
      banana not running
      orange not running
      
      Command list-instances executed successfully.
      
    2. Start the cluster as:

      ubuntu@ip-10-160-142-175:~$ asadmin start-cluster food
      
      . . .
      
      Command start-cluster executed successfully.
      
      
    3. List all the instances again as:

      ubuntu@ip-10-160-142-175:~$ asadmin list-instances
      
      . . .
      
      broccoli running
      spinach running
      apple running
      banana running
      orange running
      

      The HTTP ports of each instance can be grepped from DAS’s "domain.xml". Here are the ports for each created instance:

      broccoli 28080
      spinach 28081
      apple 28080
      banana 28081
      orange 28082

      On Amazon, you may have to poke holes in the firewall as:

      ec2-authorize default -p 28080
      ec2-authorize default -p 28081
      ec2-authorize default -p 28082
      

      And now "http://ec2-184-72-12-163.us-west-1.compute.amazonaws.com:28080/" ("broccoli" instance on DAS) will show the default index page. Similarly other host and port combinations will show this page as well.

This blog showed how to create a GlassFish 3.1 cluster spanning multiple instances on Amazon EC2 with Ubuntu 10.04.

Subsequent blogs will show:

  • How to deploy an app to this cluster and some variations ?
  • How to front-end this cluster with mod_jk for load-balancing ?

Technorati: totd glassfish clustering ssh instance amazon ec2 ubuntu

Share and Enjoy:
  • Print
  • Digg
  • Sphinn
  • del.icio.us
  • Facebook
  • Google Bookmarks
  • DZone
  • StumbleUpon
  • Technorati
  • Twitter
  • Slashdot

June 24, 2010

TOTD #141: Running GlassFish 3.1 on Ubuntu 10.04 AMI on Amazon EC2

Filed under: glassfish, totd — arungupta @ 12:48 pm

GlassFish 3.1 Milestone 2 was released this week, download the zip file.

TOTD #138 provide simple instructions to get you started with Milestone 1 and you can follow similar steps to get started with Milestone 2 as well. A more detailed blog on the new functionality (SSH Provisioning and Dynamic App Deployment) is coming as well.

In order to test the newly added clustering capabilities of GlassFish 3.1, I decided to run Milestone 2 build on a Ubuntu 10.04 instance on Amazon EC2. My host operating system is Mac OS X and even though the steps are defined at multiple locations (mentioned below) but complete set of steps were missing. This Tip Of The Day (TOTD) shows how get started with running a GlassFish 3.1 build on Ubuntu 10.04 instance on Amazon EC2.

This TOTD consulted the following blogs:

  • Starting Amzon EC2 with Mac OS X
  • EC2 Starters Guide on Ubuntu
  • Ubuntu 10.04 LTS Daily Build – Amazon Published EC2 AMIs
  • Ubuntu Linux Install Sun JDK and JRE
  • How to install Sun Java on Ubuntu 10.04 LTS

Twitterverse was very helpful and Divyen helped smoothen the rough edges!

Lets get started!

  1. In your home directory, create a new ".ec2" directory.
  2. Generate SSH Key & X.509 certificates

    1. Generate X.509 certificates key

      1. Go to your AWS account and click on "Security Credentials".
      2. In "Access Credentials" section, click on "X.509 Certificates" and click on "Create a new Certificate". Make sure to download the private key file and X.509 certificate in ".ec2" directory as "cert-xxxxxx.pem" and "pk-xxxxxxx.pem".
    2. SSH key – Public AMIs can be accessed using an ssh key. Give the following command in ".ec2" directory:

      ec2-add-keypair ec2-keypair > ec2-keypair.pem
      

      This will generate the SSH key in the file "ec2-keypair.pem".

  3. EC2 API Tools

    1. Download Amazon EC2 API Tools from here and unzip them in ".ec2" directory.
    2. Move "lib" and "bin" directory from the extracted directory to ".ec2" directory.
  4. Create ".ec2.profile" file in ".ec2" directory and add the contents:

    export EC2_HOME=~/.ec2
    export PATH=$PATH:$EC2_HOME/bin
    export EC2_PRIVATE_KEY=`ls $EC2_HOME/pk-*.pem`
    export EC2_CERT=`ls $EC2_HOME/cert-*.pem`
    export EC2_URL=https://ec2.us-west-1.amazonaws.com
    

    The last line sets the default zone to US-West-1. The AMI id used later is from this region. Source this file by giving the following command in ".ec2" directory:

    source ".ec2.profile"
    
  5. On your firewall, authorize port 22 for SSH and 8080 for HTTP access for GlassFish on your firewall as:

    ec2-authorize default -p 22
    ec2-authorize default -p 8080
    
  6. Run the instance as:

    ec2-run-instances ami-c597c680 -k ec2-keypair
    
  7. Obtain the public IP address of Ubuntu instance as:

    ec2-describe-instances
    RESERVATION     r-XXXXXXXX      XXXXXXXXXXXX    default
    INSTANCE        i-XXXXXXXX      ami-c597c680    ec2-XX-XX-XX-XX.us-west-1.compute.amazonaws.com       ip-XX-XX-XX-XX.us-west-1.compute.internal       running ec2-keypair     0               m1.small        2010-06-24T16:23:44+0000        us-west-1a      aki-XXXXXXXX    monitoring-disabled      XX-XX-XX-XX   XX-XX-XX-XX
    

    The address "ec2-XX-XX-XX-XX.us-west-1.compute.amazonws.com" is the public IP address and will be used for ssh next.

  8. SSH to the ready Ubuntu instance as:

    ssh -i ec2-keypair.pem [email protected]
    

  9. Install JDK 6 on Ubuntu

    1. Add the Ubuntu partner repository as:

      sudo add-apt-repository "deb http://archive.canonical.com/ lucid partner"
      
    2. Update the list of packages as:

      sudo apt-get update
      
    3. Install JDK 6 as:

      sudo apt-get install sun-java6-bin sun-java6-jre sun-java6-jdk
      
    4. Make sure the recently added JDK is at the top of JVM search order by giving the command:

      sudo update-java-alternatives -s java-6-sun
      

      This command adds "/usr/lib/jvm/java-6-sun" to the top of "/etc/jvm" file.

  10. Install "unzip" package as:

    sudo apt-get install unzip
    
  11. Download & start GlassFish 3.1

    1. Download GlassFish 3.1 Milestone 2 as:

      wget http://dlc.sun.com.edgesuite.net/glassfish/3.1/promoted/glassfish-3.1-b06.zip
      
    2. Unzip the downloaded zip file as:

      unzip glassfish-3.1-b06.zip
      
    3. Start GlassFish as:

      ./glassfishv3/glassfish/bin/asadmin start-domain --verbose
      
    4. And now your default web page is accessible at "http://ec2-XX-XX-XX-XX.us-west-1.compute.amazonws.com:8080".
  12. Finally terminate the instance as:

    ec2-terminate-instances  i-XXXXXXXX
    

How are you using GlassFish in the cloud ?

Technorati: totd glassfish ubuntu amazon ec2 cloud osxtips

Share and Enjoy:
  • Print
  • Digg
  • Sphinn
  • del.icio.us
  • Facebook
  • Google Bookmarks
  • DZone
  • StumbleUpon
  • Technorati
  • Twitter
  • Slashdot

June 3, 2010

TOTD #140: Moving GlassFish Installation – Referenced file does not exist “osgi-main.jar”

Filed under: glassfish, totd — arungupta @ 1:05 am

This is a quick Tip Of The Day (TOTD) to show how to get GlassFish running again if the directory is moved to a new location after it has been started once. Note, of course, you are not moving the directory while the server is running. Its only after the server has been started once at least and stopped.

If you move your GlassFish installation to a different directory then you may see errors like:

ERROR: Error creating archive. (java.io.IOException: Referenced file does not exist: /Users/arungupta/tools/glassfish/v3/glassfishv3/glassfish/modules/osgi-main.jar)
java.io.IOException: Referenced file does not exist: /Users/arungupta/tools/glassfish/v3/glassfishv3/glassfish/modules/osgi-main.jar
        at org.apache.felix.framework.cache.BundleArchive.createRevisionFromLocation(BundleArchive.java:994)
        at org.apache.felix.framework.cache.BundleArchive.revise(BundleArchive.java:631)
        at org.apache.felix.framework.cache.BundleArchive.(BundleArchive.java:206)
        at org.apache.felix.framework.cache.BundleCache.getArchives(BundleCache.java:149)
        at org.apache.felix.framework.Felix.init(Felix.java:558)
        at org.apache.felix.main.Main.main(Main.java:292)
. . .
org.osgi.framework.BundleException: Bundle symbolic name and version are not unique: com.sun.grizzly.grizzly-config:1.9.18.k
 at org.apache.felix.framework.BundleImpl.createModule(BundleImpl.java:1145)
 at org.apache.felix.framework.BundleImpl.<init>(BundleImpl.java:79)
 at org.apache.felix.framework.Felix.installBundle(Felix.java:2372)
. . .
May 30, 2010 4:27:05 PM Main install
WARNING: Failed to install file:/Users/arungupta/tools/glassfish/v3/glassfishv3-2/glassfish/modules/grizzly-config.jar
org.osgi.framework.BundleException: Bundle symbolic name and version are not unique: com.sun.grizzly.grizzly-config:1.9.18.k
 at org.apache.felix.framework.BundleImpl.createModule(BundleImpl.java:1145)
 at org.apache.felix.framework.BundleImpl.<init>(BundleImpl.java:79)
 at org.apache.felix.framework.Felix.installBundle(Felix.java:2372)
. . .

Fortunately the fix is simple, just remove your "domains/domain1/osgi-cache" directory. The cache will be rebuilt during the next run of GlassFish.

Technorati: totd glassfish v3 osgi cache error

Share and Enjoy:
  • Print
  • Digg
  • Sphinn
  • del.icio.us
  • Facebook
  • Google Bookmarks
  • DZone
  • StumbleUpon
  • Technorati
  • Twitter
  • Slashdot

May 31, 2010

TOTD #139: Asynchronous Request Processing using Servlets 3.0 and Java EE 6

Filed under: glassfish, javaee, totd — arungupta @ 8:16 am

Server resources are always valuable and should be used conservatively. Consider a Servlet that has to wait for a JDBC connection to be available from the pool, receiving a JMS message or reading a resource from the file system. Waiting for a "long running" process to completely blocks the thread – waiting, sitting and doing nothing – not an optimal usage of your server resources. Servlets 3.0 introduces the ability to asynchronously process requests such that the control (or thread) is returned back to the container to perform other tasks while waiting for the long running process to complete. The request processing continues in the same thread after after the response from the long running process is returned or or may be dispatched to a new resource from within the long running process. A typical use case for long running process is a Chat Application.

The asynchronous behavior need to be explicitly enabled on a Servlet. This is achieved by adding "asyncSupported" attribute on @WebServlet as shown below:

@WebServlet(name="AsyncServlet", urlPatterns={"/AsyncServlet"}, asyncSupported=true)
public class AsyncServlet extends HttpServlet {

The asynchronous processing can then be started in a separate thread using "startAsync" method on the request. This method returns "AsyncContext" which represents the execution context of the asynchronous request. The asynchronous request can then be completed by calling AsyncContext.complete (explicit) or dispatching to another resource (implicit). The container completes the invocation of asynchronous request in the later case.

Lets say the long running process is implemented as:

class MyAsyncService implements Runnable {
    AsyncContext ac;

    public MyAsyncService(AsyncContext ac) {
        this.ac = ac;
    }

    @Override
    public void run() {
        System.out.println("Some long running process in \"MyAsyncService\"");
    }
}

Note this is running in a separate thread. This service can be invoked from the original servlet as:

AsycnContext ac = request.startAsync();

The service may also be started as:

ScheduledThreadPoolExecutor executor = new ScheduledThreadPoolExecutor(10);
executor.execute(new MyAsyncService(ac));

The ScheduledThreadPoolExecutor usage is recommended as it makes the thread management easier.

A listener can be associated with the AsyncContext to get notified of when the async request is complete, timed out, or resulted in an error. This can be achieved as:

ac.addListener(new AsyncListener() {

    @Override
    public void onComplete(AsyncEvent event) throws IOException {
        System.out.println("onComplete.");
    }

    . . .
});

A more complete code for the above fragment is given below. The "onComplete" method is used to clean up resources created during async processing.

The asynchronous request processing can be either completed in "run" method of "MyAsyncService" by invoking "AsycnContext.complete" as shown below:

@Override
public void run() {
    System.out.println("Some long running process in \"MyAsyncService\"");
    ac.complete();
}

or dispatched to a different resource as:

@Override
public void run() {
    System.out.println("Some long running process in \"MyAsyncService\"");
    ac.dispatch("/response.jsp");
}

Lets take a look at our complete code:

@WebServlet(name="AsyncServlet", urlPatterns={"/AsyncServlet"}, asyncSupported=true)
public class AsyncServlet extends HttpServlet {

    protected void doGet(HttpServletRequest request, HttpServletResponse response)
    throws ServletException, IOException {
        response.setContentType("text/html;charset=UTF-8");
        try {
            System.out.println("Starting doGet");
            AsyncContext ac = request.startAsync();
            request.getServletContext().setAttribute("asyncContext", ac);
            ac.addListener(new AsyncListener() {

                @Override
                public void onComplete(AsyncEvent event) throws IOException {
                    System.out.println("onComplete");
                }

                @Override
                public void onTimeout(AsyncEvent event) throws IOException {
                    System.out.println("onTimeout");
                }

                @Override
                public void onError(AsyncEvent event) throws IOException {
                    System.out.println("onError");
                }

                @Override
                public void onStartAsync(AsyncEvent event) throws IOException {
                    System.out.println("onStartAsync");
                }
            });

            System.out.println("Do some stuff in doGet ...");

            // Start another service
            ScheduledThreadPoolExecutor executor = new ScheduledThreadPoolExecutor(10);
            executor.execute(new MyAsyncService(ac));

            System.out.println("Some more stuff in doGet ...");
        } finally {
        }
    }

    class MyAsyncService implements Runnable {
        AsyncContext ac;

        public MyAsyncService(AsyncContext ac) {
            this.ac = ac;
            System.out.println("Dispatched to " + "\"MyAsyncService\"");
        }

        @Override
        public void run() {
            System.out.println("Some long running process in \"MyAsyncService\"");
            ac.complete();
        }
    }
}

Invoking the GET operation of this Servlet shows the following sequence of statements in GlassFish server log:

INFO: Starting doGet
INFO: Dispatched to "MyAsyncService"
INFO: Doing some stuff in doGet ...
INFO: Some more in doGet ...
INFO: Some long running process in "MyAsyncService"
INFO: onComplete

The first statement marks the beginning of "doGet", the second statement indicates that the request is dispatched to the long running
"MyAsyncService", the third and fourth statement indicates that the response returned back to "doGet" for normal request processing. Finally fifth and sixth statement shows that now the asynchronous request is getting processed and is completed.

Clean and simple!

A request may be dispatched from Asynchronous servlet to Synchronous but other way around is illegal. The section 2.3.3.3 in the Servlets 3.0 specification provides an introduction to the Asynchronous Processing in Servlets 3.0.

The asynchronous behavior is available in the Servlet Filter as well.

The complete code used in this blog can be downloaded here. A fully working sample of a Chat Application using Servlets 3.0 can be seen here.

Technorati: totd glassfish v3 servlets javaee asynchronous comet

Share and Enjoy:
  • Print
  • Digg
  • Sphinn
  • del.icio.us
  • Facebook
  • Google Bookmarks
  • DZone
  • StumbleUpon
  • Technorati
  • Twitter
  • Slashdot

May 27, 2010

TOTD #138: GlassFish 3.1 Milestone 1 – Clustering and Application Versioning Demos

Filed under: frameworks, glassfish, javaee, totd — arungupta @ 10:34 pm

GlassFish Server Open Source Edition 3.1 Milestone 1 is now available. The key functional drivers of this release are:

  • Clustering and Centralized Administration
  • High Availability

The Feature List shows the complete set of features planned for the release. The Draft Engineering Schedule shows what/when the features will be delivered. Per the schedule, Milestone 1 is the promoted build b02.

This is a bleeding-edge build and the first time clustering capabilities and application versioning are shown in GlassFish 3.1. GlassFish Server Open Source Edition 2.1.1 is the current stable release for all clustering and high availability capabilities.

The key features that work in this milestone build are Basic Clustering Support and Application Versioning. These features are now explained below.

Basic Clustering – This feature allows to create a multi-node cluster with few local/remote server instances and start them. The concept essentially remains similar to GlassFish v2. Here are the key concepts:

  1. New commands such as "create-cluster", "create-local-instance", "start-instance", and "list-instances" are now available.
  2. There is a central Domain Administration Server (DAS), corresponds to a GlassFish domain, that manages the entire cluster. This is also the "central repository" of all the artifacts and is the single point of entry to the cluster administration.
  3. The cluster consists of multiple instances (local and/or remote) that are synchronized with the DAS using SSH Provisioning (as opposed to the "Node Agent" in the v2). The first boot of an instance synchronizes the file system with DAS for configuration files, domain.xml, and any deployed applications. The communication between instance and DAS happen uses CLI interface.
  4. All applications are deployed to the DAS with a "–target" switch indicating the target cluster.
  5. Using an interim switch (ENABLE_REPLICATION=true), any command executed on the DAS is re-executed on the local/remote instances. This allows application deployment, JDBC connection pool/resource CRUD, and other similar commands to be re-executed on the instances participating in the cluster.
  6. Each instance’s administration data is accessible at "http://{host}:{port}/management/domain".

The complete details about how to create a cluster, instances, deploy an application, enable replication etc are available at 3.1 Milestone Clustering Demo Wiki. Here is a quick summary of commands that worked for me. The WAR file used below from the demo wiki.

./bin/asadmin start-domain --verbose &
./bin/asadmin create-cluster c1
./bin/asadmin create-local-instance --cluster c1 --systemproperties HTTP_LISTENER_PORT=18080:HTTP_SSL_LISTENER_PORT=18181:IIOP_SSL_LISTENER_PORT=13800:IIOP_LISTENER_PORT=13700:JMX_SYSTEM_CONNECTOR_PORT=17676:IIOP_SSL_MUTUALAUTH_PORT=13801:JMS_PROVIDER_PORT=18686:ASADMIN_LISTENER_PORT=14848 in1
./bin/asadmin create-local-instance --cluster c1 --systemproperties HTTP_LISTENER_PORT=28080:HTTP_SSL_LISTENER_PORT=28181:IIOP_SSL_LISTENER_PORT=23800:IIOP_LISTENER_PORT=23700:JMX_SYSTEM_CONNECTOR_PORT=27676:IIOP_SSL_MUTUALAUTH_PORT=23801:JMS_PROVIDER_PORT=28686:ASADMIN_LISTENER_PORT=24848 in2
./bin/asadmin list-instances
*** list-instances ***name: in1, host: dhcp-usca14-133-151.SFBay.Sun.COM, port: 14848, state: Not Runningname: in2, host: dhcp-usca14-133-151.SFBay.Sun.COM, port: 24848, state: Not Running
./bin/asadmin deploy --target c1 helloworld.war
./bin/asadmin start-local-instance in1
./bin/asadmin start-local-instance in2
./bin/asadmin list-instances
. . .
name: in1, host: dhcp-usca14-133-151.SFBay.Sun.COM, port: 14848, state: Uptime: 1 minutes, 8 seconds, Total milliseconds: 68984

name: in2, host: dhcp-usca14-133-151.SFBay.Sun.COM, port: 24848, state: Uptime: 31,665 milliseconds, Total milliseconds: 31665
. . .
curl http://localhost:18080/helloworld/hi.jsp
<html><head><title>JSP Test</title>

</head>
<body>
<h2>Hello, World.</h2>
Thu May 27 17:53:47 PDT 2010
</body></html>
curl http://localhost:28080/helloworld/hi.jsp
<html><head><title>JSP Test</title>

</head>
<body>
<h2>Hello, World.</h2>
Thu May 27 17:53:56 PDT 2010
</body></html>
./bin/asadmin stop-instance in1
./bin/asadmin stop-instance in2
./bin/asadmin delete-local-instance in1
./bin/asadmin delete-local-instance in2
./bin/asadmin delete-cluster c1

AS_DEBUG=true and/or AS_LOGFILE=true variables can be set to see some interesting debugging information.

This is only the beginning of a journey and much more exciting features will be released in the subsequent milestones. Milestone 2 is planned for Jun 21st, stay tuned!

Application Versioning – Will Hartung provided an excellent description of why application versioning is important. Basically, multiple versions of an application can be easily deployed concurrently on a GlassFish domain, with one version enabled at a given time. The application may be rolled back to a previous version, quickly is the keyword, in case a bug is encountered in a newer version. The time taken to undeploy the current application, copying the new archive over to server, expanding the archive, deploying/starting the application is all cut down since the application is pre-deployed.

Here is a quick summary of commands that worked for me:

./bin/asadmin deploy helloworld.war
./bin/asadmin deploy --name=helloworld:test helloworld.war
./bin/asadmin deploy --name=helloworld:beta helloworld.war
./bin/asadmin deploy --name=helloworld:rc helloworld.war
./bin/asadmin list-applications
helloworld <web>
helloworld:1 <web>
helloworld:beta <web>
helloworld:rc <web>
./bin/asadmin show-component-status helloworld:beta
Status of helloworld:beta is disabled.
./bin/asadmin show-component-status helloworld:rc
Status of helloworld:rc is enabled.
./bin/asadmin enable helloworld:beta
./bin/asadmin show-component-status helloworld:rc
Status of helloworld:rc is disabled.
./bin/asadmin show-component-status helloworld:beta
Status of helloworld:beta is enabled.
./bin/asadmin undeploy helloworld:1
./bin/asadmin list-applications
helloworld <web>
helloworld:beta <web>
helloworld:rc <web>

An exception with the message "javax.management.MalformedObjectNameException: Invalid character ‘:’ in value part of property" is thrown if this WAR deployed though. This is tracked as issue #12077.

In this milestone build, the "show-component-status" command is used to check the enabled status of a particular version. The milestone 2 build will provide support for "–verbose" option with "list-applications" and "list-components" command that will show the enabled status as part of the console output.

Read more details in Clustering Infrastructure One Pager, Clustering Design Spec, and Application Versioning One Pager.

Please try out these features, help review the different One Pagers, and file issues in the Issue Tracker.

Technorati: totd glassfish 3.1 clustering version cluster application

Share and Enjoy:
  • Print
  • Digg
  • Sphinn
  • del.icio.us
  • Facebook
  • Google Bookmarks
  • DZone
  • StumbleUpon
  • Technorati
  • Twitter
  • Slashdot

May 19, 2010

TOTD #137: Asynchronous EJB, a light-weight JMS solution – Feature-rich Java EE 6

Filed under: glassfish, javaee, totd — arungupta @ 6:59 am

One of the new features introduced in Enterprise Java Beans 3.1 (JSR 318)  is asynchronous invocation of a business method. This allows the control to return to the client before the container dispatches the instance to a bean. The asynchronous operations can return a "Future<V>" that allow the client to retrieve a result value, check for exceptions, or attempt to cancel any in-progress invocations.

The "@Asynchronous" annotation is used to mark a specific (method-level) or all (class-level) methods of the bean as asynchronous. Here is an example of a stateless session bean that is tagged as asynchronous at the class-level:

@Stateless
@Asynchronous
public class SimpleAsyncEJB {

    public Future<Integer> addNumbers(int n1, int n2) {
        Integer result;

        result = n1 + n2;
        try {
            // simulate JPA queries + reading file system
            Thread.currentThread().sleep(2000);
        } catch (InterruptedException ex) {
            ex.printStackTrace();
        }

        return new AsyncResult(result);
    }
}

The method signature returns "Future<Integer>" and the return type is "AsyncResult(Integer)". The "AsyncResult" is a new class introduced in EJB 3.1 that wraps the result of an asynchronous method as a Future object. Under the covers, the value is retrieved and sent to the client. Adding any new methods to this class will automatically make them asynchronous as well.

The 2 second sleep simulates server side processing of the response which may involve querying the database or reading some information from the filesystem.

This EJB can be easily injected in a Servlet using the normal way:

@EJB SimpleAsyncEJB ejb;

This business method can be invoked in the "doGet" method of a Servlet as:

PrintWriter out = response.getWriter();
try {
    Future<Integer> future = ejb.addNumbers(10, 20);
    print(out, "Client is working ...");
    Thread.currentThread().sleep(1000);

    if (!future.isDone()) {
        print(out, "Response not ready yet ...");
    }

    print(out, "Client is working again ...");
    Thread.currentThread().sleep(1000);

    if (!future.isDone()) {
        print(out, "Response not ready yet ...");
    }

    print(out, "Client is still working ...");
    Thread.currentThread().sleep(1000);

    if (!future.isDone()) {
        print(out, "Response not ready yet ...");
    } else {
        print(out, "Response is now ready");
    }

    Integer result = future.get();

    print(out, "The result is: " + result);
} catch (InterruptedException ex) {
    ex.printStackTrace();
} catch (ExecutionException ex) {
    ex.printStackTrace();
} finally {
    out.close();
}

The control is returned to the client right after the the EJB business method is invoked and does not wait for the business method execution to finish. The methods on "Future" API are used to query if the result is available. The "Thread.sleep()" for 1 second simulate that client can continue working and possibly check for results at a regular interval. The "print" is a convenience method that prints the string to "response.getWriter" and flushes the output so that it can be instantly displayed instead of getting buffered. Invoking this "doGet" shows the following output:

1274142978365: Client is working ...
1274142979365: Response not ready yet ...
1274142979365: Client is working again ...
1274142980366: Response not ready yet ...
1274142980366: Client is still working ...
1274142981366: Response is now ready
1274142981366: The result is: 30

The client transaction context does not and security context do propagate from the client to the asynchronous business method.

Up until now, any kind of asynchrony in the EJB required to use the Message Driven Beans which in turn required some JMS setup. Introduction of this feature allows you to easily incorporate asynchrony in your EJB applications.

Try this and other Java EE 6 features in GlassFish Server Open Source Edition 3 or Oracle GlassFish Server today!

The complete source code used in this blog can be downloaded here.

Technorati: totd javaee ejb asynchronous glassfish v3

Share and Enjoy:
  • Print
  • Digg
  • Sphinn
  • del.icio.us
  • Facebook
  • Google Bookmarks
  • DZone
  • StumbleUpon
  • Technorati
  • Twitter
  • Slashdot

May 18, 2010

TOTD #136: Default Error Page using Servlets 3.0 – Improved productivity using Java EE 6

Filed under: glassfish, javaee, totd — arungupta @ 3:47 am

Servlets 2.x allowed to create a mapping between an HTTP error code or an exception type to the path of a resource in the Web application. This is achieved by specifying an "error-page" element in the "web.xml". The element definition looks like:

So any HTTP error code or an exception thrown within the application can be mapped to a resource bundled with the application. Here is a sample:

<error-page>
     <error-code>404</error-code>
     <location>/error-404.jsp</location>
</error-page>

Adding the above fragment in "web.xml" of an application will display "error-404.jsp" page to the client if a non-existing resource is accessed. This mapping can be easily done for other HTTP status codes as well by adding other <error-page> elements.

Similarly, <exception-type> element can be used to map an exception to a resource in the web application. This allows fine-grained mapping of errors from your web application to custom pages.

Starting with Servlets 3.0, <error-code> and <exception-type> elements are optional. An <error-page> without any <exception-type> and <error-code> will be considered as the webapp’s default error page, and will act as a "catch-all" for any error codes or exception types. It will be an error if a web.xml contains more than one such default error page.

A default error page may be overridden for specific exception types and error codes. For example:

     <error-page>
       <location>/error-default.jsp</location>
     </error-page>

     <error-page>
       <error-code>404</error-code>
       <location>/error-404.jsp</location>
     </error-page>

Any response with a status code other than 404 will be error-dispatched to /default.jsp, while a 404 response will be error-dispatched to /error-404.jsp.

So if the Servlet code looks like:

@WebServlet(name="HelloServlet", urlPatterns={"/HelloServlet"})
public class HelloServlet extends HttpServlet {

    protected void doGet(HttpServletRequest request,
                         HttpServletResponse response) throws IOException {
        String type = (String)request.getParameter("type");

        if (type == null) {
            response.getWriter().print("hello world");
            return;
        }

        if (type.equals("helloex")) {
          throw new HelloException();
        } else if (type.equals("ncdfe")) {
            throw new NoClassDefFoundError();
        } else {
            throw new NullPointerException();
        }
    }
}

And the "web.xml" looks like:

<?xml version="1.0" encoding="UTF-8"?>
<web-app version="3.0"
    xmlns="http://java.sun.com/xml/ns/javaee"
    xmlns:xsi="http://www.w3.org/2001/XMLSchema-instance"
    xsi:schemaLocation="http://java.sun.com/xml/ns/javaee
         http://java.sun.com/xml/ns/javaee/web-app_3_0.xsd">
    <error-page>
       <exception-type>java.lang.NoClassDefFoundError</exception-type>
       <location>/error-ncdfe.jsp</location>
    </error-page>
    <error-page>
       <exception-type>server.HelloException</exception-type>
       <location>/error-helloex.jsp</location>
    </error-page>
    <error-page>
       <error-code>404</error-code>
       <location>/error-404.jsp</location>
    </error-page>
    <error-page>
       <location>/error-default.jsp</location>
    </error-page>
</web-app>

Lets say the directory structure looks like:

WEB-INF/classes/
WEB-INF/classes/server/
WEB-INF/classes/server/HelloException.class
WEB-INF/classes/server/HelloServlet.class
WEB-INF/web.xml
error-404.jsp
error-default.jsp
error-helloex.jsp
error-ncdfe.jsp

and this application is deployed as "DefaultErrorPage.war". Then here is a table of the page that gets displayed when the URL mentioned in the first column is accessed:

URL Response Comment
http://localhost:8080/DefaultErrorPage/HelloServlet "hello world" Expected result
http://localhost:8080/DefaultErrorPage/HelloServlet2 error-404.jsp HTTP 404
http://localhost:8080/DefaultErrorPage/HelloServlet?type=ncdfe error-ncdfe.jsp System exception
http://localhost:8080/DefaultErrorPage/HelloServlet?type=helloex error-helloex.jsp User exception
http://localhost:8080/DefaultErrorPage/HelloServlet?type error-default.jsp Catch-all exception

Try this and other Java EE 6 features in GlassFish Server Open Source Edition 3 or Oracle GlassFish Server today!

The complete source code used in this blog can be downloaded here.

The default setting in Chrome is to show suggestions to navigate to other parts of the website or search with Google. This can be easily disabled by Chrome -> Preferences -> Under the Hood and deselecting "Show suggestions for navigation errors" in Privacy section. This is explained in detail here.

Technorati: totd javaee glassfish v3 servlet default error

Share and Enjoy:
  • Print
  • Digg
  • Sphinn
  • del.icio.us
  • Facebook
  • Google Bookmarks
  • DZone
  • StumbleUpon
  • Technorati
  • Twitter
  • Slashdot

May 11, 2010

TOTD #135: JSF2 Composite Components using NetBeans IDE – lightweight Java EE 6

Filed under: glassfish, javaee, javaserverfaces, netbeans, totd — arungupta @ 11:44 pm

NetBeans IDE provide comprehensive feature set to build applications using Java Server Faces 2 (JSR 314). This Tip Of The Day (TOTD) explains how to create JSF composite components using wizards provided by the NetBeans IDE.

The JSF2 specification, section 3.6 defines composite components as:

A tree of "UIComponent" instances, rooted at a top level component, that can be thought of and used as a single component in a view. The component hierarchy of this subtree is described in the composite component defining page.

This definition is good from the specification perspective but can help with some layman explanation. Essentially, a composite component is what it says – a composition of two or more components such that it behaves like a single component. For example, consider four components in a panel grid where 2 components are "h:outputText" to display prompts and other 2 are "h:inputText" to receive input from the user. The composite components allow all of these components (1 panel grid + 2 "h:inputText" + 2 "h:outputText") packaged as a single component.

Resource Handling and Facelets, both features newly introduced in the JSF2 specification, makes the creation of composite component much easier. The Resource Handling defines a standard location for bundling resources in a web application and Facelets defines a cleaner templating language that enables composition. In technical terms:

A composite component is any Facelet markup file that resides inside of a resource library.

Lets create a simple Web application using JSF 2 that accepts a username/password and displays it in a new page. The application is first created using the traditional "h:inputText" and "h:outputText" elements and is then converted to use a composite component.

Before we dig into composite component creation using JSF2, here are the steps listed to create one using JSF 1.2:

  1. Implement UIComponent subclass
  2. Markup rendering code in Renderer
  3. Register your component and renderer in faces-config.xml
  4. Implement your JSP tag
  5. And the TLD

There is Java code involved, sub-classing from JSF classes, deployment descriptor editing in "faces-config.xml", declaring TLDs and then implementing the JSP tag. Creating a composite component in JSF 1.2 was quite a chore and spread all over. There are lots of files

With that background, lets see what it takes us to create a composite component using JSF2.

The CDI backing bean for the application looks like:

package server;

import javax.enterprise.context.RequestScoped;
import javax.inject.Named;

@Named("simplebean")
@RequestScoped
public class SimpleBean {
    String name;
    String password;

    public String getPassword() {
        return password;
    }

    public void setPassword(String password) {
        this.password = password;
    }

    public String getName() {
        return name;
    }

    public void setName(String name) {
        this.name = name;
    }
}

The "index.xhtml" Facelet markup file looks like:

<?xml version='1.0' encoding='UTF-8' ?>
<!DOCTYPE html PUBLIC "-//W3C//DTD XHTML 1.0 Transitional//EN"
   "http://www.w3.org/TR/xhtml1/DTD/xhtml1-transitional.dtd">
<html xmlns="http://www.w3.org/1999/xhtml"
  xmlns:ui="http://java.sun.com/jsf/facelets"
  xmlns:h="http://java.sun.com/jsf/html">
  <h:head>
    <title>Enter Name &amp; Password</title>
  </h:head>
  <h:body>
    <h1>Enter Name &amp; Password</h1>
    <h:form>
      <h:panelGrid columns="2">
        <h:outputText value="Name:"/>
        <h:inputText value="#{simplebean.name}" title="name"
                     id="name" required="true"/>
        <h:outputText value="Password:"/>
        <h:inputText value="#{simplebean.password}" title="password"
                     id="password" required="true"/>
      </h:panelGrid>
      <h:commandButton action="show" value="submit"/>
    </h:form>
  </h:body>
</html>

And the "show.xhtml" Facelet markup looks like:

<?xml version='1.0' encoding='UTF-8' ?>
<!DOCTYPE html PUBLIC "-//W3C//DTD XHTML 1.0 Transitional//EN"
  "http://www.w3.org/TR/xhtml1/DTD/xhtml1-transitional.dtd">
<html xmlns="http://www.w3.org/1999/xhtml"
  xmlns:h="http://java.sun.com/jsf/html">
  <h:head>
    <title>Show Name &amp; Password</title>
  </h:head>
  <h:body>
    <h1>Show Name &amp; Password</h1>
    <h:panelGrid columns="2">
      <h:outputText value="Name:"/>
      <h:outputText value="#{simplebean.name}" />
      <h:outputText value="Password:"/>
      <h:outputText value="#{simplebean.password}" />
    </h:panelGrid>
  </h:body>
</html>

Now select the <panelGrid> fragment in "index.xhtml" as shown below:

Right-click and select "Convert To Composite Component …" and specify the values as given in the wizard below:

Note, most of the values are default and only the "File Name:" is changed. After clicking on "Finish" in the wizard, the updated page looks like:

<?xml version='1.0' encoding='UTF-8' ?>
<!DOCTYPE html PUBLIC "-//W3C//DTD XHTML 1.0 Transitional//EN"
   "http://www.w3.org/TR/xhtml1/DTD/xhtml1-transitional.dtd">
<html xmlns="http://www.w3.org/1999/xhtml"
  xmlns:ui="http://java.sun.com/jsf/facelets"
  xmlns:h="http://java.sun.com/jsf/html"
  xmlns:ez="http://java.sun.com/jsf/composite/ezcomp">
  <h:head>
    <title>Enter Name &amp; Password</title>
  </h:head>
  <h:body>
    <h1>Enter Name &amp; Password</h1>
    <h:form>
      <ez:username-password/>
      <h:commandButton action="show" value="submit"/>
    </h:form>
  </h:body>
</html>

The namspace/prefix "http://java.sun.com/jsf/composite/ezcomp" is added to the markup page. <ez:username-password> is the composite component used instead of those multiple components. The namespace prefix, "ez", and the tag name, "username-password", are chosen based upon the values entered in the wizard.

The JSF 2 specification, section 3.6.1.4 defines that:

The occurrence of the string “http://java.sun.com/jsf/composite/” in a Facelet XML namespace declaration means that whatever follows that last “/” is taken to be the name of a resource library.

The resource library location is relative to the Facelet markup file that is using it. So in our case, all the code is rightly encapsulated in the "resources/ezcomp/username-password.xhtml" file as:

<?xml version='1.0' encoding='UTF-8' ?>
<!DOCTYPE html PUBLIC "-//W3C//DTD XHTML 1.0 Transitional//EN"
    "http://www.w3.org/TR/xhtml1/DTD/xhtml1-transitional.dtd">
  <html xmlns="http://www.w3.org/1999/xhtml"
     xmlns:cc="http://java.sun.com/jsf/composite"
     xmlns:h="http://java.sun.com/jsf/html">

    <!-- INTERFACE -->
    <cc:interface>
    </cc:interface>

    <!-- IMPLEMENTATION -->
    <cc:implementation>
      <h:panelGrid columns="2">
        <h:outputText value="Name:"/>
        <h:inputText value="#{simplebean.name}" title="name"
                   id="name" required="true"/>
        <h:outputText value="Password:"/>
        <h:inputText value="#{simplebean.password}" title="password"
                   id="password" required="true"/>
      </h:panelGrid>
 </cc:implementation>
</html>

Notice, the composite component name matches the Facelet markup file name. The markup file lives in "resources/ezcomp" directory as indicated by the namespace value.

<cc:interface> defines metadata that describe the characteristics of component, such as supported attributes, facets, and attach points for event listeners. <cc:implementation> contains the markup substituted for the composite component.

The "index.xhtml" page is using the composite component and is conveniently called the using page. Similarly the "username-password.xhtml" page is defining the composite component and is conveniently called the defining page. In short, creating composite components in JSF2 requires the following steps:

  1. Move the required tags to a separate Facelet markup file, "defining page", in the "resources" directory
  2. Declare the namespace/prefix derived from "http://java.sun.com/jsf/composite" and the directory name
  3. Refer the composite component in the "using page".

Much simpler and cleaner than JSF 1.2. Are you using JSF 2 composite components ?

The entire source code used in this blog can be downloaded here.

JSF 2 implementation is bundled with GlassFish Server Open Source Edition, try it today!

Technorati: totd glassfish v3 netbeans jsf2 javaee composite components ajax

Share and Enjoy:
  • Print
  • Digg
  • Sphinn
  • del.icio.us
  • Facebook
  • Google Bookmarks
  • DZone
  • StumbleUpon
  • Technorati
  • Twitter
  • Slashdot
Older Posts »

The views expressed on this blog are my own and do not necessarily reflect the views of Oracle.
Powered by WordPress