Miles to go …

September 18, 2009

TOTD #104: Popular Ruby-on-Rails applications on GlassFish v3 – Redmine, Typo, Substruct

Filed under: web2.0 — arungupta @ 6:14 am

GlassFish v3 is opening up new frontiers by allowing to easily deploy Rails, Grails and Django applications, in addition to Java EE, without any additional packaging. You can even write a custom container to support new types of applications. Numerous entries on this blog have talked about how to deploy Rails applications on GlassFish v3. This Tip Of The Day (TOTD) will recap them and, once again, demonstrate how to easily get started with deploying some popular open source Rails applications on GlassFish v3.

Lets prepare a GlassFish v3 build for deploying Rails applications. This blog is going to use 9/16 nightly but you should pick the latest nightly or promoted.

  1. Unzip the downloaded bundle as:
    ~/tools/glassfish/v3/9-16 >unzip ~/Downloads/glassfish-v3-b64-09_16_2009.zip
  2. Configure JRuby/Rails in GlassFish v3 – JRuby/rails can be configured three different ways – use a previously installed JRuby/Rails directory, install JRuby/Rails module using the graphical Update Center or the “pkg” binary. This Update Center module comes packaged with JRuby 1.3.1, Rails 2.3.2 and some other useful gems. Pick the option you are most comfortable with and use it for your GlassFish installation.
    1. Configure previously installed JRuby/Rails directory as:
      ~/tools/glassfish/v3/9-16/glassfishv3/bin/asadmin create-jvm-options -Djruby.home=/Users/arungupta/tools/jruby
      Authentication failed with password from login store: /Users/arungupta/.asadminpass
      Enter admin password >
      created 1 option(s)
      Command create-jvm-options executed successfully.

      That’s it!

    2. Install JRuby/Rails module using graphical Update Tool
      1. The graphical Update Tool tool can be invoked as:
        ~/tools/glassfish/v3/9-16/glassfishv3 >./bin/updatetool
        The software needed for this command (updatetool) is not installed.
        If you choose to install Update Tool, your system will be automatically
        configured to periodically check for software updates. If you would like
        to configure the tool to not check for updates, you can override the
        default behavior via the tool's Preferences facility.
        When this tool interacts with package repositories, some system information
        such as your system's IP address and operating system type and version
        is sent to the repository server. For more information please see:
        
        http://wiki.updatecenter.java.net/Wiki.jsp?page=UsageMetricsUC2
        
        Once installation is complete you may re-run this command.
        Would you like to install Update Tool now (y/n): y
        Proxy: Using system proxy settings.
        Install image: /Users/arungupta/tools/glassfish/v3/9-16/glassfishv3
        Installing pkg packages.
        Installing updatetool packages.
        Registering notifier: Already registered.
        Initialization complete.
        Software successfully installed. You may now re-run this command (updatetool).
      2. The first invocation of the command installs the Update Tool and the second invocation shows the following screen after “JRuby on GlassFish” module is selected:

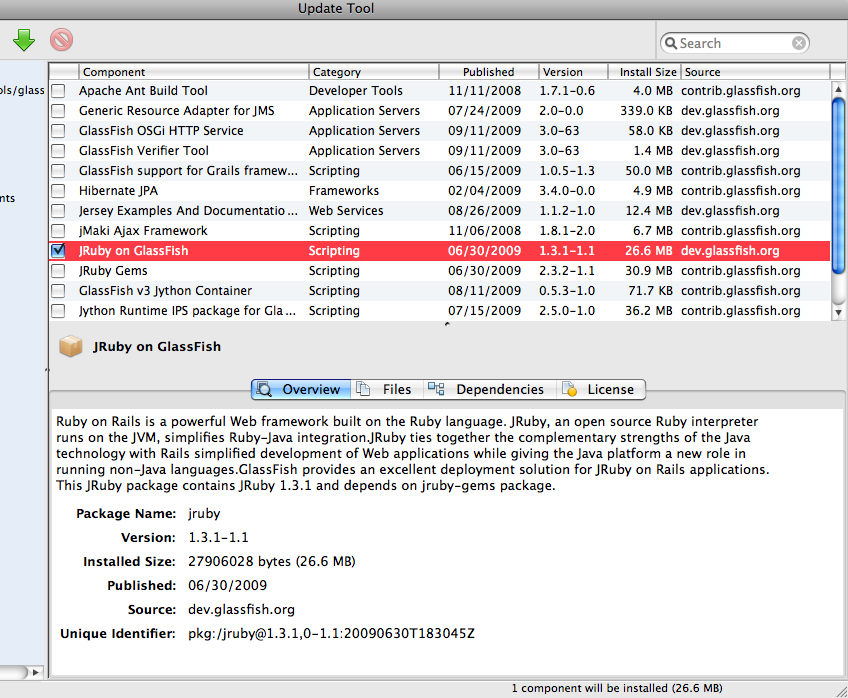
        Click on green button in the top left to install the module and it picks up the dependencies as well as shown below:

        Click on “Install” to start the installation and click on “Accept” to accept the license.

      3. Close the Update Tool window once the installation is completed. The module creates “glassfish/jruby” directory.
    3. Install JRuby/Rails module using “pkg” binary
      1. Install the JRuby/Rails bits using the “pkg” binary. Invoke the command as:
        ~/tools/glassfish/v3/9-16/glassfishv3 >./bin/pkg

        The software needed for this command (pkg) is not installed. When this tool interacts with package repositories, some system information such as your system's IP address and operating system type and version is sent to the repository server. For more information please see: http://wiki.updatecenter.java.net/Wiki.jsp?page=UsageMetricsUC2 Once installation is complete you may re-run this command. Would you like to install this software now (y/n): y Proxy: Using system proxy settings. Install image: /Users/arungupta/tools/glassfish/v3/9-16/glassfishv3 Installing pkg packages. Initialization complete. Software successfully installed. You may now re-run this command (pkg).
      2. The command “pkg list -a” shows all the modules available for installation and the output looks like:
        ~/tools/glassfish/v3/9-16/glassfishv3 >./bin/pkg list -a
        NAME (PUBLISHER)                              VERSION         STATE      UFIX
        ant (contrib.glassfish.org)                   1.7.1-0.6       known      ----
        felix                                         2.0.0-0         installed  ----
        glassfish-appclient                           3.0-65          installed  ----
        glassfish-cmp                                 3.0-65          installed  ----
        . . .
        jersey-docs-and-examples                      1.1.2-1.0       known      ----
        jmaki (contrib.glassfish.org)                 1.8.1-2.0       known      ----
        jruby                                         1.3.1-1.1       known      ----
        jruby (contrib.glassfish.org)                 1.2.0-1.1       known      u---
        jruby-gems (contrib.glassfish.org)            2.3.2-1.1       known      ----
        jython-container (contrib.glassfish.org)      0.5.3-1.0       known      ----
        jython-runtime (contrib.glassfish.org)        2.5.0-1.0       known      ----
        metro                                         2.0-19          installed  ----
        . . .
        updatetool                                    2.3.0-36.2403   known      ----
        updatetool (contrib.glassfish.org)            2.2.2-30.2311   known      u---
        wxpython2.8-minimal                           2.8.10.1-36.2403 known      ----
        wxpython2.8-minimal (contrib.glassfish.org)   2.8.8-30.2311   known      u---
      3. Start the installation of “jruby” module as:
        ~/tools/glassfish/v3/9-17/glassfishv3 >./bin/pkg install jruby
        DOWNLOAD                                  PKGS       FILES    XFER (MB)
        Completed                                  2/2 14810/14810    37.0/37.0
        PHASE                                        ACTIONS
        Install Phase                            17273/17273
  3. Redmine on GlassFish – Redmine is an open source project management web application. The simplified steps to deploy Redmine on GlassFish v3 are given below (also on GlassFish Gem and on GlassFish v3 TP2):
    1. Download and unzip Redmine 0.8.5 (latest stable release).
    2. Change the database adapter from “mysql” to “jdbcmysql” as:
      sed s/'adapter: mysql'/'adapter: jdbcmysql'/ <config/database.yml.new >config/database.yml
    3. Create the database manually as “sudo mysqladmin create redmine_development”. “db:create” fails because of JRUBY-3502.
    4. Migrate the database as “db:migrate”.
    5. Deploy the application as:
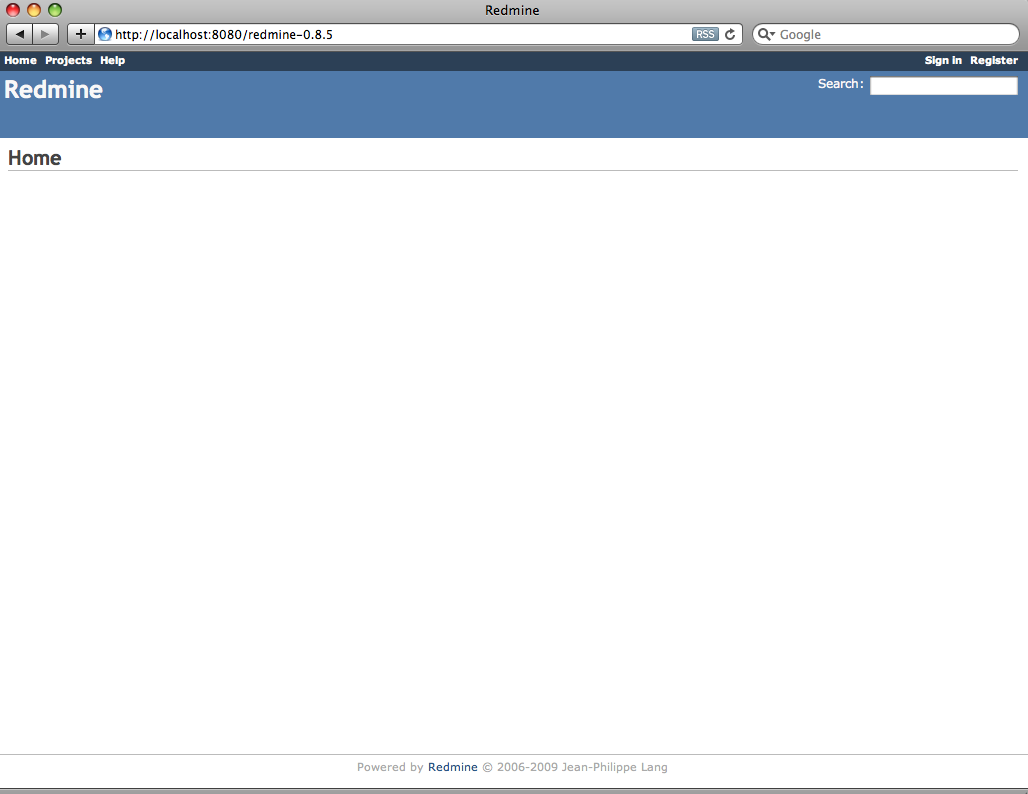
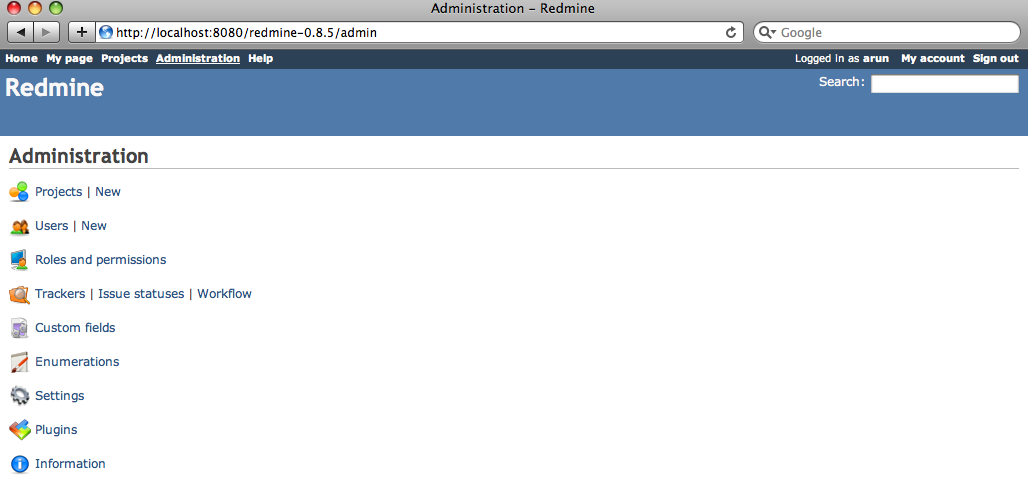
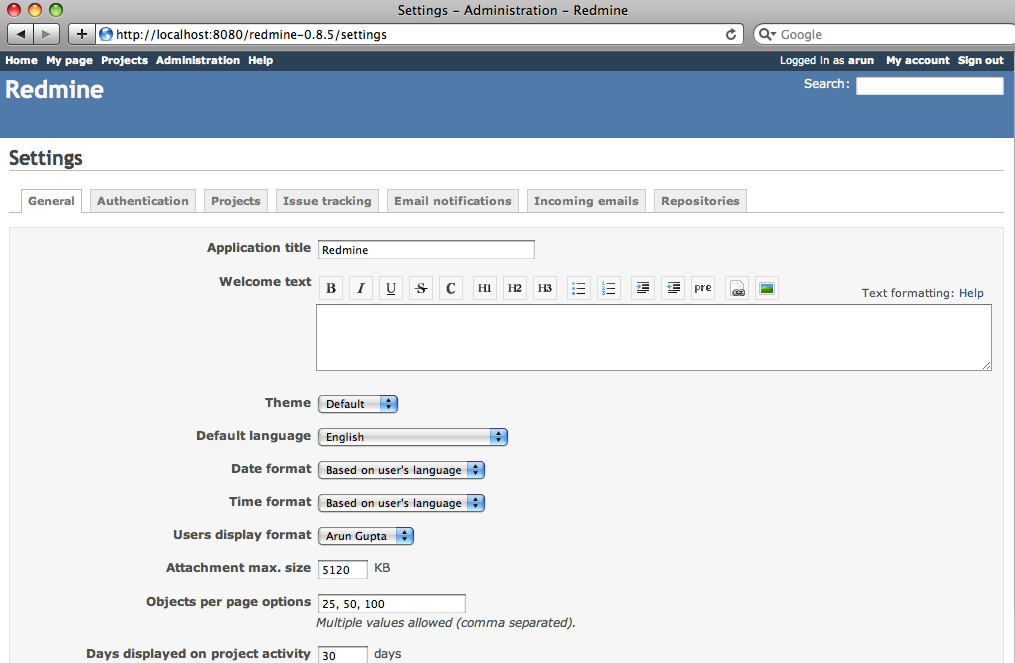
      ~/samples/jruby/redmine >~/tools/glassfish/v3/9-16/glassfishv3/bin/asadmin deploy redmine-0.8.5
      Authentication failed with password from login store: /Users/arungupta/.asadminpass
      Enter admin password>
      Command deploy executed successfully.
    6. Here are some snapshots from the deployed application:

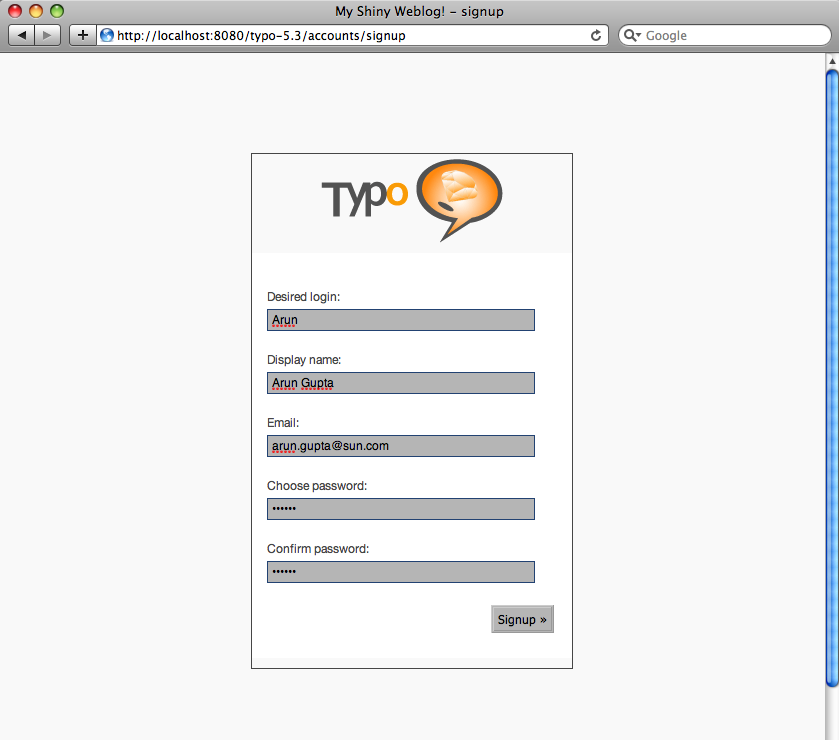
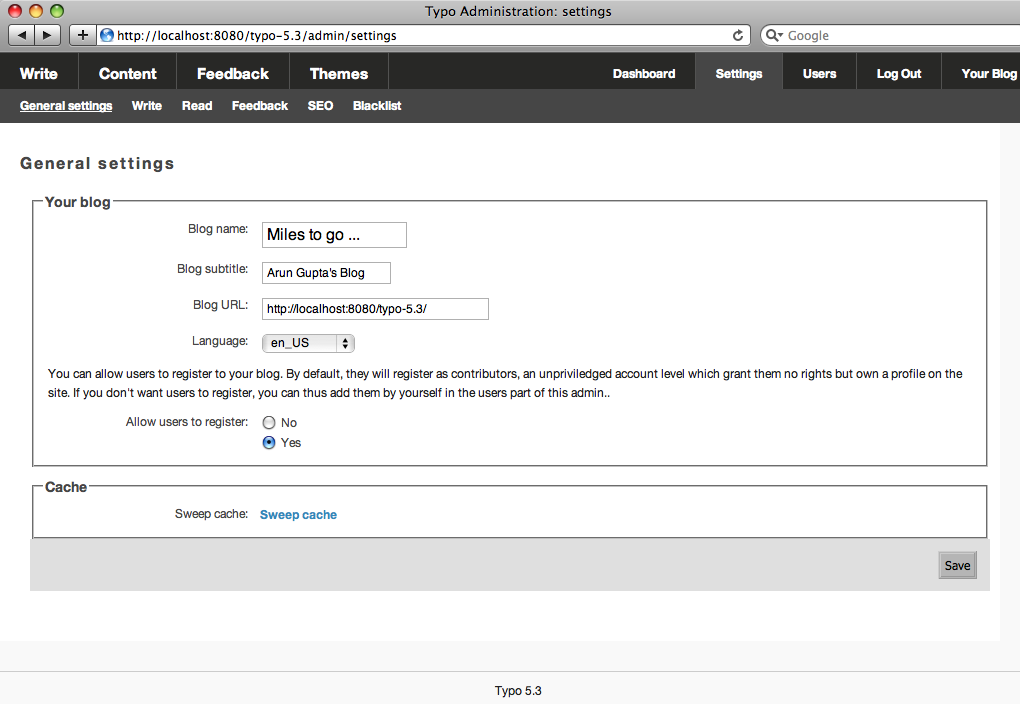
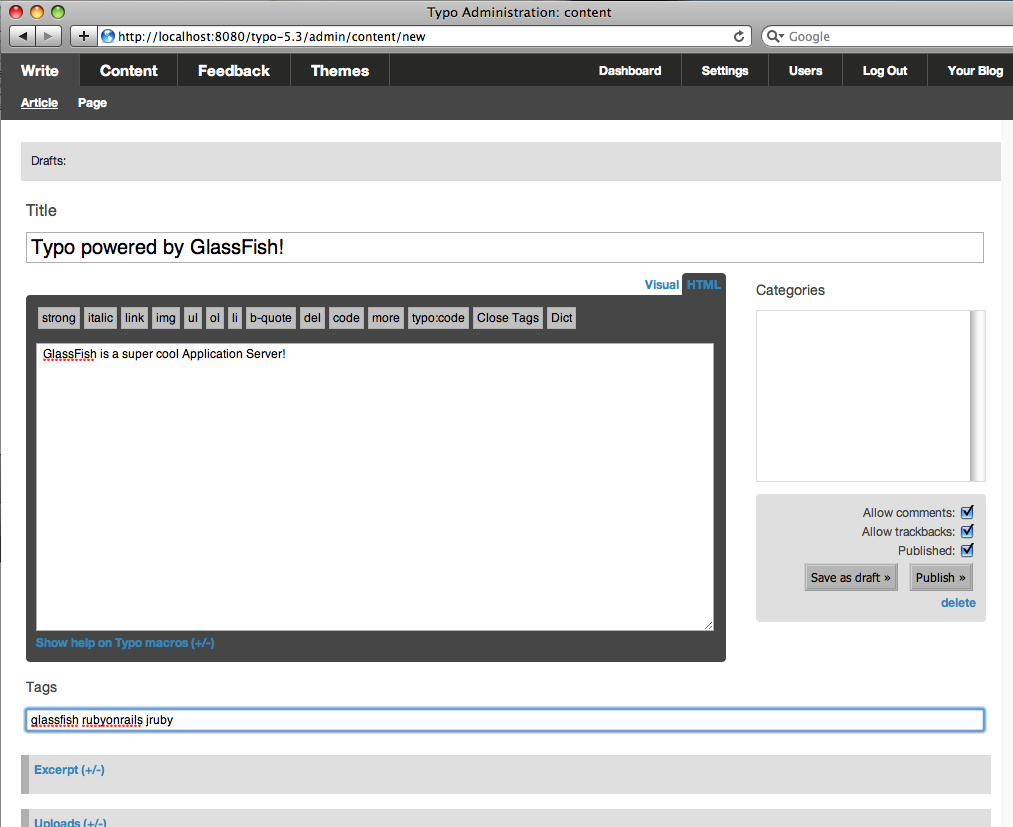
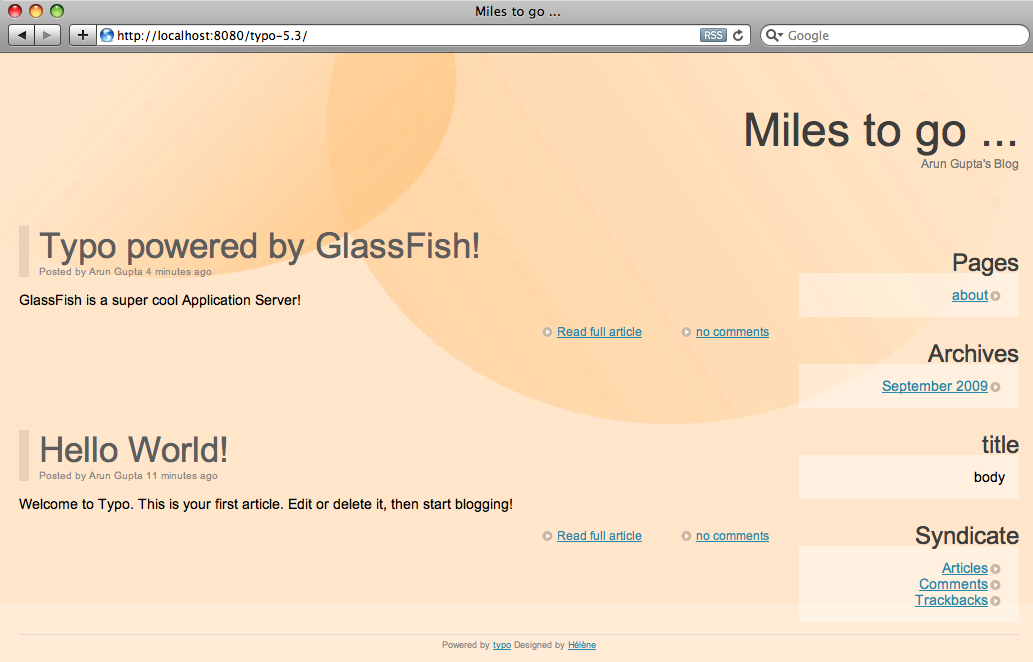
  4. Typo on GlassFish – Typo is the oldest Ruby on Rails blogware. The simplified steps to deploy Typo on GlassFish v3 are given below (also on GlassFish Prelude):
    1. Download and unzip Typo 5.3 (latest stable release).
    2. Change the database adapter from “mysql” to “jdbcmysql” as:
      sed s/'adapter: mysql'/'adapter: jdbcmysql'/ <config/database.yml.example >config/database.yml
    3. Create the database manually as “sudo mysqladmin create typo_dev”. “db:create” fails because of JRUBY-3502.
    4. Typo runs using Rails 2.2.2 so lets install Rails 2.2.2 so lets install Rails 2.2.2 as:
      ~/samples/jruby/typo/typo-5.3 >~/tools/glassfish/v3/9-16/glassfishv3/glassfish/jruby/bin/jruby -S gem install rails -v 2.2.2
      JRuby limited openssl loaded. gem install jruby-openssl for full support.
      
      http://wiki.jruby.org/wiki/JRuby_Builtin_OpenSSL
      
      Successfully installed activesupport-2.2.2
      Successfully installed activerecord-2.2.2
      Successfully installed actionpack-2.2.2
      Successfully installed actionmailer-2.2.2
      Successfully installed activeresource-2.2.2
      Successfully installed rails-2.2.2
      6 gems installed
      Installing ri documentation for activesupport-2.2.2...
      Installing ri documentation for activerecord-2.2.2...
      Installing ri documentation for actionpack-2.2.2...
      Installing ri documentation for actionmailer-2.2.2...
      Installing ri documentation for activeresource-2.2.2...
      Installing ri documentation for rails-2.2.2...
      Installing RDoc documentation for activesupport-2.2.2...
      Installing RDoc documentation for activerecord-2.2.2...
      Installing RDoc documentation for actionpack-2.2.2...
      Installing RDoc documentation for actionmailer-2.2.2...
      Installing RDoc documentation for activeresource-2.2.2...
      Installing RDoc documentation for rails-2.2.2...
    5. Migrate the database as “db:migrate”.
    6. Deploy the application as:
      ~/samples/jruby/typo >~/tools/glassfish/v3/9-16/glassfishv3/bin/asadmin deploy typo-5.3
      Authentication failed with password from login store: /Users/arungupta/.asadminpass
      Enter admin password>
      Command deploy executed successfully.
    7. Here are are some snapshots from the deployed application:

  5. Substruct on GlassFish – Substruct is an open source E-Commerce project in Ruby-on-Rails. The simplified steps to deploy Substruct on GlassFish v3 are given below (also on GlassFish v3 Gem):
    1. Download and unzip substruct 1.0 a6 (latest stable release).
    2. Install the required gems as:
      ~/samples/jruby/substruct >~/tools/glassfish/v3/9-16/glassfishv3/glassfish/jruby/bin/jruby -S gem install RedCloth fastercsv mime-types mini_magick ezcrypto jruby-openssl --no-ri --no-rdoc
    3. Change the database adapter from “mysql” to “jdbcmysql” as:
      ~/samples/jruby/substruct/substruct_rel_1-0-a6>sed s/'adapter: mysql'/'adapter: jdbcmysql'/ <config/database.yml
      >config/database.yml.new
      ~/samples/jruby/substruct/substruct_rel_1-0-a6>mv config/database.yml.new config/database.yml
    4. Create the database manually as “sudo mysqladmin create substruct_development”. “db:create” fails because of JRUBY-3502.
    5. Initialize the database as:
      ~/samples/jruby/substruct/substruct_rel_1-0-a6 >~/tools/glassfish/v3/9-16/glassfishv3/glassfish/jruby/bin/jruby -S rake substruct:db:bootstrap
    6. Deploy the application as:
      ~/samples/jruby/substruct >~/tools/glassfish/v3/9-16/glassfishv3/bin/asadmin deploy substruct_rel_1-0-a6
      Authentication failed with password from login store: /Users/arungupta/.asadminpass
      Enter admin password>
      Command deploy executed successfully.
    7. Here is a snapshot of the deployed application:

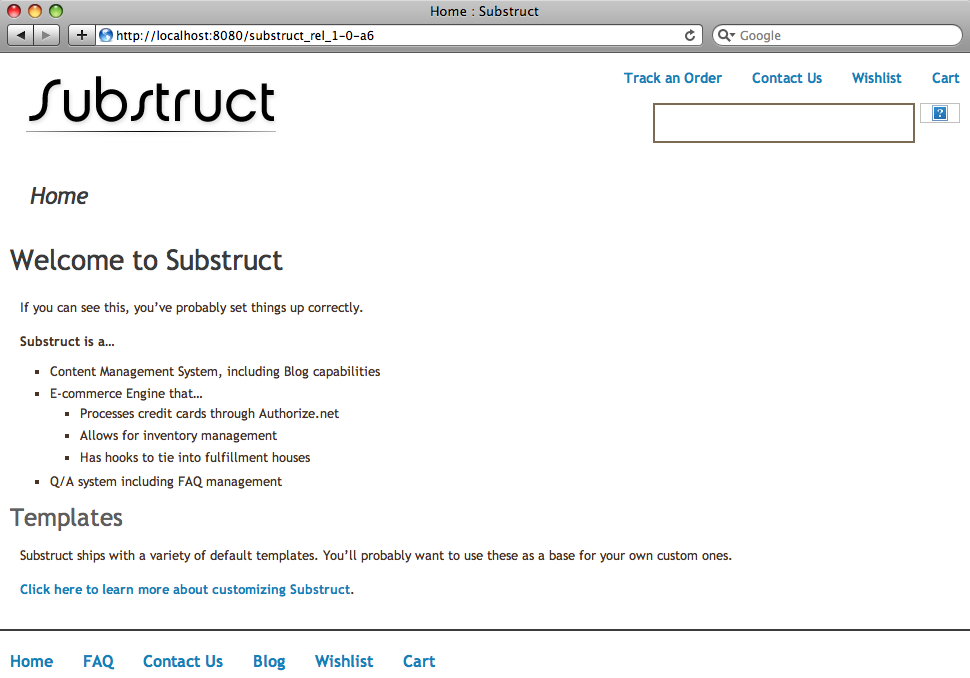
So we deployed Redmine, Typo, and Substruct using JRuby/Rails on GlassFish without any additional packaging. There are several Rails applications deployed in production on GlassFish.

What Rails applications are you deploying on GlassFish ?

Technorati: glassfish v3 rubyonrails jruby redmine typo mephisto substruct

Share and Enjoy:
  • Print
  • Digg
  • Sphinn
  • del.icio.us
  • Facebook
  • Google Bookmarks
  • DZone
  • StumbleUpon
  • Technorati
  • Twitter
  • Slashdot

August 11, 2009

TOTD #91: Applying Java EE 6 “web-fragment.xml” to Apache Wicket – Deploy on GlassFish v3

Filed under: web2.0 — arungupta @ 4:00 am

“Extensibility” is a major theme of Java EE 6. This theme enables seamless pluggability of other popular Web frameworks with Java EE 6.

Before Java EE 6, these frameworks have to rely upon registering servlet listeners/filters in “web.xml” or some other similar mechanism to register the framework with the Web container. Thus your application and framework deployment descriptors are mixed together. As an application developer you need to figure out the magical descriptors of the framework that will make this registration.

What if you are using multiple frameworks ? Then “web.xml” need to have multiple of those listeners/servlets. So your deployment descriptor becomes daunting and maintenance nightmare even before any application deployment artifacts are added.

Instead you should focus on your application descriptors and let the framework developer provide the descriptors along with their jar file so that the registration is indeed magical.

For that, the Servlet 3.0 specification introduces “web module deployment descriptor fragment” (aka “web-fragment.xml”). The spec defines it as:

A web fragment is a logical partitioning of the web app in such a way that the frameworks being used within the web app can define all the artifacts without asking devlopers to edit or add information in the web.xml.

Basically, the framework configuration deployment descriptor can now be defined in “META-INF/web-fragment.xml” in the JAR file of the framework. The Web container picks up and use the configuration for registering the framework. The spec clearly defines the rules around ordering, duplicates and other complexities.

TOTD #86 explained how to get started with Apache Wicket on GlassFish. This Tip Of The Day (TOTD) explains how to leverage ”web-fragment.xml” to deploy a Wicket application on GlassFish v3. The basic concepts are also discussed here.

For the “Hello World” app discussed in TOTD #86, the generated “web.xml” looks like:

<?xml version=”1.0″ encoding=”ISO-8859-1″?>
<web-app xmlns=”http://java.sun.com/xml/ns/j2ee”
         xmlns:xsi=”http://www.w3.org/2001/XMLSchema-instance”
         xsi:schemaLocation=”http://java.sun.com/xml/ns/j2ee http://java.sun.com/xml/ns/j2ee/web-app_2_4.xsd”
         version=”2.4″>

        <display-name>helloworld</display-name>

         <!– 
              There are three means to configure Wickets configuration mode and they are
              tested in the order given.
              1) A system property: -Dwicket.configuration
              2) servlet specific <init-param>
              3) context specific <context-param>
              The value might be either “development” (reloading when templates change)
              or “deployment”. If no configuration is found, “development” is the default.
        –>

        <filter>
                <filter-name>wicket.helloworld</filter-name>
                <filter-class>org.apache.wicket.protocol.http.WicketFilter</filter-class>
                <init-param>
                        <param-name>applicationClassName</param-name>
                        <param-value>org.glassfish.samples.WicketApplication</param-value>
                </init-param>
        </filter>

 <filter-mapping>
  <filter-name>wicket.helloworld</filter-name>
        <url-pattern>/*</url-pattern>
 </filter-mapping>

</web-app>

This deployment descriptor defines a Servlet Filter (wicket.helloworld) that registers the Wicket framework with the Web container. The filter specifies an initialization parameter that specifies the class name of the Wicket application to be loaded. And it also contains some other information that is also relevant to the framework. None of this application is either required or specified by the application. And so that makes this fragment a suitable candidate for “web-fragment.xml”.

Here are the simple steps to make this change:

  1. Remove “src/main/webapp/WEB-INF/web.xml” because no application specific deployment descriptors are required.
  2. Include “wicket-quickstart-web-fragment.jar” in the “WEB-INF/lib” directory of your application by adding the following fragment in your “pom.xml”:
        <dependencies>

            . . .
            <!– web-fragment –>
            <dependency>
                <groupId>org.glassfish.extras</groupId>
                <artifactId>wicket-quickstart-web-fragment</artifactId>
                <version>1.0</version>
                <scope>runtime</scope>
            </dependency>
        </dependencies>

       . . .

        <repositories>
            <repository>
                <id>maven2-repository.dev.java.net</id>
                <name>Java.net Repository for Maven</name>
             &nbsp
    ;  <url>http://download.java.net/maven/2/</url>
            </repository>
        </repositories>

    This file contains only “META-INF/web-fragment.xml” with the following content:

    <web-fragment>
            <filter>
                    <filter-name>wicket.helloworld</filter-name>
                    <filter-class>org.apache.wicket.protocol.http.WicketFilter</filter-class>
                    <init-param>
                            <param-name>applicationClassName</param-name>
                            <param-value>org.glassfish.samples.WicketApplication</param-value>
                    </init-param>
            </filter>

            <filter-mapping>
                    <filter-name>wicket.helloworld</filter-name>
                    <url-pattern>/*</url-pattern>
            </filter-mapping>
    </web-fragment>

  3. Create the WAR file without “web.xml” by editing “pom.xml” and adding the following fragment:
          <plugins>
                . . .
                <plugin>
                    <groupId>org.apache.maven.plugins</groupId>
                    <artifactId>maven-war-plugin</artifactId>
                    <version>2.1-beta-1</version>
                    <configuration>
                        <failOnMissingWebXml>false</failOnMissingWebXml>
                    </configuration>
                </plugin>
                . . .
          </plugins>

That’s it, now you can create a WAR file using “mvn package” and deploy this web application on GlassFish v3 latest promoted build (58 as of today) as explained in TOTD #86.

The updated WAR file structure looks like:

helloworld-1.0-SNAPSHOT
helloworld-1.0-SNAPSHOT/META-INF
helloworld-1.0-SNAPSHOT/WEB-INF
helloworld-1.0-SNAPSHOT/WEB-INF/classes
helloworld-1.0-SNAPSHOT/WEB-INF/classes/log4j.properties
helloworld-1.0-SNAPSHOT/WEB-INF/classes/org
helloworld-1.0-SNAPSHOT/WEB-INF/classes/org/glassfish
helloworld-1.0-SNAPSHOT/WEB-INF/classes/org/glassfish/samples
helloworld-1.0-SNAPSHOT/WEB-INF/classes/org/glassfish/samples/HomePage.class
helloworld-1.0-SNAPSHOT/WEB-INF/classes/org/glassfish/samples/HomePage.html
helloworld-1.0-SNAPSHOT/WEB-INF/classes/org/glassfish/samples/WicketApplication.class
helloworld-1.0-SNAPSHOT/WEB-INF/lib
helloworld-1.0-SNAPSHOT/WEB-INF/lib/log4j-1.2.14.jar
helloworld-1.0-SNAPSHOT/WEB-INF/lib/slf4j-api-1.4.2.jar
helloworld-1.0-SNAPSHOT/WEB-INF/lib/slf4j-log4j12-1.4.2.jar
helloworld-1.0-SNAPSHOT/WEB-INF/lib/wicket-1.4.0.jar
helloworld-1.0-SNAPSHOT/WEB-INF/lib/wicket-quickstart-web-fragment-1.0.jar

Notice, there is no “web.xml” and the additional “wicket-quickstart-web-fragment-1.0.jar” and everything works as is!

It would be nice if the next version of wicket-*.jar can include “META-INF/web-fragment.xml” then everything will work out-of-the-box :)

Here is a snapshot of the deployed application:

Are you deploying your Wicket applications on GlassFish ?

Technorati: totd glassfish v3 wicket javaee6 servlet web-fragment

Share and Enjoy:
  • Print
  • Digg
  • Sphinn
  • del.icio.us
  • Facebook
  • Google Bookmarks
  • DZone
  • StumbleUpon
  • Technorati
  • Twitter
  • Slashdot

August 7, 2009

TOTD #91: Retrieve JSON libraries using Maven dependency: json-lib

Filed under: web2.0 — arungupta @ 3:00 am

So you need to include JSON libraries in your Maven project. The only option that seems to be currently available is using json-lib with the following dependencies:

        <dependency>
            <groupId>net.sf.json-lib</groupId>
            <artifactId>json-lib</artifactId>
            <version>2.3</version>
            <classifier>jdk15</classifier>
        </dependency>

The APIs are based upon the original work done at json.org/java.

If you are using NetBeans for adding the Maven dependency then it nicely shows the different versions for the artifact as shown below:

The usage guide and samples at json-lib have lots of documentation to get you started. Don’t forget the package names are changed so “org.json.JSONObject” is ”net.sf.json.JSONObject” and similarly other classes.

Please leave suggestions on other TOTD (Tip Of The Day) that you’d like to see. A complete archive of all the tips is available here.

Technorati: json maven json-lib netbeans

Share and Enjoy:
  • Print
  • Digg
  • Sphinn
  • del.icio.us
  • Facebook
  • Google Bookmarks
  • DZone
  • StumbleUpon
  • Technorati
  • Twitter
  • Slashdot

August 5, 2009

TOTD #89: How to add pagination to an Apache Wicket application

Filed under: web2.0 — arungupta @ 1:00 am

TOTD #86 explained how to get started with deploying a Apache Wicket application on GlassFish. This Tip Of The Day (TOTD) will show how to add pagination to your Wicket application.

The blog entry “JPA/Hibernate and Wicket Repeating Views with Netbeans” Part 1 and 2 explain in detail how to create a CRUD application using NetBeans, JPA, Hibernate and Wicket. This blog uses the data created in TOTD #38 for the database table.

  1. After creating the JPA Controller, adding the IDataProvider and DataView implementations and hooking together, the application is available at “http://localhost:8080/helloworld” and looks like:

    As noticed in the output, all the states are listed in one page. The HTML markup looks like:

    <html>
        <head>
            <title>Wicket Quickstart Archetype Homepage</title>
        </head>
        <body>
            <strong>Wicket Quickstart Archetype Homepage</strong>
            <br/><br/>
            <span wicket:id=”message”>message will be here</span>
            <table>
                <tr>
                    <th>ID</th>
                    <th>Abbreviation</th>
                    <th>Name</th>
                </tr>
                <tr wicket:id=”rows”>
                    <td><span wicket:id=”id”>ID</span></td>
                    <td><span wicket:id=”abbrev”>Abbreviation</span></td>
                    <td><span wicket:id=”name”>Name</span></td>
                </tr>
            </table>

        </body>
    </html>

    The backing POJO looks like:

    package org.glassfish.samples;

    import java.util.Iterator;
    import org.apache.wicket.PageParameters;
    import org.apache.wicket.markup.html.basic.Label;
    import org.apache.wicket.markup.html.WebPage;
    import org.apache.wicket.markup.repeater.Item;
    import org.apache.wicket.markup.repeater.data.DataView;
    import org.apache.wicket.markup.repeater.data.IDataProvider;
    import org.apache.wicket.model.CompoundPropertyModel;
    import org.apache.wicket.model.IModel;
    import org.apache.wicket.model.LoadableDetachableModel;
    import org.glassfish.samples.controller.StatesJpaController;
    import org.glassfish.samples.model.States;

    /**
     * Homepage
     */
    public class HomePage extends WebPage {

        private static final long serialVersionUID = 1L;

        // TODO Add any page properties or variables here

        /**
         * Constructor that is invoked when page is invoked without a session.
         *
         * @param parameters
         *            Page parameters
         */
        public HomePage(final PageParameters parameters) {

            // Add the simplest type of label
            add(new Label(“message”, “If you see this message wicket is properly configured and running”));

            // TODO Add your page’s components here

                    // create a Data Provider
            IDataProvider statesProvider = new IDataProvider() {
                public Iterator iterator(int first, int count) {
                    StatesJpaController sc = new StatesJpaController();
                    return sc.findStatesEntities(count, first).iterator();
                }

                public int size() {
                    StatesJpaController sc = new StatesJpaController();
                    return sc.getStatesCount();
                }

                public IModel model(final Object object) {
                    return new LoadableDetachableModel() {
                        @Override
                        protected States load() {
                            return (States)object;
                        }
                    };
                }

                public void detach() {
                }
            };

            // TODO Add your page’s components here

          &nbsp
    ; DataView dataView = new DataView(“rows”, statesProvider) {

                @Override
                protected void populateItem(Item item) {
                    States state = (States)item.getModelObject();
                    item.setModel(new CompoundPropertyModel(state));
                    item.add(new Label(“id”));
                    item.add(new Label(“abbrev”));
                    item.add(new Label(“name”));
                }
            };

            add(dataView);
        }
    }

    and “persistence.xml” looks like:

    <?xml version=”1.0″ encoding=”UTF-8″?>
    <persistence version=”1.0″ xmlns=”http://java.sun.com/xml/ns/persistence” xmlns:xsi=”http://www.w3.org/2001/XMLSchema-instance” xsi:schemaLocation=”http://java.sun.com/xml/ns/persistence http://java.sun.com/xml/ns/persistence/persistence_1_0.xsd”>
      <persistence-unit name=”helloworld” transaction-type=”RESOURCE_LOCAL”>
        <provider>org.hibernate.ejb.HibernatePersistence</provider>
        <class>org.glassfish.samples.model.States</class>
        <properties>
          <property name=”hibernate.connection.username” value=”app”/>
          <property name=”hibernate.connection.driver_class” value=”org.apache.derby.jdbc.ClientDriver”/>
          <property name=”hibernate.connection.password” value=”app”/>
          <property name=”hibernate.connection.url” value=”jdbc:derby://localhost:1527/sample”/>
        </properties>
      </persistence-unit>
    </persistence>
  2. Lets add pagination to this simple sample.
    1. In the POJO, change DataView constructor so that it looks like:

              DataView dataView = new DataView(“rows”, statesProvider, 5)

      where “5″ is the number of entries displayed per page. Alternatively you can also set the number of items per page by invoking:

      dataView.setItemsPerPage(5);

    2. In the HTML page, add the following right after “<table/>”:
      <span wicket:id=”pager”>message will be here</span><br>

      as the last line. This is the placeholder for pagination controls.

    3. In the POJO, add the following:
              PagingNavigator pager = new PagingNavigator(“pager”, dataView);
              add(pager);

      right after “add(dateView);”.

      The output now looks like:

      and clicking on “>” shows:

      And finally clicking on “>>” shows

      The information is now nicely split amongst multiple pages.

So just adding a pagination controls placeholder in the HTML and a corresponding configuration in DataView (in the backing POJO) did the trick for us.

Please leave suggestions on other TOTD (Tip Of The Day) that you’d like to see. A complete archive of all the tips is available here.

Technorati: wicket glassfish pagination

Share and Enjoy:
  • Print
  • Digg
  • Sphinn
  • del.icio.us
  • Facebook
  • Google Bookmarks
  • DZone
  • StumbleUpon
  • Technorati
  • Twitter
  • Slashdot

August 3, 2009

TOTD #88: How add pagination to Rails – will_paginate

Filed under: web2.0 — arungupta @ 3:00 am

This Tip Of The Day (TOTD) explains how to add pagination to your Rails application.

  1. Create a simple Rails scaffold as:

    ~/samples/jruby >~/tools/jruby/bin/jruby -S rails paginate
    ~/samples/jruby/paginate >~/tools/jruby/bin/jruby script/generate scaffold book title:string author:string
    ~/samples/jruby/paginate >sed s/’adapter: sqlite3′/’adapter: jdbcsqlite3′/ <config/database.yml >config/database.yml.new
    ~/samples/jruby/paginate >mv config/database.yml.new config/database.yml
    ~/samples/jruby/paginate >~/tools/jruby/bin/jruby -S rake db:migrate

  2. Edit “test/fixtures/books.yml” and specify the content as:
    # Read about fixtures at http://ar.rubyonrails.org/classes/Fixtures.html

    one:
      title: Ultramarathon Man Confessions of an All-Night Runner
      author: Dean Karnazes

    two:
      title: My Life on the Run
      author: Bart Yasso

    three:
      title: 50/50 Secrets I Learned Running 50 Marathons in 50 Days
      author: Dean Karnazes

    four:
      title: Born to Run
      author: Christopher Mcdougall

    five:
      title: Four Months to a Four-hour Marathon
      author: Dave Kuehls

    six:
      title:  Galloway’s Book on Running
      author: Jeff Galloway

    seven:
      title: Marathoning for Mortals
      author: John Bingham and Jenny Hadfield

    eight:
      title:  Marathon You Can Do It!
      author: Jeff Galloway

    nine:
      title: Marathon The Ultimate Training Guide
      author: Hal Higdon

    ten:
      title: Running for Mortals
      author: John Bingham and Jenny Hadfield

    and load the fixtures as:

    ~/samples/jruby/paginate >~/tools/jruby/bin/jruby -S rake db:fixtures:load
    (in /Users/arungupta/samples/jruby/paginate)

  3. Run the application as:
    ~/samples/jruby/paginate >~/tools/jruby/bin/jruby -S glassfish -l
    Starting GlassFish server at: 129.145.132.8:3000 in development environment…
    Writing log messages to: /Users/arungupta/samples/jruby/paginate/log/development.log.

    . . .

    Jul 29, 2009 2:06:44 PM com.sun.grizzly.scripting.pool.DynamicPool$1 run
    INFO: New instance created in 7,488 milliseconds

    The application is accessible at “http://localhost:3000/books” and looks like:

    The page shows 10 rows, all in one page.

  4. Lets add pagination to this simple sample.
    1. Install will_paginate gem as:

      /tools/jruby >./bin/jruby -S gem install will_paginate
      JRuby limited openssl loaded. gem install jruby-openssl for full support.
      http://wiki.jruby.org/wiki/JRuby_Builtin_OpenSSL
      Successfully installed will_paginate-2.2.2
      1 gem installed
      Installing ri documentation for will_paginate-2.2.2…
      Installing RDoc documentation for will_paginate-2.2.2…

      There are other methods of installation as well.

    2. Edit “config/environment.rb” and add
      require “will_paginate”

      as the last line.

    3. Edit the “index” action in “app/controllers/books_controller.rb” as:
      @books = Book.paginate(:page => params[:page], :per_page => 5)
      #@books = Book.all

      “:per_page” specifies the number of items to be displayed in each page.

    4. In “app/views/books/index.html.erb”, add:
      <%= will_paginate @books %>

      right after “</table>”.

      The output now looks like:

      and clicking on “Next” shows:

      The information is nicely split amongst 2 pages.

An important point to remember is that will_paginate only adds pagination to your Rails app. You are still required to display all the values.

But essentially replacing “@books = Book.all” with “@books = Book.paginate(:page => params[:page], :per_page => 5)” in the Controller and adding
“<%= will_paginate @books %>” did the trick for us.

Clean and simple!

Please leave suggestions on other TOTD (Tip Of The Day) that you’d like to see. A complete archive of all the tips is available here.

Technorati: jruby rubyonrails glassfish pagination will_paginate

Share and Enjoy:
  • Print
  • Digg
  • Sphinn
  • del.icio.us
  • Facebook
  • Google Bookmarks
  • DZone
  • StumbleUpon
  • Technorati
  • Twitter
  • Slashdot

July 31, 2009

TOTD #87: How to fix the error undefined method `new’ for “Rack::Lock”:String caused by Warbler/JRuby-Rack ?

Filed under: web2.0 — arungupta @ 4:00 am

If you are using Warbler to create a WAR file of your application and deploying on GlassFish or any other Servlet container, then you are likely seeing the following error during deployment:

[#|2009-07-30T15:29:50.788-0700|SEVERE|sun-appserver2.1|javax.enterprise.system.container.web|_ThreadID=17;
_ThreadName=httpWorkerThread-4848-0;_RequestID=1d7e8f18-1c9a-4924-bd0b-6a07eba425ba;|WebModule
[/session]unable to create shared application instance
org.jruby.rack.RackInitializationException: undefined method `new’ for “Rack::Lock”:String
        from /Users/arungupta/tools/glassfish/v2.1/glassfish/domains/domain1/applications/j2ee-modules/session/WEB-INF/gems/gems/actionpack-2.3.2/lib/
action_controller/middleware_stack.rb:116:in `inject’
        from /Users/arungupta/tools/glassfish/v2.1/glassfish/domains/domain1/applications/j2ee-modules/session/WEB-INF/gems/gems/actionpack-2.3.2/lib/
action_controller/middleware_stack.rb:116:in `build’
        from /Users/arungupta/tools/glassfish/v2.1/glassfish/domains/domain1/applications/j2ee-modules/session/WEB-INF/gems/gems/actionpack-2.3.2/lib/
action_controller/dispatcher.rb:82:in `initialize’

. . .

This is a known issue as reported at JRUBY-3789 and JRUBY_RACK-18.

As the bug report indicates, this is actually an issue with jruby-rack-0.9.4 and is fixed in jruby-rack-0.9.5. The 3-step workaround is described here and explained below for convenience:

  1. Do “warble war:clean” to clean up the .war file and staging area. This basically removes previous version of jruby-rack.jar.
  2. Download the latest jruby-rack-0.9.5 snapshot (complete list) and copy in the “lib” directory of your application.
  3. If “config/warble.rb” does not exist then generate it using “jruby -S config warble”. Edit “config/warble.rb” such that it looks like:
      # Additional Java .jar files to include. Note that if .jar files are placed
      # in lib (and not otherwise excluded) then they need not be mentioned here.
      # JRuby and JRuby-Rack are pre-loaded in this list. Be sure to include your
      # own versions if you directly set the value
      # config.java_libs += FileList["lib/java/*.jar"]
      config.java_libs.delete_if {|f| f =~ /jruby-rack/ }
      config.java_libs += FileList["lib/jruby-rack*.jar"]

    This will pack jruby-rack-0.9.5 snapshot instead of the one bundled with Warbler.

    Now warbler 1.0.0 bundles “jruby-complete-1.3.0RC1.jar”. Optionally, you can also download the latest jruby-complete (jruby-complete-1.3.1.jar as of this writing) and copy in the “lib” directory of your application. In that case, modify the above fragment to:

      # Additional Java .jar files to include. Note that if .jar files are placed
      # in lib (and not otherwise excluded) then they need not be mentioned here.
      # JRuby and JRuby-Rack are pre-loaded in this list. Be sure to include your
      # own versions if you directly set the value
      # config.java_libs += FileList["lib/java/*.jar"]
      config.java_libs.delete_if {|f| f =~ /jruby-rack/ || f =~ /jruby-complete/ }
      config.java_libs += FileList["lib/jruby-complete*.jar"]
      config.java_libs += FileList["lib/jruby-rack*.jar"]

    This packs the “jruby-complete-1.3.1.jar” in your .war file.

And now follow your regular procedure of creating the .war file using “jruby -S warble” and happily deploy your Rails/Sintara/Merb applications on GlassFish.

There are several users who are already using Rails on GlassFish in production environment and they are listed at rubyonrails+glassfish+stories. Drop a comment on this blog if you are using it too :)

Technorati: jruby rack glassfish war servlet rubyonrails

Share and Enjoy:
  • Print
  • Digg
  • Sphinn
  • del.icio.us
  • Facebook
  • Google Bookmarks
  • DZone
  • StumbleUpon
  • Technorati
  • Twitter
  • Slashdot

July 29, 2009

TOTD# 86: Getting Started with Apache Wicket on GlassFish

Filed under: web2.0 — arungupta @ 11:00 pm


Apache Wicket is an application framework to build web applications using HTML for markup and POJOs to capture the business logic and all other processing. Why Wicket digs more into the motivation behind this framework.

This Tip Of The Day (TOTD) shows how to create a simple Wicket application and get it running on GlassFish:

  1. Create a Wicket project as:

    ~/samples/wicket >mvn archetype:create -DarchetypeGroupId=org.apache.wicket -DarchetypeArtifactId=wicket-archetype-quickstart -DarchetypeVersion=1.3.6 -DgroupId=org.glassfish.samples -DartifactId=helloworld
    [INFO] Scanning for projects…
    [INFO] Searching repository for plugin with prefix: ‘archetype’.
    [INFO] ————————————————————————
    [INFO] Building Maven Default Project
    [INFO]    task-segment: [archetype:create] (aggregator-style)
    [INFO] ————————————————————————
    [INFO] Setting property: classpath.resource.loader.class => ‘org.codehaus.plexus.velocity.ContextClassLoaderResourceLoader’.
    [INFO] Setting property: velocimacro.messages.on => ‘false’.
    [INFO] Setting property: resource.loader => ‘classpath’.
    [INFO] Setting property: resource.manager.logwhenfound => ‘false’.
    [INFO] [archetype:create]
    [WARNING] This goal is deprecated. Please use mvn archetype:generate instead
    [INFO] Defaulting package to group ID: org.glassfish.samples
    [INFO] —————————————————————————-
    [INFO] Using following parameters for creating OldArchetype: wicket-archetype-quickstart:1.3.6
    [INFO] —————————————————————————-
    [INFO] Parameter: groupId, Value: org.glassfish.samples
    [INFO] Parameter: packageName, Value: org.glassfish.samples
    [INFO] Parameter: package, Value: org.glassfish.samples
    [INFO] Parameter: artifactId, Value: helloworld
    [INFO] Parameter: basedir, Value: /Users/arungupta/samples/wicket
    [INFO] Parameter: version, Value: 1.0-SNAPSHOT
    [INFO] ********************* End of debug info from resources from generated POM ***********************
    [INFO] OldArchetype created in dir: /Users/arungupta/samples/wicket/helloworld
    [INFO] ————————————————————————
    [INFO] BUILD SUCCESSFUL
    [INFO] ————————————————————————
    [INFO] Total time: 3 seconds
    [INFO] Finished at: Tue Jul 28 15:30:21 PDT 2009
    [INFO] Final Memory: 12M/80M
    [INFO] ————————————————————————
  2. Run it using the pre-configured Jetty plugin as:
    ~/samples/wicket/helloworld >mvn jetty:run
    [INFO] Scanning for projects…
    [INFO] Searching repository for plugin with prefix: ‘jetty’.
    [INFO] ————————————————————————
    [INFO] Building quickstart
    [INFO]    task-segment: [jetty:run]
    [INFO] ————————————————————————
    [INFO] Preparing jetty:run
    [INFO] [resources:resources]
    [INFO] Using default encoding to copy filtered resources.
    [INFO] [compiler:compile]
    [INFO] Compiling 2 source files to /Users/arungupta/samples/wicket/helloworld/target/classes
    [INFO] [resources:testResources]
    [INFO] Using default encoding to copy filtered resources.
    [INFO] [compiler:testCompile]
    [INFO] Compiling 2 source files to /Users/arungupta/samples/wicket/helloworld/target/test-classes
    [INFO] [jetty:run]
    [INFO] Configuring Jetty for project: quickstart
    [INFO] Webapp source directory = /Users/arungupta/samples/wicket/helloworld/src/main/webapp
    [INFO] Reload Mechanic: automatic
    [INFO] Classes = /Users/arungupta/samples/wicket/helloworld/target/classes
    2009-07-28 15:31:35.820::INFO:  Logging to STDERR via org.mortbay.log.StdErrLog
    [INFO] Context path = /helloworld
    [INFO] Tmp directory =  determined at runtime
    [INFO] Web defaults = org/mortbay/jetty/webapp/webdefault.xml
    [INFO] Web overrides =  none

    . . .

    INFO  – WebApplication             – [WicketApplication] Started Wicket version 1.3.6 in development mode
    ********************************************************************
    *** WARNING: Wicket is running in DEVELOPMENT mode.              ***
    ***                               ^^^^^^^^^^^                    ***
    *** Do NOT deploy to your live server(s) without changing this.  ***
    *** See Application#getConfigurationType() for more information. ***
    ********************************************************************
    2009-07-28 15:31:37.333::INFO:  Started [email protected]:8080
    [INFO] Started Jetty Server

    And the default web page is available at “http://localhost:8080/helloworld” and looks like:

    A later blog will show how to run this application using Embedded GlassFish. But for now lets package the application as a WAR file and deploy it on GlassFish.

  3. Download GlassFish v3 Preview and unzip.
  4. Create a WAR file as:
    ~/samples/wicket/helloworld >mvn package
    [INFO] Scanning for projects…
    [INFO] ————————————————————————
    [INFO] Building quickstart
    [INFO]    task-segment: [package]

    . . .

    [INFO] Processing war project
    [INFO] Webapp assembled in[494 msecs]
    [INFO] Building war: /Users/arungupta/samples/wicket/helloworld/target/helloworld-1.0-SNAPSHOT.war
    [INFO] ————————————————————————
    [INFO] BUILD SUCCESSFUL
    [INFO] ————————————————————————
    [INFO] Total time: 6 seconds
    [INFO] Finished at: Tue Jul 28 15:35:59 PDT 2009
    [INFO] Final Memory: 14M/80M
    [INFO] ——————————————
    ——————————

    and deploy as:

    ~/samples/wicket/helloworld >~/tools/glassfish/v3/preview/glassfishv3/bin/asadmin deploy target/helloworld-1.0-SNAPSHOT.war

    Command deploy executed successfully.

    The app is now accessible at “http://localhost:8080/helloworld-1.0-SNAPSHOT” and looks like:

Cool, that was pretty straight forward!

Now that’s a very vanilla application but at least shows that Wicket applications can be deployed on GlassFish out-of-the-box. A slightly more complex application will be shared on this blog in future.

Here are some more useful links for Wicket:

  • Wicket Quickstart shows how to create a Wicket application and get started easily.
  • Wicket Examples provide a flavor of how the code is structured.
  • Wicket in Action is a great book that explains the concepts very well.
  • May want to look at wicket-extensions for a list of gadgets/widgets that extend the core capability of the framework.

A few related blog posts planned:

  • Run Wicket application using Embedded GlassFish
  • Use Servlet 3.0 web-fragments.xml and leverage GlassFish v3 Pluggability to run Wicket applications
  • A Wicket version of Track your running miles application
  • Deploying Wicket applications from NetBeans to GlassFish

In the meanwhile, let us know if you are deploying your Wicket applications on GlassFish.

Please leave suggestions on other TOTD that you’d like to see. A complete archive of all the tips is available here.

Technorati: totd wicket glassfish netbeans

Share and Enjoy:
  • Print
  • Digg
  • Sphinn
  • del.icio.us
  • Facebook
  • Google Bookmarks
  • DZone
  • StumbleUpon
  • Technorati
  • Twitter
  • Slashdot

July 2, 2009

Rails on GlassFish – “most performant of all”, “simpler and just works”, “blazing speed”

Filed under: web2.0 — arungupta @ 10:01 am

Here are some quotes about running Rails applications on GlassFish from user@jruby mailing list:

I find the glassfish gem to be the most performant of all — and I don’t need to war-up my app.

I also have some mongrel cluster stuff, but glassfish is simpler and just works.

Voila…blazing speed, can handle lots of traffic. Note that I am also cominging into apache from a dyndns name. So, whatever IP I have, I can go straight to execution on the glassfish gem and NO warring up! What could be easier deployment, or a faster execution?

It’s running fantasticly and performing like nothing I’ve seen before :) Completely stable memory, no wirings or anything bad for 5 days now.. (with several ab/htperf stresstests).

It’s always exciting to get good endorsements of our efforts in the GlassFish team :)

Other similar stories for using Rails/GlassFish in production are described at rubyonrails+stories.

Technorati: glassfish v3 gem rubyonrails stories jruby

Share and Enjoy:
  • Print
  • Digg
  • Sphinn
  • del.icio.us
  • Facebook
  • Google Bookmarks
  • DZone
  • StumbleUpon
  • Technorati
  • Twitter
  • Slashdot

June 18, 2009

TOTD #85: Getting Started with Django Applications on GlassFish v3

Filed under: web2.0 — arungupta @ 4:00 am

GlassFish v3 is an extensible App server. Basically the core App server functionality can be easily extended using add-ons such as an OSGi module. This allows to keep the core light-weight and install the required features on demand. The add-ons can be easily installed using the Update Center. The what/why/how about extensibility is described in the GlassFish v3 Extensibility One-pager.

GlassFish v3 provides support for Dynamic Languages and Web Frameworks such as Ruby-on-Rails, Groovy/Grails, and Python/Django using this extensibility. This blog has published multiple tips on using Ruby-on-Rails at rubyonrails+totd and a few tips on Groovy/Grails at grails+totd. This blog will explain how to get started with deploying Python/Django applications on GlassFish v3 Preview. The blog will use Jython interpreter which is the Java implemention of Python.

Vivek already blogged about the detailed instructions and this blog shows how to run the pre-bundled samples.

  1. Download GlassFish v3 Preview.
  2. Install Jython 2.5
    1. Download Jython 2.5 from here. 
    2. Install as:
      java -jar ~/Downloads/jython_installer-2.5.0.jar

      Choose the default options (pick your directory) as shown below:

      and click on “Next” to start the installation process.

    3. As mentioned in Django on Jython wiki, create the following aliases:
      alias jython25=~/tools/jython2.5.0/bin/jython
      alias django-admin-jy=”jython25 ~/tools/jython2.5.0/bin/django-admin.py”

    4. Invoking the command “jython25″ from the installation directory shows the Jython interpreter as:
      ~/tools/jython/jython2.5rc4 >jython25
      Jython 2.5rc4 (Release_2_5rc4:6470, Jun 8 2009, 13:23:16)
      [Java HotSpot(TM) 64-Bit Server VM (Apple Inc.)] on java1.6.0_13
      Type “help”, “copyright”, “credits” or “license” for more information.
      >>>

  3. Install Django
    1. Download Django 1.0.2 from here.
    2. Install Django 1.0.2 as:
      ~/tools >tar xzvf ~/Downloads/Django-1.0.2-final.tar.gz
      Django-1.0.2-final/
      Django-1.0.2-final/AUTHORS
      Django-1.0.2-final/django/
      . . .
      Django-1.0.2-final/scripts/rpm-install.sh
      Django-1.0.2-final/setup.cfg
      Django-1.0.2-final/setup.py
      ~/tools/Django-1.0.2-final >jython25 setup.py install
      running install
      running build
      running build_py
      . . .
      running install_egg_info
      Writing /Users/arungupta/tools/jython/jython2.5.0/Lib/site-packages/Django-1.0.2_final-py2.5.egg-info

  4. Install Jython container for GlassFish
    1. Start GlassFish v3 Preview Update Center using the following command:

      ~/tools/glassfish/v3/preview/glassfishv3/bin >./updatetool 

      to see the screen as:

    2. Select “GlassFish v3 Jython Container” and click on “Install”, “Accept” the license and complete the installation. Close the Update Center window. This installs Jython Container OSGi module and Grizzly Adapter JARs in the “glassfish/modules” directory.
  5. Start and configure GlassFish
    1. Start GlassFish as:

      ~/tools/glassfish/v3/preview/glassfishv3/glassfish >./bin/asadmin start-domain

    2. Configure Jython in GlassFish as:
      ~/tools/glassfish/v3/preview/glassfishv3/glassfish >./bin/asadmin create-jvm-options -Djython.home=/Users/arungupta/tools/jython2.5.0
      created 1 option(s)

      Command create-jvm-options executed successfully.

      Make sure to specify the directory where Jython is installed.

  6. Deploy the samples bundled with the Django installation as:
    ~/tools/Django-1.0.2-final/examples >~/tools/glassfish/v3/preview/glassfishv3/glassfish/bin/asadmin deploy .

    Command deploy executed successfully.

    and now they are accessible at “http://localhost:8080/examples/” and shown as:

    Make sure to specify the end “/” otherwise the context root is not resolved correctly and none of the links will work.

    Click on “Hello World (HTML)” to see the output as:

    And click on “Displaying request metadata” to see output as:

    The same sample can, of course, run using the built-in development server as:

    ~/tools/Django-1.0.2-final/examples >jython25 manage.py runserver
    Validating models…
    0 errors found

    Django version 1.0.2 final, using settings ‘examples.settings’
    Development server is running at http://127.0.0.1:8000/
    Quit the server with CONTROL-C.

    and then accessible at “http://localhost:8000″ as:

More details are available in Django Tutorial. The subsequent blogs will provide more detailed samples.

If you are using GlassFish v2 then Django applications can be deployed as a WAR file as explained here.

Please leave suggestions on other TOTD (Tip Of The Day) that you’d like to see. A complete archive of all the tips is available here.

Technorati: totd glassfish v3 django python

Share and Enjoy:
  • Print
  • Digg
  • Sphinn
  • del.icio.us
  • Facebook
  • Google Bookmarks
  • DZone
  • StumbleUpon
  • Technorati
  • Twitter
  • Slashdot

June 16, 2009

TOTD #84: Using Apache + mod_proxy_balancer to load balance Ruby-on-Rails running on GlassFish

Filed under: web2.0 — arungupta @ 11:00 pm

TOTD #81 explained how to install/configure nginx for load-balancing/front-ending a cluster of Rails application running on GlassFish Gem. Another popular approach in the Rails community is to use Apache HTTPD + mod_proxy_balancer. A user asked the exact details of this setup on the GlassFish Gem Forum. This Tip Of The Day (TOTD) will clearly explain the steps.

  1. Create a simple Rails scaffold and run this application using GlassFish Gem on 3 separate ports as explained in TOTD #81.
  2. Setup and configure HTTPD and mod_proxy_balancer
    1. Setup and install Apache HTTPD as explained here. I believe mod_proxy_balancer and other related modules comes pre-bundled with HTTPD, at least that’s what I observed with Mac OS X 10.5.7. Make sure that the “mod_proxy_balancer” module is enabled by verifying the following line is uncommented in “/etc/apache2/httpd.conf”:

      LoadModule proxy_balancer_module libexec/apache2/mod_proxy_balancer.so

      Please note another similar file exists in “/etc/httpd/httpd.conf” but ignore that one.

    2. Setup a mod_proxy_balancer cluster by adding the following fragment in “httpd.conf” as:
      <Proxy balancer://glassfishgem>
      BalancerMember http://localhost:3000
      BalancerMember http://localhost:3001
      BalancerMember http://localhost:3002
      </Proxy>

      The port numbers must exactly match with those used in the first step.

    3. Specify the ProxyPass directives to map the cluster to a local path as:
      ProxyPass / balancer://glassfishgem/
      CustomLog /var/log/glassfishgem.log/apache_access_log combined

      The “/” at the end of “balancer://glassfishgem” is very important to ensure that all the files are resolved correctly.

    4. Optionally, the following directive can be added to view the access log:
      CustomLog /var/log/glassfishgem.log/apache_access_log combined

      Make sure to create the directory specified in “CustomLog” directive.

  3. Now the application is accessible at “http://localhost/runlogs”. If a new GlassFish instance is started then update the <Proxy> directive and restart your HTTPD as “sudo httpd -k restart”. Dynamic update of BalancerMembers can be configured as explained here.

TOTD #81 started the Rails application in root context. You can alternatively start the application in a non-root context as:

~/tools/jruby/rails/runner >../../bin/jruby -S glassfish -e production -c myapp
Starting GlassFish server at: 10.0.177.178:3000 in production environment…
Writing log messages to: /Users/arungupta/tools/jruby-1.3.0/rails/runner/log/production.log.
Press Ctrl+C to stop.
. . .
~/tools/jruby/rails/runner >../../bin/jruby -S glassfish -e production -c myapp -p 3001
Starting GlassFish server at: 10.0.177.178:3001 in production environment…
Writing log messages to: /Users/arungupta/tools/jruby-1.3.0/rails/runner/log/production.log.
Press Ctrl+C to stop.
. . .
~/tools/jruby/rails/runner >../../bin/jruby -S glassfish -e production -c myapp -p 3002
Starting GlassFish server at: 10.0.177.178:3002 in production environment…
Writing log messages to: /Users/arungupta/tools/jruby-1.3.0/rails/runner/log/production.log.
Press Ctrl+C to stop.

and then the ProxyPass directive will change to:

ProxyPass /myapp/ balancer://glassfishgem/myapp/

The changes are highlighted in bold. And the application is now accessible at “http://localhost/myapp/runlogs”.

After discussing on Apache HTTP Server forum, the BalancerMember host/port can be printd in the log file using a custom log format. So add the following log format to “/etc/apache2/httpd.conf”:

LogFormat “%h %l %u %t \”%r\” %>s %b \”%{Referer}i\” \”%{User-agent}i\” \”%{BALANCER_WORKER_NAME}e\”" custom

And change the format from the default “combined” to the newly defined “custom” format as:

CustomLog /var/log/glassfishgem.com/apache_access_log custom

Three subsequent invocations of “http://localhost/runlogs” then prints the following log entries:

::1 – - [17/Jun/2009:10:53:53 -0700] “GET /runlogs HTTP/1.1″ 304 – “-” “Mozilla/5.0 (Macintosh; U; Intel Mac OS X 10.5; en-US; rv:1.9.0.11) Gecko/2009060214 Firefox/3.0.11″ “http://localhost:3002″
::1 – - [17/Jun/2009:10:54:04 -0700] “GET /runlogs HTTP/1.1″ 200 621 “-” “Mozilla/5.0 (Macintosh; U; Intel Mac OS X 10.5; en-US; rv:1.9.0.11) Gecko/2009060214 Firefox/3.0.11″ “http://localhost:3000″
::1 – - [17/Jun/2009:10:54:05 -0700] “GET /runlogs HTTP/1.1″ 304 – “-” “Mozilla/5.0 (Macintosh; U; Intel Mac OS X 10.5; en-US; rv:1.9.0.11) Gecko/2009060214 Firefox/3.0.11″ “http://localhost:3001″

As evident from the last fragment of each log line, the load is distributed amongst three GlassFish Gem instances. More details on load balancer algorithm are available here.

Feel free to d
rop a comment on this blog if you are using GlassFish in production for your Rails applications. Several stories are already available at rubyonrails+glassfish+stories.

Technorati: glassfish rubyonrails apache httpd mod_proxy_balancer loadbalancing clustering

Share and Enjoy:
  • Print
  • Digg
  • Sphinn
  • del.icio.us
  • Facebook
  • Google Bookmarks
  • DZone
  • StumbleUpon
  • Technorati
  • Twitter
  • Slashdot
Older Posts »

The views expressed on this blog are my own and do not necessarily reflect the views of Oracle.
Powered by WordPress