Taking TOTD #121 forward, this blog explains how to create a JPA Persistence Unit for a MySQL sample database and package it as a library. This JAR file can then be easily included in other web applications.
Lets get started!
- Configure GlassFish for using the MySQL sample database (sakila) as described in TOTD #121.
- Add the GlassFish instance in NetBeans IDE using "Services" panel.
- Create JPA entities using NetBeans IDE.
- Create a Java class library:
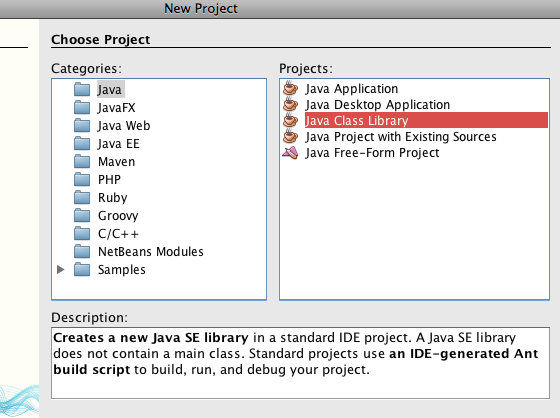
Our ultimate goal is to create a reusable JAR file and that’s why this project type is chosen.
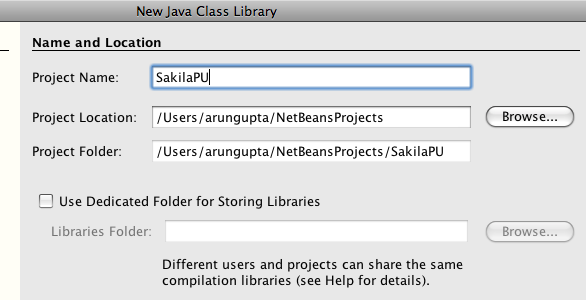
- Specify the name of project as "SakilaPU":
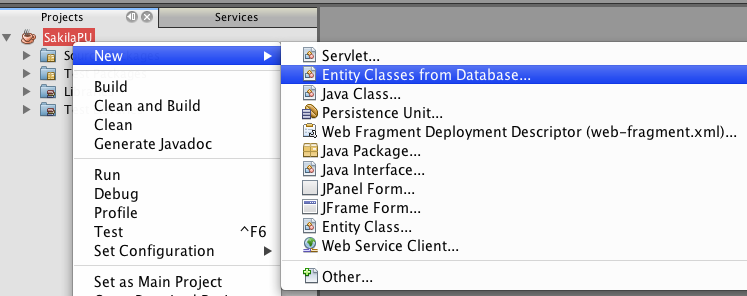
- Right-click on the project and select "New", "Entity Classes from Database …" to initiate the process of entity generation:
- Choose the database connection as:
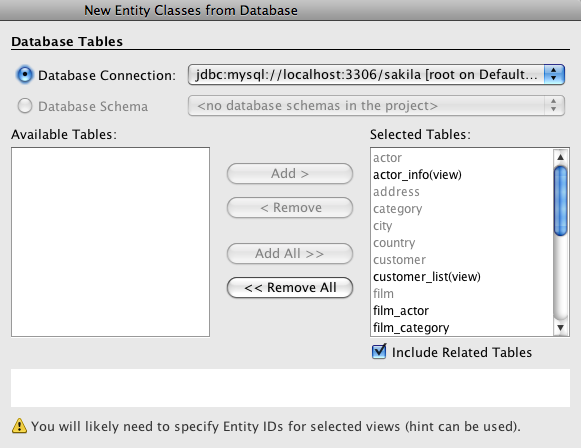
If not configured, then can be easily done by clicking on "New Database Connection …" in the list box.
- Click on "Add All >>" to generate the mapped JPA entities for all tables and views.
- The views do not have primary keys and will need to be appropriately annotated (described later).
- Click on "Next >".
- Give the package name as:
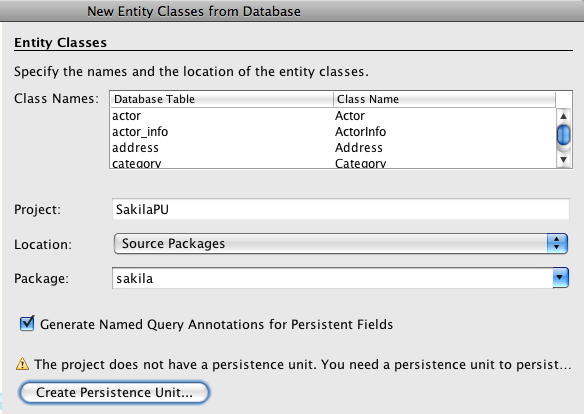
and specify the package name as "sakila". Click on "Create Persistence Unit …".
- Change the default PU name from "SakilaPUPU" to "SakilaPU":
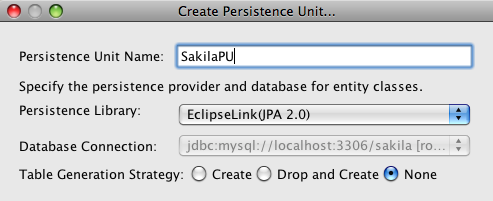
and click on "Finish". Notice that "EclipseLink", the Reference Implementation of JPA 2.0, is used as the persistence library.
- Add "@javax.persistence.Id" annotation to the following class/field combination:
Class Field sakila.SalesByFilmCategory category sakila.ActorInfo actorId sakila.FilmList fid sakila.CustomerList id sakila.NicerButSlowerFilmList fid sakila.StaffList id sakila.SalesByStore store This is required because none of the "views" are defined with a primary key.
-
Right-click on the project and select "Clean & Build". This generates "dist/SakilaPU.jar" and the structure looks like:
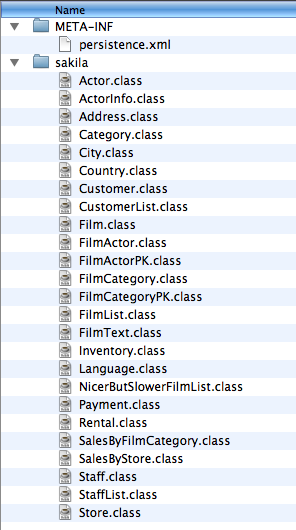
- Create a Java class library:
This JAR file can now be included in any web application. The pre-built JAR file can also be downloaded here.
In order for this PU to be used in an application server (such as GlassFish) that is pre-configured with a JDBC resource, the "persistence.xml" needs to be changed to:
<?xml version="1.0" encoding="UTF-8"?>
<persistence version="2.0" xmlns="http://java.sun.com/xml/ns/persistence" xmlns:xsi="http://www.w3.org/2001/XMLSchema-instance" xsi:schemaLocation="http://java.sun.com/xml/ns/persistence http://java.sun.com/xml/ns/persistence/persistence_2_0.xsd">
 <persistence-unit name="SakilaPU" transaction-type="JTA">
 <jta-data-source>jdbc/sakila</jta-data-source>
 <properties/>
 </persistence-unit>
</persistence>
The JDBC resource name is specified using <jta-data-source>.
The key items to note about this pre-built JAR:
- Persistence Unit Name: "SakilaPU"
- All classes are in "sakila.*" package.
- Each class has a pre-defined "<CLASS-NAME>.findAll" named query that returns all elements from the underlying view/table.
This JAR can be installed to your local Maven repository as:
mvn install:install-file -Dfile=SakilaPU.jar -DgroupId=org.glassfish.samples -DartifactId=sakilapu -Dversion=1.0 -Dpackaging=jar -DgeneratePom=true
and then included in your "pom.xml" as:
 <dependency>
   <groupId>org.glassfish.samples</groupId>
   <artifactId>sakilapu</artifactId>
   <version>1.0</version>
   <scope>compile</scope>
 </dependency>
Even though this blog uses a MySQL sample database, these steps can be easily followed for any other database such as Oracle or JavaDB.
Technorati: totd javaee glassfish v3 jpa eclipselink persistenceunit mysql sakila netbeans
Related posts:- TOTD #38: Creating a MySQL Persistence Unit using NetBeans IDE
- TOTD #99: Creating a Java EE 6 application using MySQL, JPA 2.0 and Servlet 3.0 with GlassFish Tools Bundle for Eclipse
- RESTful representation of “sakila” using GlassFish and NetBeans IDE
- TOTD #108: Java EE 6 web application (JSF 2.0 + JPA 2.0 + EJB 3.1) using Oracle, NetBeans, and GlassFish
- TOTD #125: Creating an OSGi bundles using NetBeans and deploying in GlassFish