Now that you’ve installed GlassFish Tools Bundle for Eclipse 1.1, lets use this bundle to create a simple Metro/JAX-WS compliant Web service and deploy on GlassFish. These steps will work with either Eclipse 3.4.2 or 3.5 with WTP Java EE support.
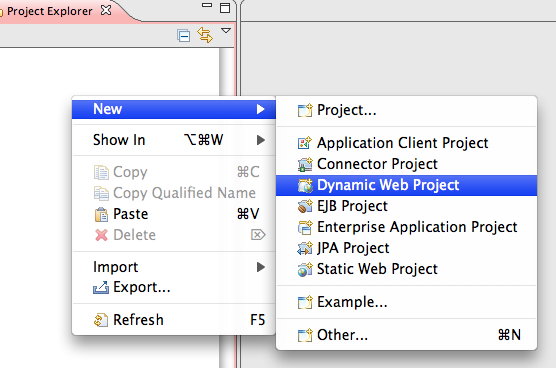
- Lets create a simple “Dynamic Web Project” as shown below:
- Name the project “HelloMetro” and take all other defaults:
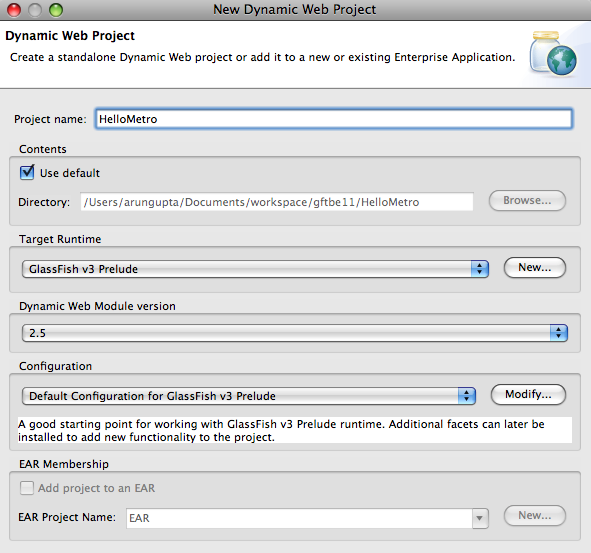
Click on “Finish” to complete the project creation.
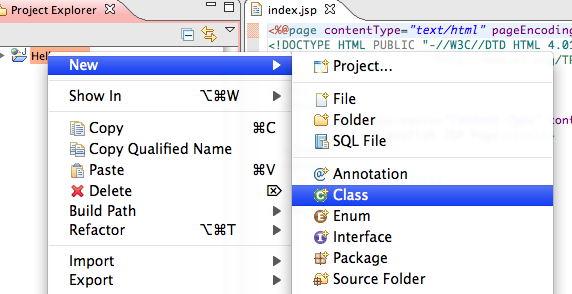
- Metro allows to create a Web service from a POJO class. So let’s add a POJO to the project by right-clicking on the project and selecting “New”, “Class” as shown below:
Specify the package name as “server”, class name as “HelloService” and click on “Finish”.
- Add a simple method to the newly generated class as:
public String sayHello(String name) { return "Hello " + name + "!!"; } - Expand the project, go to “HelloService.java” in “server” package, right-click, select “Web Services”, “Create Web service”.
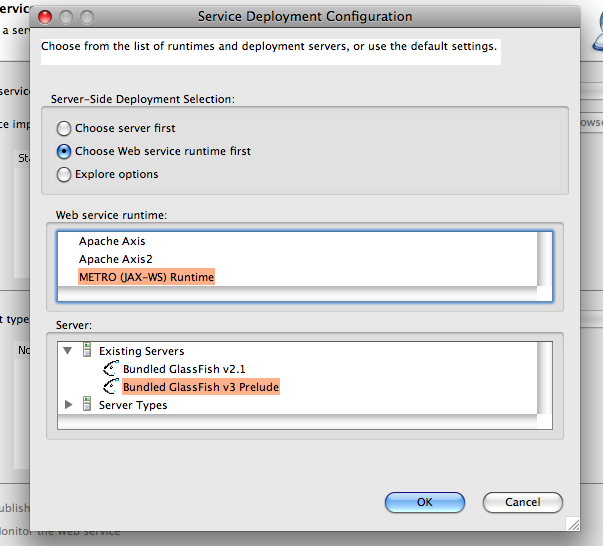
- Click on “Web service runtime: Apache Axis” and select “Metro (JAX-WS) Runtime” as the Web service runtime as shown below:
- Move the slider on the left to top. This will enable testing of the deployed Web service. The completed configuration looks like:
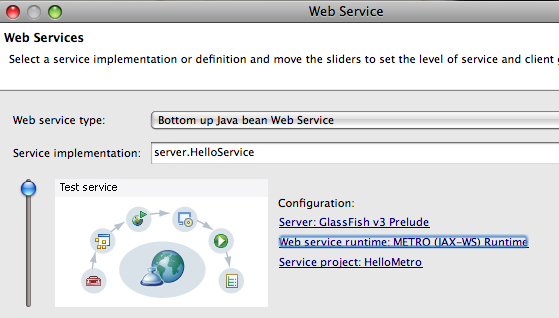
and click on “Next >”.
- Select the checkbox “Copy Metro library jars to the project” to resolve the references correctly as shown below:
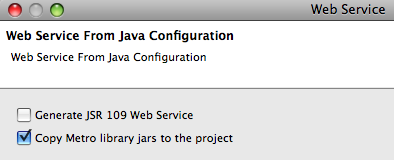
and click on “Next >”. This bundles the application and deploys to GlassFish and provides an option to test the deployed Web service as shown below:
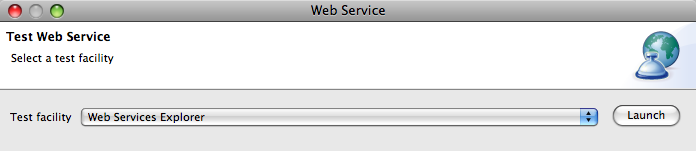
Clicking on the “Launch” button shows the following output in the browser:
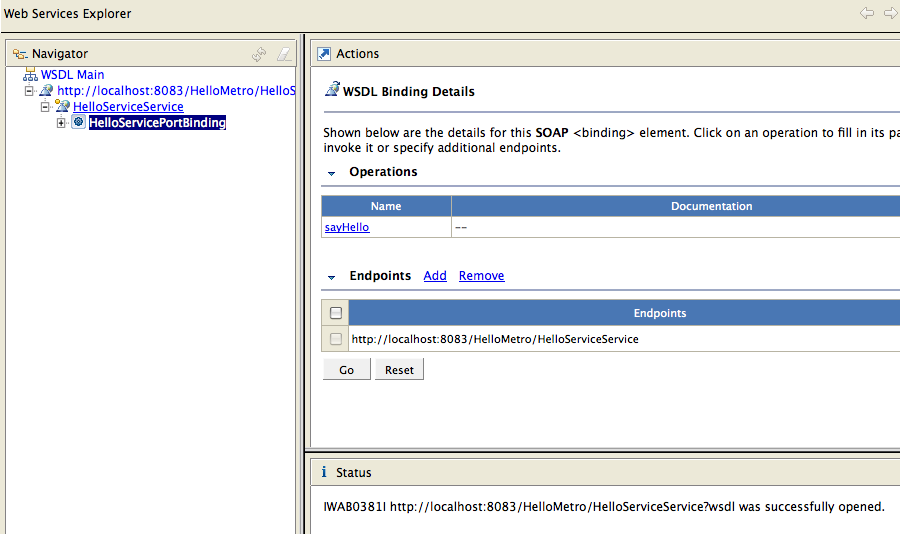
The WSDL is hosted at “http://localhost:8083/HelloMetro/HelloServiceService?wsdl”.
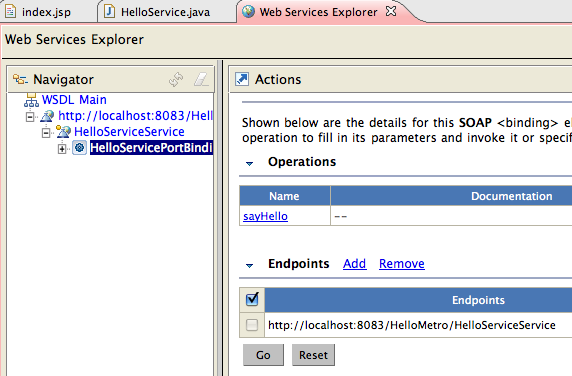
- Click on “sayHello” method, click on “Add” and enter the value as “Duke” as shown below:
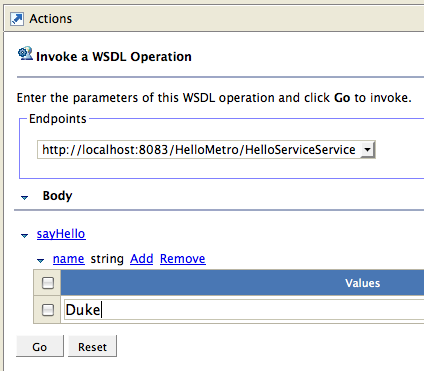
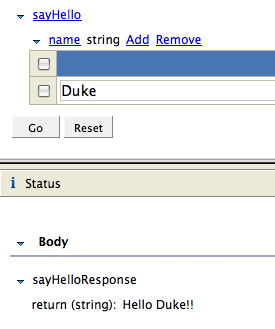
Click on “Go” and the response is shown as:
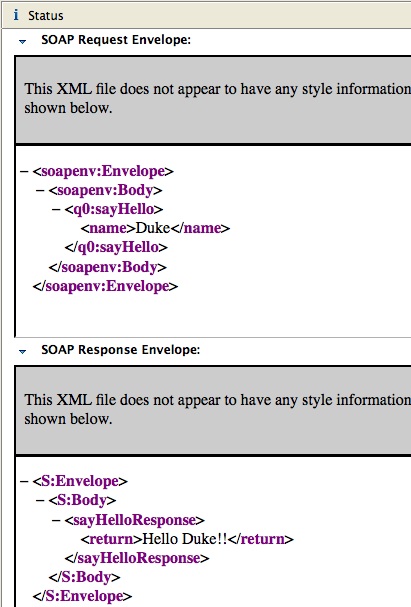
Clicking on “Source” in the response window shows the SOAP request/response messages as shown below:
- Alternatively, you can click on “Finish” to complete the dialog. Then click on “Run” menu item, “Launch the Web Services Explorer” to see a screen as:
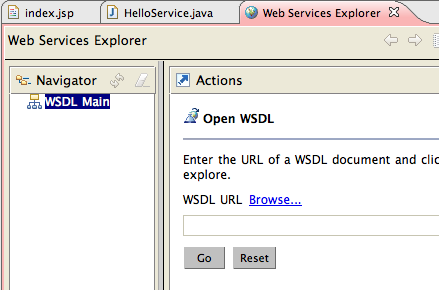
Enter the URL of the WSDL in “WSDL URL” box as “http://localhost:8083/HelloMetro/HelloServiceService?wsdl” and click on “Go”. Now you are seeing the similar screen to test the Web service within the integrated browser as shown below:
A future blog will cover how to write a database-enabled application using the bundled Dali JPA Tools and MySQL pre-registered JDBC driver.
Please send your questions and comments to .
Please leave suggestions on other TOTD that you’d like to see. A complete archive of all the tips is available here.
Technorati: totd glassfish eclipse galileo webservices metro jax-ws


