This Tip Of The Day (TOTD) will explain how to install Oracle Database 10g on Mac OS X.
The official documentation is available here and is very well suited for folks with lots of time and patience. But all I wanted was to install Oracle database server up & running on my localhost so that I can start experimenting with it. All my previous entries have used either JavaDB or MySQL so far, but it’s about time ![]()
I started preparing a brief tutorial after following the lengthy documentation but then found this excellent blog entry. And realized the content is looking exactly similar ![]() Anyway, below are the instructions I followed and additionally also provide a snapshot of the installer windows.
Anyway, below are the instructions I followed and additionally also provide a snapshot of the installer windows.
For the brave of heart, complete installation guide is available in HTML and PDF. Read on for an abbreviated, and yet working version, of the instructions.
- Download Oracle database 10g R2 (10.2.0.4.0) from here and unzip.
- Check hardware/software requirements. (10.5.4+ required)
- Create required groups/users (complete details):
-
- Create Oracle inventory group as:
# dscl . -create /groups/oinstall # dscl . -append /groups/oinstall gid 100 # dscl . -append /groups/oinstall passwd "*" - Create Oracle software owner as:
# dscl . -create /users/oracle # dscl . -append /users/oracle uid uid_number # dscl . -append /users/oracle gid oinstall_gid # dscl . -append /users/oracle shell /bin/bash # dscl . -append /users/oracle home /Users/oracle # dscl . -append /users/oracle realname "Oracle software owner" - Create the home directory for Oracle user as:
# mkdir /Users/oracle # chown oracle:oinstall /Users/oracle - Set the password for Oracle user:
# passwd oracle
- Create Oracle inventory group as:
- Configure kernel parameters (complete details) by editing "/etc/sysctl.conf" and adding the contents:
kern.sysv.semmsl=87381
kern.sysv.semmns=87381
kern.sysv.semmni=87381
kern.sysv.semmnu=87381
kern.sysv.semume=10
kernel.shmall=2097152
kernel.sys.shmmax=2147483648
kernel.sys.shmmni=4096
kern.maxfiles=65536
kern.maxfilesperproc=65536
net.inet.ip.portrange.first=1024
net.inet.ip.portrange.last=65000
kern.corefile=core
kern.maxproc=2068
kern.maxprocperuid=2068
and reboot the machine for these parameters to take effect.
- Configure Oracle user’s environment (complete details). In the "oracle" user’s home directory, create ".bash_profile" and add the following lines:
export DISPLAY=:0.0 export ORACLE_BASE=$HOME export ORACLE_SID=orcl umask 022 ulimit -Hn 65536 ulimit -Sn 65536 - The "Basic Installation" of "Standard Edition" in an "Interactive" mode can be performed using the "Oracle Universal Installer". This installer is invoked using the script "db/Disk01/runInstaller" (complete details). The screen snapshots are shown below:
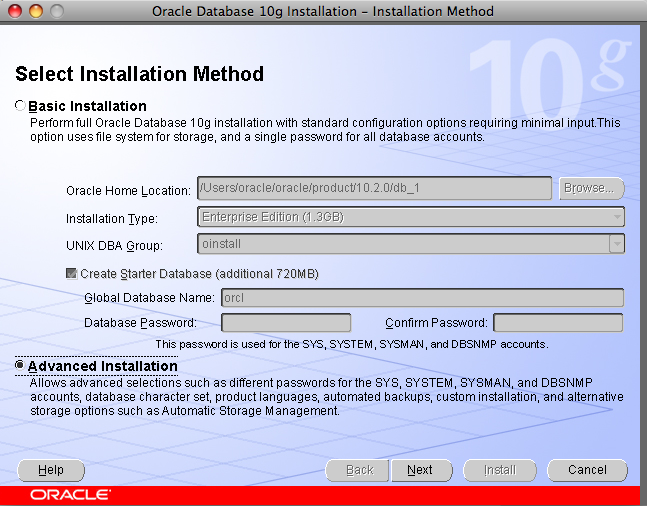
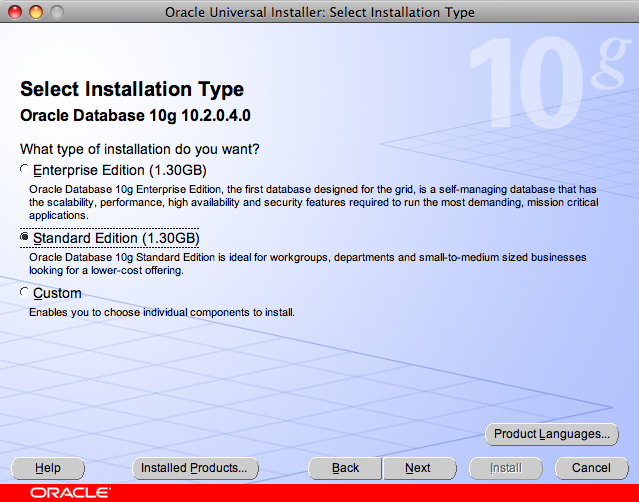
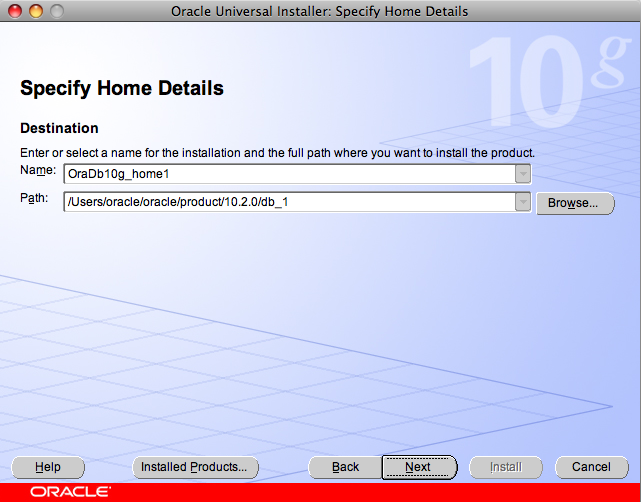
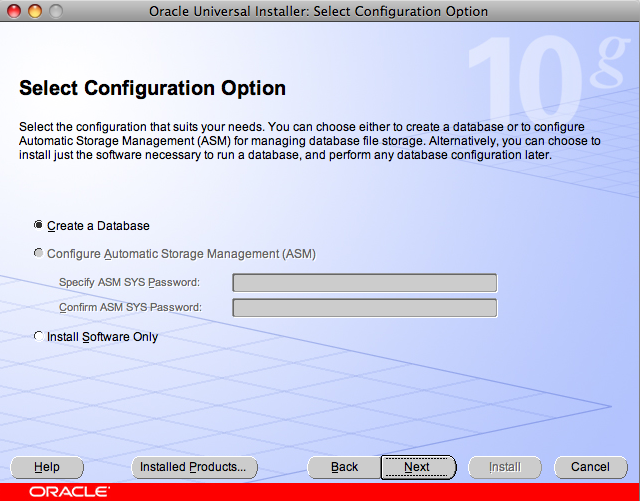
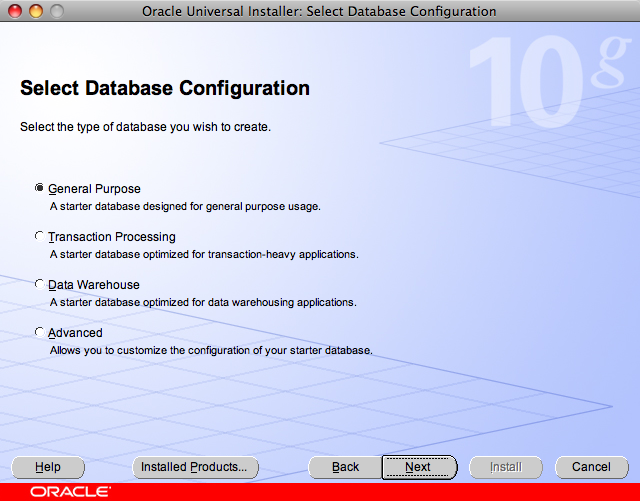
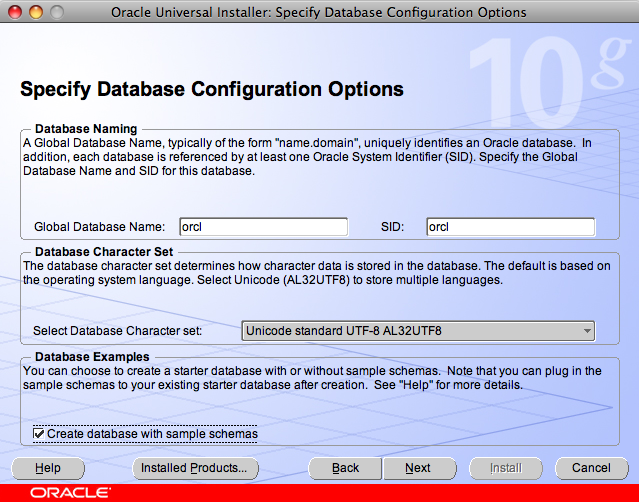
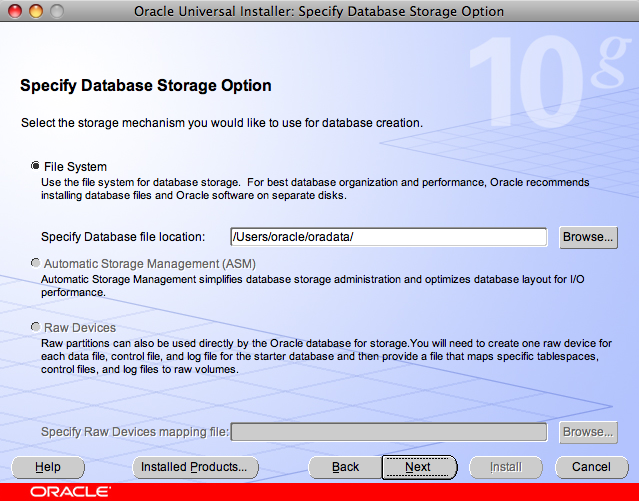
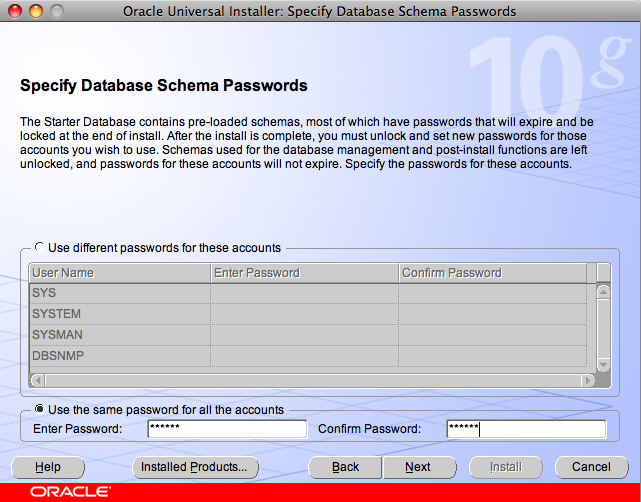
Choose "oracle" as the database password for simplicity.
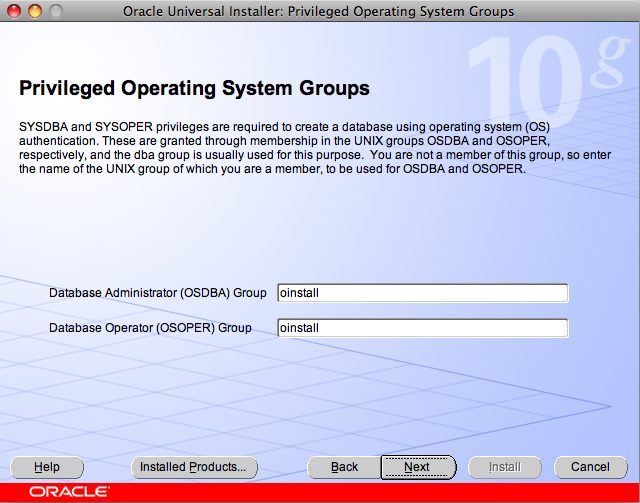
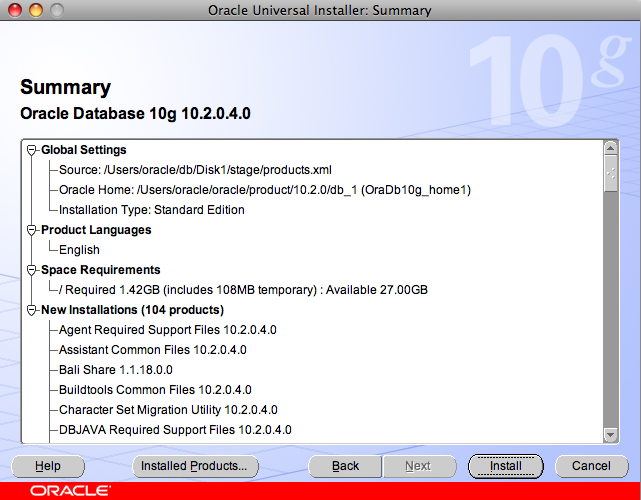
and finally click on "Install" to begin the installation.
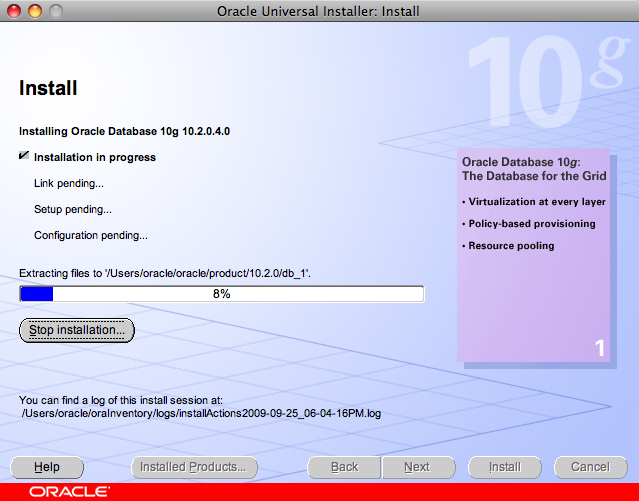
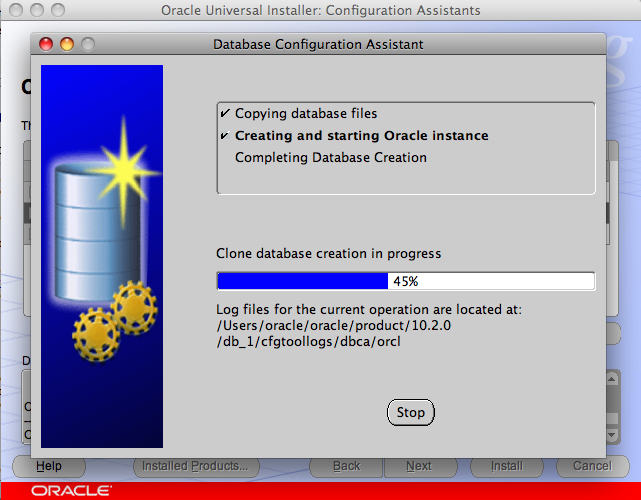
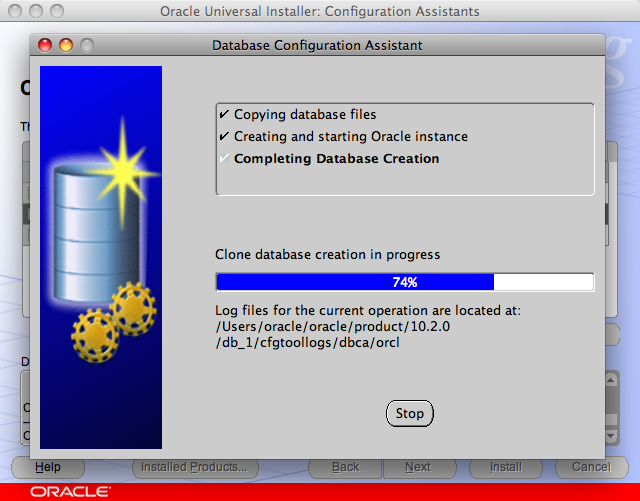
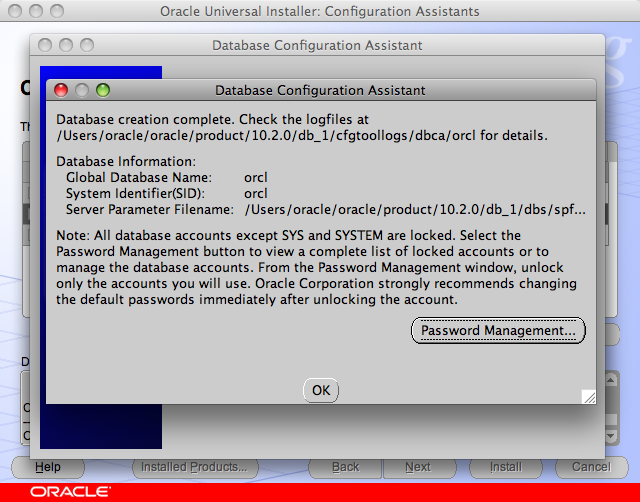
Click on "Password Management…" to unlock the sample database user …
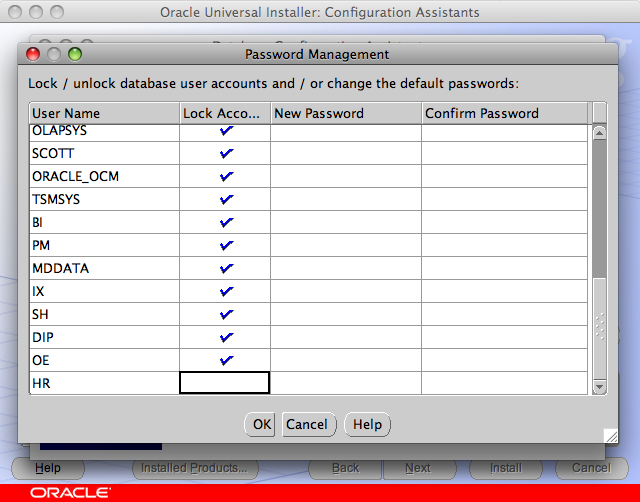
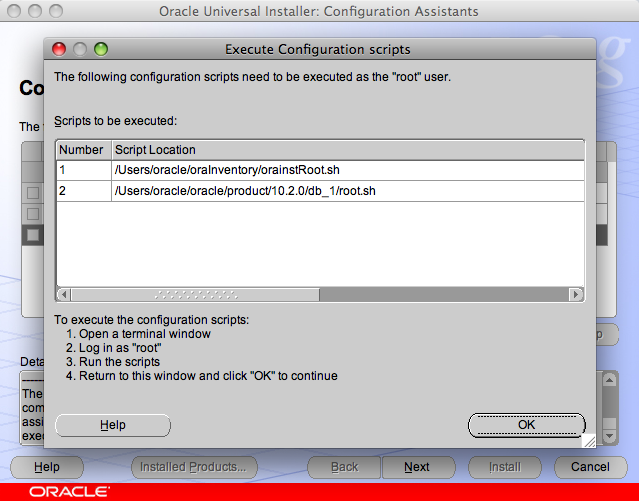
The output of these scripts look like:
~ > sudo /Users/oracle/oraInventory/orainstRoot.sh
Changing permissions of /Users/oracle/oraInventory to 770.
Changing groupname of /Users/oracle/oraInventory to oinstall.
The execution of the script is complete
and
~ > sudo /Users/oracle/product/10.2.0/db_1/root.sh
Running Oracle 10g root.sh script ...

The following environment variables are set as:
     ORACLE_OWNER= oracle
     ORACLE_HOME= /Users/oracle/oracle/product/10.2.0/db_1
Enter the full pathname of the local bin directory: [/usr/local/bin]:
    Copying dbhome /usr/local/bin ...
    Copying oraenv to /usr/local/bin ...
    Copying coraenv to /usr/local/bin ...
Creating /etc/oratab file...
Entries will be added to the /etc/oratab file as needed by
Database Configuration Assistant when a database is created
Finished running generic part of root.sh script.
Now product-specific root actions will be performed.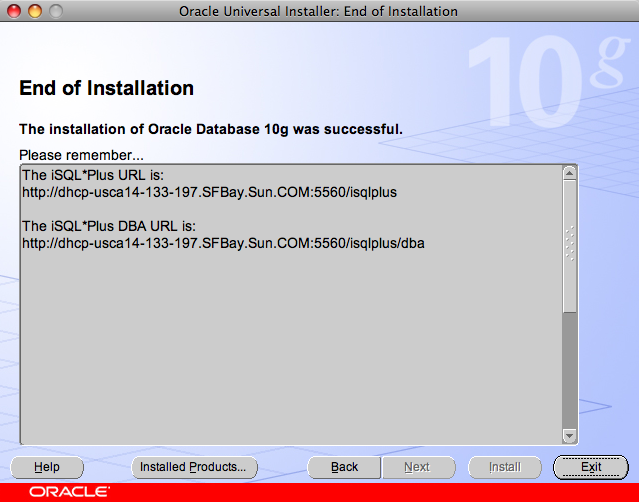
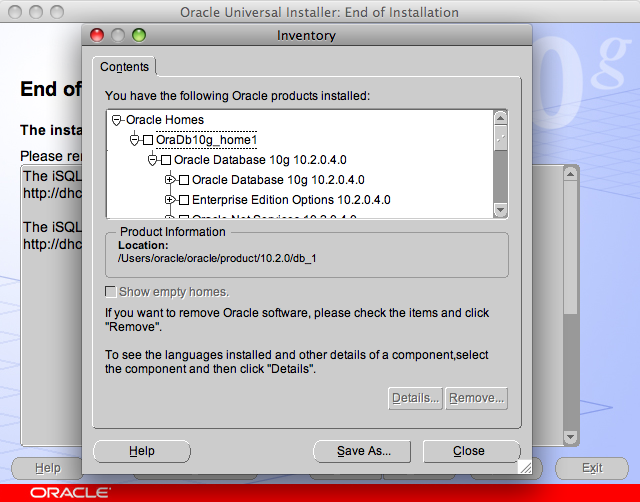
Click on "Installed Products…" to see the list of Oracle products installed.
- There are some more steps before you can start the Oracle listener process.
- Edit ".bash_profile" of "oracle" user and add the following settings:
export ORACLE_HOME=/Users/oracle/oracle/product/10.2.0/db_1
export PATH=$PATH:$ORACLE_HOME/bin
export DYLD_LIBRARY_PATH=$ORACLE_HOME/lib
Not setting DYLD_LIBRARY_PATH gives the following error:
~ oracle$ lsnrctl start
dyld: Library not loaded: /b/227/network/lib/libnnz10.dylib
  Referenced from: /Users/oracle/oracle/product/10.2.0/db_1/bin/lsnrctl
  Reason: image not found
Trace/BPT trap
This was not obvious but Googling helped. Make sure to relogin for these changes to take effect.
- If your Mac is using DHCP (most likely) then you may see the error shown below:
~ oracle$ lsnrctl start

LSNRCTL for MacOS X Server: Version 10.2.0.4.0 - Production on 28-SEP-2009 14:48:49

Copyright (c) 1991, 2007, Oracle.  All rights reserved.

Starting /Users/oracle/oracle/product/10.2.0/db_1/bin/tnslsnr: please wait...

TNSLSNR for MacOS X Server: Version 10.2.0.4.0 - Production
System parameter file is /Users/oracle/oracle/product/10.2.0/db_1/network/admin/listener.ora
Log messages written to /Users/oracle/oracle/product/10.2.0/db_1/network/log/listener.log
Listening on: (DESCRIPTION=(ADDRESS=(PROTOCOL=ipc)(KEY=EXTPROC1)))
Error listening on: (DESCRIPTION=(ADDRESS=(PROTOCOL=TCP)(HOST=dhcp-usca14-133-197.SFBay.Sun.COM)(PORT=1521)))
TNS-12545: Connect failed because target host or object does not exist
 TNS-12560: TNS:protocol adapter error
  TNS-00515: Connect failed because target host or object does not exist
   MacOS X Server Error: 49: Can't assign requested address

Listener failed to start. See the error message(s) above...
This error occurs because your MacBook may be running on a different IP address if rebooted after the installation and before starting the server. Fortunately, the error message is very intuitive and it’s easy to fix the error by editing "$ORACLE_HOME/network/admin/listener.ora" as shown below:
# listener.ora Network Configuration File: /Users/oracle/oracle/product/10.2.0/db_1/network/admin/listener.ora
# Generated by Oracle configuration tools.

SID_LIST_LISTENER =
  (SID_LIST =
    (SID_DESC =
      (SID_NAME = PLSExtProc)
      (ORACLE_HOME = /Users/oracle/oracle/product/10.2.0/db_1)
      (PROGRAM = extproc)
    )
    (SID_DESC =
      (SID_NAME = orcl)
      (ORACLE_HOME = /Users/oracle/oracle/product/10.2.0/db_1)
    )
  )

LISTENER =
  (DESCRIPTION_LIST =
    (DESCRIPTION =
      (ADDRESS = (PROTOCOL = IPC)(KEY = EXTPROC1))
      (ADDRESS = (PROTOCOL = TCP)(HOST = localhost)(PORT = 1521))
    )
  )
The changes are highlighted in the bold. Basically, add a new SID referring to "orcl". And for DHCP users the value of HOST key needs to be changed from dynamically assigned IP address to "localhost". Strangely, the Installing on DHCP Computers section of the installation guide says nothing about it

- Additionally, for DHCP users, you need to change "$ORACLE_HOME/network/admin/tnsnames.ora" as:
# tnsnames.ora Network Configuration File: /Users/oracle/oracle/product/10.2.0/db_1/network/admin/tnsnames.ora
# Generated by Oracle configuration tools.

ORCL =
  (DESCRIPTION =
    (ADDRESS = (PROTOCOL = TCP)(HOST = localhost)(PORT = 1521))
    (CONNECT_DATA =
      (SERVER = DEDICATED)
      (SERVICE_NAME = orcl)
    )
  )
The changes are highlighted in bold. And here as well change the value of HOST key to "localhost".
- Edit ".bash_profile" of "oracle" user and add the following settings:
- And finally, start the database using SQL*Plus as:
~ oracle$ sqlplus "/ as sysdba"

SQL*Plus: Release 10.2.0.4.0 - Production on Mon Sep 28 17:44:40 2009

Copyright (c) 1982, 2007, Oracle.  All Rights Reserved.
Connected to an idle instance.

SQL> startup nomount
ORACLE instance started.

Total System Global Area  612368384 bytes
Fixed Size                  2085872 bytes
Variable Size             167775248 bytes
Database Buffers          436207616 bytes
Redo Buffers                6299648 bytes
SQL> alter database mount;

Database altered.
SQL> alter database open;
Database altered.

SQL> ALTER USER HR IDENTIFIED BY hr ACCOUNT UNLOCK;
User altered.

SQL> exit
Disconnected from Oracle Database 10g Release 10.2.0.4.0 - Production
The last step of unlocking the account should not be required because we explicitly unlocked the account during installation but that apparently didn’t work. And I hit ORA-01033, ORA-01034, ORA-12514, ORA-12541, ORA-12547, and ORA-27101 trying different combinations to get the app working.
Anyway now re-connect to the HR sample database as:
~ oracle$ sqlplus hr/hr@orcl

SQL*Plus: Release 10.2.0.4.0 - Production on Mon Sep 28 17:46:19 2009

Copyright (c) 1982, 2007, Oracle.  All Rights Reserved.

Connected to:
Oracle Database 10g Release 10.2.0.4.0 - Production

SQL> select table_name from user_tables;
TABLE_NAME
------------------------------
REGIONS
LOCATIONS
DEPARTMENTS
JOBS
COUNTRIES
EMPLOYEES
JOB_HISTORY

7 rows selected.

SQL> desc regions;
 Name                                      Null?    Type
 ----------------------------------------- -------- ----------------------------
 REGION_ID                                 NOT NULL NUMBER
 REGION_NAME                                        VARCHAR2(25)

SQL> select * from regions;
 REGION_ID REGION_NAME
---------- -------------------------
         1 Europe
         2 Americas
         3 Asia
         4 Middle East and Africa
Note: If the database is not shutdown properly then it can be forced to do so using the command "shutdown abort" using SQL*Plus.
A complete archive of all the tips is available here.
Technorati: totd oracle database mac osxtips leopard installation
Related posts:- TOTD #112: Exposing Oracle database tables as RESTful entities using JAX-RS, GlassFish, and NetBeans
- TOTD #121: JDBC resource for MySQL and Oracle sample database in GlassFish v3
- TOTD #107: Connect to Oracle database using NetBeans
- TOTD #110: JRuby on Rails application using Oracle on GlassFish
- TOTD #108: Java EE 6 web application (JSF 2.0 + JPA 2.0 + EJB 3.1) using Oracle, NetBeans, and GlassFish
[...] Arun Gupta is a technology enthusiast, a passionate runner, and a community guy who works for Sun Microsystems. And this is his blog! « « TOTD #105: How to install Oracle Database 10g on Mac OS X (Intel) ? [...]
Pingback by TOTD #106: Connect to Oracle database using NetBeans « Miles to go … — September 30, 2009 @ 12:34 am
[...] TOTD #105 explained how to install Oracle database 10g R2 on Mac OS X. TOTD #106 explained how to connect this Oracle database using NetBeans. This Tip Of The Day will explain how to use the sample HR database (that comes with Oracle database server) to write a simple Java EE 6 application. [...]
Pingback by TOTD #107: Java EE 6 web application (JSF 2.0 + JPA 2.0 + EJB 3.1) using Oracle, NetBeans, and GlassFish « Miles to go … — October 1, 2009 @ 10:03 am
questions:
1) is it free and open source ? May I include this in my open-source project without break my license (LGPL) ?
2) The performance is much better then MySql ? some other special reason to migrate from MySql to Oracle in small projects?
3) it sounds too complicated to setup such thing, and I am concerned about the complexity it will add in the setup of my project for new users. Any tip here ? any magic shell script ?
Comment by Felipe Gaucho — October 2, 2009 @ 11:26 pm
Felipe,
Oracle is not free and certainly not open source. The complete license is available at:
http://www.oracle.com/technology/software/popup-license/standard-license.html
I did not compare performance and did not evaluate much on the feature comparison with MySQL as well. But it was certainly much more complicated than setting up MySQL. Unfortunately, the steps do need to be followed individually but hopefully this blog will help you get rolling fast.
Comment by arungupta — October 3, 2009 @ 7:36 am
[...] Install Oracle database as explained in TOTD #106. [...]
Pingback by TOTD #110: JRuby on Rails application using Oracle on GlassFish « Miles to go … — October 9, 2009 @ 9:08 am
Is there a way to get around the “server” flavor OS version to the desktop version?
Comment by John Sluder — October 9, 2009 @ 6:08 pm
I suspect “Standard Edition” is the leanest version that can be installed. I tried searching for a smaller/compact/lite version but could not find anything.
Comment by arungupta — October 9, 2009 @ 10:51 pm
Hi,
Please if you can help
I get an error on my mac , do you know how can i resolved?
Thank You!
david-nahmiass-macbook:~ david$ dscl . -create /groups/oinstall
attribute status: eDSPermissionError
DS Error: -14120 (eDSPermissionError)
Comment by David Nahmias — November 10, 2009 @ 7:22 pm
David,
You need to “sudo” the commands.
Comment by arungupta — November 10, 2009 @ 9:39 pm
Hi Please if you can help !
I am getting this error
david-nahmiass-macbook:Install oracle$ ./runInstaller
You do not have sufficient permissions to access the inventory ‘/Volumes/u01/app/oracle/oraInventory’. Installation cannot continue. Make sure that you have read/write permissions to the inventory directory and restart the installer.: Permission denied
Comment by David Nahmias — November 15, 2009 @ 11:54 am
David,
Did you sudo before running the installer ?
Comment by arungupta — November 16, 2009 @ 10:02 am
So I’ve followed all the above steps…however, I’m hitting the following road-block. After successfully starting the OUI, Immediately proceeding the step of setting up the SYS, SYSTEM, SYSMAN and DBSNMP I get the following error dialog: “OUI-10150:Error Invalid OSOPER name in component Oracle Database 10g 10.2.0.4.0 . Installation cannot continue for this component.”
Can anyone please advise??
Thanks for the support!!
Comment by Saff — March 3, 2010 @ 4:29 pm
nice document
Comment by www.oracledba.inj — May 8, 2010 @ 8:12 am