Now that you’ve installed GlassFish Tools Bundle for Eclipse 1.1, lets use this bundle to create a simple Metro/JAX-WS compliant Web service and deploy on GlassFish. These steps will work with either Eclipse 3.4.2 or 3.5 with WTP Java EE support.
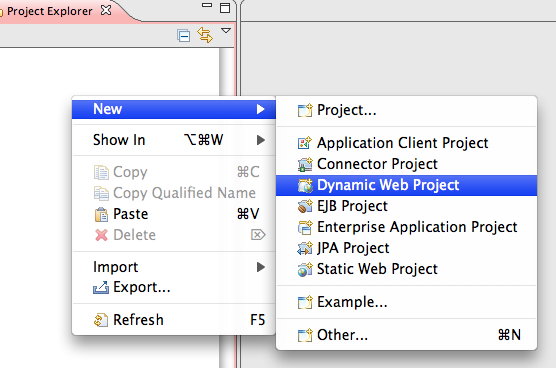
- Lets create a simple “Dynamic Web Project” as shown below:
- Name the project “HelloMetro” and take all other defaults:
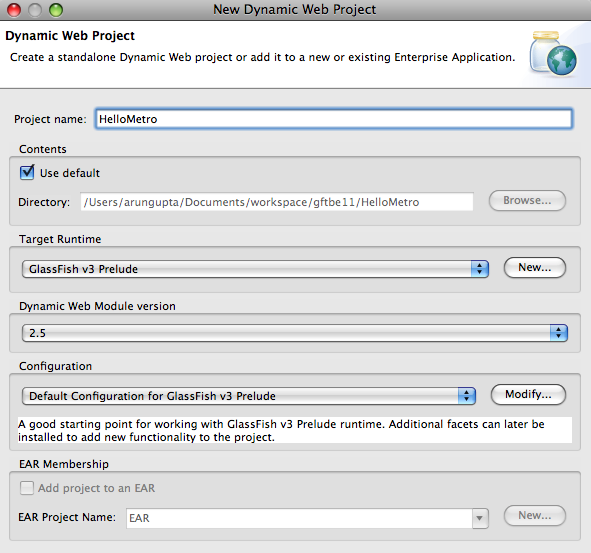
Click on “Finish” to complete the project creation.
- Metro allows to create a Web service from a POJO class. So let’s add a POJO to the project by right-clicking on the project and selecting “New”, “Class” as shown below:
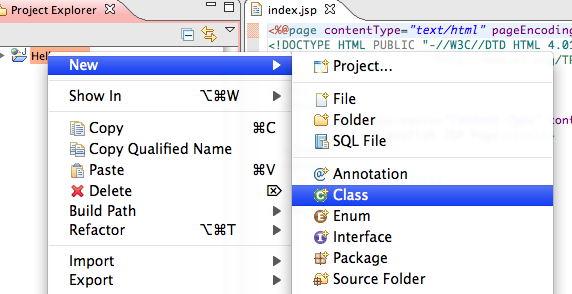
Specify the package name as “server”, class name as “HelloService” and click on “Finish”.
- Add a simple method to the newly generated class as:
public String sayHello(String name) {
      return "Hello " + name + "!!";
}
- Expand the project, go to “HelloService.java” in “server” package, right-click, select “Web Services”, “Create Web service”.
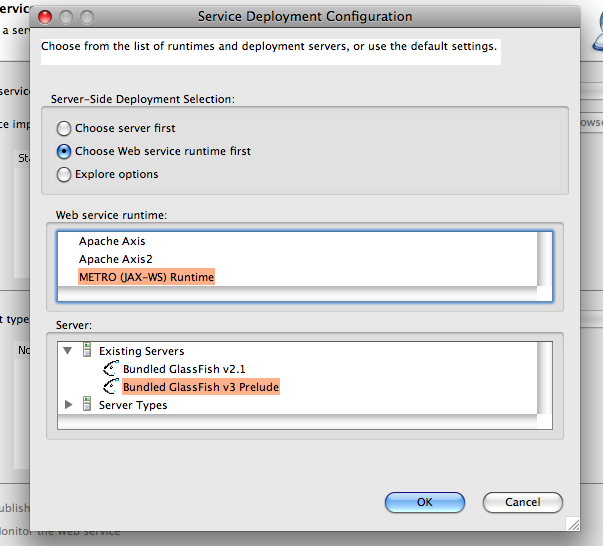
- Click on “Web service runtime: Apache Axis” and select “Metro (JAX-WS) Runtime” as the Web service runtime as shown below:
- Move the slider on the left to top. This will enable testing of the deployed Web service. The completed configuration looks like:
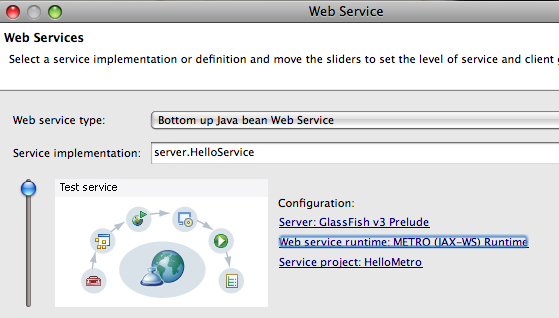
and click on “Next >”.
- Select the checkbox “Copy Metro library jars to the project” to resolve the references correctly as shown below:
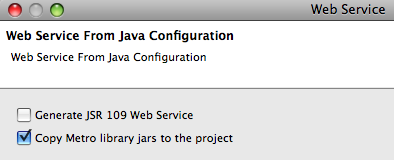
and click on “Next >”. This bundles the application and deploys to GlassFish and provides an option to test the deployed Web service as shown below:
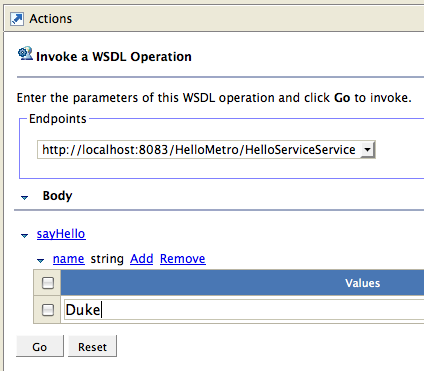
Clicking on the “Launch” button shows the following output in the browser:
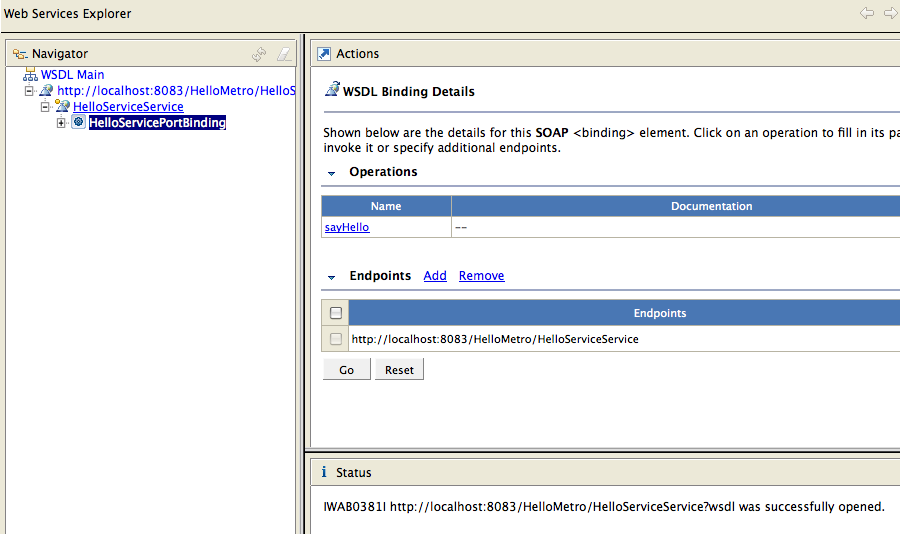
The WSDL is hosted at “http://localhost:8083/HelloMetro/HelloServiceService?wsdl”.
- Click on “sayHello” method, click on “Add” and enter the value as “Duke” as shown below:
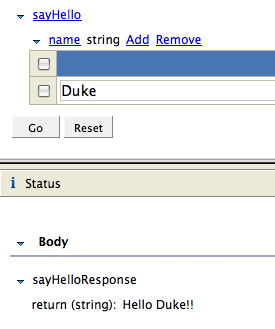
Click on “Go” and the response is shown as:
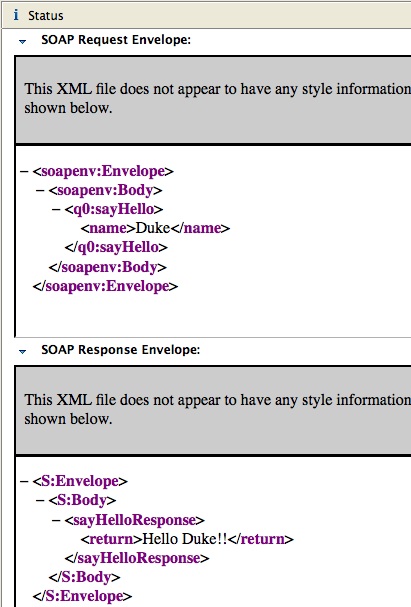
Clicking on “Source” in the response window shows the SOAP request/response messages as shown below:
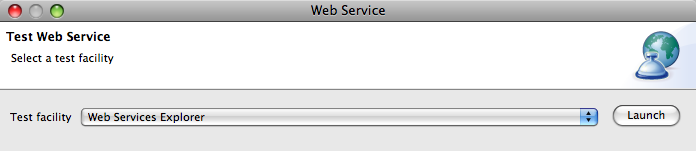
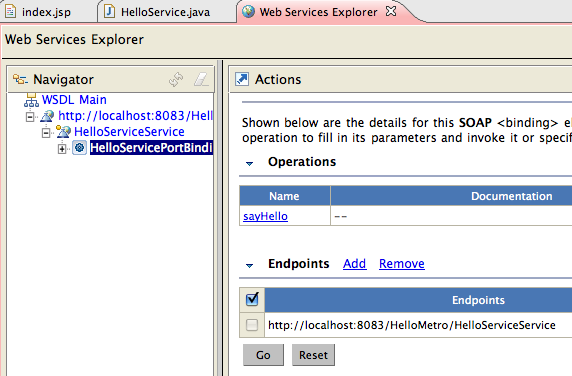
- Alternatively, you can click on “Finish” to complete the dialog. Then click on “Run” menu item, “Launch the Web Services Explorer” to see a screen as:
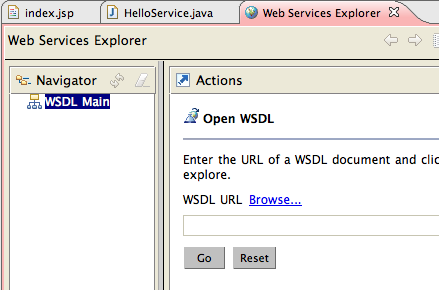
Enter the URL of the WSDL in “WSDL URL” box as “http://localhost:8083/HelloMetro/HelloServiceService?wsdl” and click on “Go”. Now you are seeing the similar screen to test the Web service within the integrated browser as shown below:
A future blog will cover how to write a database-enabled application using the bundled Dali JPA Tools and MySQL pre-registered JDBC driver.
Please send your questions and comments to .
Please leave suggestions on other TOTD that you’d like to see. A complete archive of all the tips is available here.
Technorati: totd glassfish eclipse galileo webservices metro jax-ws
TOTD #56 explains how to create a RESTful Web service endpoint using Jersey and publish the resource using JSON representation. The blog entry showed how the endpoint can be accessed from a Web browser. This Tip Of The Day explains how to use Jersey Client APIs to invoke the published endpoint.
Lets get started!
- Create a new directory “./src/test/java/org/glassfish/samples”
- Add a test
- Add a template test file “AppTest.java” as shown below:
|
package org.glassfish.samples;
import junit.framework.Test;
import junit.framework.TestCase;
import junit.framework.TestSuite;
/**
* Unit test for simple App.
*/
public class AppTest
extends TestCase
{
/**
* Create the test case
*
* @param testName name of the test case
*/
public AppTest( String testName )
{
super( testName );
}
/**
* @return the suite of tests being tested
*/
public static Test suite()
{
return new TestSuite( AppTest.class );
}
/**
* Rigourous Test 
*/
public void testApp()
{
assertTrue(true);
}
}
|
- Add a new method “createResource()” as:
private WebResource createResource() {
Client client = Client.create();
WebResource resource = client.resource(“http://localhost:8080/helloworld-webapp/webresources/myresource”);
return resource;
} |
This code creates a default instance of Jersey Client and creates a Web resource from that client for the URI passed as an argument.
- Change the implementation of “testApp()” method as:
Greeting result = createResource().get(Greeting.class);
assertTrue(result.greeting.equals(“Hi there!”)); |
This invokes the GET method on the resource by passing specific type and compares the returned and expected value.
- Add the following “imports”:
import com.sun.jersey.api.client.Client;
import com.sun.jersey.api.client.WebResource; |
- Copy “Greeting.java” from TOTD #56 to ”./src/test/java/org/glassfish/samples” directory.
- Run the test
- Deploy the endpoint as “mvn glassfish:run”.
- Run the test as “mvn test”. The following output is shown:
~/samples/jersey/helloworld-webapp >mvn test
[INFO] Scanning for projects…
[INFO] ————————————————————————
[INFO] Building helloworld-webapp Jersey Webapp
[INFO] task-segment: [test]
[INFO] ————————————————————————
[INFO] [resources:resources]
[INFO] Using default encoding to copy filtered resources.
[INFO] [compiler:compile]
[INFO] Nothing to compile – all classes are up to date
[INFO] [resources:testResources]
[INFO] Using default encoding to copy filtered resources.
[INFO] [compiler:testCompile]
[INFO] Compiling 1 source file to /Users/arungupta/samples/jersey/helloworld-webapp/target/test-classes
[INFO] [surefire:test]
[INFO] Surefire report directory: /Users/arungupta/samples/jersey/helloworld-webapp/target/surefire-reports
——————————————————-
T E S T S
——————————————————-
Running org.glassfish.samples.AppTest
Tests run: 1, Failures: 0, Errors: 0, Skipped: 0, Time elapsed: 0.587 sec
Results :
Tests run: 1, Failures: 0, Errors: 0, Skipped: 0
[INFO] ————————————————————————
[INFO] BUILD SUCCESSFUL
[INFO] ————————————————————————
[INFO] Total time: 4 seconds
[INFO] Finished at: Mon Nov 24 16:50:17 PST 2008
[INFO] Final Memory: 18M/43M
[INFO] ————————————————————————
|
- View request and response messages
- Change the implementation of “createResource()” method as (changes highlighted in bold):
Client client = Client.create();
WebResource resource = client.resource(“http://localhost:8080/helloworld-webapp/webresources/myresource”);
resource.addFilter(new LoggingFilter());
return resource; |
- Running the tests as “mvn test” now shows the output, with request and response messages, as shown below:
Running org.glassfish.samples.AppTest
1 * Out-bound request
1 > GET http://localhost:8080/helloworld-webapp/webresources/myresource
1 >
1 < 200
1 < X-Powered-By: Servlet/2.5
1 < Transfer-Encoding: chunked
1 < Content-Type: application/json
1 < Server: GlassFish/v3
1 < Date: Tue, 25 Nov 2008 07:07:51 GMT
1 <
{“greeting”:”Hi there!”}
1 * In-bound response
Tests run: 1, Failures: 0, Errors: 0, Skipped: 0, Time elapsed: 1.074 sec |
Really easy!
Even though the APIs are used to invoke a RESTful endpoint deployed using Jersey but are very generic and can be used to invoke any RESTful endpoint. Paul’s blog explain in detail on the usage. You can also see how these APIs can be used to consume a service hosted using Apache Abdera.
com.sun.jersey.api.client, com.sun.jersey.api.client.config, and com.sun.jersey.api.client.filter packages documents all the classes that provide support for client-side communication with HTTP-based RESTful Web services.
Technorati: totd glassfish v3 embeddable jersey jsr311 rest json webservices