Tag Archives: iot

AWS IoT Button, Lambda and Couchbase

Getting Started with Serverless FaaS and AWS Lambda shows how to use a simple Java function to store a JSON document to Couchbase using AWS Lambda. This blog builds upon that and shows how an AWS IoT Button can be used as a trigger for that Lambda function.

By end of this blog, you’ll learn:

  • How to configure AWS IoT Button
  • Use IoT Button as trigger for Lambda Function
  • Test IoT button

The overall flow will be:
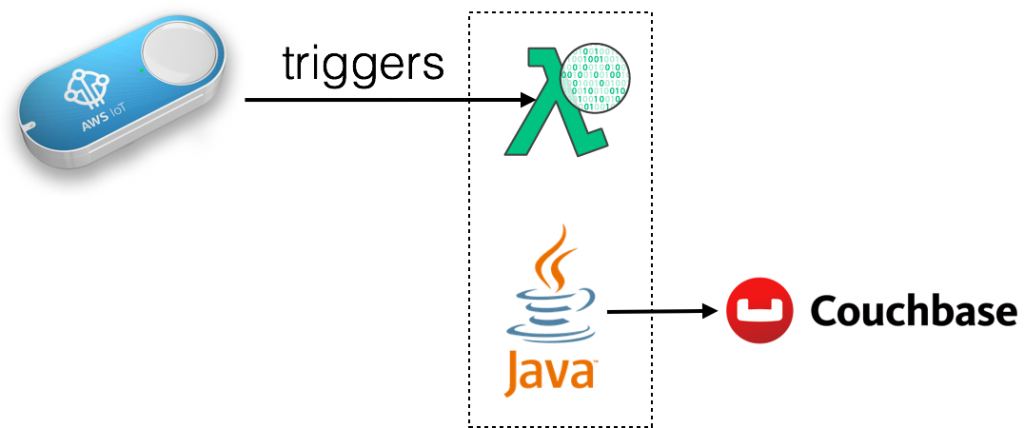
serverless-iot-couchbase

Iot button click will invoke HelloCouchbaseLambda Lambda function. This function is uses Couchbase Java SDK to create a JSON document in Couchbase.

This blog is also playing catch up with Collecting iBeacon Data with Couchbase and Raspberry Pi IoT Devices by Nic and The CouchCase by Matthew on their summer projects. One last blog will be published in this series. That will show how multiple AWS IoT buttons can be used for some fun.

Let’s get started!

Configure IoT Button

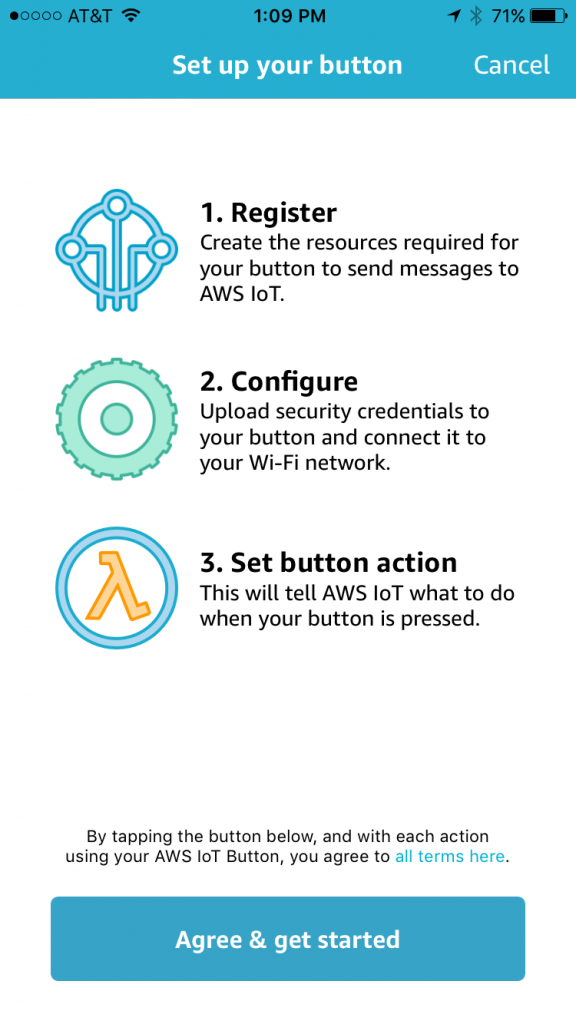
The fastest way to configure IoT button  is using the mobile app for iOS or Android.


More details about configuring IoT Button using mobile app.

Here are some snapshots from configuring button using the mobile app.

Bring up the app, click on + to start configuring a new button:

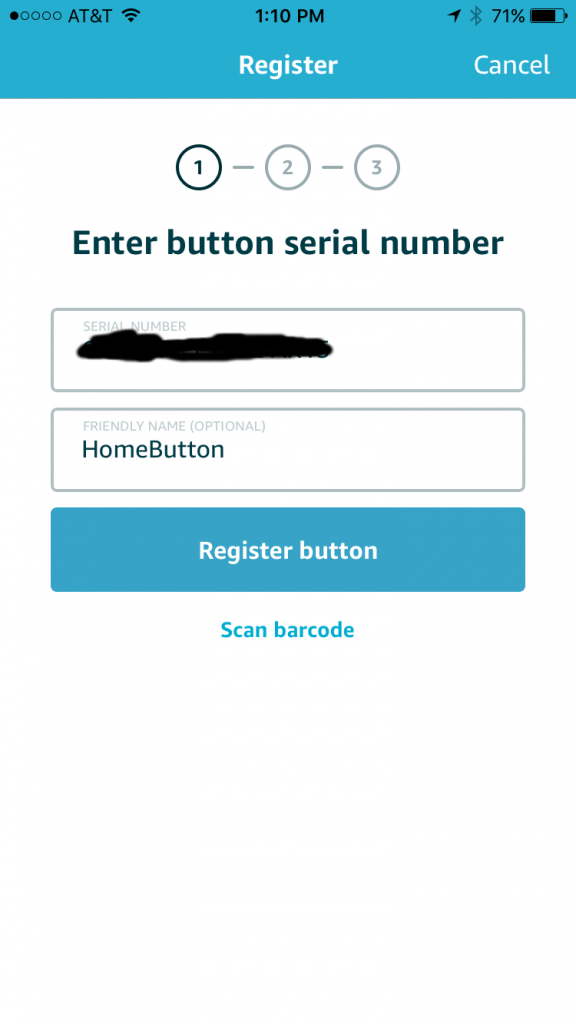
aws-iot-button-configure-1

Enter button’s serial number:

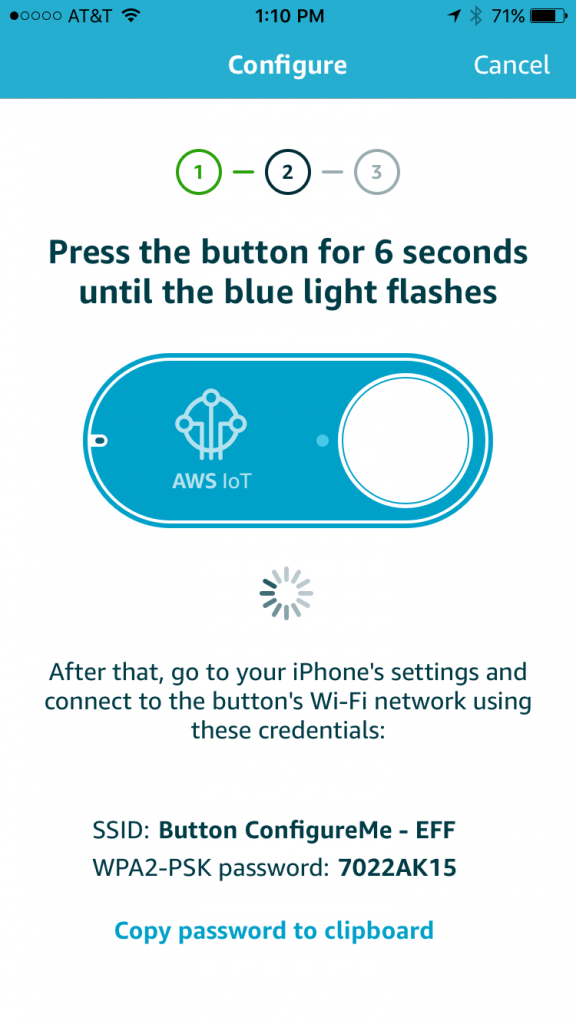
aws-iot-button-configure-2

Register the button:

aws-iot-button-configure-3

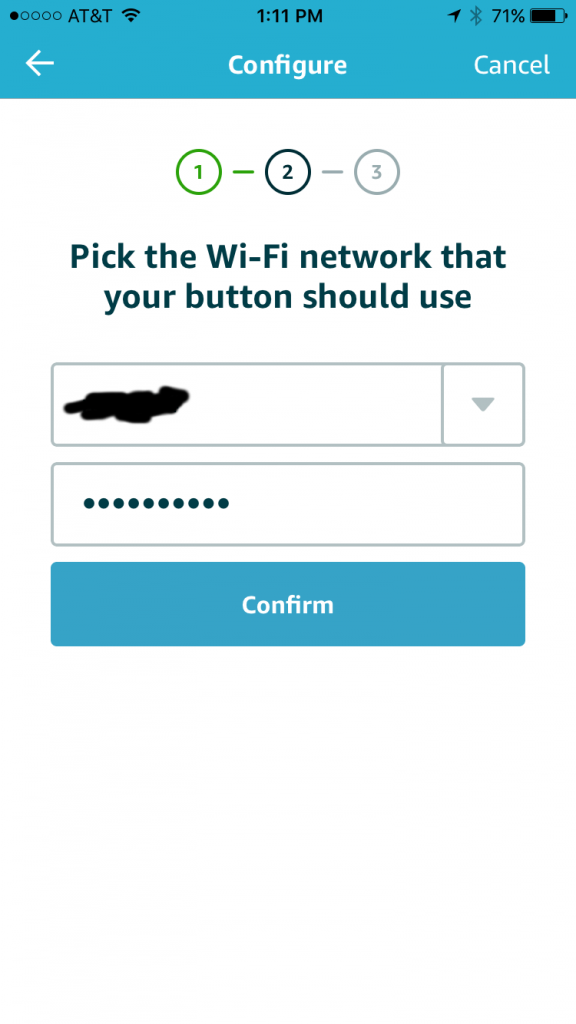
Configure the button with wifi network:

aws-iot-button-configure-4

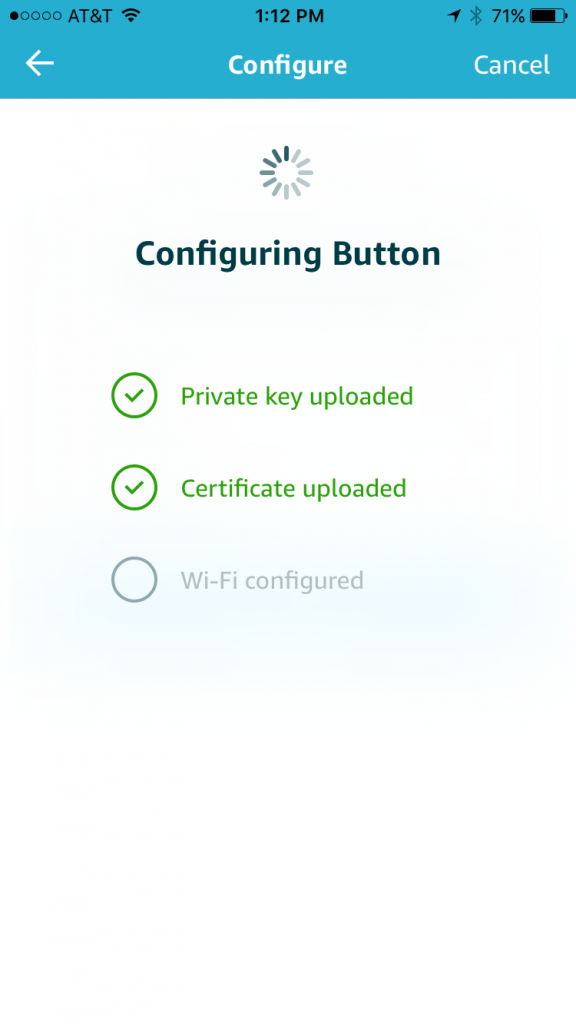
Upload all the certificates etc:

aws-iot-button-configure-5

After this, the button is configured and ready to use. This blog skipped the part where a template Lambda Function is associated with the button click.

If  mobile app cannot be used then the button can be configured manually.

Use IoT Button as Trigger for Lambda Function

The aws lambda create-event-source-mapping CLI allows to create an event source for Lambda function. As of AWS CLI version 1.11.21, only Amazon Kinesis stream or an Amazon DynamoDB stream can be used. But for this blog, we’ll use IoT button as a trigger. And this has to be configured using AWS Lambda Console.

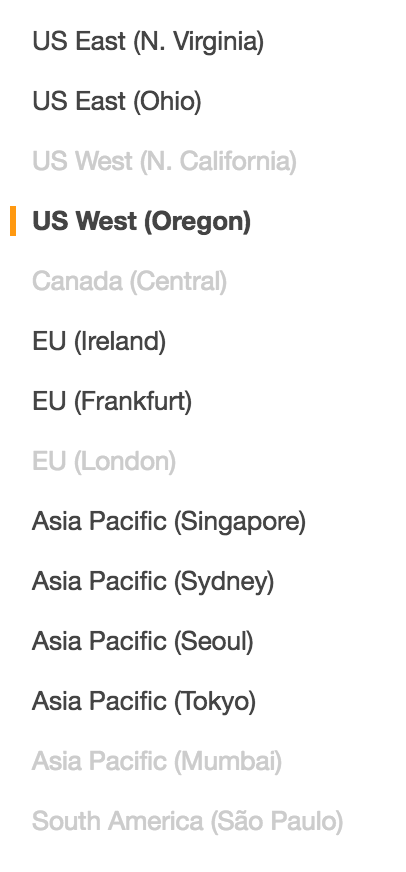
IoT Button is only supported in a limited number of regions. For example, it is not supported in the us-west-1 region but us-west-2 region works.

The list of regions not supported are greyed out in the following list:

aws-iot-buttons-supported-region

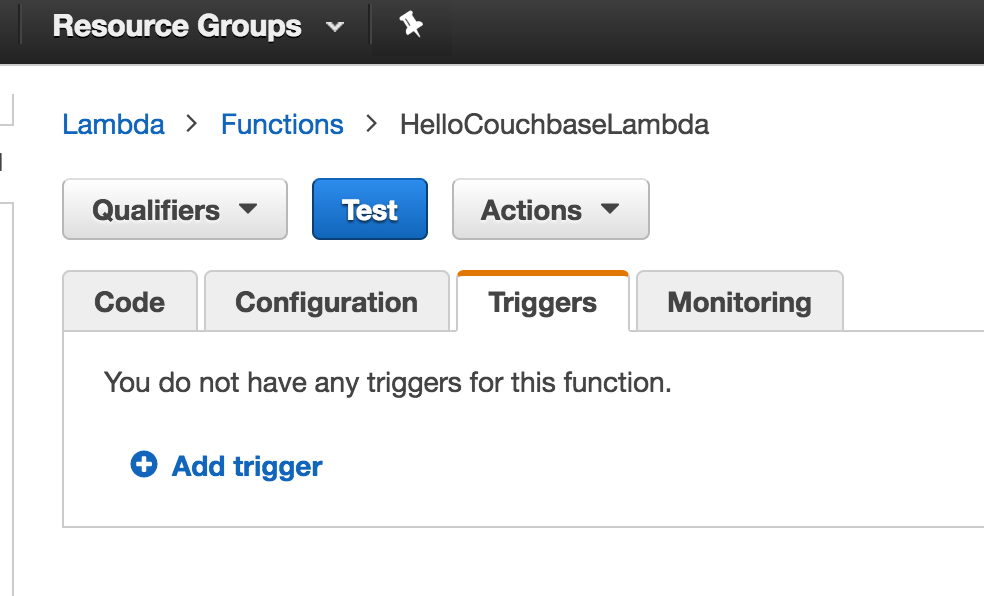
Lambda Function can be triggered by several events. Lambda Function is invoked when any of these events occur. By default, no triggers are associated with a Lambda Function. For our HelloCouchbaseLambda function, these can be seen at us-west-2.console.aws.amazon.com/lambda/home?region=us-west-2#/functions/HelloCouchbaseLambda?tab=triggers.

AWS Lambda Default Triggers

Click on Add trigger to add a new trigger:

AWS Lambda Add Trigger

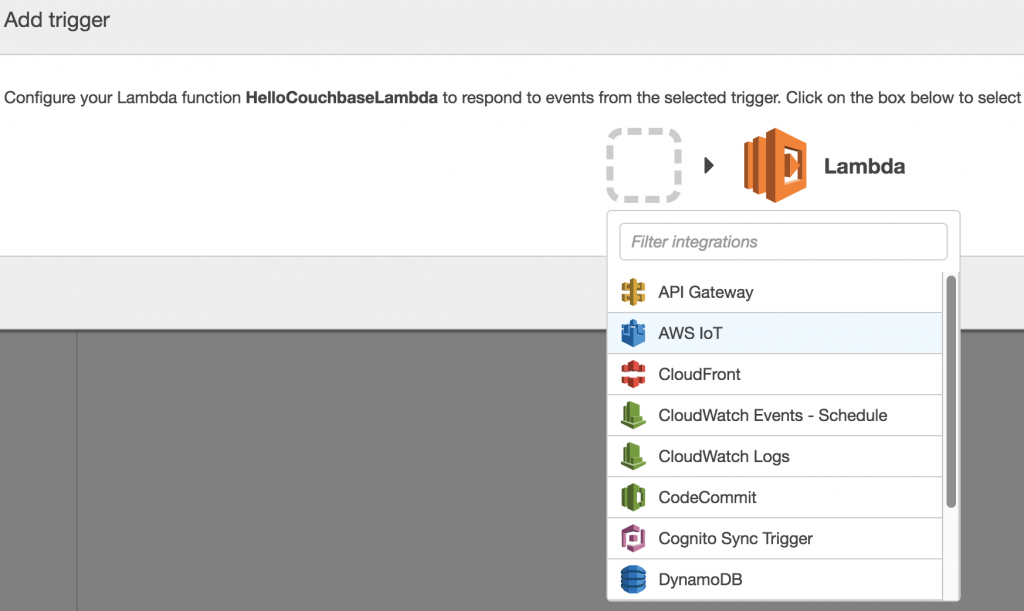
Select on the empty square to create a new trigger, and select AWS IoT:

AWS Lambda Add IoT Trigger

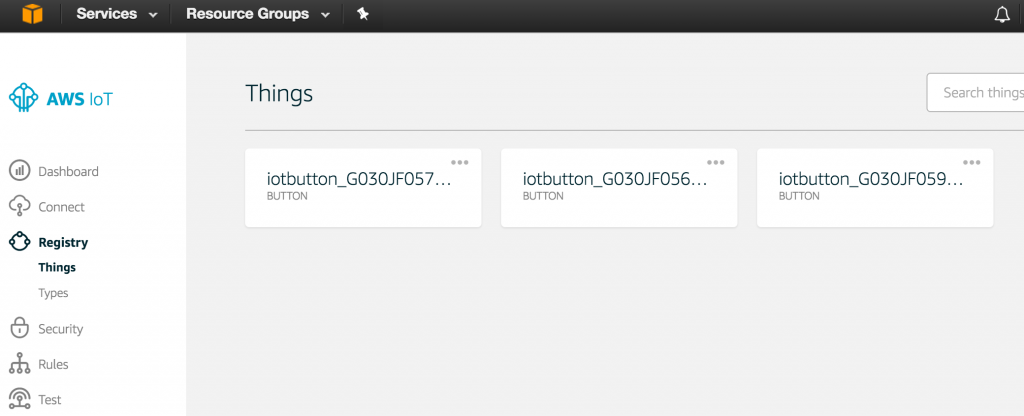
For the button previously registered, get the serial number from us-west-2.console.aws.amazon.com/iotv2/home?region=us-west-2#/thinghub:

aws-iot-things-hub

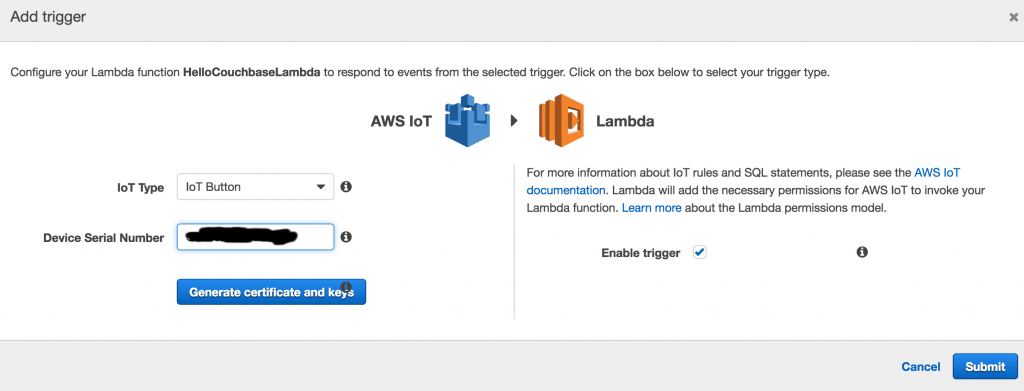
Specify the serial number of the button in the AWS IoT trigger:

aws-iot-add-trigger

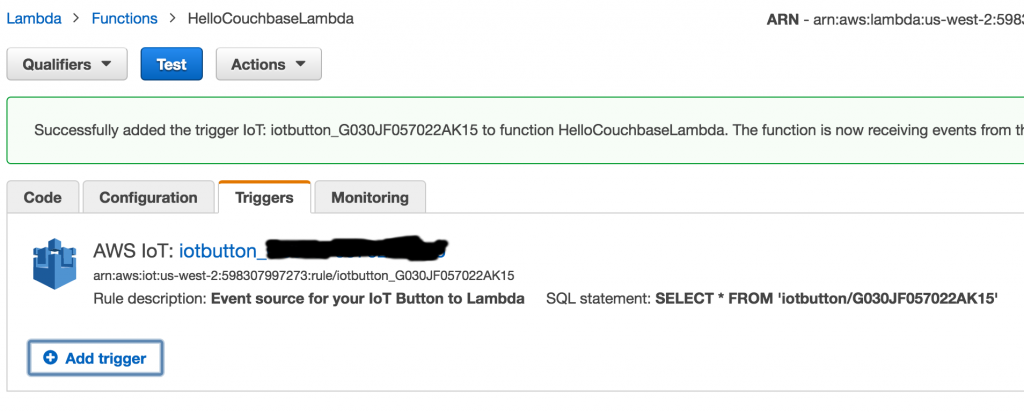
Click on Submit to create the trigger:

aws-iot-added-trigger

And this confirms that the trigger has been added.

Test IoT Button

Before testing the button, let’s login to the Couchbase instance and verify the number of JSON documents in the bucket:

aws-iot-button-couchbase-console-default

This can be verified at http://<EC2-IP-Address>:8091/index.html#sec=buckets. As expected, no documents exists in the bucket.

Press the button once, and refresh the page. It shows that one document is now stored in the bucket. This is verified in the Couchbase Web Console:

aws-iot-button-couchbase-console-one-document

Click on Documents to see the complete list of documents:

aws-iot-button-couchbase-one-document-2

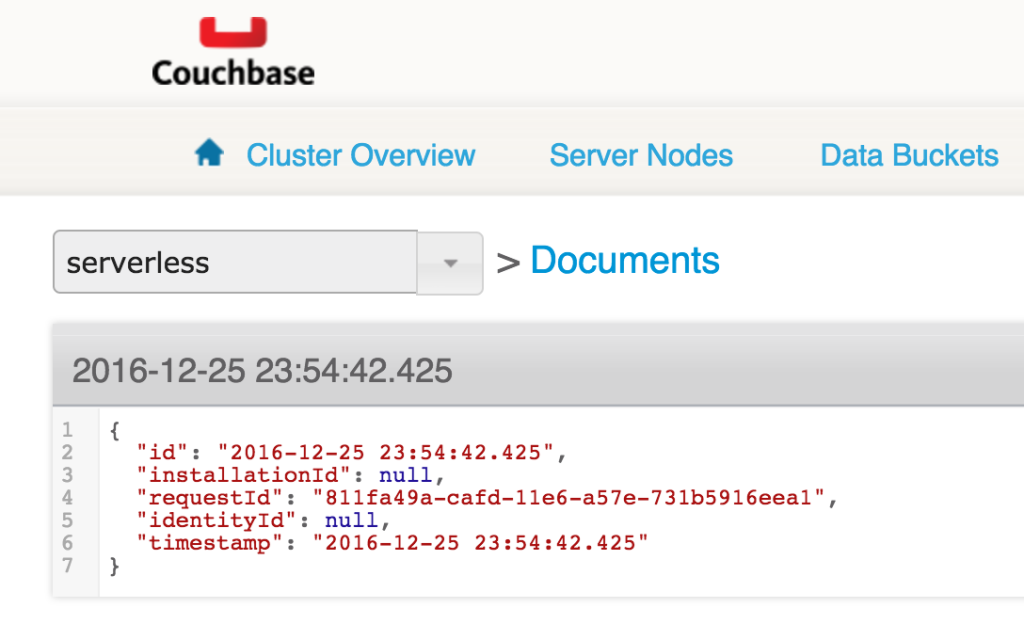
Click on the document ID to see more details about the document:

aws-iot-button-couchbase-one-document-details

Only timestamp is stored in this JSON document.

Now, let’s update HelloCouchbaseLambda code to include request id in the document as well. This can be achieved by adding the following line of code in the Java class:

A new deployment package can be built and uploaded using the following command:

Now clicking the button will update the number of documents. But the updated document will have an additional attribute populated as shown:

aws-iot-button-couchbase-second-document-details

How are you going to take AWS IoT button and use it with Lambda and Couchbase? Let us know at Couchbase Forums.

References

  • AWS IoT Button
  • AWS IoT Button Developer Guide
  • Couchbase Server Docs
  • Couchbase Forums
  • Follow us at @couchbasedev

Source: https://blog.couchbase.com/2016/december/aws-iot-button-lambda-couchbase
WildFly Cluster on Raspberry Pi (Tech Tip #28)

Tech Tip #25 showed how to configure WildFly on Raspberry Pi. Tech Tip #27 showed how to setup WildFly on two Raspberry Pis in managed domain mode. This tech tip will show how to setup a WildFly cluster over those two hosts.

WildFly supports mod_cluster out of the box. There are several advantages of mod_cluster:

  • Dynamic configuration of httpd workers
  • Server-side load balance factor calculation
  • Fine-grained web app lifecycle control

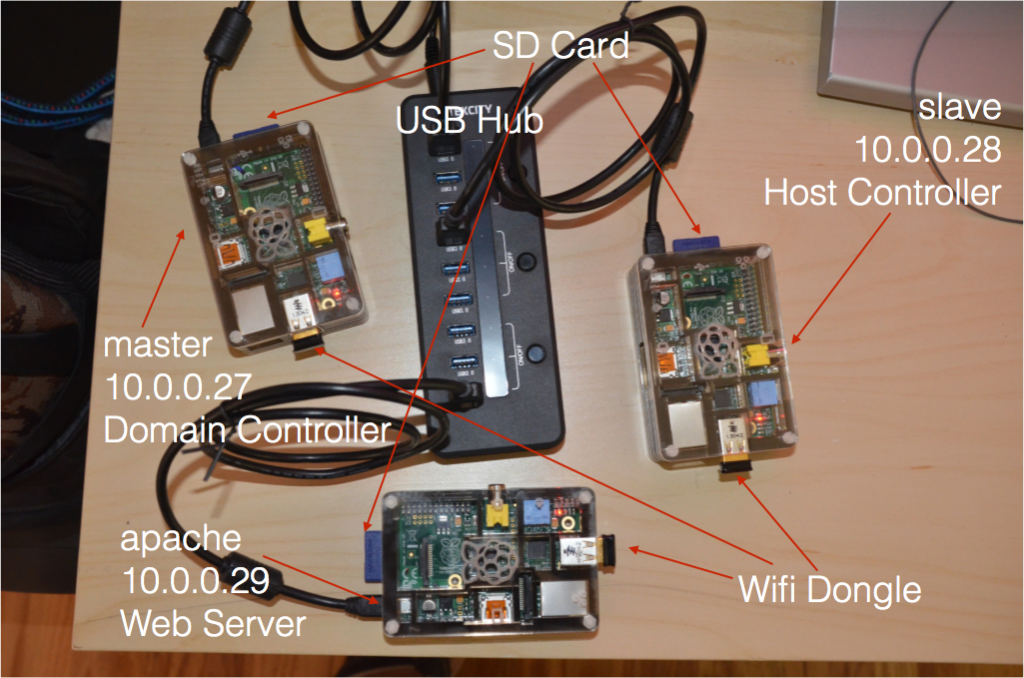
However there is no ARM build available for it, yet. So we’ll use mod_proxy instead that gets pre-installed as part of Apache2. The Domain Controller and HTTP server need not be on the same host and that’s the configuration we’ll use for our setup. So effectively, there will be three Raspberry Pis:

  • Domain Controller
  • Host Controller
  • Web Server

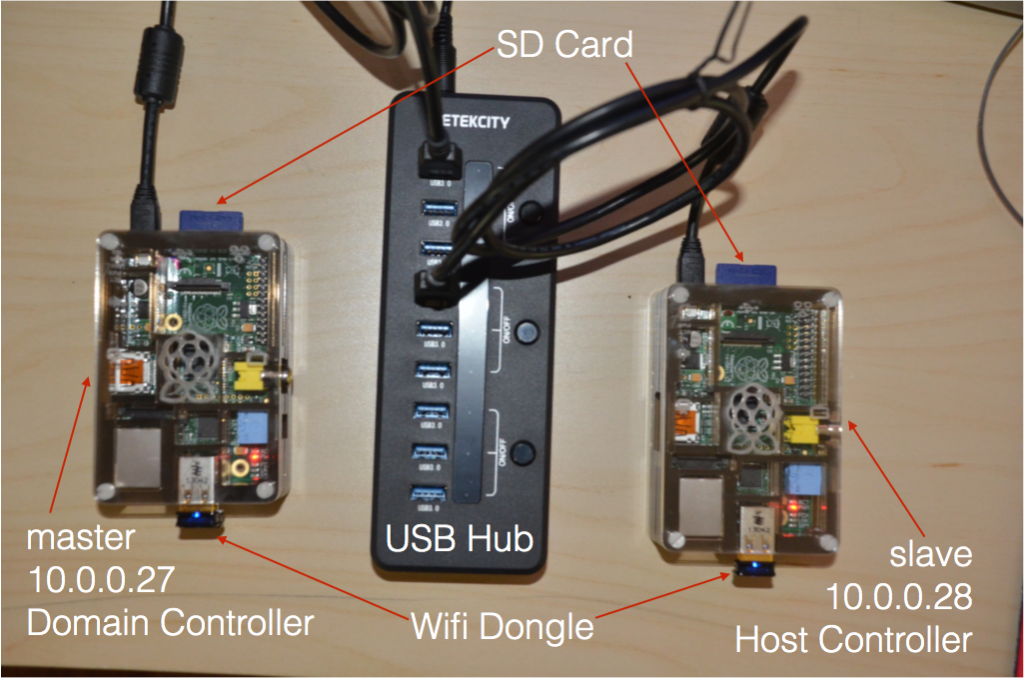
raspi-cluster-techtip28

Lets get started!

  1. Before installing any modules, including Apache, on Raspbian, the system needs to be fully updated:
    Trying to install Apache without updating the system will give weird errors:
    Now install Apache HTTP as:
    The log messages show that server’s name could not be determined, and 127.0.1.1 is instead used for ServerName. This can be fixed by editing “/etc/apache2/apache2.conf” and adding the following line:
  2. After Apache is installed, “mod_proxy” modules already exists in the “/usr/lib/apache2/modules” directory, and just need to enabled.Create “/etc/apache2/mods-enabled/mod_proxy.load” as:
    This file will be picked up via a direcinve in “/etc/apache2/apache2.conf”.

    Restart the server:

    If there are any errors, then you can see them in “/var/log/apache2/error.log” directory.

    The list of modules loaded can be seen using:

    The newly loaded modules are highlighted in bold.

  3. Provide convenient host names for each of the Raspberry Pis. The names chosen for each host is shown in the table below:
    IP Address Role Host Name
    10.0.0.27 Domain Controller raspi-master
    10.0.0.28 Host Controller raspi-slave
    10.0.0.29 Web Server raspi-apache

    This is enabled by editing “/etc/hostname” on each Raspberry Pi and changing “raspberrypi” to the given name.

    In addition, “/etc/hosts” on each Raspberry Pi need to make two entries of the following format:

    Here <IP Address> and <Host Name> for each host needs to be used from the table above.

    Finally, added the following entries on “/etc/hosts” on my local Mac:

    This ensures that any cookies are set from the same domain.

    Flush the DNS using:

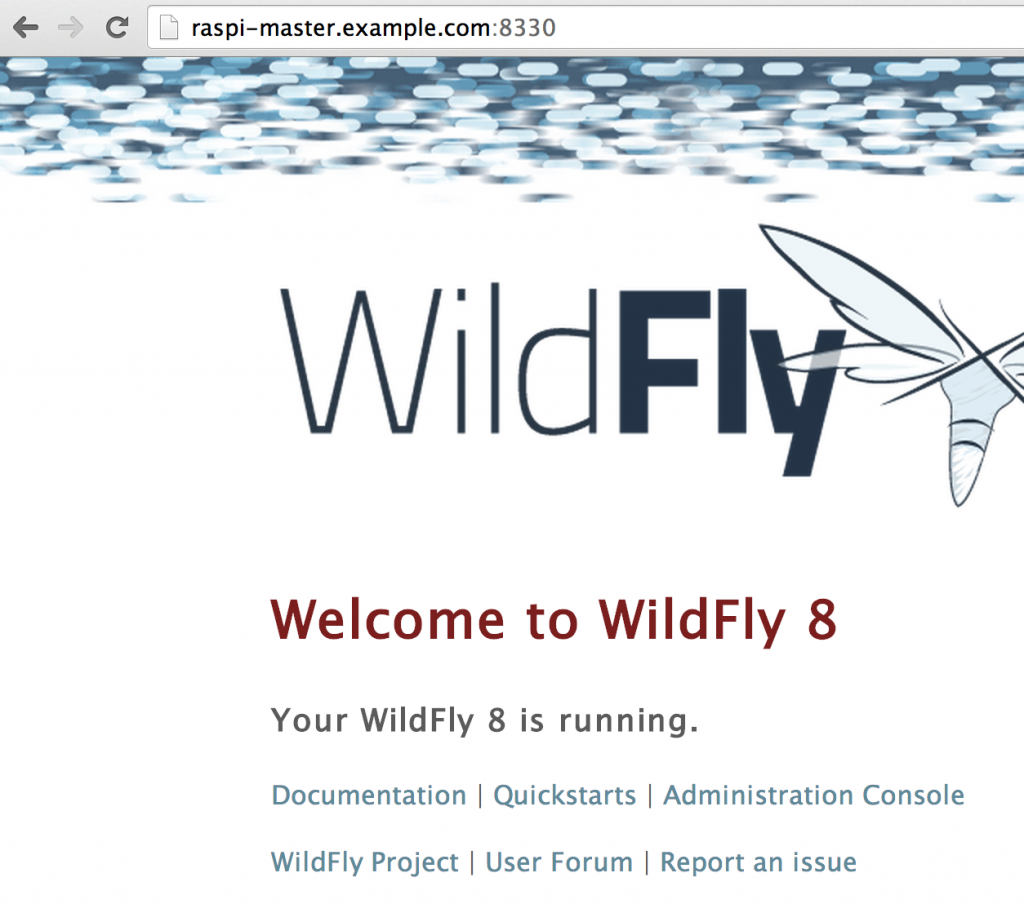
    Now raspi-master.example.com:8330 in the browser shows:

    raspi-master-defaultoutput-techtip28

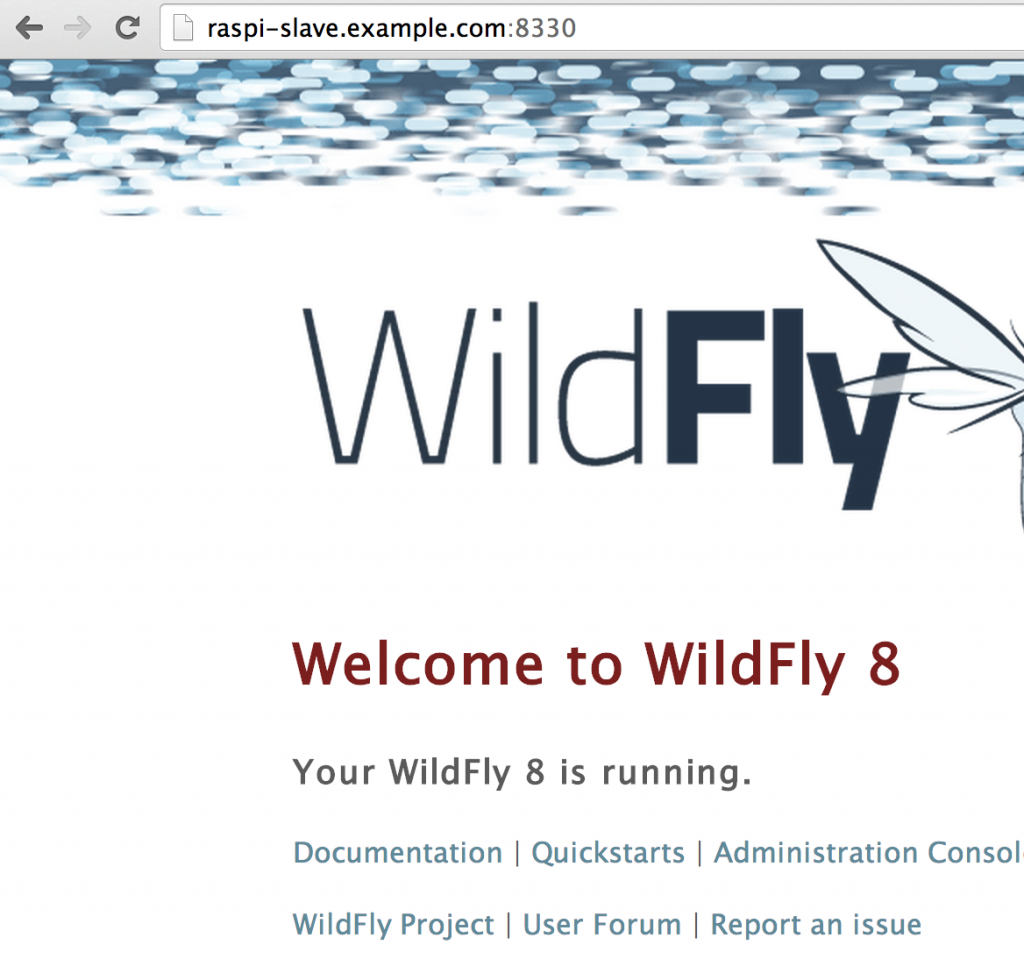
    And similarly raspi-slave.example.com:8330 shows:

    raspi-slave-default-output-techtip28

  4. Configure mod_proxy load balancer by editing “/etc/apache2/apache2.conf” and add the following lines at the end of the file:

    This directive provide load balancing between “master” and “slave”. “Header” and “ProxySet” directive provides sticky session.

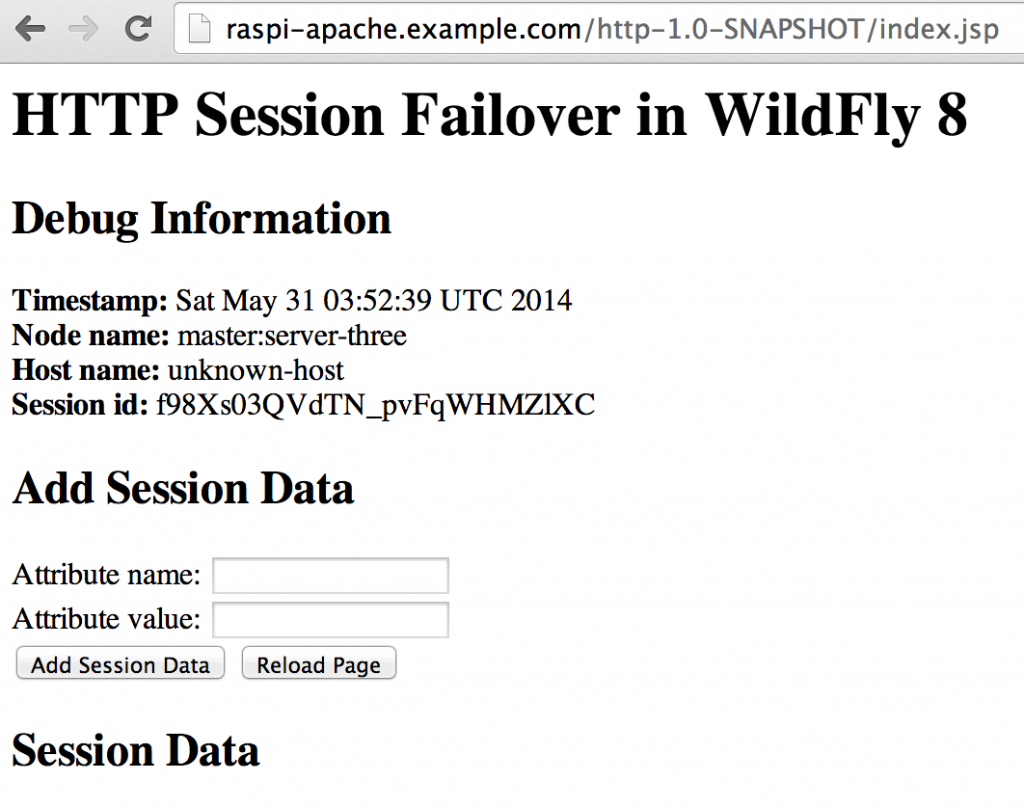
Now accessing raspi-apache.example.com/http-1.0-SNAPSHOT/index.jsp shows:

raspi-apache-default-output-techtip28

And so in three parts (part 1 and part 2), we learned how to setup a WildFly cluster on Raspberry Pi!

WildFly Managed Domain on Raspberry Pi (Tech Tip #27)

Tech Tip #25 showed how to configure WildFly on Raspberry Pi. This tech tip will show how to setup a WildFly managed domain over two hosts running on Raspberry Pi.

Lets understand some basic concepts first.

WildFly can run in two modes:

  • Managed Domain allows you to run and manage a multi-server domain topology
  • Standalone allows to run a single instance of server

Multiple standalone instances can be configured to form a highly available cluster. It is up to the user to coordinate management across multiple servers though.

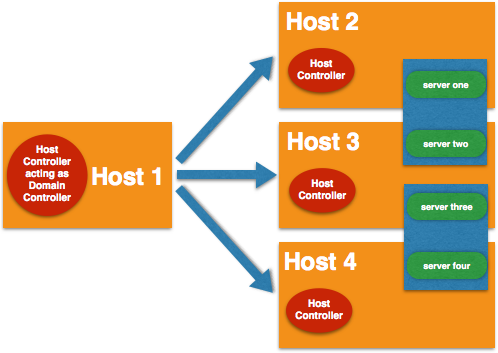
Servers running in managed domain mode are referred to as the members of a “domain”. A single Domain Controller acts as the central management control point for the domain. A domain can span multiple physical or virtual hosts, with all WildFly instances on a given host under the control of a Host Controller process. One Host Controller instance is configured to act as the Domain Controller. The Host Controller on each host interacts with the Domain Controller to control the lifecycle of the application server instances running on its host and to assist the Domain Controller in managing them.

It is important to understand that administration of servers (standalone or managed domain) is orthogonal to clustering and high availability. In the managed domain mode, a server instance always belong to a Server Group. A domain can have multiple Server Groups. Each group can be configured with different profiles and deployments.

wildfly-clustering-architecture-techtip27

For example, default WildFly installation comes with “main-server-group” and “other-server-group” as shown:

“main-server-group” has two servers: “server-one” and “server-two”. “other-server-group” has one server: “server-three”.

default-server-group-techtip27

By default, these are all configured on a single machine (localhost) with Host Controller and Domain Controller co-located. This is defined in “domain/configuration/host.xml”.

Each Server Group is configured with a profile. These profiles are defined, and associated with a Server Group, in “domain/configuration/domain.xml”. Default WildFly installation comes with two profiles: “full” and “full-ha”.

“main-server-group” is configured with “full” profile and “other-server-group” is configured with “full-ha” profile.

server-group-profiles-techtip27

Profile is a named set of subsystem configurations that adds capabilities like Servlet, EJB, JPA, JTA, etc. The “full-ha” profile also enable all subsystems needed to establish cluster (infinispan, jcluster, and mod_cluster).

OK, enough explanation, lets get into action!

Make sure to install WildFly on each of the Raspberry Pi following Tech Tip #25.

docs.jboss.org/author/display/WFLY8/WildFly+8+Cluster+Howto explain in detail on how to setup Domain Controller and Host Controller on two hosts and enable clustering. This tech tip follows these instructions and adapt them for WildFly. This tech tip will show how to configure WildFly managed domain over two Raspberry Pis.

raspi-cluster-techtip27

A subsequent blog will show how to configure cluster over this managed domain.

Here is what we’ll do:

  • Call one host as “master” and another as “slave”.
  • Both will run WildFly 8.1 CR2, master will run as Domain Controller and slave will run under the domain management of master
  • Deploy a project into domain, and verify that the application is deployed on both master and slave hosts.

Each WildFly was connected to a display to obtain the IP address and enable SSH access. It can be enabled by invoking

Scroll down to the SSH option and enable it. Then the two Raspberry Pis were configured to run in headless mode (no keyboard, mouse, or monitor).

raspi-wildfly-setup-techtip27

  1. Domain Configuration – Configure master and slave “host.xml”
    1. Master configuration
      1. Login to the master Raspberry pi:
        The default password is “raspberry”.
      2. By default, WildFly is configured to run in server VM. As mentioned in Tech Tip #25, this is not support on JDK bundled on Raspbian. This needs to be updated at two places. Edit “bin/domain.sh”:
        and remove the lines marked 80 through 110.
      3. Edit host.xml
        Remove “-server” option by removing lines 75 through 77 as shown below:
         
      4. The default setting for <interfaces> in this file looks like:
        Change this to:
        10.0.0.27 is master’s IP address.
    2. Slave configuration
      1. Login to the slave Raspberry pi:
        The default password is “raspberry”.
      2. Edit “domain.sh” and remove the lines as done for server. This will ensure that non-server, or client, JVM is used for running the domain.
      3. Edit “host.xml”
      4. Set the host name by changing
        to
      5. Remove “-server” option by removing lines 75 through 77 as explained above.
      6. Modify <domain-controller> such that slave can connect to master’s management port. Change
        to
        10.0.0.27 is master’s IP address.
      7. Change the default <interfaces> from:
        to:
        10.0.0.28 is slave’s IP address.
  2. Security Configuration
    1. Master
      1. Using “add-user.sh” script, create a user in Management Realm for master.
      2. Using “add-user.sh” script, create a user in Management Realm for slave. The username must be equal to the name given in the slave’s <host> element in “host.xml”.
        The answer to the last question is “yes” as this slave will be connecting to master.

        Note that output’s last line contains a <secret …> element. Copy this string as this will need to be used in slave’s “host.xml”.

    2. Slave
      1. Configure “domain/configuration/host.xml” for authentication by changing the security-realms element from:

        to

        The <secret …> element added here is obtained when “add-user.sh” is invoked for slave in the previous step. Slave’s host name is “slave”, master has a username by “slave”, and adding <secret …> element (base64 code for the password) allows the slave to connect to master.

  3. Change the default username/password for HornetQ otherwise it will throw a pesky warning in the server log as:

    Edit “domain/configuration/domain.xml” in master and change:

    to

    Make this change in “domain/configuration/domain.xml” for slave as well.

  4. Disable the firewall on master and slave by giving the following command on each host.

  5. Start the master first as:

    The last message in the log will look like:

    After the master has completely started, start the slave as:

    The last message in the log will look like:

    The server log for master will also show a message indicating that the slave is now a registered host with master:

  6. Deploy the application
    1. Check out a simple application that puts/gets some HTTP session data.

      This workspace has other samples related to WildFly. But the one that we care about it is in “clustering/http” directory. Change to that directory and build the sample as:

      This will generate a WAR file in the “target” directory.

    2. “jboss-cli” is a Command Line management tool for standalone and managed domains. It is bundled as a script in the “bin” directory. It can connect to remote servers as well. Now that we’ve Domain Controller running on master and Host Controller running on slave, lets connect it from your local machine as:

      10.0.0.27 is IP address of the master. The generated WAR file can now be deployed as:

      This shows the following output in master’s log:

      And slave’s log shows:

Accessing the application on master (http://10.0.0.27:8330/http-1.0-SNAPSHOT/index.jsp) shows:

master-default-output-techtip27

Accessing the application on slave (http://10.0.0.28:8330/http-1.0-SNAPSHOT/index.jsp) shows:

slave-default-output-techtip27

So we could easily deploy a Java EE application to multiple WildFly instances, running on RaspberryPi, in managed domain mode, with a single command. How cool ?

Next blog will explain how to setup cluster on these multiple instances.

WildFly on Raspberry Pi (Tech Tip #25)

WildFly is a lightweight, extremely flexible, highly manageable, Java EE 7 compliant, open source Application Server. Raspberry Pi (a.k.a. Raspi) is a credit-card sized computer that plugs into a computer monitor or TV, and uses a standard USB keyboard and mouse. It was created with the intention of promoting teaching of basic computer science in schools.

raspi-wildfly

This tech tip will show how you can get WildFly running on Raspberry Pi.

The latest model of Raspi is Model B that consists of:

  • 512 MB RAM
  • Two USB ports
  • One ethernet port

Raspi does not come with a storage device, not even for the operating system. But there is a slot for SD card that can be used for booting and persistent storage.

So, what else do you need to get going ?

  • One 8GB SD card
  • SD card writer so that you can burn the operating system on the card, typically in-built on Macs
  • Power supply to the unit, a 5V micro-USB connector
  • HDMI cable for connecting to a monitor/TV. You may need an adapter depending upon what is being used for display
  • USB mouse and keyboard. A wireless mouse and keyboard with a common USB dongle would be better (uses only one of the two USB ports)
  • Wifi dongle or Ethernet cable
  • Optionally, USB hub depending upon how many USB connections are made to Raspi

The original intention of Raspi was to promote teaching of basic computer science in schools. But people have all sorts of fun things with Raspi, including a super computer.

Lets get started!

  1. Easiest way to get started with Raspi is using New Out Of The Box Software (NOOBS). on SD card. The installation instructions are clearly documented here.
  2. Insert the prepared SD card, plugin the dongles and cables as shown. Make sure that the cable to laptop is connected after all others have been connected.raspi-setup
  3. The display flashes with lovely rainbow colors and then reads the card as shown:1
  4. The list of operating systems that can be installed are shown. Choose Raspbian, the first and recommended option. Change the default language and keyboard to whatever is appropriate, US in my case. Click on “Install”.2This warns that all the data on the card will be overwritten:

    3

    Clicking on “Yes” will start the Raspbian installation.

    4

    56

    The following message is shown when operating system is completed installed:

    7

    Or a more close up view:

    8

  5. Clicking on “OK” shows the following configuration menu:9Use arrow keys to go through the menu until “Finish” is selected as shown:

    10

    This will bring you to the shell. Type “startx” to start the GUI which looks like as
    shown:

    11

  6. First step here is to configure Wi-Fi. Click on “Wifi Config” icon on the desktop to see the window as shown:12
  7. Click on “Scan” to scan the list of network SSIDs that can be connected to. Another window pops up, click “Scan” again to see the list of network ids as:13Double-click on the SSID that you can connect to see a window as:14

    I had to manually change the value of Authentication from “WPA2-Personal (PSK)” to “WPA-Personal (PSK)”. Enter the wireless password and click on “Add”. The following window should be shown:

    15

  8. Open a terminal by clicking on “Terminal” on the desktop and check your network configuration looks good. Raspbian comes bundled with JDK 7 and you can check the version for that as well as shown:16
  9. Download WildFly 8.1 CR2 (latest release as of today) by giving the following command in the shell:

    Unzip WildFly as:

  10. By default WildFly is configured to run in the server VM. Trying to run the default WildFly installation gives the following error:

    This can be easily worked around by editing “wildfly-8.1.0.CR2/bin/standalone.sh” as:

    And removing line 214 and 215 which looks like:

    WildFly can now be easily started by giving the command “”wildfly-8.1.0.CR2/bin/standalone.sh” and shows the output as:

    17

  11. NetSurf is the default browser that can be started by clicking on the start bar on bottom left, selecting Internet, and then “Net Surf Web” as shown:18The browser looks like:

    19

  12.  Finally access the WildFly default home page at http://127.0.0.1:8080:20

That’s it!

What crazy thing are you going to use WildFly and Raspberry Pi for now ? :-)