Tag Archives: java

Creating Smaller Java Image using Docker Multi-stage Build

Two of the announcements at DockerCon 2017 directly relevant to Java developers are:

  • Docker Multi-stage build
  • Oracle JRE in Docker Store

This blog explains the purpose of Docker multi-stage build and provide examples of how they help us generate smaller and more efficient Java Docker images.

Docker Multi-stage Build

Just show me the code: github.com/arun-gupta/docker-java-multistage.

What is the issue?

Building a Docker image for a Java application typically involves building the application and package the generated artifact into an image. A Java developer would likely use Maven or Gradle to build a JAR or WAR file. If you are using the Maven base image to build the application then it will download the required dependencies from the configured repositories and keep them in the image. The number of JARs in the local repository could be significant depending upon the number of dependencies in the pom.xml. This could leave a lot of cruft in the image.

Let’s take a look at a sample Dockerfile:

In this Dockerfile:

  • maven:3.5-jdk-8 is used as the base image
  • Application source code is copied to the image
  • Maven is used to build the application artifact
  • WildFly is downloaded and installed
  • Generated artifact is copied to the deployments directory of WildFly
  • Finally, WildFly is started

There are several issues with this kind of flow:

  • Using maven as the base image restricts on what functionality is available in the image. This requires WildFly to be downloaded and configured explicitly.
  • Building the artifact downloads all Maven dependencies. These stay in the image and are not needed at runtime. This causes an unnecessary bloat in the image size at runtime.
  • Change in WildFly version will require to update the Dockerfile. This would’ve been much easier if we could use the jboss/wildfly base image by itself.
  • In addition, unit tests may run before packaging the artifact and integration tests after the image is created. The test dependencies and results is again not needed to live in the production image.

There are other ways to build the Docker image. For example, splitting the Dockerfile into two files. The first file will then build the artifact and copy the artifact to a common location using volume mapping. The second file will then pick up the generated artifact and then use the lean base image. This approach has also has issues where multiple Dockerfiles need to be maintained separately. Additional, there is an out-of-band hand-off between the two Dockerfiles.

Let’s see how these issues are resolved with multi-stage build.

What are Docker multi-stage build?

Multi-stage build allows multiple FROM statements in a Dockerfile. The instructions following each FROM statement and until the next one, creates an intermediate image. The final FROM statement is the final base image. Artifacts from intermediate stages can be copied using COPY --from=<image-number>, starting from 0 for the first base image. The artifacts not copied over are discarded. This allows to keep the final image lean and only include the relevant artifacts.

FROM syntax is updated to specify stage name using as <stage-name>. For example:

This allows to use the stage name instead of the number with --from option.

Let’s take a look at a sample Dockerfile:

In this Dockerfile:

  • There are two FROM instructions. This means this is a two-stage build.
  • maven:3.5-jdk-8 is the base image for the first build. This is used to build the WAR file for the application. The first stage is named as BUILD.
  • jboss/wildfly:10.1.0.Final is the second and the final base image for the build. WAR file generated in the first stage is copied over to this stage using COPY --from syntax. The file is directly copied in the WildFly deployments directory.

Let’s take a look at what are some of the advantages of this approach.

Advantages of Docker multi-stage build

  • One Dockerfile has the entire build process defined. There is no need to have separate Dockerfiles and then coordinate transfer of artifact between “build” Dockerfile and “run” Dockerfile using volume mapping.
  • Base image for the final image can be chosen appropriately to meet the runtime needs. This helps with reduction of the overall size of the runtime image. Additionally, the cruft from build time is discarded during intermediate stage.
  • Standard WildFly base image is used instead of downloading and configuring the distribution manually. This makes it a lot easier to update the image if a newer tag is released.

Size of the image built using a single Dockerfile is 816MB. In contrast, the size of the image built using multi-stage build is 584MB.

Docker Multi-stage Java Image

So, using a multi-stage helps create a much smaller image.

Is this a typical way of building Docker image? Are there other ways by which the image size can be reduced?

Sure, you can use docker-maven-plugin as shown at github.com/arun-gupta/docker-java-sample to build/test the image locally and then push to repo. But this mechanism allows you to generate and package artifact without any other dependency, including Java.

Sure, maven:jdk-8-alpine image can be used to create a smaller image. But then you’ll have to create or find a WildFly image built using jdk-8-alpine, or something similar, as well. But the cruft, such as maven repository, two Dockerfiles, sharing of artifact using volume mapping or some other similar technique would still be there.

There are other ways to craft your build cycle. But if you are using Dockerfile to build your artifact then you should seriously consider multi-stage builds.

Read more discussion in PR #31257.

As mentioned earlier, the complete code for this is available at github.com/arun-gupta/docker-java-multistage.

Sign up for Docker Online Meetup to get a DockerCon 2017 recap.

Deployment Pipeline using Docker, Jenkins, Java and Couchbase

This blog explains how to create a Deployment Pipeline using Jenkins and Docker for a Java application talking to a database.

Jenkins support the creation of pipelines. They are built with simple text scripts that use a Pipeline DSL (domain-specific language) based on the Groovy programming language.

The script, typically called Jenkinsfile, defines multiple steps to execute both simple and complex tasks according to the parameters that you establish. Once created, pipelines can build code and orchestrate the work required to drive applications from commit to delivery.

A pipeline consists of steps, node and stage. A pipeline is executed on a node – a computer that is part of Jenkins installation. A pipeline often consists of multiple stages. A stage consists of multiple steps. Read Getting Started with Pipeline for more details.

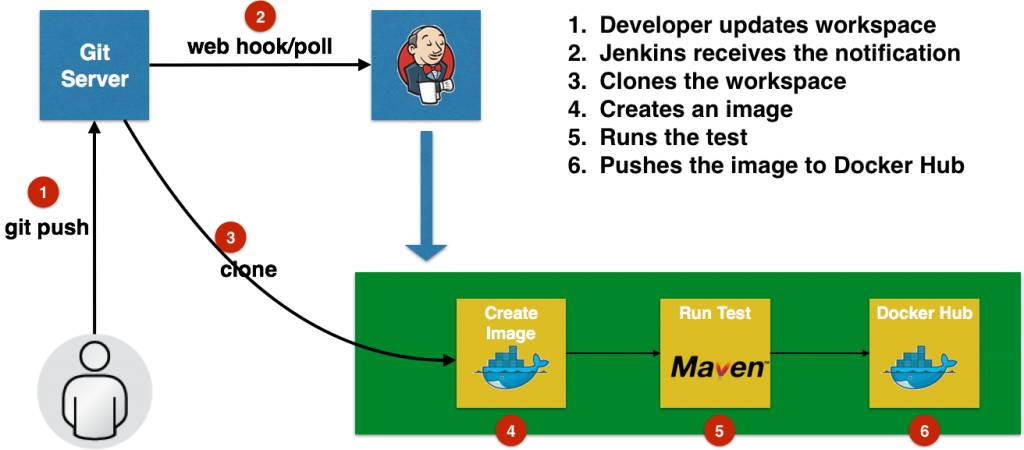
For our application, here is the basic flow:

docker-pipeline-jenkins

Complete source code for the application used is at github.com/arun-gupta/docker-jenkins-pipeline.

The application is defined in the webapp directory. It opens a connection to the Couchbase database and stores a simple JSON document using Couchbase Java SDK. The application also has a test that verifies that the database indeed contains the document that was persisted.

Many thanks to @alexsotob for helping me with Jenkins configuration.

Let’s get started!

Download and Install Jenkins

  • Download Jenkins from jenkins.io. This was tested with Jenkins 2.21.
  • Start Jenkins:
    This command starts Jenkins by specifying the home directory where all the configuration information is stored. It also defines the port on which Jenkins is listening, 9090 in this case.
  • First start of Jenkins shows the following message in the console:
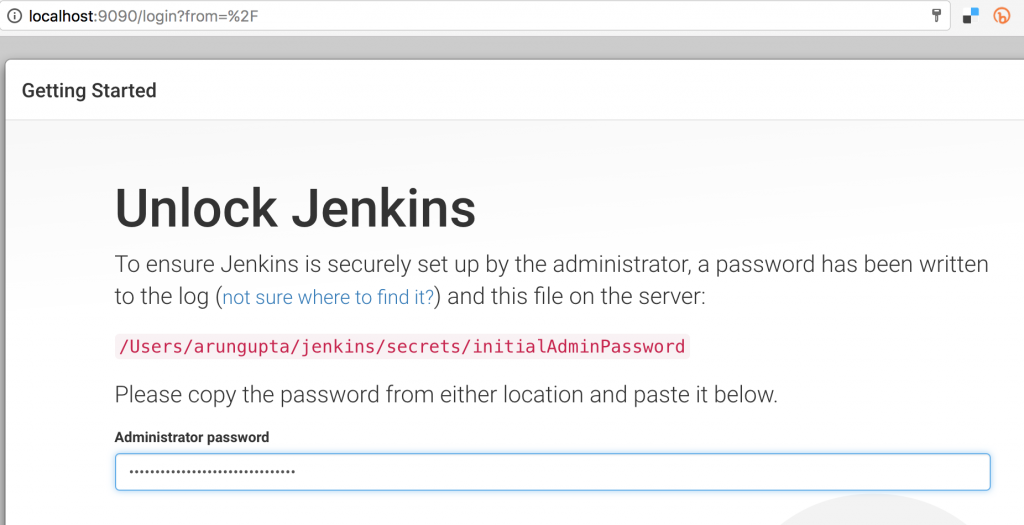
    Copy the password shown here. This will be used to unlock Jenkins.
  • Access the Jenkins console at localhost:9090 and paste the password:docker-pipeline-jenkins-unlockClick on Next.
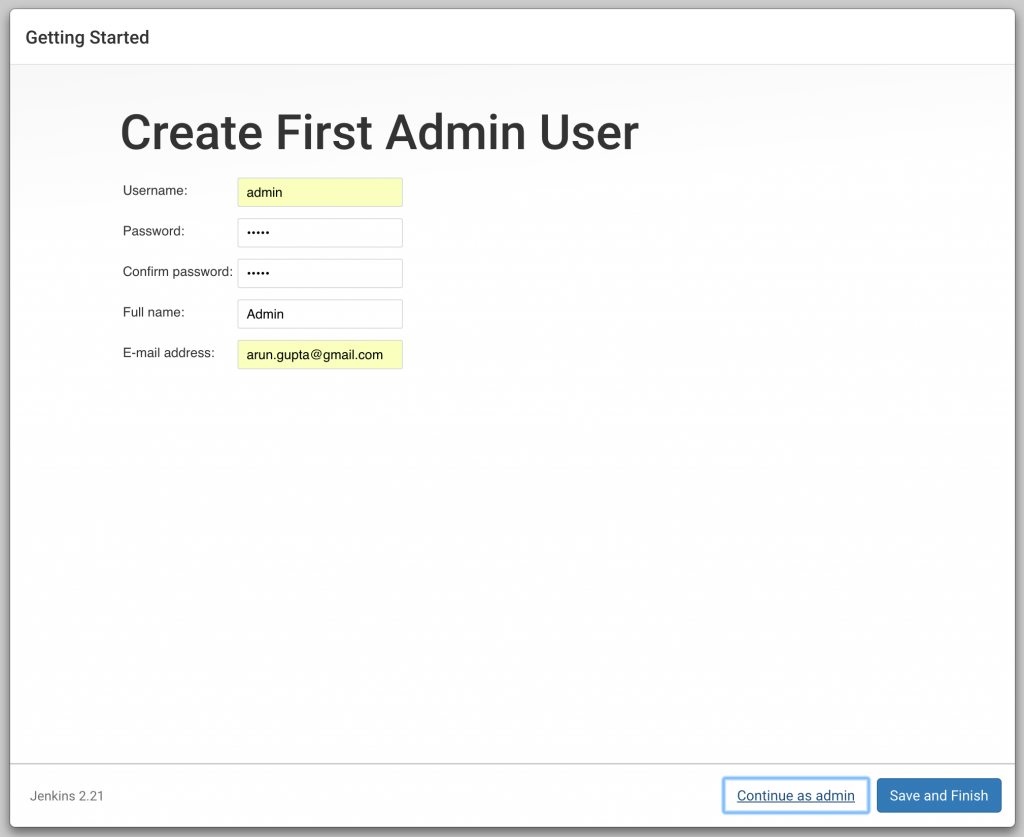
  • Create the first admin user as shown:
    docker-pipeline-jenkins-create-admin-user
    Click on Save and Finish.
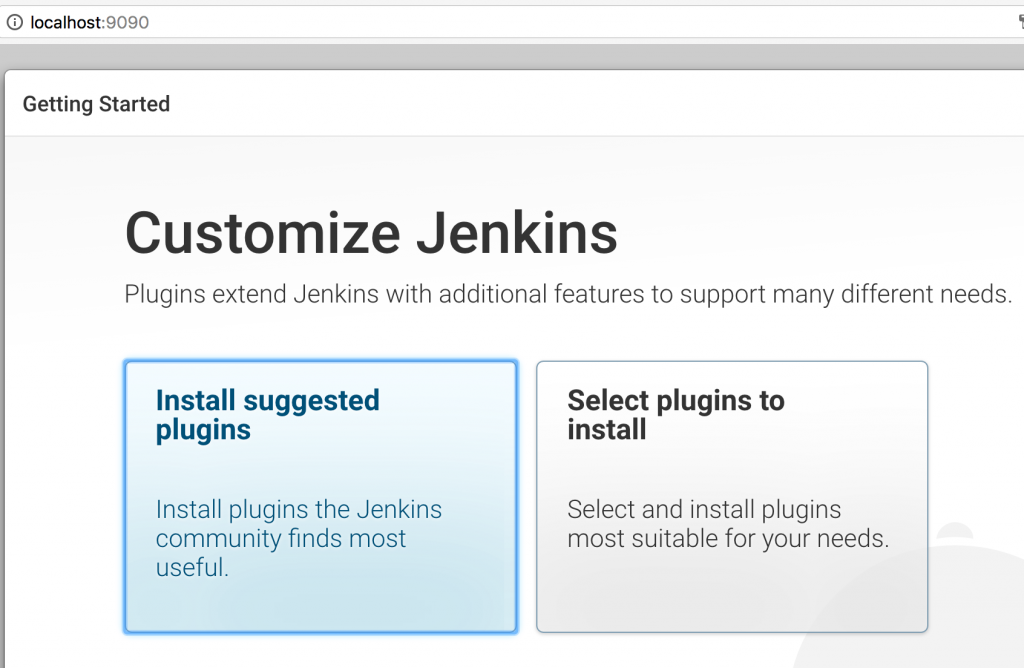
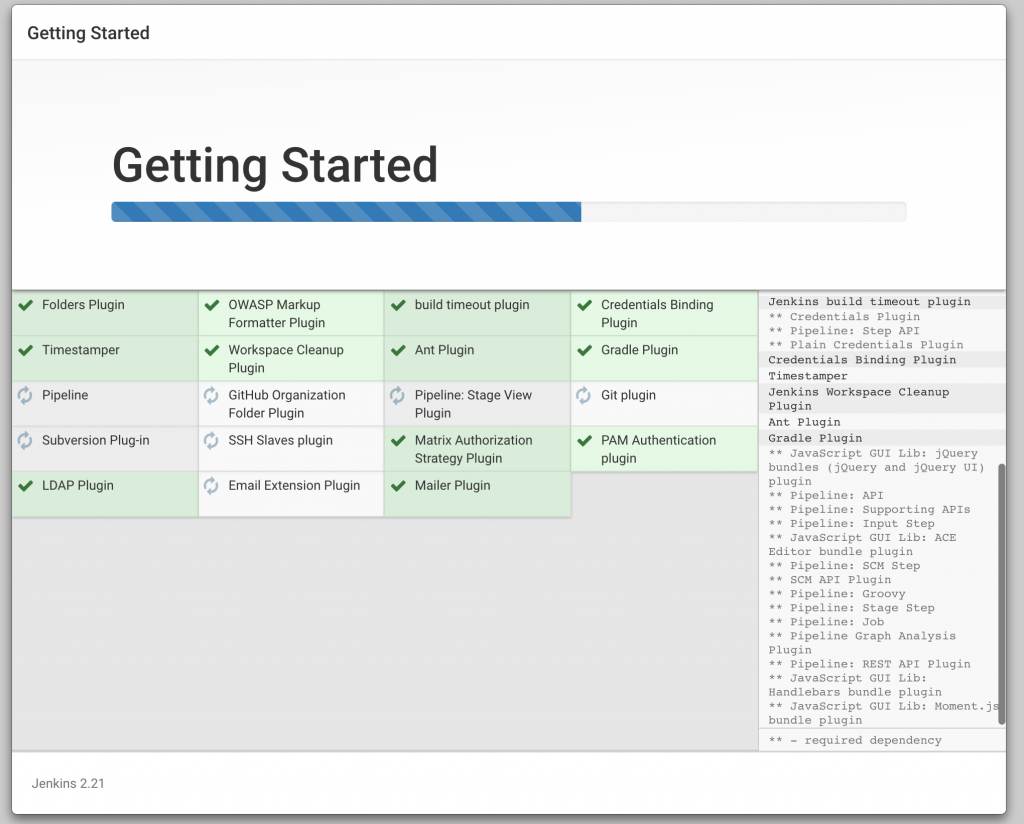
  • Click on Install suggested plugins:docker-pipeline-jenkins-install-suggested-plugins
    A bunch of default plugins are installed:docker-pipeline-jenkins-installing-suggested-plugins
    Found it surprising that Ant and Subversion are the default plugins.
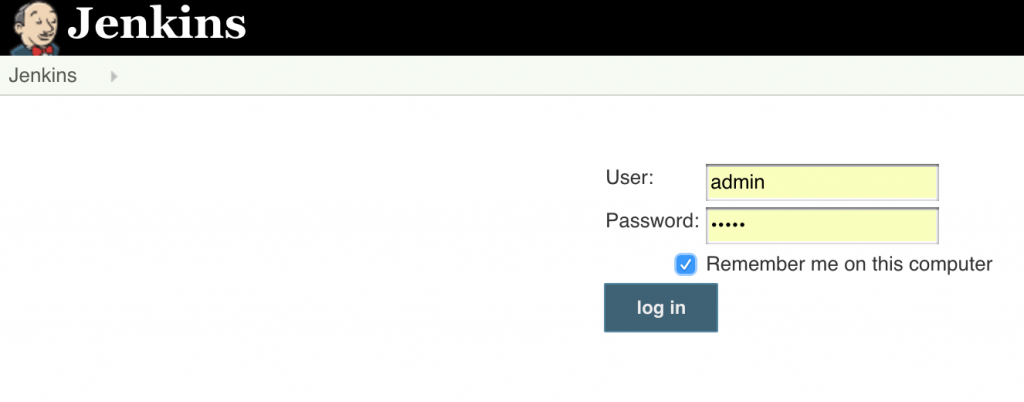
  • Login screen is prompted.
    docker-pipeline-jenkins-login
    Enter the username and password specified earlier.
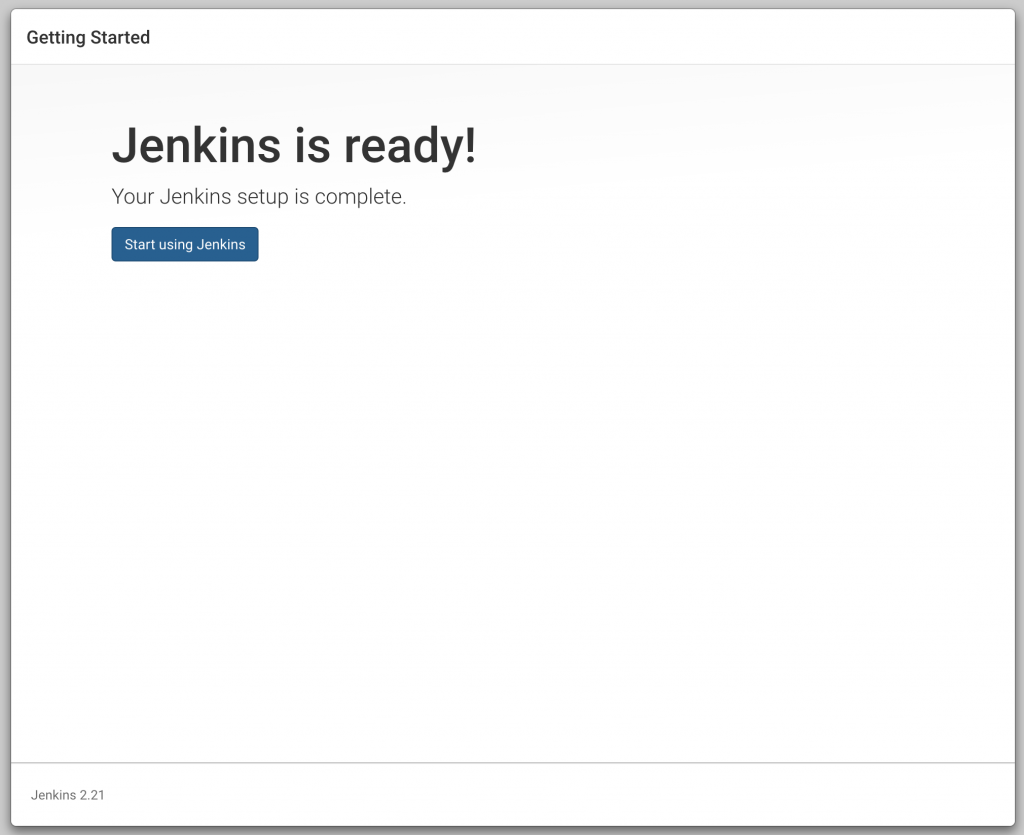
  • Finally, Jenkins is ready to use:
    docker-pipeline-jenkins-start-using

That’s quite a bit of steps to get started with basic Jenkins. Do I really have to jump through all these hoops to get started with Jenkins? Is there an easier, simpler, dumber, lazier way to start Jenkins? Follow Convention-over-Configuration and give me one-click pre-configured installation.

Install Jenkins Plugins

Install the required plugins in Jenkins.

  1. If your Java project is built using Maven, then you need to configure Maven in Jenkins. Click on Manage Jenkins, Global Tool Configuration, Maven installations, and specify the location of Maven.docker-pipeline-jenkins-configure-maven
    Name the tool as Maven3 as that is the name used in the configuration later.Again a bit lame, why can’t Jenkins pick up the default location of Maven instead of expecting the user to specify a location.
  2. Click on Manage Jenkins, Manage Plugins, Available tab, search for docker pipe. Select CloudBees Docker Pipeline, click on Install without restart.
    docker-pipeline-jenkins-pipeline-plugin
    Click on Install without restart.Docker Pipeline Plugin plugin understands the Jenkinsfile and executes the commands listed there.
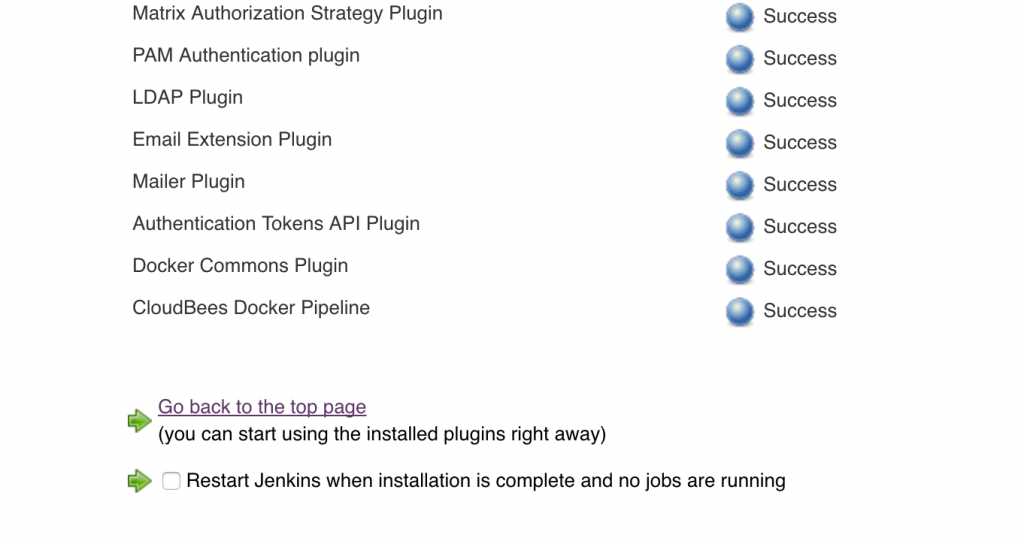
  3. Next screen shows the list of plugins that are installed:docker-pipeline-jenkins-pipeline-plugin-restart-jenkins
    The last line shows that CloudBees Docker Pipeline plugin is installed successfully. Select Restart Jenkins checkbox. This will install restart Jenkins as well.

Create Jenkins Job

Let’s create a job in Jenkins that will run the pipeline.

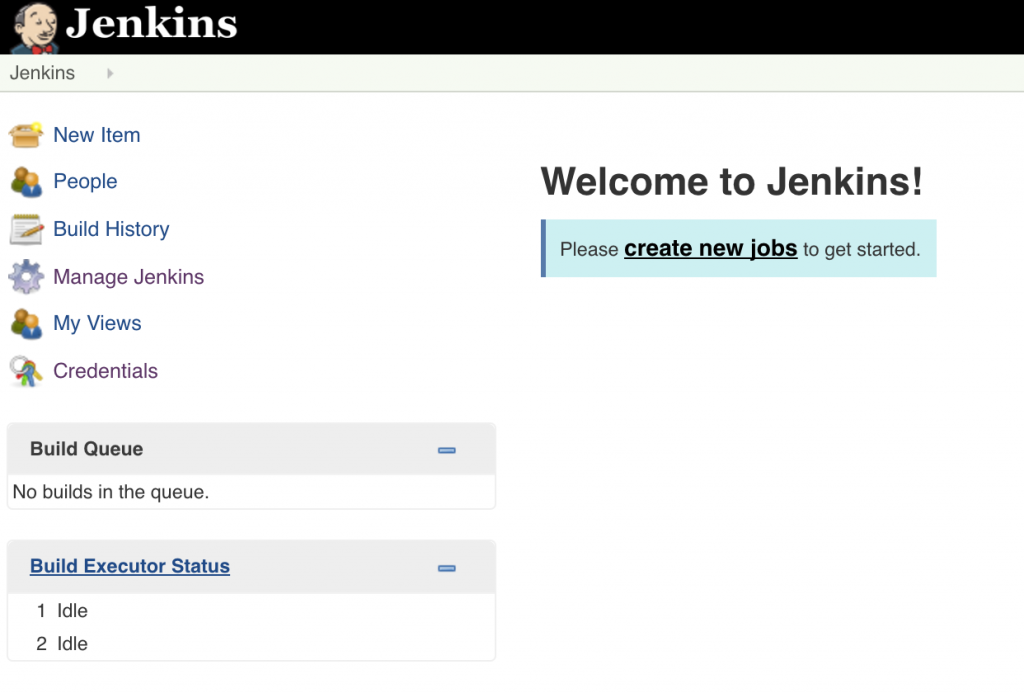
  1. After Jenkins restarts, it shows the login screen. Enter the username and password created earlier. This brings you back to Installing Plugins/Upgrades page. Click on the Jenkins icon in the top left corner to see the main dashboard:docker-pipeline-jenkins-dashboard
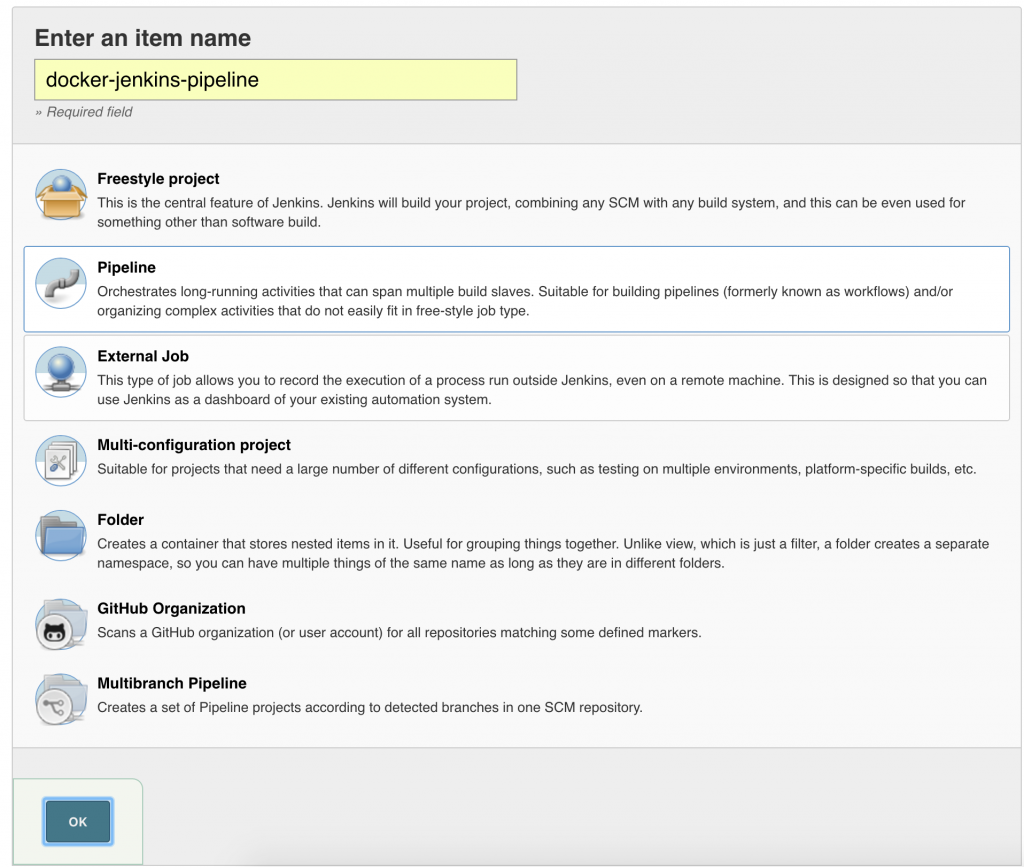
  2. Click on create new jobs, give the name as docker-jenkins-pipeline and choose the type as Pipeline:docker-pipeline-jenkins-create-projectClick on OK.
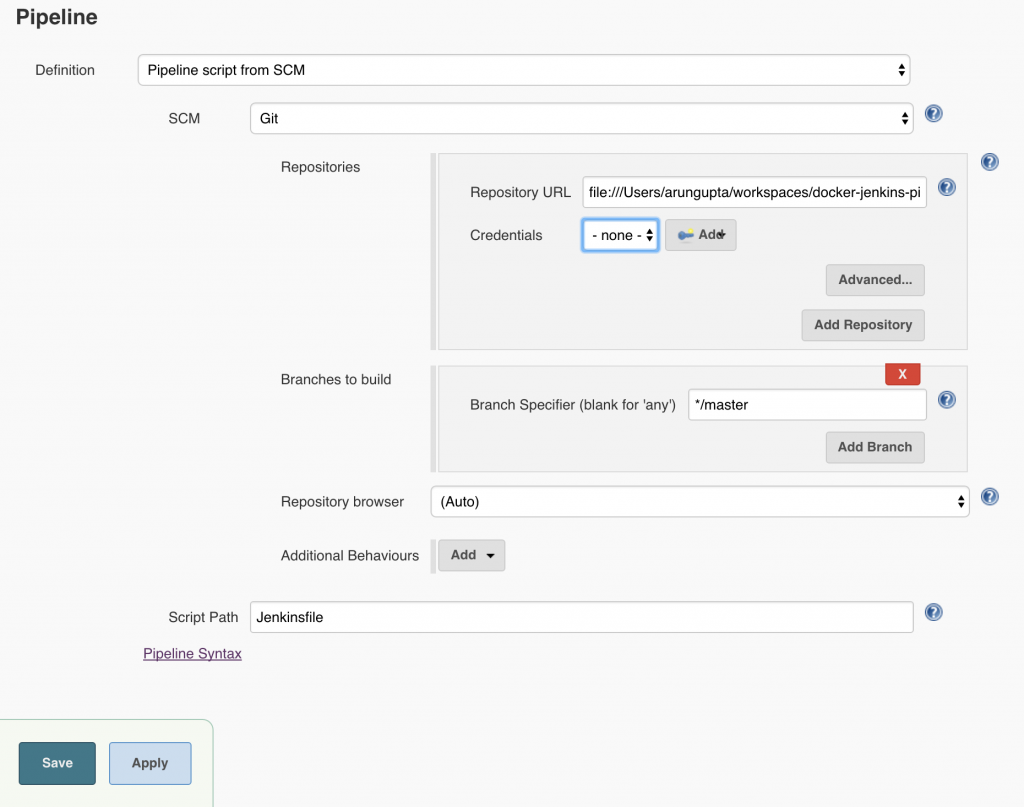
  3. Configure Pipeline as shown:
    docker-pipeline-jenkins-configure-pipelineLocal git repo is used in this case. You can certainly choose a repo hosted on github. Further, this repo can be configured with a git hook or poll at a constant interval to trigger the pipeline.Click on Save to save the configuration.

Run Jenkins Build

Before you start the job, Couchbase database need to be explicitly started as:

This will be resolved after #9 is fixed.  Make sure you can access Couchbase at http://localhost:8091, use Administrator as the login and password as the password. Click on Data Buckets tab and see the books bucket created.

docker-pipeline-couchbase-books

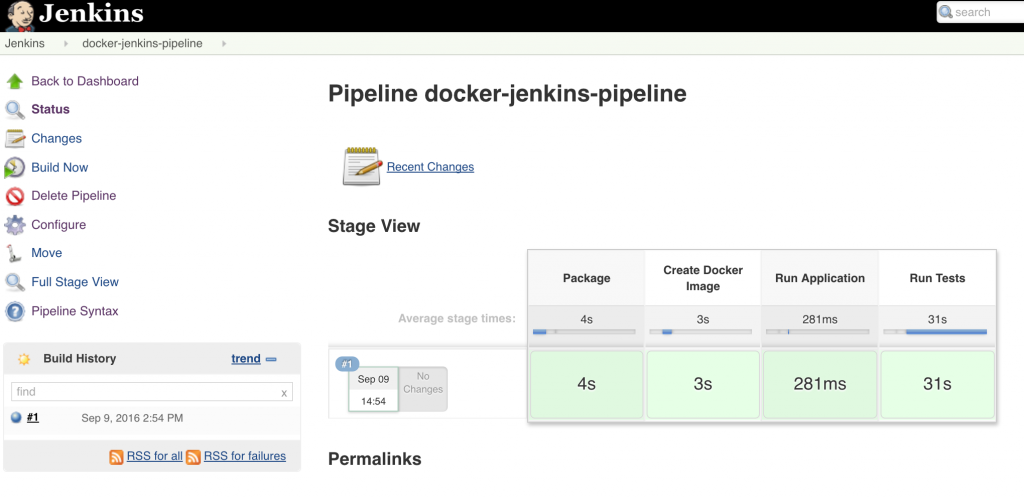
Click on Build Now and you should see an output similar to:

docker-pipeline-jenkins-build-run

All green is good!

Let’s try to understand what happened behind the scene.

Jenkinsfile describes how the pipeline is built. At the top level, it has four stages – Package, Create Docker Image, Run Application and Run Tests. Each stage is shown as a box in Jenkins dashboard. Total time taken for each stage is shown in the box.

Let’s understand what happens in each stage.

  • Package – Application source code lives in the webapp directory. Maven command mvn clean package -DskipTests is used to create a JAR file of the application. Note that the maven project also includes the tests and are explicitly skipped using -DskipTests. Typically, tests would be in a separate downstream project.Maven project creates a far JAR file of the application and includes all the dependencies.
  • Create Docker Image – Docker image of the application is built using the Dockerfile in the webapp directory. The image simply includes the fat JAR and runs it using java -jar.Each image is tagged with the build number using ${env.BUILD_NUMBER}.
  • Run Application – Running the application involves running the application Docker container.IP address of the database container is identified using the docker inspect command.The database container and the application container are both running in the default bridge network. This allows the two containers to communicate with each other. Another enhancement would be to run the pipeline in a swarm mode cluster. This would require to create and use an overlay network.
  • Run Tests – Tests are run against the container using the mvn test command. If the tests pass the image is pushed to Docker Hub. The test results are captured either way.This stage also shows the usage of try/catch/finally block in Jenkinsfile.If the tests pass then the image is pushed to Docker Hub. In this case, it is available at hub.docker.com/r/arungupta/docker-jenkins-pipeline/tags/.

Some TODOs …

  • Move the tests to a downstream project (#7)
  • Use Git hook or poll to trigger pipeline (#8)
  • Automate database startup/shutdown (#9)
  • Run pipeline in a cluster of Docker Engines with Swarm mode (#10)
  • Show alternate configuration to push image to bintray (#11)

Another pain point is that global variables syntax does not seem to be documented anywhere. It is only available at <JENKINS-HOST>:<JENKINS-PORT>/job/docker-jenkins-pipeline/pipeline-syntax/globals. This is again slightly lame!

“not impossible, just not implemented yet” #sadpanda

Some further references to read:

  • Getting Started with the Jenkinsfile
  • CloudBees Docker Pipeline Plugin
  • CloudBees Docker Pipeline Plugin User Guide
  • Jenkinsfile DSL Reference
  • Jenkins Pipeline Talk from JavaZone 2016

More information about Couchbase:

  • Couchbase Developer Portal
  • Couchbase Forums
  • @couchbasedev or @couchbase

Feel free to file bugs at github.com/arun-gupta/docker-jenkins-pipeline/issues or send PR.

Source: blog.couchbase.com/2016/september/deployment-pipeline-docker-jenkins-java-couchbase

JavaOne4Kids 2015 Wrapup – Devoxx4Kids and Oracle Academy Together!

JavaOne4Kids is focused on promoting technology to next generation of developers; kids who want to learn more about programming, robotics and engineering.

Oracle Academy collaborated with Devoxx4Kids to bring kids content that includes several topics like Minecraft Modding, Java, Python, Scratch, Raspberry Pi, Arduino, NAO robot, LEGO Mindstorms, Greenfoot, Alice, and others at JavaOne 2015.

The attendance grew 3x from last year and it was certainly very heartening to see that!

If you live in/around San Francisco Bay Area, and want a more continued experience through out the year, then its highly recommend to join meetup.com/Devoxx4Kids-BayArea/!

Here are some statistics from the event:

javaone4kids-2015-boys-girls

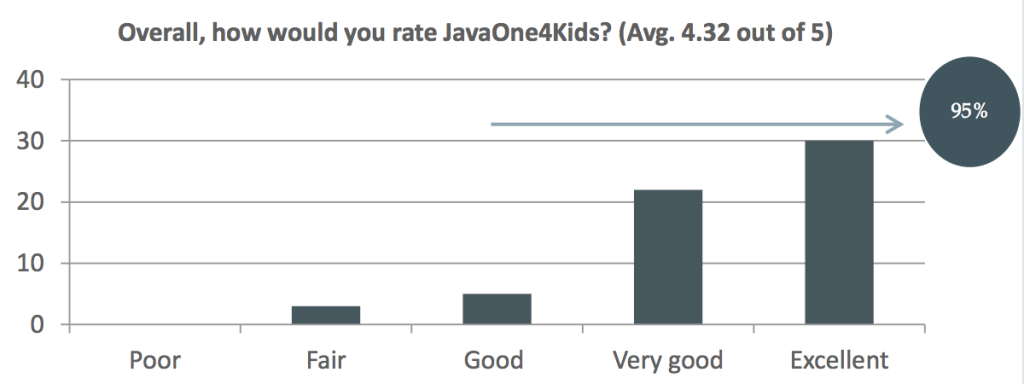
A survey was sent to the attendees and some of them responded back. 95% of responses rated were happy with the event:

javaone4kids-2015-rate

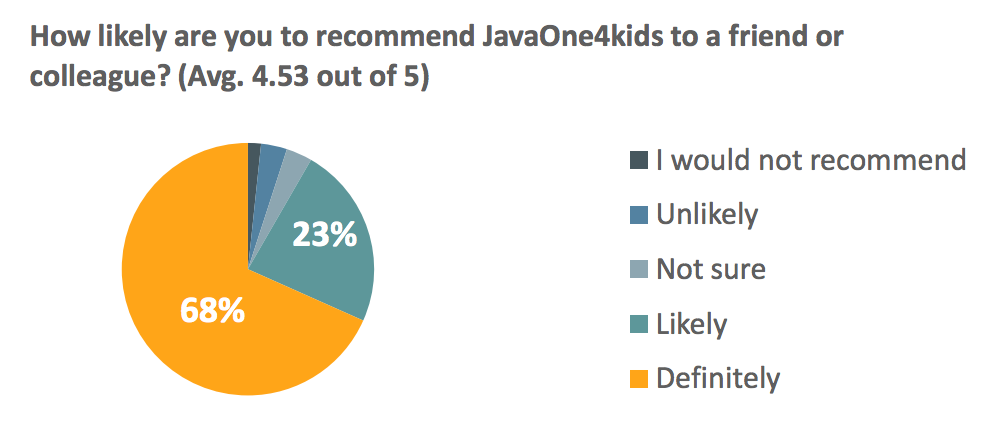
90%+ would recommend JavaOne4Kids to a friend:

javaone4kids-2015-recommend

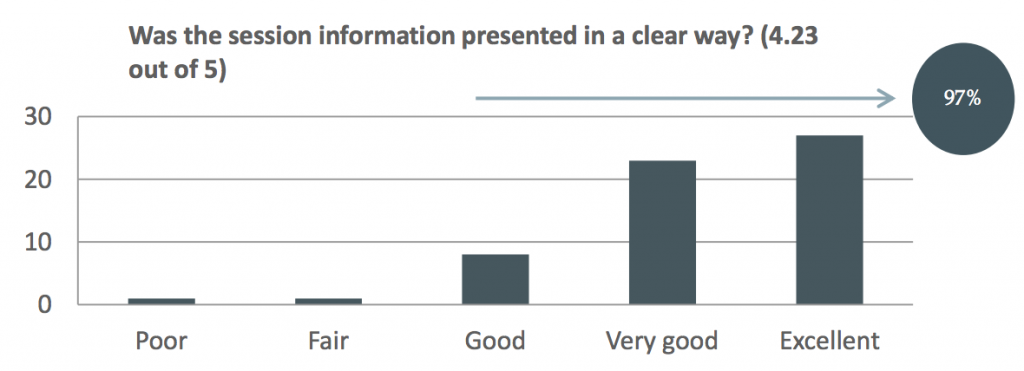
Instructors seem to have done a good job with 97% presenting in good, very good, and excellent way:

javaone4kids-2015-clear-way

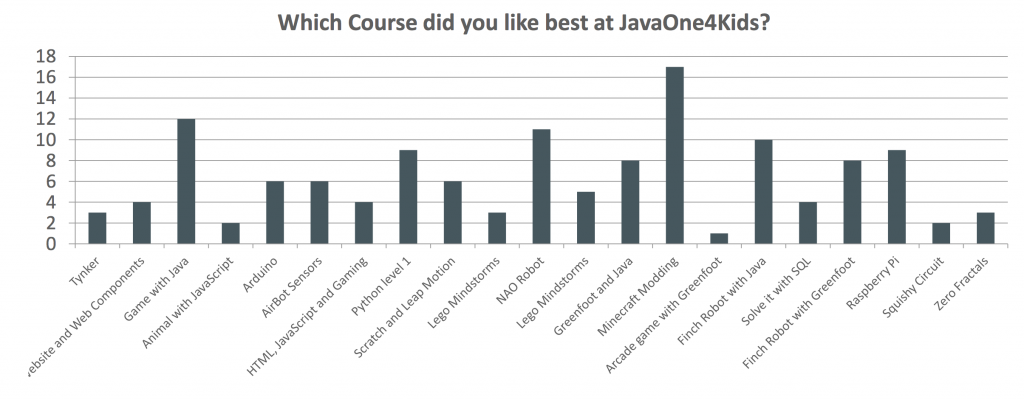
Minecraft Modding continues to be the top rated workshop:

javaone4kids-2015-course

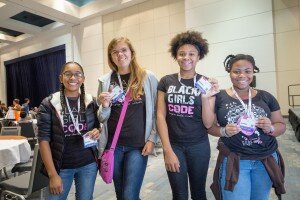
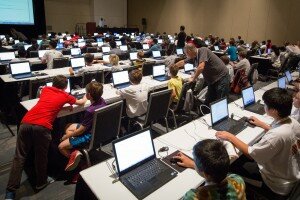
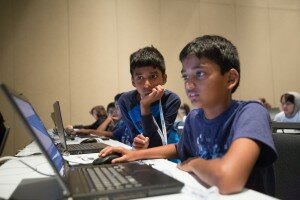
Here are some pictures from the event:

 
 Oracle Oracle
 Oracle Oracle
 Oracle Oracle


Check out the complete album:

JavaOne4Kids 2015 Album

Picture is worth a thousand words, and a video is worth a million words. Check out kids in action from the event, and then subsequently in JavaOne Community Keynote:

It takes a village to run an event like this. This was certainly not possible without the impeccable support from Oracle team, instructors, and volunteers who helped us through out the event!

Do we expect these kids to come back to again next year? Yes, absolutely!

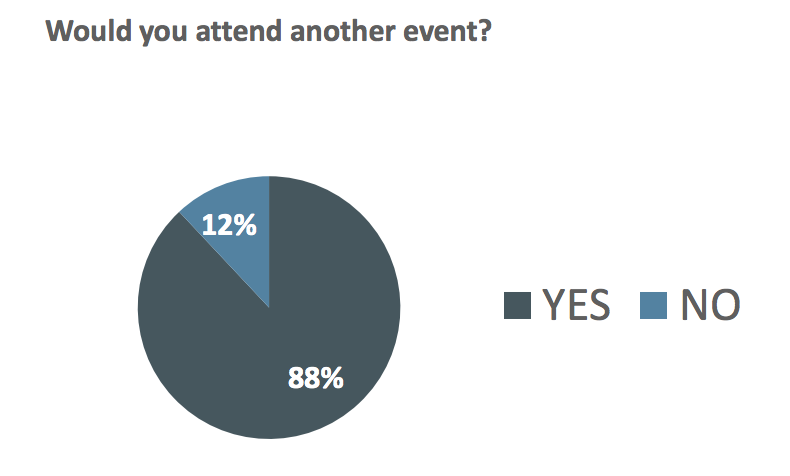
At least, 88% of them want to come back :)

javaone4kids-2015-another-event

Don’t forget to join the local meetup.com/devoxx4kids-bayarea for local events in Bay Area.

Gilt and Microservices: Why and How

Gilt.com provides instant insider access to top designer labels, at up to 70% off retail. The company went through growing pains when the monolithic application was not able to handle the needs of growing business demand. They looked at microservices for a scalable solution and are one of the live examples of how they are using it effectively to keep up with the velocity and agility of the business.

  • What was the need to refactor monolithic application to microservice?
  • What is the technology stack?
  • Is JVM relevant?
  • Relevance of containers
  • Is DevOps a requirement for microservices?
  • Should the microservices be fully contained or can the data be shared?

Watch the answer to these questions in this interview with Adrian Trenaman (@adrian_trenaman), software engineer at Gilt:

Some other details are at:

  • tech.gilt.com
  • Scaling Microservices at Gilt with Scala, Docker, and AWS
  • Scaling Gilt: From Monolithic Ruby Application to Distributed Scala Microservices Architecture

Many thanks to Daniel Bryant (@danielbryantuk) for the introduction!