Category Archives: wildfly

Arquillian tests on a WildFly instance hosted on OpenShift (Tech Tip #55)

Tech Tip #54 explained how to enable Arquillian for an existing Java EE project. In that tip, the tests were run against a locally installed WildFly server. Would the same adapter work if this WildFly instance was running on OpenShift ? No!

Because the security constraints and requirement of a PaaS, as opposed to a localhost, are different. Lets take a look at what’s required to run our tests in javaee7-continuous-delivery on a WildFly instance hosted on OpenShift.

Lets get started!

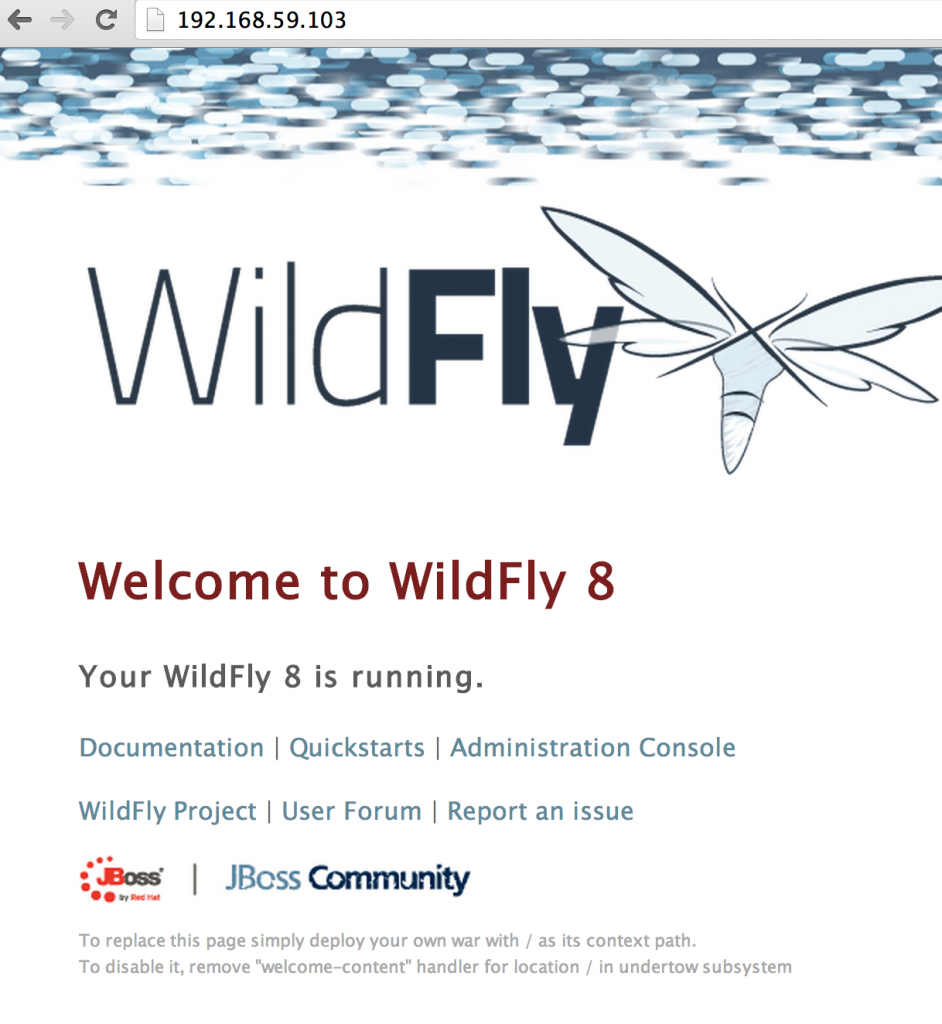
  1. As explained in Tech Tip #52, create a WildFly application on OpenShift as shown:

    Note down the ssh user name from the log. This is the part before @ in the value corresponding to SSH to.
  2. Until FORGEPLUGINS-177 is resolved, we need to manually add maven profile and provide container configuration information in “arquillian.xml”. Add the following <profile> to “pom.xml”:

    This is using arquillian-openshift container and referring to arquillian-wildfly-openshift configuration that will be matched with the appropriate container in “arquillian.xml”.

    So this is how the updated “arquillian.xml” look:

    Note the new <container> with the qualifier arquillian-wildfly-openshift. It provides information about where the server is located and some other configuration properties. The sshUserName property value should be the same from the WildFly instance created earlier.

  3. That’s it, now you can run the test against the WildFly instance on OpenShift:

The complete source code is available at github.com/arun-gupta/javaee7-continuous-delivery.

Enjoy!

Slides from Nuts and Bolts of WebSocket at #Devoxx 2014

Peter Moskovits from Kaazing (@peterm_kaazing) and I gave a university talk at Devoxx 2014 on Nuts and Bolts of WebSocket. The slides are now available at:

The entire session is recorded and will be made available on parleys.com in the coming weeks/months.

The complete script for the demo is available at github.com/arun-gupta/nuts-and-bolts-of-websocket (including pointers to the demos). Most of the demos are anyway available at the following links:

Positive feedback from twitter overall:

And it was rated the top talk for the day until 6pm:

devoxx14-websocket-talk-rank

With Red Hat spirit, “the more you share, the more you grow”, share the slides and demos all over and spread the love!

Happy Devoxx!

STOMP over WebSocket (Tech Tip #53)

STOMP is Simple Text Oriented Messaging Protocol. It defines an interoperable wire format that allows a STOMP client to communicate with any STOMP message broker. This provides easy and widespread messaging interoperability among different languages, platforms and brokers.

The specification defines what makes it different from other messaging protocols:

It is an alternative to other open messaging protocols such as AMQP and implementation specific wire protocols used in JMS brokers such as OpenWire. It distinguishes itself by covering a small subset of commonly used messaging operations rather than providing a comprehensive messaging API.

STOMP is a frame-based protocol. A frame consists of a command, a set of optional headers and an optional body. Commonly used commands are:

  • CONNECT
  • SEND
  • SUBSCRIBE
  • UNSCUBSCRIBE
  • ACK
  • NACK
  • DISCONNECT

WebSocket messages are also transmitted as frames. STOMP over WebSocket maps STOMP frames to WebSocket frames.

Different messaging servers like HornetQ, ActiveMQ, RabbitMQ, and others provide native support for STOMP over WebSocket. Lets take a look at a simple sample on how to use STOMP over WebSocket using ActiveMQ.

The source code for the sample is available at github.com/arun-gupta/wildfly-samples/tree/master/websocket-stomp.

Lets get started!

  1. Download ActiveMQ 5.10 or provision an ActiveMQ instance in OpenShift as explained at github.com/arun-gupta/activemq-openshift-cartridge.
  2. Download WildFly 8.1 zip, unzip, and start as bin/standalone.sh
  3. Clone the repo and deploy the sample on WildFly:
  4. Access the application at localhost:8080/websocket-stomp-1.0-SNAPSHOT/ to see the page as:techtip53-default-page
  5. Specify text payload “foobar and usse ActiveMQ conventions for topics and queues to specify a queue name as “/queue/myQ1”. Click on Connect, Send Message, Subscribe, and Disconnect buttons one after the other. This will display messages on your browser window where WebSocket connection is established, STOMP message is sent to the queue, subscribed to the queue to receive the message, and then finally disconnected.STOMP frames can be seen using Chrome Developer Tools as shown:

    techtip53-websocket-frames

    As you can see, each STOMP frame is mapped to a WebSocket frame.

In short, ActiveMQ on OpenShift is running a STOMP broker on port 61614 and is accessible on localhost:61614 by port-forwarding. Clicking on Connect button uses the Stomp library bundled with the application to establish a WebSocket connection with ws://localhost:61614/. Subsequent buttons send STOMP frames over WebSocket as shown in the Frames tab of Developer Tools.

Read more details about how all the pieces work together at jmesnil.net/stomp-websocket/doc/. Jeff has also written an excellent book explaining STOMP over WebSocket and lot more other interesting things that can be done over WebSocket in his Mobile and Web Messaging book.


Create WildFly OpenShift application using Command Line Tools (Tech Tip #52)

A new instance of WildFly can be easily provisioned on OpenShift by using the quick start. Just a single click, and you are ready to go!

Generally power users of OpenShift use Command Line Tools. However you could not create WildFly cartridge using the CLI tools. But bug# 1134134 is now resolved.

And so now rhc cartridge-list shows:

The newly added cartridge of WildFly 8 is shown in bold.

And so now a new WildFly instance can be easily provisioned using the CLI as:

And then the application’s main page is accessible as shown:

techtip52-main-page

And the application can be deleted as:

Simple, isn’t it ?

See several other OpenShift getting-started related blog entries here.

WebSocket Chat on WildFly and OpenShift (Tech Tip #51)

Chat is one of the most canonical sample to explain WebSocket. Its a fairly commonly used interface and allows to explain the fundamental WebSocket concepts very easily. Of course, Java EE 7 WebSocket has one too, available here! You can easily run it on WildFly using the following steps:

And then access it at http://localhost:8080/chat/.

One of the biggest advantage of WebSocket is how it opens up a socket over the same port as HTTP, 8080 in this case. If you want to deploy this application to OpenShift, then WebSocket is available on port 8000 for regular access, and 8443 for secure access. This is explained in the figure below:

openshift-websocket-routing

 If you want to run this Chat application on OpenShift, then use the following steps:

  1. Click here to provision a WildFly instance in OpenShift. Change the name to “chatserver” and everything else as default. Click on “Create Application” to create the application.
  2. Clone the workspace:
  3. Edit the first line of “javaee7-samples/websocket/chat/src/main/webapp/websocket.js”from:

    to
  4. Create the WAR file:
  5. Copy the generated WAR file to the workspace cloned earlier:
  6. Remove existing files and add the WAR file to git repository:

    And this shows the output as:

And now your chat server is available at: http://chatserver-milestogo.rhcloud.com and looks like:

techtip51-websocket-chat-output

Enjoy!

Securing WebSocket using wss and HTTPS/TLS (Tech Tip #50)

50th tip on this blog, yaay!

Tech Tip #49 explained how to secure WebSockets using username/password and Servlet Security mechanisms. This Tech Tip will explain how to secure WebSockets using HTTPS/TLS on WildFly.

Lets get started!

  1. Create a new keystore:

    Used “websocket” as the convenience password.
  2. Download WildFly 8.1, unzip, and copy “websocket.keystore” file in standalone/configuration directory.
  3. Start WildFly as
  4. Connect to it using jboss-cli as:
  5. Add a new security realm as:

    And configure it:
  6. Add a new HTTPS listener as:
  7. A simple sample to show TLS-based security for WebSocket is available at github.com/javaee-samples/javaee7-samples/tree/master/websocket/endpoint-wss. Clone the workspace and change directory to “websocket/endpoint-wss”. The sample’s deployment descriptor has:

    This ensures that any request coming to this application will be auto-directed to an HTTPS URL.
  8. Deploy the sample by giving the command:

Now accessing http://localhost:8080/endpoint-wss redirects to https://localhost:8080/endpoint-wss. The browsers may complain about self-signed certificate. For example, Chrome shows the following warning:

techtip50-certificate-chrome

And Safari shows the following warning:

techtip50-certificate

In either case, click on “Proceed to localhost” or “Continue” to proceed further. And then a secure WebSocket connection is established.

Another relevant point to understand is that a non-secure WebSocket connection cannot be made from an https-protected page. For example the following code in our sample:

will throw the following exception in Chrome Developer Tools:

Enjoy!

Securing WebSockets using Username/Password and Servlet Security (Tech Tip #49)

RFC 6455 provide a complete list of security considerations for WebSockets. Some of them are baked in the protocol itself, and others need more explanation on how they can be achieved on a particular server. Lets talk about some of the security built into the protocol itself:

  • The Origin header in HTTP request includes only the information required to identify the principal (web page, JavaScript or any other client) that initiated the request (typically the scheme, host, and port of initiating origin). For WebSockets, this header field is included in the client’s opening handshake. This is used to inform server of the script origin generating the WebSocket connection request. The server may then decide to accept or reject the handshake request accordingly. This allows the server to protect against unauthorized cross-origin use of a WebSocket server by scripts using the WebSocket API in a browser.

    For example, if Java EE 7 WebSocket Chat sample is deployed to WildFly and accessed at localhost:8080/chat/ then the Origin header is “http://localhost:8080”. Non-browser clients may use the Origin header to specify the origin of the request. WebSocket servers should be careful about receiving such requests.
  • WebSocket opening handshake from client must include Sec-WebSocket-Key and Sec-WebSocket-Version HTTP header field. XMLHttpRequest can be used to make HTTP requests, and allows to set headers as part of that request as:

    If XMLHttpRequest tries to set any header fields starting with Sec- then they are ignored. So a malicious user cannot simulate a WebSocket connection to a server by using HTML and JavaScript APIs.

In addition to these two primary ways, WebSockets can be secured using client authentication mechanism available to any HTTP servers. This Tech Tip will show how to authenticate Java EE 7 WebSockets deployed on WildFly.

Lets get started!

  • Clone Java EE 7 Samples workspace:
  • The “websocket/endpoint-security” sample shows how client authentication can be done before the WebSocket handshake is initiated from the client. This is triggered by including the following deployment descriptor:

    Some key points to understand about this descriptor:

    • <url-pattern> indicates that any request made to this application will be prompted for authentication
    • <auth-constraint> defines the security role that can access this resource
    • <login-config> shows that file-based realm is used with basic authentication
    • <security-role> defines the security roles referenced by this application

    In our particular case, the page that creates the WebSocket connection is protected by basic authentication.

  • Download WildFly 8.1, unzip, and add a new user by invoking the following script:

    This will add user “u1” with password “p1” in group “g1”. The group specified here needs to match as defined in <role-name> in the deployment descriptor.

  • Deploy the sample by giving the command:

Now when the application is accessed at localhost:8080/endpoint-security then a security dialog box pops up as shown:

techtip49-browser-security-popup

Enter “u1” as the username and “p1” as the password to authenticate. These credentials are defined in the group “g1” which is referenced in the deployment descriptor. Any other credentials will keep bringing the dialog back.

As soon as the request is successfully authenticated, the WebSocket connection is established and a message is shown on the browser.

If you are interested in securing only the WebSocket URL then change the URL pattern from

to

In websocket.js, change the URL to create WebSocket endpoint from:

to

Note, how credentials are passed in the URL itself. As of Google Chrome 38.0.2125.104, a browser popup does not appear if only WebSocket URL requires authentication.

Next Tech Tip will explain how to secure WebSocket using wss:// protocol.

Log your miles and community runs: Java EE 7 Real World Experience

miles2run-logo

miles2run.org is an easy way to track your running activities and share with friends and families. Day-based or distance-based goals can be created and then tracked. It also allows to create community run goals and have multiple runners participate and track their activities towards that goal. You can also find out local runners and connect with them.

The project was started to help track running activities for #JavaOneStreak. The goal was to run at least a mile every day all the way until JavaOne and use this website to track the runs. There are tons of sophisticated applications and websites that allow you to track running activity. Most of them provide integration with your GPS watch, phone GPS, and other fancy features. Some of them even allow creating a group but none of them is based on Java :-)

The application is hosted as a website and built using HTML5 and Java EE 7. The landing page provides a summary of total runners, their city/country, miles, and hours logged so far.

miles2run-landingpage

The website can be viewed on a desktop, tablet, or a cell phone. The runners can login to the website using common social brokers such as Facebook, Google, and Twitter.

Any body can click on “Community Runs” on the top-right corner to see what all group runs have been created so far. These can only be created by an administrator. The group run page for JavaOne shows how many runners have joined this run and other statistics.

miles2run-javaone-mainpage

Each runner is presented with a dashboard showing how much distance they’ve run so far and total/completed/remaining/missed days.

miles2run-javaone-dashboard1

A visual representation of the progress and a heat map of the activity calendar is shown:

miles2run-javaone-dashboard2

A line chart of mileage over the days is shown:

miles2run-javaone-dashboard3

And then a summary of activities over the past months is shown as well:

miles2run-javaone-dashboard4

Runners also have the opportunity to follow other runners and track their activities.

Here is a conceptual view of the application:

miles2run-architecture

And here is a technology view of the application:

miles2run-tech

Here is a brief description of the technology stack:

  • Presentation
    • Thymeleaf template engine views rendered by JAX-RS
    • Social brokering using native APIs for Facebook, Google, Twitter
  • Middle Tier
    • @Stateless EJB for all transactional JPA interactions, @Asynchronous for posting status to social networks
    • JAX-RS for exposing REST endpoints. ContainerRequestFilter and ContainerResponseFilter for security for cross-cutting concerns like authentication, injecting profile, and CORS.
    • Bean Validation constraints in JAX-RS resources.
    • Bean discovery mode=”all”
  • Backend
    • CDI producers for creating EntityManagers and other configuration objects like Redis connection pool objects or MongoDB configuration object. All NoSQL services are created @ApplicationScoped.
    • Using native drivers for Redis and MongoDB. Jedis is being used for Redis and MongoDB Java driver is used for MongoDB. CDI services wrap these driver API and expose business functionalities that other layers could use.
    • JPA + Bean Validation. Database scripts are generated from JPA model, added to source control, manually applied to the database. Using @Index and Entity Graph.
    • Servlets are used for callback URLs for social brokers.
    • Error pages are configured using <error-page>.
    • MySQL is used for all business entities like Activity, Goal, User Profile etc. Redis is used for storing counters and timeline data. MongoDB is used for location-based user recommendations and follower/following recommendations.

Technologies from outside the platform:

  • JavaScript
    • D3.js and C3.js for visually appealing graphs
    • AngularJS for views
    • Cal Heatmap for calendar heatmap
    • jQuery
  • Google Geocoding API to convert Location Text to latitude and longitude
  • Jadira usertype for storing dates in UTC
  • Joda-Time for working with dates
  • Thymeleaf was used instead of JavaServer Faces because:
    • Allows JAX-RS to be used as an MVC framework to render server side HTML pages and exposing REST services.
    • This application is a Single Page application built using AngularJS. So, we needed a lightweight approach to render server side pages. JAX-RS along with Thyemleaf render the main HTML 5 page and then we use AngularJS to render different partials/views on that page. For example, the main home page is rendered by JAX-RS and Thymeleaf. When you work with different sections of this page all of them are part of a SPA managed by AngualarJS.
    • Thymeleaf documents are valid HTML 5 documents so you can work with them offline for static prototyping.
  • Redis is used for storing all the counters like number of runners, cities, counters specific to goal like total distance covered in a goal etc. To avoid lots of read/write from the database, an an in-memory database is used so all the write and read operations are very performant. Redis counters are atomic, which means there are no concurrency issues associated with it. INCR andINCRBY Redis operations are used to update counters.
  • MongoDB is used for location data.

Toolset

  • JDK 8
  • IntelliJ 13.1 with Maven
  • Wildfly 8.1.0.Final – Development was done using a local WildFly instance and then pushed to scalable WildFly instances on OpenShift for deployment. HA Proxy is used as the load balancer.The advantage of working with OpenShift is that there is no OpenShift specific code in your application. So, it’s the same application that work locally that is deployed to test and production environment. You just have to use environment variables to abstract out environment specific configuration.
  • Github

Planned updates

  • Use Jenkins for Continuous Integration and manage deployments
  • JPA 2.1 converter instead of Jadira
  • Keycloak instead of native social broker
  • Opensource the application

Wish list for Java EE 8

  • Integration with OAuth providers
  • A real MVC framework with support for pluggable template engines
  • Seamless working with NoSQL databases

Download WildFly 8.1 today, learn the technology by reading/trying Java EE 7 samples, browse through Java EE 7 resources.

Or if you want to be on the bleeding edge, check out WildFly 9.0.

Many thanks to Shekhar Gulati (@shekhargulati) for authoring the application and providing all the answers!

Are you using Java EE 7 and WildFly to deploy your projects ? Would love to feature you here! Send me an email or leave a comment on the blog.

Java EE 7, JBoss, WildFly, Devoxx4Kids, and Parties at JavaOne 2014

JavaOne 2014 is about a week away, although some of festivities will start next Friday! This is going to be my 16th JavaOne in as many years and I’ve really enjoyed participating in each one of them. As always, there is great content lined up with rockstar speakers. This conference is a confluence of movers and shakers in the Java world and provides plenty of opportunities to engage with them. This is going to be my first year as Red Hatter and looking forward to catching up with friends and colleagues.

And in case you are wondering, and care about it, here are my engagements for that week:

Saturday, Sep 27

Devoxx4Kids Day
7pm – 11:30pm: NetBeans Party

Sunday, Sep 28

8am – 9:30am, Java Champions Brunch
7pm – 8:30pm: Duke Choice Awards
8pm – 11pm: Java EE Appreciation Event

Monday, Sep 29

8:30am – 10:30am Java EE 7 Soup to Nuts Tutorial [TUT1952]
11:30pm – 12:30pm Meet the Experts on Java EE and HTML5 Enterprise Application Development
1:30pm – 2:00pm Java EE 7 Essentials book signing at O’Reilly Booth

Tuesday, Sep 30

8:30am – 10:30am: Devoxx4Kids for Parents Tutorial [TUT1878]
12:30pm – 1:30pm: Lessons learned from real-life Java EE 7 Deployments [CON2450]
2:30pm – 4pm: Java EE Hackergarten
6pm – 9pm: Oracle Authors Appreciation Party
7pm – 9pm: JavaOne IGNITE
7pm – 10pm: PartyOne
7pm – 9:30: Java Champions Social
8pm – 8:45pm: Technology Evangelists Gathering [BOF12166]

Wednesday, Oct 1

1pm – 1:30pm: Book signing on Java EE and HTML5 Enterprise Application Development book (OOW bookstore in Moscone South, Upper Hall Lobby)
4pm – 6:30pm: #JavaOneStreak meetup, Hilton San Francisco Union Square, Sutter

Thursday, Oct 2

11:50: Broadening JCP Program Participation [CON9775]

I’ll also be running my own “hallway track” and so feel free to meet there. Of course, you can catch me at Red Hat booth as well!

There are lots of Red Hat speakers and sessions at the conference as well. And if you are not able to attend a Red Hat session then you can check out the mini-sessions in the exhibit hall.

See ya there!

Load Balance WebSockets using Apache HTTPD (Tech Tip #48)

JBoss EAP 6.3 provides a technology preview of WebSocket and WildFly have supported them as part of Java EE 7 compliance.

github.com/javaee-samples/javaee7-samples/tree/master/websocket provide tons of Java EE 7 samples that run on WildFly. If you are interested in similar functionality on JBoss EAP 6.3 then github.com/jboss-developer/jboss-eap-quickstarts/tree/6.4.x-develop/websocket-hello is a quickstart. In addition, there are a few more samples at github.com/arun-gupta/jboss-samples/tree/master/eap63.

One of the common questions asked related to WebSockets is how to how to load balance  them. This Tech Tip will explain that for WildFly and JBoss EAP 6.3.

First, what are the main components ?

  • At least Apache HTTPD 2.4.5 is required. Now HTTPD binaries are not available for Mac but fortunately compiling instructions are explained clearly in Tech Tip #45.
  • mod_proxy_wstunnel is an Apache module that provides support for tunneling of Web Socket connections to a backend Web Sockets server, such as WildFly or JBoss EAP. It is a support module to mod_proxy that provide support for a number of popular protocols as well as several different load balancing algorithms. The connection is automagically upgraded to a WebSocket connection.  And all the modules are already included in the modules directory.
  • mod_proxy_balancer module is required that provides load balancing for HTTP and other protocols.

Let’s go!

  1. Download and unzip WildFly 8.1.
  2. Start WildFly 8.1 in domain mode using ./bin/domain.sh.
  3. Download this chat sample, rename the file to “chat.war” and deploy to “main-server-group” as:

    The only difference from the original Java EE 7 WebSocket Chat sample is the addition of System.getProperty("jboss.node.name") to display the name of WildFly instance serving the application. The source code is available at github.com/arun-gupta/wildfly-samples/tree/master/websocket-loadbalance.
  4. Uncomment the following lines in /usr/local/apache2/conf/httpd.conf:

    This will enable all the required modules.
  5. Add the following code fragment at the end of “httpd.conf”:

    Proxy is a container for proxied resources and is creating a load balancing group in this case using balancer directive. BalancerMember adds a member to this load balancing group.  ProxyPass is a standard directive that maps remote servers running on different ports into the space of the local server. In this case, WildFly is started in domain mode and so starts two instances on port 8080 and 8230. Both of these instances are mapped to localhost:80, which is where Apache HTTPD is running by default.

The deployed chat sample is now accessible at localhost:8080/chat (first instance in the managed domain), localhost:8230/chat (second WildFly instance in the managed domain), and localhost/chat (via Apache HTTPD).

Now even if you kill one of the WildFly instances, the other instance will continue to serve the client. Note, this only gives application availability as there is no session failover in this.

This was also verified on JBoss EAP 6.3 and there are a few differences:

  1. Use the sample from github.com/arun-gupta/jboss-samples/tree/master/eap63/websocket-chat instead.
  2. The generated archive name is different and so the command would look slightly different too:
  3. Configure “httpd.conf” as:

And that’s it!

Watch this live in action:

An important point to understand is that there is no concept of “sticky sessions” in WebSocket as, unlike HTTP, there is a direct and “permanent” connection between the client and the server in this case.

Enjoy!

WildFly with a custom configuration in OpenShift (Tech Tip #47)

WildFly instances can be easily started in OpenShift. Tech Tip #7 shows how to spin up an instance of WildFly in OpenShift. Tech Tip #21 explained how to get started using JBoss Tools.

Now this WildFly instance is started with the stock configuration.xml. However some times you may want to configure the containers or specify additional configuration information in this file. This Tech Tip will show you how to do that.

Let’s go!

  1. Start a WildFly instance as explained in Tech Tip #7.
  2. On the application page, clone the workspace associated with this application. The command will look something like:
  3. This workspace has .openshift/standalone.xml file. Edit this file to meet your need. For example, if you want to use Infinispan as a persistency solution in standalone mode, then you’ll add the following code fragment:

    under <subsystem xmlns="urn:jboss:domain:infinispan:2.0"> section.
  4. Commit and push the change:

    This will automatically restart the cartridge and show the output as:

Now the WildFly instance in OpenShift will use the updated configuration file.

You can even verify this by logging into your application as:

And checking for the updated elements in wildfly/standalone/configuration/standalone.xml file.

Alternatively, you can ssh into your instance and use the JBoss CLI to make updates to your standalone.xml file.

Enjoy!

Java EE 7 Real World Experience: Campground Management with Tipi.camp

tipicamp-logo

Tipi.camp provides a simple campground management software and targets 25,000+ independent campgrounds all over Europe. It provides a customer-friendly booking-portal and a RESTful API for partners to integrate. The project was conceived in September 2013 when Christoph returned from vacation, disappointed because of the missed booking for their tent. And now he has created a new solution connecting campers and campgrounds with each other.

The website offers a SaaS where campgrounds can register their camp sites and campers can look at the availability of these campgrounds, check out their calendar, pick a site and make a reservation. It is also available for on-site installation if you prefer running it on your domain. Think of it as koa.com, but available to all the independent campgrounds and much more modern 😉

The landing page is certainly very fancy:

tipicamp-opening-page

Websites of smaller campgrounds are typically characterized by low data maintenance and absence of a booking possibility. tipi.camp has advantages:

  • Easy-to-use portal for campground owners and campers
  • Campground owner administrate and book his sites independently
  • Customer data management
  • External sales channels, for example booking.com, can be connected to sell the log cabins
  • RESTful API it is also possible to handle larger individual installations

Campgrounds get their own portal, reservations, channel management, email and much more for €1/day if they are located in Europe or $1/day if they are in US. Each campground with an Internet connection and browser (whether computer or iPad) can use the software.

In terms of the overall flow, campground owner register their campground with tipi.camp. Traveler checks out the calendar and books the campground using the responsive portal.

tipicamp-architecture


Check out the welcome page:

tipicamp-welcome

Campers can search through the available camps and then look at the calendar of a particular camp:

tipicamp-calendar

Pick a particular site on the campground:

tipicamp-maps

And then checkout to make the payment:

tipicamp-checkout

This website is built using Java EE 7:

tipicamp-technology


Here is a brief description of the technology stack:

  • Presentation
    • JavaServer Faces + Expression Language. Different templates are used for desktop and iPad apps. JSF Template Library might be used to provide a fully customized portal for the campground owners later.
    • Security: JAAS Principal + JDBC realm
    • Bean discovery mode=”all”
  • Middle Tier
    • EJB for business boundaries
    • Servlets with JSON for web hooks: response from Paypal and Sendgrid
    • JAX-RS for exposing API to partners
  • Backend
    • JPA + Bean Validation, use @Index for database generation during development. Flyway API for database migrations in production.
    • Concurrency: Calculation of statistics and sending messages, Sendgrid takes ~1-4 seconds to send messages
    • Using @Startup @Singleton @Schedule to run a job at pre-defined time

Technologies from outside the platform were:

  • Primefaces 5 for the GUI and Bootstrap for the responsive Enduser-Portal.
  • Sendgrid API for sending mails. This is required as opposed to JavaMail because specific meta information needs to be added to each email.
  • Misc apache commons (eq. FileUtils.writeByteArrayToFile or IOUtils.toByteArray) – there are only a few sections.
  • Flyway API for database migrations
  • Junit with Derby – for testing

Toolset

  • JDK 8
  • IntelliJ 13.1 with Maven
  • Wildfly 8.1.0.Final – Single instance of WildFly is used. The app was previously deployed on GlassFish.
  • Apache httpd is used to:
    • performance-tuning with KeepAlive, mod_expires for the images and the compression
    • easy SSL configuration
    • handle more WildFly under 1 hostname with the mod_proxy
    • mod_redirect for redirect all http requests to the app to https
  • Github
  • Jenkins
  • loader.io for Load-Testing
  • Currently the application is deployed on a self-hostet Linux-Server in the hetzner.de data center.

Wish list for Java EE 8

  • Most used Apache Commons Libs
  • @Temporal works with LocalDate and LocalDateTime
  • Batch processing API does support generics

And here are supporting quotes on Java EE 7

And on WildFly:

So, do you want to start on this terrific two combination of Java EE 7 + WildFly ?

Download WildFly 8.1 today, learn the technology by reading/trying Java EE 7 samples, browse through Java EE 7 resources.

Or if you want to be on the bleeding edge, check out WildFly 9.0.

Many thanks to Christoph Gapp (info@tipi.camp) and Adam Bien (@adambien) for providing all the answers!

Are you using Java EE 7 and WildFly to deploy your projects ? Would love to feature you here! Send me an email or leave a comment on the blog.


WildFly 9: Features and Getting Started (Tech Tip #43)

WildFly 8.1 provides a Java EE 7 compliant application server, and is pretty awesome!

WildFly team has been actively working this summer on the next release. WildFly 9 features were announced a few weeks ago. Here is a quick summary and links to discussions on wildfly-dev:

  • Core/Servlet/Full Split
  • Graceful shutdown
  • Elytron (Security improvments)
  • Switching to the JDK ORB from JacORB
  • Undertow as a mod_cluster frontend
  • Subsystem Capabilities and Requirements
  • EAP 6.4 RFEs (TBA)

Links/details to rest of the features TBD.

So how do you get started with WildFly 9 ?

  • Building WildFly 9 requires at least have Maven 3.2.1, download the latest here.
  • Clone the workspace as:
  • Build the workspace as:

    Took 02:36 mins to build on my machine :)
  • Unzip dist/target/wildfly-9.0.0.Alpha1-SNAPSHOT.zip to a new directory
  • Run WildFly as:

Note that is still very early in the development stages and workspace is constantly evolving. So things may be broken but you know that Red Hat is working actively on your favorite application server :-)

Some useful references …

  • Feel free to subscribe to wildfly-dev alias and participate in the discussion
  • Ask your questions on WildFly forum
  • WildFly 9 docs (very early, mostly placeholder)
  • Follow us at @WildFlyAS

WildFly Administration Course by Alexis Hassler

Alexis Hassler (@alexishassler) is a software developer, specialized in Java and Java EE. He is using JBoss since version 2.0, more than twelve years ago. His business is to code for other companies or help them to improve the way they develop and deploy Java applications. He is co-leader of LyonJUG and helps to organize Mix-IT, an annual conference in Lyon.

He recently concluded a WildFly administration course. Here is a brief Q&A with him:

Q. You recently concluded a 4-day WildFly administration course. Tell us more about that.
A. This course will help you understand the operation, configuration principles of WildFly. The core of the course is 3 days long. It deals with installation, deployment, administration tools, security and tuning. The forth day is on clustering and is optional. The recently concluded session was the first one and was conducted on-site in Brussels.

Q. Who is this course targeted for ?
A.  The course is designed for application server administrators. But it is useful for developers and software architects too. In fact, it is useful for anybody who have to work with WildFly.

Q. Where can users register for this course ?
A. The schedule of the course is on my company web site : http://www.sewatech.fr/formation-wildfly.html. Registration can be done by e-mail : formation -at- sewatech.fr.

Q. How much of this course would be relevant for JBoss EAP users/customers ?
A. JBoss EAP 6 is based on JBoss AS 7, but a lot of administration features of the latest EAP has been added in WildFly 8. So if you have EAP 6.2 or 6.3, this course will match ~ 80%. If you have an older EAP, a JBoss AS 7 course would be better (http://www.sewatech.fr/formation-jboss-7.html). JBoss EAP users is not the main target of this course.  RedHat has some great courses on JBoss Middleware Development and JBoss Middleware Administration.

Q. How is your experience with JBoss / WildFly management tools ?
A. Comparing with older versions of JBoss (I mean before JBoss AS 6), WildFly management tools are a huge step ahead. You can choose your tool:

  • Web console
  • Command line
  • JMX
  • HTTP API
  • Java API

Jboss-cli is the most useful one. It allow an admin to automate the whole setup his application server. The HTTP API is great too, as it allow to make custom tools in any language. For example, you can build your own simplified admin console in pure JavaScript. I don’t really like the Java API because, it’s a detyped API and it doesn’t fit with a compiled-time typed language. Maybe a Groovy guy could make a nice DSL on top of it. All in one, the greatest thing is that the different tools are really consistent : same data and same logic to manipulate these data. If you learn jboss-cli, it’s really easy to understand the HTTP API.

Q. What tips would you give for users coming new to WildFly ?
A. If you know JBoss AS 7, it will be easy. WildFly 8 is just the next version. Read the changelog and everything will be fne. If you know older versions of JBoss AS, forget everything you know, and start from the beginning with a good book. If you know Tomcat, be prepared to discover the power to “fly”. And for everybody, learn the CLI tool.

Q. Which application servers developers should choose, for both development and deployment ?
A. It mainly depends on what you want to do. Tomcat can be great too, because it’s really simple. When it comes with Java EE, TomEE is a very nice application server but lacks of administration tools. For Glassfish, we will see with the next versions if the current quality is maintained or if it comes back to a simple RI software. So, OK, WildFly is my favorite choice : great module system, great admin tools and great community.

Q. What resources do you generally refer to when looking for help on WildFly ?
A. For me, the main resource are the official documentation (https://docs.jboss.org/author/display/WFLY8/) and Francesco Marchioni’s blog (http://www.mastertheboss.com/). For a beginner, Francesco’s book WildFly 8, administration guide would be easier. The last resource I would recommend is the WildFly section on my wiki (http://jtips.info/index.php?title=Cat%C3%A9gorie:WildFly), but it’s in French.


Getting Started with Docker (Tech Tip #39)

If the numbers of articles, meetups, talk submissions at different conferences, tweets, and other indicators are taken into consideration, then seems like Docker is going to solve world hunger. It would be nice if it would, but apparently not. But it does solve one problem really well!

Lets hear it from @solomonstre – creator of Docker project!

In short, Docker simplifies software delivery by making it easy to build and share images that contain your application’s entire environment, or application operating system.

What does it mean by application operating system ?

Your application typically require a specific version of operating system, application server, JDK, database server, may require to tune the configuration files, and similarly multiple other dependencies. The application may need binding to specific ports and certain amount of memory. The components and configuration together required to run your application is what is referred to as application operating system.

You can certainly provide an installation script that will download and install these components. Docker simplifies this process by allowing to create an image that contains your application and infrastructure together, managed as one component. These images are then used to create Docker containers which run on the container virtualization platform, provided by Docker.

What are the main components of Docker ?

Docker has two main components:

  • Docker: the open source container virtualization platform
  • Docker Hub: SaaS platform for sharing and managing Docker images

Docker uses Linux Containers to provide isolation, sandboxing, reproducibility, constraining resources, snapshotting and several other advantages. Read this excellent piece at InfoQ on Docker Containers for more details on this.

Images are “build component” of Docker and a read-only template of application operating system. Containers are runtime representation, and created from, images. They are “run component” of Docker. Containers can be run, started, stopped, moved, and deleted. Images are stored in a registry, the “distribution component” of Docker.

Docker in turn contains two components:

  • Daemon runs on a host machine and does the heavy lifting of building, running, and distributing Docker containers.
  • Client is a Docker binary that accepts commands from the user and communicates back and forth with daemon

How do these work together ?

Client communicates with Daemon, either co-located on the same host, or on a different host. It requests the Daemon to pull an image from the repository using pull command. The Daemon then downloads the image from Docker Hub, or whatever registry is configured. Multiple images can be downloaded from the registry and installed on Daemon host.

docker-architecture-techtip39

Client can then start the Container using run command. The complete list of client commands can be seen here.

Client communicates with Daemon using sockets or REST API.

Because Docker uses Linux Kernel features, does that mean I can use it only on Linux-based machines ?

Docker daemon and client for different operating systems can be installed from docs.docker.com/installation/. As you can see, it can be installed on a wide variety of platforms, including Mac and Windows.

For non-Linux machines, a lightweight Virtual Machine needs to be installed and Daemon is installed within that. A native client is then installed on the machine that communicates with the Daemon. Here is the log from booting Docker daemon on Mac:

For example, Docker Daemon and Client can be installed on Mac following the instructions at docs.docker.com/installation/mac.

The VM can be stopped from the CLI as:

And then restarted again as:

And logged in as:

The complete list of boot2docker commands are available in help:

Enough talk, show me an example ?

Some of the JBoss projects are available as Docker images at www.jboss.org/docker and can be installed following the commands explained on that page. For example, WildFly Docker image can be installed as:

The image can be verified using the command:

Once the image is downloaded, the container can be started as:

By default, Docker containers do not provide an interactive shell and input from STDIN. So if WildFly Docker container is started using the command above, it cannot be terminated using Ctrl + C.  Specifying -i option will make it interactive and -t option allocated a pseudo-TTY.

In addition, we’d also like to make the port 8080 accessible outside the container, i.e. on our localhost. This can be achieved by specifying -p 80:8080 where 80 is the host port and 8080 is the container port.

So we’ll run the container as:

Container’s IP address can be found as:

The started container can be verified using the command:

And now the WildFly server can now be accessed on your local machine as http://192.168.59.103 and looks like as shown:

Finally the container can be stopped by hitting Ctrl + C, or giving the command as:

The container id obtained from “docker ps” is passed to the command here.

More detailed instructions to use this image, such as booting in domain mode, deploying applications, etc. can be found at github.com/jboss/dockerfiles/blob/master/wildfly/README.md.

What else would you like to see in the WildFly Docker image ? File an issue at github.com/jboss/dockerfiles/issues.

Other images that are available at jboss.org/docker are:

  • KeyCloak
  • TorqueBox
  • Immutant
  • LiveOak
  • AeroGear


Did you know that Red Hat is amongst one of the top contributors to Docker, with 5 Red Hatters from Project Atomic working on it ?