Category Archives: techtip

Rapid Java EE Application Development using Forge 2 (Tech Tip #17)

How do you rapidly build Java EE applications in an IDE-agnostic way ?

JBoss Forge is your answer!

This short video shows how to:

  • Rapidly build a Java EE application from scratch using Forge 2 CLI
  • Create JPA entities and add properties to them
  • Add Bean Validation constraints
  • Create JSF scaffolds and REST endpoints
  • Deploy the application on JBoss EAP running in OpenShift

Complete detailed instructions followed in this screencast are available here.

Enjoy!


WildFly 8 Clustering and Session Failover (Tech Tip #16)

This blog contains a video tutorial on how to setup up HTTP session failover using WildFly 8. Specifically, it shows:

  • Introduction to WildFly and Managed Domain concepts
  • Setup up a 2-instance cluster
  • Deploy a WAR file to the cluster using centralized administration from admin console
  • Access the application on one node and add HTTP session attributes on it
  • Shutdown that instance and show HTTP session failover by accessing the application on other instance

Enjoy!

FREE Minecraft Server Hosting on OpenShift (Tech Tip #15)

minecraft-logo

Are you looking for free Minecraft server hosting and invite your friends to join the party ?

If yes, then read on!

First some context …

bukkit-logo

Bukkit is a free, open source project that provides the API and runtime to extend Minecraft. It is one of the most popular ways to write Minecraft mods. Bukkit uses a more general terminology of “plugin” but essentially they are mods in Minecraft context. Developers write plugins using Bukkit API.

CraftBukkit is a mod for the Minecraft server that implements Bukkit API. Developers can download CraftBukkit JAR for a particular version of Minecraft and use it to run a Minecraft server. This allows plugins, or mods in Minecraft parlance, written using Bukkit API to be installed in the CraftBukkit server.

Tech Tip #7 introduced OpenShift – Red Hat’s PaaS platform.

OpenShift-logo

This tip will show how to host a CraftBukkit server on public PaaS (sign up for free) version of OpenShift.

  1. Install OpenShift client tools. For simplicity, Mac commands are given below:
    Note, you need to use MRI Ruby, not JRuby. Install RVM to manage different versions of Ruby on your machine. For example, install Ruby 2.1.0 as:
    And set the default Ruby version using:
  2. Create OpenShift DIY application as:
    This command uses an OpenShift QuickStart, created by John Yeary, to create an OpenShift application. CraftBukkit JAR is downloaded and Minecraft server is started using it by the time application is ready.

    Note, a free account gives 3 small gears where each gear is 512 MB RAM and 1GB of disk space. Minecraft wiki recommends 512 MB of RAM and 2GB of disk space for 6-10 players.

  3. As mentioned in Steven Citron-Pousty’s blog:At this time, OpenShift is primarily a HTTP server platform – we proxy HTTP calls but no other protocols. In addition, we only expose ports 80 (HTTP), 443 (HTTPS), and 22 (SSH) to the outside world from your gear. While we can start up Minecraft Server on any port we want (and tell the client to listen on that port), the Minecraft server and client do not talk HTTP so we can not proxy the calls. To get this to work we are going to have to SSH port-forward either from your laptop to the server or vice versa (both configurations are supported on OpenShift).So lets forward a port from our local machine to the Minecraft server port on OpenShift using the following command:

    This should show an output something similar to as shown:

    And now you are ready to connect your Minecraft client.

  4. Login to OpenShift using the command:

    Change the directory to view Miencraft logs as:

    Read through server.log file in that directory to check the Minecraft server version. Its 1.7.2 as of this writing and shows a message like:

    Now run Minecraft launcher and select the matching version as explained in this video. Click on Play to start the game.

    Now click on Multiplayer:

    tt15-minecraft-multiplayer

    Click on Add Server and specify the server details as:

    tt15-craftbukkit-openshift-server

    Click on Done. Select the recently added server and click on Join Server:

    tt15-join-server

    And now you are playing a CraftBukkit server hosted on OpenShift.

  5. Set up the administrative player (or operator in Minecraft parlance) by following the instructions here.

Minecraft is a lot more fun when played with other friends. The instructions above allow you to host a server and be the operator. The following instructions are needed on each player who wants to join the same server:

  1. Install and setup RHC
  2. The following steps need to be done by the player hosting the server.
    • Each player’s public key (typically in .ssh directory and file named id_rsa.pub) needs to be added to the domain hosting the server. This can be done at https://openshift.redhat.com/app/console/settings.
    • Each player’s OpenShift account (email id) needs to be added to the domain hosting the server (for example: https://openshift.redhat.com/app/console/domain/milestogo)
  3. For Windows machines only: Download Putty (used for ssh shell verification) and PuttyGen (used for importing the id_rsa key so that it can be recognized by Putty). Import the id_rsa key using PuttyGen as explained here.
  4. Port forward using the following command:

And now the players can connect to the same server using the multiplayer setup instructions explained above!

Note that even though server requirements for Minecraft state that 6-10 players can join in 512 MB of RAM but practically speaking only 2 players could play in this much memory. More memory can always be added to your existing account by signing up for Silver Plan.

minecraft-steve

Happy minecrafting!

Cordova: Getting Started with iOS and Android Applications (Tech Tip #14)

cordova-logo

Apache Cordova is a platform for building native mobile applications using HTML, CSS, and JavaScript. This blog will show how to build a simple application using Cordova and run it on iPhone and Android emulators.

Complete detailed instructions are available here. Lets get started!

  1. Install Node Package Manager (optional): The easiest way to get started with Cordova is using the cordova command-line interface. This tool allows you to create new projects, build them on different platforms, and run them within an emulator. You can also use the CLI to initialize project code, after which you use various platforms’ SDKs to develop them further.The command-line is available as Node.js packaged module and can be installed using npm. If you already have Node.js then you already have npm, otherwise download and install Node.js.
  2. Install cordova command-line as:
  3. Create a new project as:
  4. Target platforms: Specify a set of target platforms such as iOS or Android. But before these target platforms can be specified the machine needs to support the SDK and the corresponding SDK must be installed.For example, XCode must be installed to specify iOS as the target platform, and Android SDK for Android target platform. Once installed, the target platform can be added as:
    And verify as:
  5. Build the app as:
  6. Simulator: Install the iOS simulator
  7. Test the app on iOS simulator:
    to see the result as:

    tt15-ios-simulator-default-screen

  8. Add Android target platform as:

    You’ll need to make sure bin directory from Apache Ant and android command from Android SDK are in the path.

  9. Create Android Vitual Device
    1. Generate the list of targets:

    2. Create Android Virtual Device as:

      Note that the target value is chosen from previous command’s output.

  10. Test the app on Android emulator:

    to see the result as:

    tt15-android-simulator-default-screen

Most of the steps above like installing emulators, XCode, Android SDK are one time. But other than that the application development process is pretty straightforward.

How cool ?

There are several ways to get help: mailing lists, file an issue, docs, @apachecordova.

JBoss Tools provide great tooling for Cordova. Check out this two-part video that provide an end-to-end application development using Cordova

and

Future blogs will continue building upon this application and show integration with other technologies, add other features like accelerometer, compass, geolocation, battery events, camer, media, vibration, etc.

Role Based Access Control in WildFly 8 (Tech Tip #12)

Role Based Access Control (RBAC) is the ability to restrict access to system or certain portions of it to authorized users. For JBoss AS 7.x or JBoss EAP 6.0 and 6.1, the web-based administrative console had an all-or-nothing approach. So if a user can authenticate with management security realm, then he’ll have all the privileges. This might be OK for smaller deployments but the roles are typically divided for mission critical deployments and a finer-grained control is required. JBoss EAP 6.2 and WildFly 8 introduces RBAC using different roles.

There are 7 different roles in 2 different categories – first 4 roles where users are locked out of sensitive data and 3 higher level roles where users are able to deal with sensitive data.

Role Permissions
Monitor Has the fewest permissions
Only read configuration and current runtime state
No access to sensitive resources or data or audit logging resources
Operator All permissions of Monitor
Can modify the runtime state, e.g. reload or shutdown the server, pause/resume JMS destination, flush database connection pool.
Does not have permission to modify persistent state.
Maintainer All permissions of Operator
Can modify the persistent state, e.g. deploy an application, setting up new data sources, add a JMS destination
Deployer All permissions of Maintainer
Permission is restricted to applications only, cannot make changes to container configuration
Administrator All permissions of Maintainer
View and modify sensitive data such as access control system
No access to administrative audit logging system
Auditor All permissions of Monitor
View and modify resources to administrative audit logging system
Cannot modify sensitive resources or data outside auditing, can read any sensitive data
Super User Has all the permissions
Equivalent to administrator in previous versions

WildFly 8 ships with two access control providers:

  • “simple”
    • any authenticated administrator has all privileges
    • consistent with AS 7
    • the default behavior (ensures compatibility with older releases)
  • “rbac”
    • users are mapped to different roles
    • new in WildFly 8

Brian Stansberry has wonderfully explained all the nitty-gritty details in three-part video.

First part shows the basics of Role Based Access Control, and show how you can use standard roles within the WildFly Administration Console.

Second part shows how to configure roles and setup users which map to roles.

Third part shows how to configure constraints which allow you to tweak the behavior of roles.

Enjoy!

Deploy to WildFly using jboss-cli (Tech Tip #11)

WildFly provides multiple ways to deploy to your applications.

So far we’ve seen:

This tip will cover the most likely way to deploy deploy applications to WildFly, i.e. jboss-cli.

jboss-cli is Command Line Interface management tool for a standalone server or a managed domain. It is available in the “bin” directory of unzipped WildFly distribution and allows a user to connect to a standalone server or domain controller and execute management operations.

“jboss-cli” can be used to deploy applications using the interactive console or in a non-interactive manner.

Lets look at interactive first:

    • Use jboss-cli to connect with the existing standalone instance by giving the following command:
      The -c switch connects using the default host (โ€˜localhostโ€™) and management port (โ€˜9990โ€™). These values are specified in โ€˜bin/jboss-cli.xmlโ€™ and can be updated.

      This opens up the “jboss-cli” interactive console and shows the following prompt:

      The prompt indicates that โ€˜jboss-cliโ€™ is connected to a standalone instanceโ€™s management port.

    • Deploy the application by giving the following command in console:

      The directory name of the war file in the command may be different depending upon how โ€˜jboss-cliโ€™ was invoked. Verify the server log to ensure that the application was redeployed. Look for specific timestamp in the log entries.

      --force switch can be included in the command to replace the existing application.

    • Verify the deployment status by typing the following command deployment-info in the console:

      and see the output as:

      Verify the server log to ensure that the application was deployed. Look for specific timestamp in the log entries.

    • Undeploy the application by giving the following command:

    • Type “exit” or “quit” to exit the interactive console.

Now lets look at how these commands can be issued non-interactively very easily.

  • Deploy the application as:
  • Verify the deployment status as:
  • Undeploy the application as:

Deploy to WildFly using curl (Tech Tip #10)

WildFly 8 provide multiple ways to deploy your web applications.

So far we’ve seen:

This tip will show how to use curl to deploy your applications to WildFly.

Deploying applications using curl is a two-step process.

Step 1: Upload your archive to WildFly using the following command:

This command:

  • Makes a POST request using form-encoded (“-F”) data with one field (“file”) defining the location of the WAR file
  • “target/javaee7-1.0-SNAPSHOT.war” is the location of the WAR file
  • “u1” is the administrative user with password “p1”
  • “localhost:9090” is the default management host and port for WildFly instance
  • WildFly management port uses digest authentication and that is defined using “–digest”
  • Prints the output as something like:
    {“outcome” : “success”, “result” : { “BYTES_VALUE” : “+Dg9u1ALXacrndNdLrT3DQSaqjw=” }}

Step 2: Deploy the archive

This command:

  • Sends a POST request (“-d”) with JSON payload
  • The value assigned to “result” name in the JSON response of previous command is used in this command
  • Content type of the payload is explicitly specified to be “application/json”
  • “add” command triggers the deployment of the archive
  • Application archive is enabled as well, as opposed to not by default
  • As earlier, “u1” is the administrative user with password “p1”
  • As earlier, “localhost:9090” is the default management host and port for WildFly instance
  • As earlier, WildFly management port uses digest authentication and that is defined using “–digest”

Now your application is available at http://localhost:8080/javaee7/EmployeeList or whatever the context root is!

That’s it!

Additional ways to deploy your applications will be discussed in subsequent blogs.

WildFly Maven Plugin to Deploy Applications and Artifacts (Tech Tip #9)

Applications can be deployed to WildFly in many different ways. One of the typical ways it to use the wildfly-maven-plugin. This tech tip will provide details on that.

Actually, you just need to add wildfly-maven-plugin to your pom.xml as:

And that’s it!

Fire up a WildFly instance as explained in Tech Tip #1. Deploy your application to this WildFly instance using:

Simple, isn’t it ?

You can even start a WildFly instance defined by -Djboss-as.home property and deploy the application using the following command:

The property -Djboss-as.home may not be specified in which case WildFly is downloaded and started and the application is deployed to it.

The version of WildFly to be downloaded can be optionally specified as:

Now this application can be redeployed as:

Or undeployed as:

This plugin provide lots of other targets:

Goals Description
wildfly:deploy-only Only deploy, without packaging
wildfly:redeploy-only Redeploy, without packaging
wildfly:add-resource Adds a resource to the server (only in domain mode)
wildfly:add-artifact Adds an arbitrary artifact
wildfly:execute-command Execute commands to the running instance, batch mode supported as well

Refer to the plugin usage page and documentation for complete details.

Other deployment mechanisms such as jboss-cli, web-based admin console, REST API, and filesystem based will be covered in future blogs.

What is your typical way to deploy an application to WildFly ?

What is your deployment preference during development ? Does it differ from testing deployment phase ?

Multiple Instances of WildFly on Different Ports on Same Machine (Tech Tip #8)

WildFly can be started on the default port 8080 using:

./bin/standalone.sh

The default landing page is then accessible at localhost:8080 and looks like:

tt1-wildfly-welcome

The default admin console is accessible at localhost:9990/console and looks like:

tt8-admin-console

Do you want to start another WildFly standalone instance on the same machine on a different port ?

./bin/standalone.sh -Djboss.socket.binding.port-offset=1000

will start another standalone server on port 8080 + 1000. And so the landing page is now accessible at localhost:9080. Similarly, admin console is now accessible at localhost:10990/console.

Similarly, you can start multiple instances by specifying port offset.

WildFly 8 CR1 on OpenShift (Tech Tip #7)

OpenShift-logo

OpenShift is Red Hat’s PaaS platform and comes in three flavors:

  • Origin is the Community PaaS offering. You can explore the community-driven open source upstream of OpenShift. Join the community.
  • Online is the Public PaaS offering. Host your applications in the public cloud with automated provisioning, management, and scaling of applications. Sign up for free.
  • Enterprise is the Private PaaS offering. Leverage PaaS in your own data centers and private cloud. Request evaluation.

With 1.5m+ total apps created, 2400 apps created each day, 2100 new users each week, OpenShift provides the best PaaS experience for Java with JBoss EAP, Tomcat, Jenkins, Maven, Eclipse, MongoDB, MySQL, and a whole variety of pluggable cartridges. OpenShift provides great velocity by providing support for devops, Node.js, Ruby, Mobile, NoSQL. In addition it also offers stability by offering multi-tenancy, security, auto-scaling, no lock-in, and Red Hat Enterprise Linux.

OpenShift was the first PaaS to offer support for WildFly, naturally! As WildFly CR1 was released recently with 100% Java EE 7 TCK passing, the developer cartridge has been updated as well.

Lets take a look at how to get started with WildFly CR1 using the CLI tools. Alternatively, Web Console or IDE can be used as explained in Getting Started Guide.

  1. Install the client: sudo gem install rhc
  2. Setup your environment: rhc setup
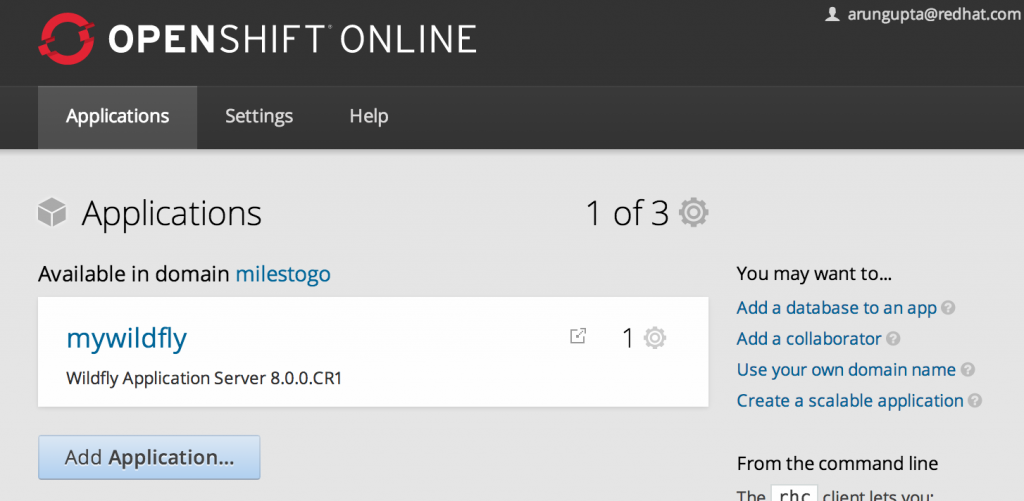
  3. Create your application as shown
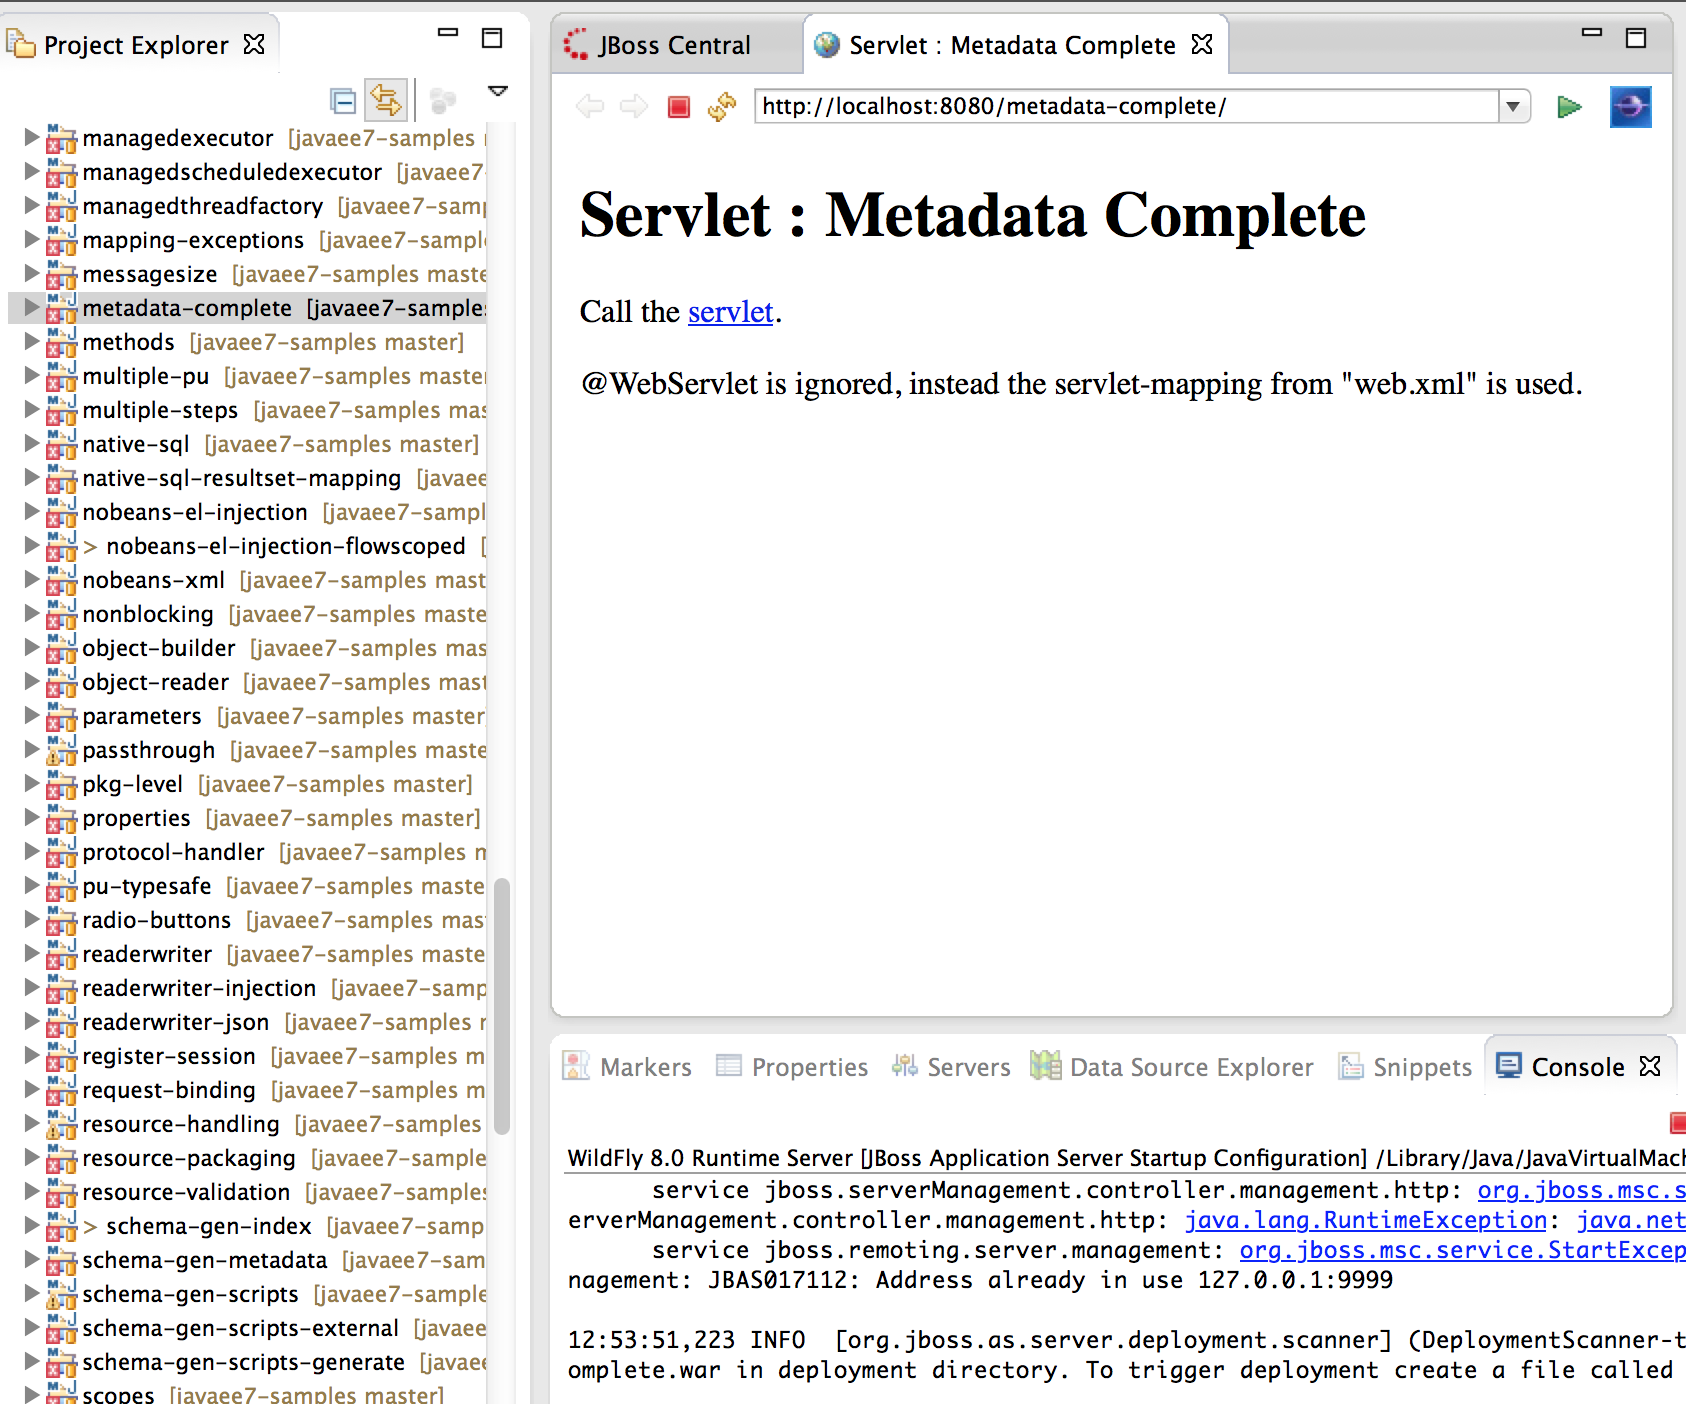
    And now you have your first application running on OpenShift and deployed on WildFly. Console should show the following output:

openshift-console-techtip7

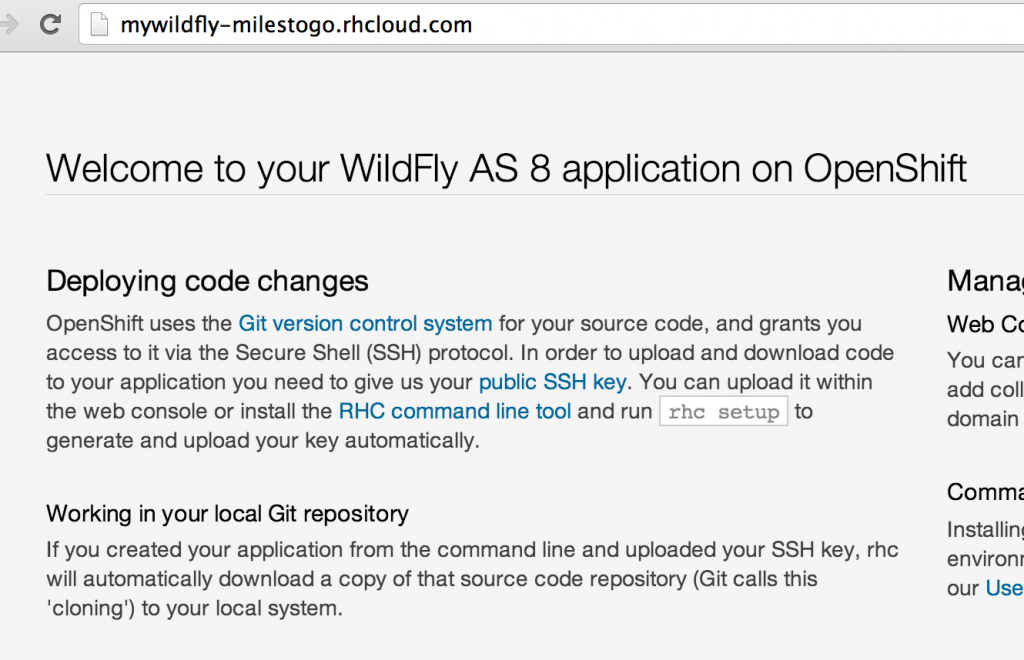
The application is now accessible at:

http://mywildfly-milestogo.rhcloud.com and looks like:

wildfly-openshift-mainpage-techtip7

Port forwarding can be enabled by issuing the following command:

Now WildFly’s wonderful admin console is accessible at http://localhost:9090 and is automatically redirected to your instance running on OpenShift.

You can also get some more details about the service at:

http://mywildfly-milestogo.rhcloud.com/snoop.jsp

Do you want to try deploying one of the Java EE 7 samples on this application now ? May be a WebSocket one ๐Ÿ˜‰

NetBeans 8 and WildFly 8 (Tech Tip #6)

Announcing the availability of WildFly support in NetBeans 8 nightly builds!

Wildfly_logo

netbeans-dev-techtip6

Disclaimer: WildFly plugin provides very basic functionality as of now and is evolving rapidly to support broader feature set. It is purely for testing purpose at this time.

Many thanks to Emmanuel Hugonnet for contributing the plugin and constant support from NetBeans team, especially Geertjan Wielenga in making this possible.

How to get started ?

  1. Download NetBeans 8 nightly. Worked on existing NetBeans 7.4 as well, see instructions below.
  2. Go to “Tools”, “Plugins”, “Available Plugins”, search on “wildfly” to see the updated screen:wildfly-plugin--netbeans-techtip6click on “Install”. Follow the prompts to complete the installation.
  3. In NetBeans, go to “Services”, right click on “Servers”, select “Add Server…” to see:wildfly-server-configure-techtip6Click on “Next>”.
  4. Install or build WildFly following Tech Tip #1. Click on “Browse…” next to “Server Location…” and select the location of WildFly. For example, I used “/Users/arungupta/workspaces/wildfly/build/target/wildfly-8.0.0.Beta2-SNAPSHOT” on my machine.wildfly-server-instance-techtip6

    Click on “Next>”.
  5. Take the defaults as shown:wildfly-instance-props-techtip6and click on “Finish”. Now you can see WildFly configured in NetBeans:

    wildfly-server-techtip6

  6. Right-click on the newly added server and select “Start”:wildfly-start-techtip6to see an output something like:

    “09:51:29,191 INFO [org.jboss.as] (Controller Boot Thread) JBAS015874: WildFly 8.0.0.Beta2-SNAPSHOT “WildFly” started in 2039ms – Started 184 of 232 services (78 services are lazy, passive or on-demand)”

    in the output console.

That’s all it takes to configure WildFly 8 in NetBeans 8!

Trying to run a simple sample showed the following window:

netbeans-server-one-time-techtip6

I particularly like this feature as it does not “corrupt” my Maven files or generate any IDE-specific files.

Do you want to try running Java EE 7 samples/tests and hands-on lab on WildFly from NetBeans ? File plugin bugs at NetBeans Bugzilla and use “WildFly” component.

Note, although this plugin can be installed in NetBeans 8 out-of-the-box, but you can configure an additional Update Center in earlier versions of NetBeans and use “http://deadlock.netbeans.org/job/nbms-and-javadoc/lastStableBuild/artifact/nbbuild/nbms/updates.xml.gz” URL. This is how I hacked my NetBeans 7.4 installation and added support for WildFly there.

Get your wheels churning and try your WildFly applications running from NetBeans 8.

Getting Started with JBoss Tools and WildFly (Tech Tip #5)

JBoss Tools 4.1.1 and JBoss Developer Studio 7.1 were released 2 days ago. This release is built on top of Eclipse Kepler 4.3.1, came in less than 6 months from the previous one, has 500+ bug fixes and some nice  features.

  • Improved hybrid mobile tooling with support for Apache Cordova using Aerogear
  • More support for OpenShift 2.0
  • Content assist on Angular.js attributes and resource content

What is the difference between JBoss Tools and JBoss Developer Studio ?

JBoss Tools is a set of plugins for Eclipse that complements, enhances and goes beyond the support that exists for JBoss and related technologies in the default Eclipse distribution.

JBoss Developer Studio is a fully bundled Eclipse distribution which not only includes the majority of JBoss Tools but also all its needed dependencies and 3rd party plugins allowing for an easy one-click and no-fuss installation.

If you are into doing your own bleeding edge Eclipse plugin assembly, JBoss Tools is for you; if you are more into having something that “Just Works” then JBoss Developer Studio is the way to go.

I took JBoss Tools for a ride and tried Java EE samples on WildFly. Here are the steps for the same:

  1. Downloaded Eclipse IDE for Java EE Developers. Ignore this step if you already have Eclipse Kepler 4.3.1 for Java EE.
  2. Drag and Drop the button in Eclipse to install the tools . There are other usual methods to install as well but I found this extremely convenient.Dropping the button shows the following screen:jboss-tools-install-techtip4

    Follow the instructions to complete the installation. Restarting the Eclipse shows the following screen:

    kepler-main-screen-techtip4

    And that shows a successful installation.

  3. Click on the “Servers” tab, click on “Click this link to create a new server…”jboss-servers-techtip4Select “WildFly” and click on “Next>”. Use Tech Tip #1 to install WildFly locally on your machine. Specify the WildFly location on next screen:

    wildfly-location-techtip4

    Click on the second “Browse…” button to select an appropriate profile. Click on “Finish” to complete WildFly installation.

  4. Right-click on the selected server and click on “Start” to start WildFly.wildfly-log-techtip4
  5. Check out Java EE samples and import them in Eclipse. Select any project, right-click on it and select “Run on Server”. Choose the WildFly server to see the output as:

jboss-tools-browser-techtip4

And now you’ve a Java EE 7 sample running on WildFly using JBoss Tools!

Here are some resources:

  • JBoss Developer Studio Getting Started Guide
  • New and Noteworthy features
  • Ask a question on forums, @jbosstools, or file an issue on JIRA

Have fun!

IntelliJ IDEA 13, Java EE 7 and WildFly (Tech Tip #4)

IntelliJ IDEA 13 was recently released – download now!

intellij-idea13

What’s New provide a comprehensive list of new features in this release, and there are plenty! Needless to say the features that I’m most excited about is Java EE 7 and WildFly support.

Here are some of the highlights for Java EE 7 in IDEA 13:

  • Support for JavaServer Faces 2.2 including a rich set of coding assistance features for flows, actions, contracts, pass-through attributes, and more.
  • Improved navigation, code analysis, and diagrams for injected beans, including Context and Dependency Injection 1.1 annotations and beans.xml configuration.
  • New JAX-RS 2.0 and WebSocket annotations are supported with additional code completion and analysis for path parameters; improved REST Client tool window (now with authorization capabilities and requests history.)
  • Advanced coding assistance for Batch Processing jobs definition, including specific code completion, navigation, code analysis, and many more.
  • Easier project configuration: no need to download or configure Java EE libraries if they are bundled with application server youโ€™re using. This was my personal pet peeve for the longest time and is very clean now.

Andrey Cheptsov (from JetBrains), Antonio Goncalves (a very famous Java person ๐Ÿ˜‰ and myself did a webinar a few days ago highlighting some of these capabilities. A replay of the webinar is now available:

Here is a quick tutorial and a playlist of videos that show the Java EE 7 features in detail:

WildFly 8 Beta2 snapshot can be easily configured as well:

techtip4-wildfly8-beta2-snapshot-idea13

Here are some additional videos for you to get started:

  • How to import Java EE 7 samples from GitHub,
  • How to test RESTful web applications using REST Client tool window,
  • How to debug WebSockets,
  • And finally how to configure Java EE 7 using Gradle.

A fully imported Java EE 7 samples repo is shown below:

tectip4-javaee7-samples

IntelliJ has definitely matured a LOT since I tried it first a few years ago. Congratulations to the entire team for a release well done, especially Andrey who really listened to all the feedback and Philip Torchinsky (ex-colleague and a friend) who triggered my interest back in IntelliJ.

Note that Java EE support is only available in Ultimate Edition, not the free Community Edition. Compare the feature sets between the two here. Both the bundles are available for download here.

Also note, IDEA 13 still requires JDK 6 for retina display although there is a hack available for JDK 7.

Java EE 7 Implementations in WildFly (Tech Tip #3)

WildFly Beta 1 has been available for some time now. Tech Tip #1 shows you how to get started with it. Have you tried it ?

Wildfly_logo

This tip will inform you of where all the different Java EE 7 component implementations are coming from:

Component JSR Implementation
Java API for WebSocket 356 Undertow (lightweight Web server for WildFly)
Java API for JSON Processing 353 Used from GlassFish
Concurrency Utilities for Java EE 236 Used from GlassFish
Batch Applications for the Java Platform 352 jberet
Java API for RESTful Web Services 339 RESTEasy rest-easy-logo
Java Message Service (JSR 343) 343 HornetQ hornetq
Contexts and Dependency Injection 346 Weld weld-logo
Bean Validation 349 Hibernate Validator hibernate-validator-logo
Java API for Persistence 338 Hibernate hibernate-logo
Java Connector Architecture 322 IronJacamar iron-jacamar-logo
Java Transaction API 907 Narayana naryana-logo
JavaServer Faces 344 Used from GlassFish
Expression Language 341 Used from GlassFish
Servlet 340 Undertow
Enterprise JavaBeans 345 WildFly
Java API for XML-based Web Services 224 JBossWS jbossws-logo (Apache CXF is default)


And in case you are wondering, here is a pancake diagram that shows how these technologies fit together:

javaee7-pancake

Have you tried any of the implementations by itself ?