Monthly Archives: April 2015

Devoxx4Kids CFP at Red Hat Summit and DevNation

RedHat Summit LogoDevNation Logo Devoxx4Kids

Red Hat is hosting a Devoxx4Kids event that will invite technology educators and kids together on Sunday, Jun 21 in Boston, MA.

Are you speaking or attending Red Hat Summit or DevNation? Do you live in and around Boston area?

Are you interested in delivering a 2-hour hands-on workshop for kids on the Sunday before the main conference?

This is an opportunity for developers and educators who would like to give a 2-hour hands-on workshop to kids from 6-16 years old. Presenters will need to arrange all the software and hardware required for the lab, except laptops which will be provided.

Coordinates

What? Two tracks, six workshops
Who?
Kids 6-10 and 10-16 years old
When? Sunday, Jun 21
Where? Hynes Convention Center, Boston, MA

Suggested Topics

What are some of the suggested topics that can be submitted for the workshops?

  • Are you involved with CoderDojo or a Devoxx4Kids instructor who would like to give a workshop in Boston?
  • Do you like to tinker with Tynker, Scratch, Blockly, Greenfoot or any other such technology?
  • Have you been giving workshops on LEGO, Arduino, RaspberryPi, Intel Galileo, or any other fancy boards?
  • Would you like to show a real practical use case of Internet of Things to kids using simple software and hardware?
  • How about some Java, JavaScript, Scala, HTML5, CSS, Python, Ruby?
  • Teach kids workshops on basic principles of Open Source?
  • Build a simple mobile applications using Android or iOS?

And these are only suggested topics. We know that you are much more creative and can submit all sorts of fun sessions.

Submit Talks

Submit your talks by filling in the form below:

We have a limited capacity and looking forward to your submissions. You’ve until May 7th to submit your workshops.

Good luck!

If you’ve submitted talks for the main conference, then this would be a great opportunity to bring your kids. They can either attend the workshop, or even deliver a workshop. Young presenters are always very inspiring!

You can learn more about Red Hat’s involvement with Devoxx4Kids at jboss.org/devoxx4kids.

Registration for this event will be announce at a later date.

Clustering Using Docker Swarm 0.2.0 (Tech Tip #85)

One of the key updates as part of Docker 1.6 is Docker Swarm 0.2.0. Docker Swarm solves one of the fundamental limitations of Docker where the containers could only run on a single Docker host. Docker Swarm is native clustering for Docker. It turns a pool of Docker hosts into a single, virtual host.

This Tech Tip will show how to create a cluster across multiple hosts with Docker Swarm.

Docker Swarm

A good introduction to Docker Swarm is by @aluzzardi and @vieux from Container Camp:

Key Components of Docker Swarm

Docker Swarm Cluster

Swarm Manager: Docker Swarm has a Master or Manager, that is a pre-defined Docker Host, and is a single point for all administration. Currently only a single instance of manager is allowed in the cluster. This is a SPOF for high availability architectures and additional managers will be allowed in a future version of Swarm with #598.

Swarm Nodes: The containers are deployed on Nodes that are additional Docker Hosts. Each Swarm Node  must be accessible by the manager, each node must listen to the same network interface (TCP port). Each node runs a node agent that registers the referenced Docker daemon, monitors it, and updates the discovery backend with the node’s status. The containers run on a node.

Scheduler Strategy: Different scheduler strategies (binpack, spread, and random) can be applied to pick the best node to run your container. The default strategy is spread which optimizes the node for least number of running containers. There are multiple kinds of filters, such as constraints and affinity.  This should allow for a decent scheduling algorithm.

Node Discovery Service: By default, Swarm uses hosted discovery service, based on Docker Hub, using tokens to discover nodes that are part of a cluster. However etcd, consul, and zookeeper can be also be used for service discovery as well. This is particularly useful if there is no access to Internet, or you are running the setup in a closed network. A new discovery backend can be created as explained here. It would be useful to have the hosted Discovery Service inside the firewall and #660 will discuss this.

Standard Docker API: Docker Swarm serves the standard Docker API and thus any tool that talks to a single Docker host will seamlessly scale to multiple hosts now. That means if you were using shell scripts using Docker CLI to configure multiple Docker hosts, the same CLI would can now talk to Swarm cluster and Docker Swarm will then act as proxy and run it on the cluster.

There are lots of other concepts but these are the main ones.

TL;DR Here is a simple script that will create a boilerplate cluster with a master and two nodes:

Lets dig into the details now!

Create Swarm Cluster

Create a Swarm cluster as:

This command returns a token and is the unique cluster id. It will be used when creating master and nodes later. As mentioned earlier, this cluster id is returned by the hosted discovery service on Docker Hub.

Make sure to note this cluster id now as there is no means to list it later. #661 should fix this.

Create Swarm Master

Swarm is fully integrated with Docker Machine, and so is the easiest way to get started on OSX.

  1. Create Swarm master as:
    --swarm configures the machine with Swarm, --swarm-master configures the created machine to be Swarm master. Make sure to replace cluster id after token:// with that obtained in the previous step. Swarm master creation talks to the hosted service on Docker Hub and informs that a master is created in the cluster.

    There should be an option to make an existing machine as Swarm master. This is reported as #1017.

  2. List all the running machines as:

    Notice, how swarm-master is marked as master.

    Seems like the cluster name is derived from the master’s name. There should be an option to specify the cluster name, likely during cluster creation. This is reported as #1018.

  3. Connect to this newly created master and find some more information about it:

Create Swarm Nodes

  1. Create a swarm node as:

    Once again, node creation talks to the hosted service at Docker Hub and joins the previously created cluster. This is specified by --swarm-discovery token://... and specifying the cluster id obtained earlier.

  2.  Create another Swarm node as:

  3. List all the existing Docker machines:

    The machines that are part of the cluster have the cluster’s name in the SWARM column, blank otherwise. For example, mydocker is a standalone machine where as all other machines are part of swarm-master cluster. The Swarm master is also identified by (master) in the SWARM column.

  4. Connect to the Swarm cluster and find some information about it:

    There are 3 nodes – one Swarm master and 2 Swarm nodes. There is a total of 4 containers running in this cluster – one Swarm agent on master and each node, and there is an additional swarm-agent-master running on the master. This can be verified by connecting to the master and listing all the containers:

  5. Configure the Docker client to connect to Swarm cluster and check the list of running containers:

    No application containers are running in the cluster, as expected.

  6. List the nodes in the cluster as:

A subsequent blog will show how to run multiple containers across hosts on this cluster, and also look into different scheduling strategies.

Scaling Docker with Swarm has good details.

Swarm is not fully integrated with Docker Compose yet. But what would be really cool is when I can specify all the Docker Machine descriptions in docker-compose.yml, in addition to the containers. Then docker-compose up -d would setup the cluster and run the containers in that cluster.

JBoss Heroes – The Road to Awesome!

Juliet made one of the most famous quote in Romeo and Juliet play by William Shakespeare:

What’s in a name? that which we call a rose
By any other name would smell as sweet;

Red Hat announced JBoss Champions a few weeks ago. These are a selected group of community members who are passionate advocate of JBoss technologies. It fosters the growth of individuals that promote adoption of JBoss Projects and/or JBoss Products and actively share their deep technical expertise about it in the community, within their company and their customers or partners. This could be done in forums, blogs, screencasts, tweets, conferences, social media, whitepapers, articles, books, and other means.

The essence, purpose, and intention of the program is still exactly the same. The name is now changed to JBoss Heroes.

JBoss Hero

For completeness, let me repeat the main information in this blog as well.

Founding JBoss Heroes

Proud and excited to announce the first set of JBoss Heroes:

  1. Adam Bien (@AdamBien)
  2. Alexis Hassler (@alexishassler)
  3. Antonin Stefanutti (@astefanut)
  4. Antonio Goncalves (@agoncal)
  5. Bartosz Majsak (@majson)
  6. Francesco Marchioni (@mastertheboss)
  7. Geert Schuring (@geertshuring)
  8. Guillaume Scheibel (@g_scheibel)
  9. Jaikiran Pai
  10. John Ament (@JohnAment)
  11. Mariano Nicolas De Maio (@marianbuenosayr)
  12. Paris Apostolopoulos (@javapapo)

Many congratulations to the first set of JBoss Heroes!

Make sure to wish them using email, tweet, blog, or any other means that is available on their jboss.org profile. Give them a hug when you meet them at a conference. Ask them a tough JBoss question, challenge them! Invite them to your local Java User Group to give a talk about JBoss technology.

Want to nominate a JBoss Hero?

Do you have it in you, and feel worthy of being a JBoss Hero?

Want to nominate yourself, or somebody else?

Send an email to heroes@jboss.org.

Here are some likely candidates:

  • Senior developers, architects, consultants, academia who are using and promoting JBoss technologies using different means
    • Blogs and webinars
    • Publish articles on jboss.org, InfoQ, DZone, etc.
    • Social media
    • Talks at conferences and local JUGs/JBUGs
  • Implemented real-world projects using JBoss technologies
  • Actively answering questions in JBoss forums/StackOverflow
  • Authored a book on JBoss topic
  • Lead a JBoss User Group
  • Mentoring other community members and grooming heroes

Make sure the nominee has a current jboss.org profile and has all the relevant details. Include any references that will highlight your value to the JBoss community. The complete list of criteria is clearly defined at jboss.org/heroes.

Subscribe to the twitter feed of existing @jbossdeveloper/lists/jboss-heroes.

Once again, many congratulations to the first set of JBoss Heroes, and looking forward to many others.

Submit your nomination today!

Are you wondering why the name change? Ask me about it when we meet in person 😉

JavaOne4Kids 2015 – Submit Your Talks

JavaOne4Kids Devoxx4Kids 

Recap of JavaOne Kids Day 2014

Do you remember JavaOne Kids Day 2014?

It was quite a blast with ~135 kids learning Python, Minecraft modding, Arduino, NAO, Greenfoot and lots of other technologies using hands-on workshops. Satisfying and rewarding are the two words that will summarize helping with the event last year!

Just to recap, here are some pictures from the last year’s event:


One of the most vocal feedback from the event was:

Based upon this very popular attendee request, and extremely positive feedback from everywhere else, JavaOne 2015 is taking that event to a much bigger scale. However this event will only be successful if you are share your passion and time to educate kids.

How can I help JavaOne4Kids 2015?

  • Are you a technology educator?
  • Are you a school teacher who would like to deliver a workshop at a professional conference?
  • Are you involved with CoderDojo or Devoxx4Kids instructor who would like to give a workshop in San Francisco?
  • Do you like to tinker with Tynker, Scratch, Blockly, Greenfoot or any other such technology?
  • Have you been giving workshops on LEGO, Arduino, RaspberryPi, Intel Galileo, or any other fancy boards?
  • Would you like to show a real practical use case of Internet of Things to kids using simple software and hardware?
  • How about some Java, JavaScript, Scala, HTML5, CSS, Python, Ruby?
  • Building simple mobile applications using Android or iOS?

JavaOne Call For Papers is open. There is a special track for developers and educators who are interested in delivering a two-hour hands-on workshop targeted at children 10 to 18 years old. Presenters will be responsible for preparing all the content and required hardware and software for 50 children—exclusive of laptops, which will be provided.

If you’ve submitted talks for the main conference, then this would be a great opportunity to bring your kids. They can either attend the workshop, or even deliver a workshop.

We love young presenters!

To submit a JavaOne4Kids Day talk, select “JavaOne4Kids Day” as the session type. Even though you are required to populate a primary track, this field will be ignored.

Read complete details at oracle.com/javaone/javaone4kids.html.

Don’t wait, submit your workshop today!

JBoss EAP 6.4 – Java 8, JSR 356 WebSocket, Kereberos auth for management

JBoss Enterprise Application Platform 6.4, an update to the commercial release of Red Hat’s Java EE 6 compliant application server is now available.

JBoss EAP Logo

Download JBoss EAP 6.4

For current customers with active subscriptions, the binaries can be downloaded from the Customer Support Portal. This also has Installer, Quickstarts, Javadocs, Maven repository, Source Code, and much more.

Bits are also available from jboss.org/products/eap under development terms & conditions; and questions can be posed to the EAP Forum.

New Features in JBoss EAP 6.4

The key new features are:

  • Java 8 Support
  • JSR 356 WebSockets 1.0 support
  • Kerberos auth for management API connections, EJB invocations, and selected database access
  • Hibernate Search included as a new feature
  • Support for nested expressions
  • Ability to read boot errors from the management APIs
  • Display of server logs in the admin console

Read the comprehensive list of new features in JBoss EAP 6.4.

Documentation

Complete documentation is available at Customer Support Portal, and here are quick links:

  • Release Notes
  • Documentation
    • Getting Started Guide
    • Installation Guide
    • Administration and Configuration Guide
    • Development Guide
    • Security Guide
    • Migration Guide

If you are looking for a Java EE 7 compliant application server, then download WildFly.

Docker 1.6 released – Docker Machine 0.2.0 (Tech Tip #84)

Docker 1.6 was released yesterday. The key highlights are:

  • Container and Image Labels allow to attach user-defined metadata to containers and images (blog post)
  • Docker Windows Client (blog post)
  • Logging Drivers allow you to send container logs to other systems such as Syslog or a third-party. This available as a new option to docker run,  --log-driver, which has three options: json-file (the default, and same as the old functionality), syslog, and none. (pull request)
  • Content Addressable Image Identifiers simplifies applying patches and updates (docs)
  • Custom cgroups using --cgroup-parent allow to define custom resources for those cgroups and put containers under a common parent group (pull request)
  • Configurable ulimit settings for all containers using --default-ulimit(pull request)
  • Apply Dockerfile instructions when committing or changing can be done using commit --change and import –change`. It allows to specify standard changes to be applied to the new image (docs)
  • Changelog

In addition, Registry 2.0, Machine 0.2, Swarm 0.2, and Compose 1.2 are also released.

This blog will show how to get started with Docker Machine 0.2.0. Subsequent blogs will show how to use Docker Swarm 0.2.0 and Compose 1.2.

Download Docker Client

Docker Machine takes you from zero-to-Docker on a host with a single command. This host could be your laptop, in the cloud, or in your data center. It creates servers, installs Docker on them, then configures the Docker client to talk to them.

It works with different drivers such as Amazon, VMWare, and Rackspace. The easiest to start on a local laptop is to use VirtualBox driver. More details on configuring Docker Machine in the next section. But in order for Docker commands to work without having to use SSH into the VirtualBox image, we need to install Docker CLI.

Lets do that!

If you have installed Boot2Docker separately, then there is Docker CLI included in the VM. But this approach would allow you to directly call multiple hosts from your local machine.

Docker Machine 0.2.0

Learn more details about Docker Machine and how to getting started with version 0.1.0. Docker 1.6 released Docker Machine 0.2.0. This section will talk about how to use that and configure it on Mac OS X.

  1. Download Docker Machine 0.2.0:
  2. Verify the version:
  3. Download and install the latest VirtualBox.
  4. Create a Docker host using VirtualBox provider:
  5. Setup client by giving the following command in terminal:
  6. List the Docker Machine instances running:
  7. List Docker images and containers:
    Note, there are no existing images or container.
  8. Run a trivial Java EE 7 application on WildFly using arungupta/javaee7-hol image:
  9. Find IP address of the Docker host:
  10. Access the application at http://192.168.99.100:8080/movieplex7/ to see the output as:Docker Machine 0.2.0 Output
  11. List the images again:
    And the containers:

Enjoy!

Paris Marathon 2015 – Electric and Runtastic

It took me ten years to run first international marathon. But so glad I choose Paris Marathon as the inaugural run. The experience was electric, really amazing, and runtastic.

Paris Marathon 2015

There are several common trends observed after running San Francisco, Sacramento, Napa Valley, and Big Sur marathons over the past years. So I’m taking this opportunity to share what I liked about the race, and what could possibly be improved. Some of this feedback may be tinted as I’ve only run marathons in the USA only so far.

Paris Marathon – The Good

  1. Cheerleaders: Number of spectators through out, literally through out, the course was definitely the best part of the race. And there were ~250,000 of them. Men, women, families, and so many little kids stretching their hands out and waiting for high-five, really kept the runners motivated.
  2. Attractions: How many races go through tourist spots like Eiffel Tower, Louvre, and Seine? OK, to be fair, San Francisco has Golden Gate Bridge and Golden Gate Park, Napa Valley has vineyards lined through out, and Big Sur runs along Highway 1 next to Pacific. In addition, how many races can claim to start and finish at a beautiful venue like Arc de Triomphe?
  3. Mile markers: Mile markers were done really right. They were tall, big bold numbers, and nicely stretched on a frame instead of fluttering flags. They could possibly withstand wind and rain, although the weather was very cooperative. Another important aspect was that there were mile markers, in addition to KM markers. This made it really helpful for the US runners as we are more used to former.
  4. Music: ~100 local bands were playing through out the race. There were very few moments that the music could not be heard.
  5. Corrals: With 50,000 runners (35% outside France and from 183 countries), the corrals were very well organized on Champs de Elysees. The corrals were starting with 3 hour pace, 15 minutes apart, and closed ~15 mins before their start.
  6. Paris Fire Department was sparing water using their hose at several points through out the course. Anybody running a marathon can appreciate the importance of that when the temperature is ~55-60F.
  7. Expo: This was the biggest expo with ~200 booths. It even had a 80m (CHECK) running track to try out new running shoes. There were plenty of clothes, running gear, accessories, etc. All the runner’s name were printed on a wall, and that was quite a crowded destination for everybody.

Paris Marathon – Areas of Improvement

  1. 436,497 number of plastic bottles with almost a million liters water were handed throughout the course. Based upon my personal observation, ~30% of the water was wasted. California is going through fourth year of drought, and there are several countries with severe water shortage. Hey, these places can take all the water! And plastic, really? Use paper glasses, runners and mother nature would love you for ever.
  2. Sports drinks (Powerade) were offered only once during the entire course. Plain water does not supplement the electrolytes lost during the race and so they should be offered at each water stand, in addition to water. That’s what I’ve experienced in all the US races so far.
  3. Water stations were at ~5k. This is fine for the first 15 miles, but they need to more frequent in the later miles.
  4. Pre-cut bananas were offered at each water stand. But banana peels and cobble stone do not make a good combination. Pre-peeled would be preferred.
  5. Finishers shirt was given after the finish line. It should instead be given at the Expo as that is more convenient.
  6. Only a limited number of food stalls were at the Expo. And also no place to hydrate.
  7. Communication on the pacing strategy with the pacer was futile as they didn’t know how to speak English.

This race made me create a new bucket list item, and that is to run a marathon in all seven continents. North America and Europe are now checked, lets see which one will be the next one.

I also like the idea of Conference Driven Marathon as suggested in the following tweet:

Lets see which conference is going to align their schedule with a marathon. Conference organizers, game on 😉

You are definitely missing out if you’ve never run this race. Its a big race, go run it!

Docker MySQL Persistence (Tech Tip #83)

One of the recipes in 9 Docker recipes for Java developers  is using MySQL container with WildFly. Docker containers are ephemeral, and so any state stored in them is gone after they are terminated and removed. So even though MySQL container can be used as explained in the recipe, DDL/DML commands can be used to persist data, but that state is lost, or at least not accessible, after the container is terminated and removed.

This blog shows different approaches of Docker MySQL Persistence – across container restarts and accessible from multiple containers.

Default Data Location of MySQL Docker Container

Lets see the default location where MySQL Docker container stores the data.

Start a MySQL container as:

And inspect as:

Then it shows the anonymous volumes:

If you are using Boot2Docker, then /mnt/sda1 directory is used for storing images, containers, and data. This directory is from the Boot2Docker virtual machine filesystem. This is clarified in Docker docs as well and worth repeating here:

Note: If you are using Boot2Docker, your Docker daemon only has limited access to your OSX/Windows filesystem. Boot2Docker tries to auto-share your /Users (OSX) or C:\Users (Windows) directory – and so you can mount files or directories using docker run -v /Users/<path>:/<container path> ... (OSX) or docker run -v /c/Users/<path>:/<container path ... (Windows). All other paths come from the Boot2Docker virtual machine’s filesystem.

You can view this mounted directory on Boot2Docker by logging into the VM as:

And then view the directory listing as:

MySQL Data Across Container Restart – Anonymous Volumes

Anonymous volumes, i.e. volumes created by a container and which are not explicitly mounted, are container specific. They stay around unless explicitly deleted using docker remove -v command. This means a new anonymous volume is mounted for a new container even though the previous volume may not be deleted. The volume still lives on the Docker host even after the container is terminated and removed. Anonymous volume created by one MySQL container is not accessible to another MySQL container. This means data cannot be shared between different data containers.

Lets understand this using code.

Start a MySQL container as:

Login to the container:

Connect to the MySQL instance, and create a table, as:

Stop the container:

Restart the container:

Now when you connect to the MySQL container, the database table is shown correctly. This shows that anonymous volumes can persist state across container restarts.

Inspect the container:

And it correctly shows the same anonymous volume from /mnt/sda1 directory.

Now lets delete the container, and start a new MySQL container. First remove the container:

And start a new container using the same command as earlier:

Now when you try to see the list of tables, its shown as empty:

This is because anonymous volumes are visible across container restarts, but not visible to different containers. A new volume is mounted for a new run of the container. This is also verified by inspecting the container again:

A different directory is used to mount the anonymous volume.

So effectively, any data stored in the MySQL database by one container is not available to another MySQL container.

Docker Volume to Store MySQL Data

One option to share data between different MySQL containers is to mount directories on your Docker host as volume in the containers using -v switch when running the Docker image. If you are using Boot2Docker, then there are two options:

  • Mount a directory from the Boot2Docker VM filesystem. This directory, if does not exist already, would need to be created.
  • Mount a directory from your Mac host. For convenience, this need to exist in /Users/arungupta or whatever your corresponding directory is.

The first approach ties to the specific Boot2Docker VM image, and the second approach ties to a specific Mac host. We’ll look at how this can be fixed later.

We’ll discuss the first approach only here. Start the MySQL container as:

/var/lib/mysql is the default directory where MySQL container writes its files. This directory is not persisted after a Boot2Docker reboot. So the recommended option is to create a directory in /mnt/sda1 and map that instead. Make sure to create the directory /mnt/sda1/var/mysql_data, as is the case above.

Now inspecting the container as:

Now any additional runs of the container can mount the same volume and will have access to the data.

Remember, multiple MySQL containers cannot access this shared mount together and instead will give the error:

So you need to make sure to stop an existing MySQL container, start a new MySQL container using the same volume, and the data would still be accessible.

This might be configured using master/slave configuration, where the master and slave have access to same volume. It’ll be great if somebody who has tried that configuration can share that recipe.

But as mentioned before, this approach is host-centric. It restricts MySQL to a particular Boot2Docker VM image. That means, you once again loose the big benefit of portability as offered by Docker.

Meet Docker data-only containers!

Docker Data-only Containers

Docker follows Single Responsibility Principle (SRP) really well. Docker Data-only containers are NoOp containers that perform a command that is not really relevant, and instead mount volumes that are used for storing data. These containers don’t even need to start or run, and so the command really is irrelevant, just creating them is enough.

Create the container as:

If you plan to use a MySQL container later, its recommended to use the mysql image to save bandwidth and space from downloading another random image. You can adjust this command for whatever database container you are using.

If you intend to use MySQL, then this data-only container can be created as:

Dockerfile for this container is pretty simple and can be adopted for a database server of your choice.

Since this container is not running, it will not be visible with just docker ps. Instead you’ll need to use docker ps -a to view the container:

Docker allows to mount, or pull in, volumes from other containers using --volumes-from switch specified when running the container.

Lets start our MySQL container to use this data-only container as:

Boot2Docker VM has /var/lib/mysql directory now populated:

If you stop this container, and run another container then the data will be accessible there.

Docker Data Containers

In a simple scenario, application server, database, and data-only container can all live on the same host. Alternatively, application server can live on a separate host and database server and data-only container can stay on the same host.

Hopefully this would be more extensive when Docker volumes can work across multiple hosts.

It would be nice if all of this, i.e. creating the data-only container and starting the MySQL container that uses the volume from data-only container can be easily done using Docker Compose. #1284 should fix this.

Usual mysqldump and mysql commands can be used to backup and restore from the volume. This can be achieved by connecting to the MySQL using CLI as explained here.

You can also look at docker-volumes to manage volumes on your host.

You can also read more about volumes may evolve in future at #6496.

Enjoy!

Minecraft Modding with Forge – Print and Ebook Now Available

Would you like to learn Minecraft Modding in a family-friendly way?
Don’t have any previous programming experience?
Never programmed in Java?

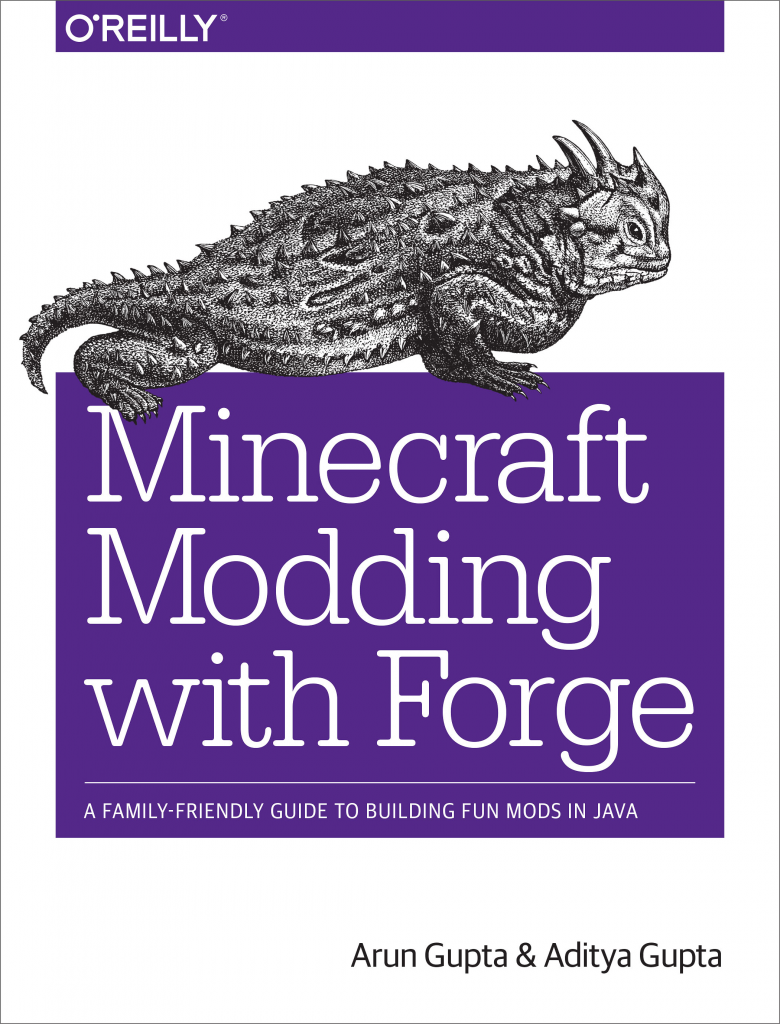
This new O’Reilly book on Minecraft Modding with Forge is targeted at parents and kids who would like to learn how to create new Minecraft mods. It can be read by parents or kids independently, and is more fun when they read it together. No prior programming experience is required however some familiarity with software installation would be very helpful.

Minecraft Modding with Forge Book Cover

Release Date: April 2015
Language: English
Pages: 194
Print ISBN:978-1-4919-1889-0| ISBN 10:1-4919-1889-6
Ebook ISBN:978-1-4919-1883-8| ISBN 10:1-4919-1883-7

Minecraft is commonly associated with “addiction”. This book hopes to leverage the passionate kids and teach them how to do Minecraft Modding, and in the process teach some fundamental Java concepts. They also pick up basic Eclipse skills as well.

It uses Minecraft Forge and shows how to create over two dozen mods. Here is the complete Table of Content:

Chapter 1 Introduction
Chapter 2 Block Break Message
Chapter 3 Fun with Explosions
Chapter 4 Entities
Chapter 5 Movement
Chapter 6 New Commands
Chapter 7 New Block
Chapter 8 New Item
Chapter 9 Recipes and Textures
Chapter 10 Sharing Mods
Appendix A What is Minecraft?
Appendix B Eclipse Shortcuts and Correct Imports
Appendix C Downloading the Source Code from GitHub
Appendix D Devoxx4Kids

Each chapter also provide several additional ideas on what readers can try based upon what they learned.

It has been an extremely joyful and rewarding experience to co-author the book with my 12-year old son. Many thanks to O’Reilly for providing this opportunity of a lifetime experience to us.

Here is the effort distribution by different collaborators on the book:

The book is available in print and ebook and can be purchased from shop.oreilly.com/product/0636920036562.do.

Three reviews so far are all five star and so that is encouraging:

Minecraft Modding with Forge Book Feedback - April 2015

Its also marked as #1 hot new release at Amazon in Game Programming:

Minecraft Modding with Forge - #1 Hot Release on Amazon

Scan the QR code to get the URL on your favorite device and give the first Java programming lesson to your kid – the Minecraft Way. They are going to thank you for that!

minecraft-modding-book-qrcode

Happy modding and looking forward to your reviews.

Microservice Design Patterns

The main characteristics of a microservices-based application are defined in Microservices, Monoliths, and NoOps.  They are functional decomposition or domain-driven design, well-defined interfaces, explicitly published interface, single responsibility principle, and potentially polyglot. Each service is fully autonomous and full-stack. Thus changing a service implementation has no impact to other services as they communicate using well-defined interfaces. There are several advantages of such an application, but its not a free lunch and requires a significant effort in NoOps.

But lets say you understand the required effort, or at least some pieces of it, that is required to build such an application and willing to take a jump. What do you do? What is your approach for architecting such applications? Are there any design patterns on how these microservices work with each other?

microservices-function

Functional decomposition of your application and the team is the key to building a successful microservices architecture. This allows you to achieve loose coupling (REST interfaces) and high cohesion (multiple services can compose with each other to define higher level services or application).

Verb (e.g. Checkout) or Nouns (Product) of your application are one of the effective ways to achieve decomposition of your existing application. For example, product, catalog, and checkout can be three separate microservices and then work with each other to provide a complete shopping cart experience.

Functional decomposition gives the agility, flexibility, scalability, and other *ilities but the business goal is still to create the application. So once different microservices are identified, how do you compose them to provide the application’s functionality?

This blog will discuss some of the recommended patterns on how to compose microservices together.

Aggregator Microservice Design Pattern

The first, and probably the most common, is the aggregator microservice design pattern.

In its simplest form, Aggregator would be a simple web page that invokes multiple services to achieve the functionality required by the application. Since each service (Service A, Service B, and Service C) is exposed using a lightweight REST mechanism, the web page can retrieve the data and process/display it accordingly. If some sort of processing is required, say applying business logic to the data received from individual services, then you may likely have a CDI bean that would transform the data so that it can be displayed by the web page.

Microservice Aggregator Design Pattern

Another option for Aggregator is where no display is required, and instead it is just a higher level composite microservice which can be consumed by other services. In this case, the aggregator would just collect the data from each of the individual microservice, apply business logic to it, and further publish it as a REST endpoint. This can then be consumed by other services that need it.

This design pattern follows the DRY principle. If there are multiple services that need to access Service A, B, and C, then its recommended to abstract that logic into a composite microservice and aggregate that logic into one service. An advantage of abstracting at this level is that the individual services, i.e. Service A, B, and C, and can evolve independently and the business need is still provided by the composite microservice.

Note that each individual microservice has its own (optional) caching and database. If Aggregator is a composite microservice, then it may have its own caching and database layer as well.

Aggregator can scale independently on X-axis and Z-axis as well. So if its a web page then you can spin up additional web servers, or if its a composite microservice using Java EE, then you can spin up additional WildFly instances to meet the growing needs.

Proxy Microservice Design Pattern

Proxy microservice design pattern is a variation of Aggregator. In this case, no aggregation needs to happen on the client but a different microservice may be invoked based upon the business need.

Microservice Proxy Design Pattern


Just like Aggregator, Proxy can scale independently on X-axis and Z-axis as well. You may like to do this where each individual service need not be exposed to the consumer and should instead go through an interface.

The proxy may be a dumb proxy in which case it just delegates the request to one of the services. Alternatively, it may be a smart proxy where some data transformation is applied before the response is served to the client. A good example of this would be where the presentation layer to different devices can be encapsulated in the smart proxy.

Chained Microservice Design Pattern

Chained microservice design pattern produce a single consolidated response to the request. In this case, the request from the client is received by Service A, which is then communicating with Service B, which in turn may be communicating with Service C. All the services are likely using a synchronous HTTP request/response messaging.

Microservice Chain Design Pattern

The key part to remember is that the client is blocked until the complete chain of request/response, i.e. Service <-> Service B and Service B <-> Service C, is completed. The request from Service B to Service C may look completely different as the request from Service A to Service B. Similarly, response from Service B to Service A may look completely different from Service C to Service B. And that’s the whole point anyway where different services are adding their business value.

Another important aspect to understand here is to not make the chain too long. This is important because the synchronous nature of the chain will appear like a long wait at the client side, especially if its a web page that is waiting for the response to be shown. There are workarounds to this blocking request/response and are discussed in a subsequent design pattern.

A chain with a single microservice is called singleton chain. This may allow the chain to be expanded at a later point.

Branch Microservice Design Pattern

Branch microservice design pattern extends Aggregator design pattern and allows simultaneous response processing from two, likely mutually exclusive, chains of microservices. This pattern can also be used to call different chains, or a single chain, based upon the business needs.

Microservice Branch Design Pattern

Service A, either a web page or a composite microservice, can invoke two different chains concurrently in which case this will resemble the Aggregator design pattern. Alternatively, Service A can invoke only one chain based upon the request received from the client.

This may be configured using routing of JAX-RS or Camel endpoints, and would need to be dynamically configurable.

Shared Data Microservice Design Pattern

One of the design principles of microservice is autonomy. That means the service is full-stack and has control of all the components – UI, middleware, persistence, transaction. This allows the service to be polyglot, and use the right tool for the right job. For example, if a NoSQL data store can be used if that is more appropriate instead of jamming that data in a SQL database.

However a typical problem, especially when refactoring from an existing monolithic application, is database normalization such that each microservice has the right amount of data – nothing less and nothing more. Even if only a SQL database is used in the monolithic application, denormalizing the database would lead to duplication of data, and possibly inconsistency. In a transition phase, some applications may benefit from a shared data microservice design pattern.

In this design pattern, some microservices, likely in a chain, may share caching and database stores. This would only make sense if there is a strong coupling between the two services. Some might consider this an anti-pattern but business needs might require in some cases to follow this. This would certainly be an anti-pattern for greenfield applications that are design based upon microservices.

Microservice Branch Shared Data Design Pattern

This could also be seen as a transition phase until the microservices are transitioned to be fully autonomous.

Asynchronous Messaging Microservice Design Pattern

While REST design pattern is quite prevalent, and well understood, but it has the limitation of being synchronous, and thus blocking. Asynchrony can be achieved but that is done in an application specific way. Some microservice architectures may elect to use message queues instead of REST request/response because of that.

Microservice Async Messaging Design Pattern

In this design pattern, Service A may call Service C synchronously which is then communicating with Service B and D asynchronously using a shared message queue. Service A -> Service C communication may be asynchronous, possibly using WebSockets, to achieve the desired scalability.

A combination of REST request/response and pub/sub messaging may be used to accomplish the business need.

Coupling vs Autonomy in Microservices is a good read on what kind of messaging patterns to choose for your microservices.

Hope you find these design patterns are useful.

What microservice design patterns are you using?

JavaOne Cloud, DevOps, Containers, Microservices etc. Track

javaone-logo

Every year, for the past 19 years, JavaOne is the biggest and most awesome gathering of Java enthusiasts from around the world. JavaOne 2015 is the 20th edition of this wonderful conference. How many conferences can claim this? :)

Would you like to be part of JavaOne 2015? Sure, you can get notified when the registration opens and attend the conference. Why not take it a notch higher on this milestone anniversary?

Submit a session and become a speaker? Tips for Effective Sessions Submissions at Technology Conferences provide detailed tips on how to make the session title/abstract compelling for the program committee.

Have you been speaking at JavaOne for past several years? Don’t wait, and just submit your session today. The sooner you submit, higher the chances of program committee members voting on it. You know the drill!

Important Dates

  • Call for Papers closes April 29, 2015
  • Notifications for accepted and declined sessions: mid-June
  • Conference date: Oct 25 – 29

JavaOne Tracks

JavaOne conference is organized by tracks, and the tracks for this year are:

  • Core Java Platform
  • Java and Security
  • JVM and Emerging Languages
  • Java, DevOps, and the Cloud
  • Java and the Internet of Things
  • Java and Server-Side Development
  • Java, Clients, and User Interfaces
  • Java Development Tools and Agile Techniques

I’m excited and honored to co-lead the Java, DevOps, and the Cloud track with Bruno Borges (@brunoborges). The track abstract is:

The evolution of service-related enterprise Java standards has been underway for more than a decade, and in many ways the emergence of cloud computing was almost inevitable. Whether you call your current service-oriented development “cloud” or not, Java offers developers unique value in cloud-related environments such as software as a service (SaaS) and platform as a service (PaaS). The Java Virtual Machine is an ideal deployment environment for new microservice and container application architectures that deploy to cloud infrastructures. And as Java development in the cloud becomes more pervasive, enabling application portability can lead to greater cloud productivity. This track covers the important role Java plays in cloud development, as well as orchestration techniques used to effectively address the service lifecycle of cloud-based applications. Track sessions will cover topics such as SaaS, PaaS, DevOps, continuous delivery, containers, microservices, and other related concepts.

So what exactly are we looking for in this track?

  • How have you been using PaaS effectively for solving customer issues?
  • Why is SaaS critical to your business? Are you using IaaS, PaaS, SaaS all together for different parts of your business?
  • Have you used microservices in a JVM-based application? Lessons from the trenches?
  • Have you transformed your monolith to a microservice-based architecture?
  • How are containers helping you reduce impedance mismatch between dev, test, and prod environments?
  • Building a deployment pipeline using containers, or otherwise
  • Are PaaS and DevOps complimentary? Success stories?
  • Docker machine, compose, swarm recipes
  • Mesosphere, Kubernetes, Rocket, Juju, and other clustering frameworks
  • Have you evaluated different containers and adopted one? Pros and Cons?
  • Any successful practices around containers, microservices, and DevOps together?
  • Tools, methodologies, case studies, lessons learned in any of these, and other related areas
  • How are you moving legacy applications to the Cloud?
  • Are you using private clouds? Hybrid clouds? What are the pros/cons? Successful case studies, lessons learned.

These are only some of the suggested topics and are looking forward to your creative imagination. Remember, there are a variety of formats for submission:

  • 60 mins session or panel
  • Two-hour tutorial or hands-on lab
  • 45 mins BoFs
  • 5 mins Ignite talk

We think this is going to be the coolest track of the conference, with speakers eager to share everything about all the bleeding edge technologies and attendees equally eager to listen and learn from them. We’d like to challenge all of you to submit your best session, and make our job extremely hard!

Once again, make sure to read Tips for Effective Sessions Submissions at Technology Conferences for a powerful session submission. One key point to remember: NO vendor or product pitches. This is a technology conference!

Dilbert Technology Show

Links to Remember

  • Call for Papers: oracle.com/javaone/call-for-proposals.html
  • Tracks: oracle.com/javaone/tracks.html
  • Submit your Proposal: oracleus.activeevents.com/2015/portal/cfp/cfpLogin.ww

JavaOne is where you have geekgasm multiple times during the day. This is going to be my 17th attendance in a row, and so looking forward to see you there!