Monthly Archives: February 2015

Build Binaries Only Once for Continuous Deployment

What is Build Binaries Only Once?

One of the fundamental principle of Continuous Delivery is Build Binaries Only Once, or in short BBOO. This means that the binary artifacts should be build once, and only once. These artifacts should then be stored in a repository manager, such as a Nexus Repository. Subsequent deploy, test, and release cycles should never attempt to build this binary again and instead reuse this binary. This ensures that the exact same binary has gone through all different test cycles and delivered to the customer.

Several times binaries are rebuilt during each testing phase using a specific tag of the workspace, and considered the same. But that is still different! This might turn out to be the same but that’s more incidental. Its more likely not same because of different environment configurations. For example, development team might be using JDK 8 on their machine and the test/staging might be using JDK 7. There are a multitude reasons because of which the binary artifacts could differ. So it’s very essential to build binaries only once, store them in a repository, and make them go through different test, staging, and production cycle. This increases the overall confidence level of delivery to the customer.

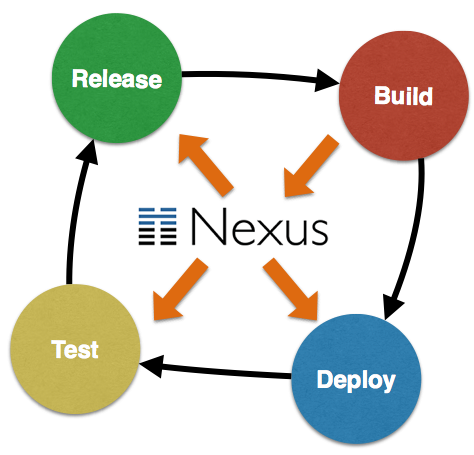
Build Binaries Only Once

This image shows how the binaries are built once during Build stage and stored on Nexus repository. There after, Deploy, Test, and Release stages are only reading the binary from Nexus.

The fact that dev, test, and staging environments differ is a different issue. And we’ll deal with that in a subsequent blog.

How do you setup Build Binaries Only Once?

For now, lets look at the setup:

  1. A Java EE 7 application WAR file is built once
  2. Store in a Nexus repository, or .m2 local repository
  3. Same binary is used for smoke testing
  4. Same binary is used for running full test suite

The smoke test in our case will be just a single test and full suite has four tests. Hopefully this is not your typical setup in terms of the number of tests, but at least you get to see how to setup everything.

Also only two stages of testing, smoke and full but the concept can be easily extended to add other stages. A subsequent blog will show a full blown deployment pipeline.

Lets get started!

  1. Check out a trivial Java EE 7 sample application from github.com/javaee-samples/javaee7-simple-sample. This is a typical Java EE application with REST endpoints, CDI beans, JPA entities.
  2. Setup a local Nexus Repository and deploy a SNAPSHOT of the application to it as:
    By default, Nexus repository is configured on localhost:8081/nexus. Note down the host/port if you are using a different combination. Also note down the exact version number that is deployed to Nexus. By default, it will be 1.0-SNAPSHOT.

    You can also deploy a RELEASE to this Nexus repository as:

    Note down whether you deployed SNAPSHOT or RELEASE.

    In either case, you can also specify -P release Maven profile and sources and javadocs will be attached with the deployment. So if RELEASE is deployed as:

    Then sources and javadocs are also attached.

  3. Check out the test workspace from github.com/javaee-samples/javaee7-simple-sample-test. Make the following changes in this project:
    1. Change nexus-repo property to match the host/port of the Nexus repository. If you used the default installation of Nexus and deployed a RELEASE, then nothing needs to be changed.By default, Nexus has one repository for SNAPSHOTs and another for RELEASEs. The workspace is configured to use RELEASE repository. If you deployed a SNAPSHOT, then “releases” in nexus-repo needs to be changed to “snapshots”to point to the appopriate repository.
    2. Change javaee7-sample-app-version property to match the version of the application deployed to Nexus.
  4. Start WildFly and run smoke tests as:

    This will run all files ending in “SmokeTest”. ShrinkWrap and Arquillian perform the heavy lifting of resolving the WAR file from Nexus and using it for running the tests:

    Running the smoke tests will show the results as:

  5. Run the full tests as:

    This will run all files included in your test suite and will show the results as:

    In both cases, smoke tests and full tests are using the binary that is deployed to Nexus.

Learn more about your toolset for creating this simple yet powerful setup:

arquillian-logo nexus-logowildfly-logo


Here are some other blogs coming in this series:

  • Use a CI server to deploy to Nexus
  • Run tests on WildFly running in a PaaS
  • Add static code coverage and code metrics in testing
  • Build a deployment pipeline

Enjoy!

Setup Local Nexus Repository and Deploying WAR File from Maven (Tech Tip #74)

Maven Central serves as the central repository manager where binary artifacts are uploaded by different teams/companies/individuals and shared with rest of the world. Much like github, and other source code repositories, which are very effective for source code control, these repository managers also act as a deployment destination for your own generated binary artifacts.

Setting up a local repository manager has several advantages. The primary ones are that they act as a highly configurable proxy between Maven central so that everybody does not have to download all the dependencies from the central repo. Another primary reason is to control your interim generated artifacts within your team. Reasons to Use a Repository Manager provide detailed explanation of a complete set of benefits.

This Tech Tip will show how to setup a local Nexus repository manager, and push artifacts to it – both snapshots and releases.

Lets get started!

Install and Configure Local Nexus Repository

  1. Download and unzip latest Nexus OSS. Default administrator’s login/password is admin/admin123. Default deployment login/password is deployment/deployment123.
  2. Start up Nexus as:
    The logs can then be seen as:
    Or you can start where the logs are displayed in the console itself:
  3. Configure Maven Settings file (~.m2/settings.xml) to include the default deployment username and password as:

Deploy Snapshot to Local Nexus Repository

  1. Check out a simple Java EE sample from github.com/javaee-samples/javaee7-simple-sample.
  2. Create and deploy the WAR file to the local Nexus repository as:
    The snapshot repository, after pushing couple of builds, can be seen at localhost:8081/nexus/#view-repositories;snapshots~browsestorage and looks like as shown:

    Nexus Snapshot Repository

    The actual repository storage is in ../sonatype-work/nexus directory. This is created in parallel to where ever Nexus OSS bundle was unzipped.

Deploy Release to Local Nexus Repository

  1. Clean any previously performed release:

  2. Prepare for the next release:

  3. Perform the release:

    Notice, how this command is ending with an error. This is similar to as reported here but the strange thing is that the files are still uploaded on Nexus. Here is the snapshot from localhost:8081/nexus/#view-repositories;releases~browsestorage while trying to test multiple releases and wondering about these “spurious” error messages:

    Nexus Release Repository

    This error will require more debugging but at least snapshot and release builds can now be stored on local Nexus repository.

    UPDATE: Manfred Moser helped debug this error by sending pull requests. This error is now gone and instead should show something like:


You learned how to setup a local Nexus Repository and push snapshot and release builds to it. Subsequent blogs will show how this repository can be used for CI/CD.

Enjoy!

Tips for Effective Session Submissions at Technology Conferences

Several of us go through the process of submitting talks at a technology conference. This requires thinking of a topic that you seem worthy of a presentation. Deciding a topic can be a blog by itself, but once the topic is selected then it involves creating a title and an abstract that will hopefully get selected. The dreaded task of preparing the slides and demos after that is a secondary story, but this blog will talk about dos and don’ts of an effective session submission that can improve your chances of acceptance.

What qualifies me to write this blog?

I’ve been speaking for 15+ years in ~40 countries, around the world, in a variety of technology conferences. In early years, this involved submitting a session at a conference, getting rejected and accepted, and then speaking at some of the conferences. The sessions were reviewed by a Program Committee which is typically a bunch of people, expert in their domain, and help shape the conference agenda. For the past several years, I’ve participated in Program Committees of several conferences, either as an individual member or leading the track with multiple individual members.

Now, I’ve had my share of rejects, and still get rejected at conferences. There are multiple reasons for that such as too many sessions by a speaker, more compelling abstract by another speaker, Program Committee looking for a real-life practitioner, and others. But the key part is that these rejects never let me down. I do miss the opportunity to talk to the attendees at that conference though. For example, I’ve had rejects from a conference three years in a row but got accepted on the fourth year. And hopefully will get invited again this year 😉

Lets see what I practice to write a session title/abstract. And what I expect from other sessions when I’m part of the Program Committee!

Tips for Effective Session Submission

  1. No product pitches – In a technology-focused conference, any product, marketing or seemingly market-ish talk is put at the bottom of the list, or basically rejected right away. Most vendors have their product specific conference and such talks are better suited there.
  2. Catchy title – Title is typically 50-80 characters that explain what your talk is all about. Make your title is catchy and conveys the intention. Program Committee will read through the entire submission but more likely to look at yours first if the title is catchy. Attendees are more likely to read the abstract, and possibly attend the talk, if they like the title.Some more points on title:
    1. Politically correct language – However, don’t lean on the side of making it arcane or at least use any foul language. You must remember that Program Committee has both male and female members and people from different cultures. Certain words may be appropriate in a particular culture but not so on a global level. So make sure you check global political correctness of the title before picking the words.
    2. Use numbers, if possible – Instead of saying “Tips for Java EE 7”, use “50 Tips in 50 Minutes for Java EE 7”. This talk got me a JavaOne 2013 Rockstar Award. Now this was not entirely due to the title but I’ve seen a few other talks with similar titles in JavaOne 2014. I guess the formula works 😉 And there is something about numbers and how the human brain operate. If something is more quantified then you are more likely to pay attention to it!
  3. Coherent Abstract – Abstract is typically 500-1500 characters, some times more than that, that describes what you are going to do in your session. Session abstracts can differ based upon what is being presented. But typically as a submitter, I divide it into three parts – setup/define the problem space, show what will be presented (preferably with an outline), and then the lessons learned by the attendees. I also include any demos, cast studies, customer/partner participation, that will be included in the talk.

    As a Program Committee member, I’m looking at similar points and how the title/abstract is going to fit in the overall rhythm of the conference.Some additional points about abstract since that is where most of the important information is available.

    1. WIIFM (Whats In It For Me) – Prepare an abstract that will allow the attendees to connect with you. Is this something that they may care about? Something that they face in their daily life? Think if you were an attendee, would you be interested in attending this session by reading the abstract? Think WIIFM from attendee’s perspective.
    2. Use all the characters – Conferences have different limit of characters to pitch your abstract. The reviewers may not know you or your product at all and you get N characters to pitch your idea. Make sure to use all of them, to the last Nth character.
    3. Review your abstract – Make sure to read your abstract multiple times to ensure that you are giving all the relevant information. Think through your presentation and see if you are leaving out any important aspects. Also look if the abstract has any redundant information that will not required by the reviewers. You can also consider getting your abstract peer reviewed.I’m always happy to provide that service to my blog readers :-)
    4. Coordinate within team – Make sure to coordinate within your team before the submission – multiple sessions from the same team or company does not ensure that the best speaker is picked. In such case we rely upon your “google presence” and/or review committee’s prior knowledge of the speaker. Its unfortunate if the selected speaker is not the most appropriate one.

    Make sure you don’t write an essay here, or at least provide a TLDR; version. Just pick the three most important aspect of your session and highlight them.

  4. Hands-on Labs: Hands-on labs is where attendees sit through the session from two to four hours, and learn a tool, build/debug/test an application, practice some methodology, or something else in a hands-on manner. Make sure you clearly highlight flow of the lab, down to every 30 mins, if possible. The end goal such as “Attendees will build an end-to-end Java EE 7 application using X, Y, X” or “Attendees will learn the tools and techniques for adopting DevOps in their team”. A broad outline of the content is still very important so that Program Committee can understand attendees’ experience.
  5. Appropriate track – Typically conferences have multiple tracks and as a submitter you typically one as a primary track, and possibly another as a secondary. Give yourself time to read through track descriptions and choose the appropriate track for your talk. In some cases, the selected track may be inappropriate, either by accident, or some other reason. In that case, Program Committee will try their best to recategorize the talk to an appropriate track, if it needs to. But please ensure that you are filing in the right track to have all the right eyeballs looking at it. It would be really unfortunate, for the speaker and the conference, if an excellent talk gets dropped because of being in the inappropriate track.
  6. Use tags – Some conferences have the ability to apply tags to a submission. Feel free to use the existing tags, or create something that is more likely to be searched by the Program Committee. This provides a different dissection of all the submissions, and possibly some more eyes on your submission.
  7. First time speaker – If you are a newbie, or a first time presenter, then consider paying close attention to the CFP sections which gives you an opportunity to toot your horn. Make sure to include a URL of your video presentation that has been done elsewhere. If you never ever presented at a public conference or speaking at this conference for the first time, then you can consider recording a technical presentation and upload the video on YouTube or Vimeo. This will allow the Program Committee to know you slightly better. Links to slideshare profile are recommended as well in this case. Very often the Program Committee members will google the speaker. So make sure your social profile, at least Twitter and LinkedIn, are up to date. Please don’t say “call me at xxx-xxx-xxxx to find out the details” :-)
  8. Run spell checker – Make sure to run spell checker in everything you submit as part of the session. Spelling mistakes turn off some of the Program Committee members, including myself 😉 This will generally never be a sole criteria of rejection but shows lack of attention, and only makes us wonder about the quality of session.

Never Give Up!

If your session does not get accepted, don’t give up and don’t take it personally. Each conference has a limited number of session slots and typically the number of submissions is more, sometimes way more, than that. The Program Committee tries, to the best of their ability, to pick the right sessions that fits in the rhythm of the conference. You’ve done the hard work of preparing a compelling title/abstract, submit at other conferences. At the least, try giving the talk at a local Java User Group and get feedback from the attendees there. You can always try out Virtual JUG as well for a more global audience.

Even though these tips are based upon my experience on presenting and selecting sessions at technology conferences, but most of these would be valid at others as well.

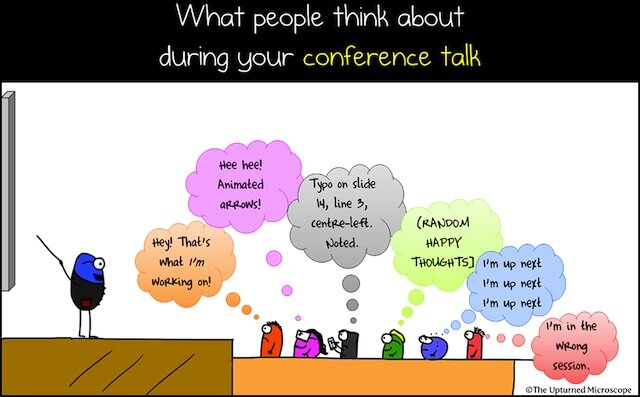
If your talk do get approved and you go through the process of creating compelling slides and sizzling demos, the attendees will always be a mixed bunch 😉

Attendees in a Conference Session

Enjoy, good luck, and happy conferencing!

Any more tips to share?

Database Migrations in Java EE using Flyway (Hanginar #6)

flyway-logoDatabase schema of any Java EE application evolves along with business logic. This makes database migrations an important of any Java EE application.

Do you still perform them manually, along with your application deployment? Is it still a lock step process or run as two separate scripts – one for application deployment and one for database migrations?

Learn how Flyway simplifies database migrations, and seamlessly integrates with your Java EE application in this webinar with Axel Fontaine (@axelfontaine).

You’ll learn about:

  • Need for database migration tool in a Java EE application
  • Seamless integration with Java EE application lifecycle
  • SQL scripts and Java-based migrations
  • Getting Started guides
  • Comparison with Liquibase
  • And much more!

A fun fact about this, and jOOQ hanginar, is that both were conceived on the wonderful cruise as part of JourneyZone. Happy to report that these are now complete!

Enjoy!

OpenShift v3: Getting Started with Java EE 7 using WildFly and MySQL (Tech Tip #73)

OpenShift OriginOpenShift is Red Hat’s open source PaaS platform. OpenShift v3 (due to be released this year) will provide a holistic experience on running your microservices using Docker and Kubernetes. In a classic Red Hat way, all the work is done in the open source at OpenShift Origin. This will also drive the next major release of OpenShift Online and OpenShift Enterprise.

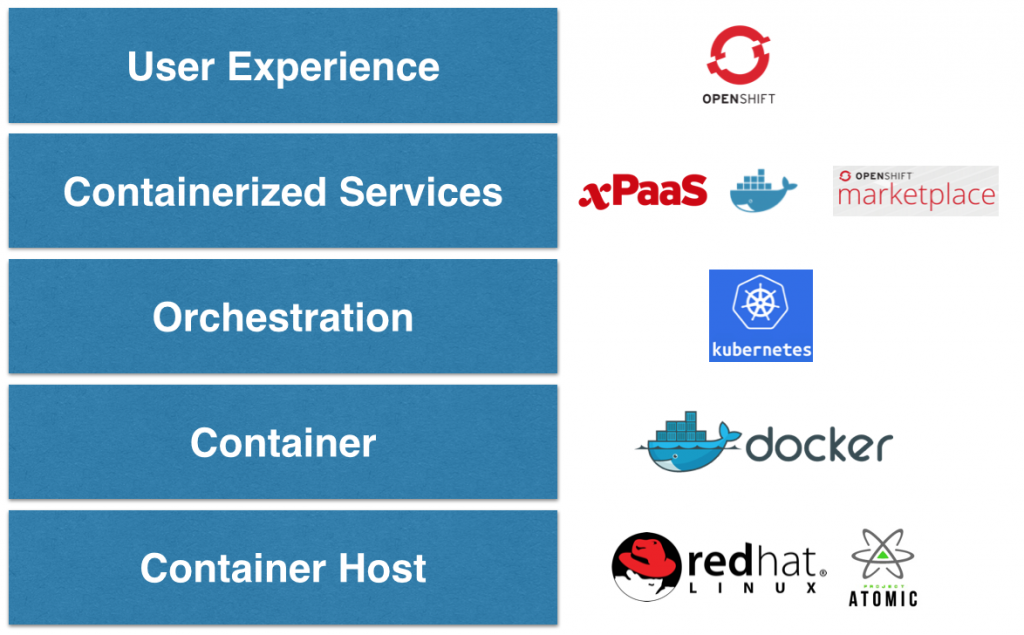
OpenShift v3 uses a new platform stack that is using plenty of community projects where Red Hat contributes such as Fedora, Centos, Docker, Project Atomic, Kubernetes, and OpenStack. OpenShift v3 Platform Combines Docker, Kubernetes, Atomic and More explain this platform stack in detail.

OpenShift v3 Stack

This tech tip will explain how to get started with OpenShift v3, lets get started!

Getting Started with OpenShift v3

Pre-built binaries for OpenShift v3 can be downloaded from Origin at GitHub. However the simplest way to get started is to run OpenShift Origin as a Docker container.

OpenShift Application Lifecycle provide complete details on what it takes to run a sample application from scratch. This blog will use those steps and adapt them to run using boot2docker VM on Mac. And in the process we’ll also deploy a Java EE 7 application on WildFly which will be accessing database on a separate MySQL container.

Here is our deployment diagram:

OpenShift v3 WildFly MySQL Deployment Strategy

  • WildFly and MySQL are running on separate pods.
  • Each of them is wrapped in a Replication Controller to enable simplified scaling.
  • Each Replication Controller is published as a Service.
  • WildFly talks to the MySQL service, as opposed to directly to the pod. This is important as Pods, and IP addresses assigned to them, are ephemeral.

Lets get started!

Configure Docker Daemon

  1. Configure the docker daemon on your host to trust the docker registry service you’ll be starting. This registry will be used to push images for build/test/deploy cycle.
    • Log into boot2docker VM as:
    • Edit the file
      This will be an empty file.
    • Add the following name/value pair:
      Save the file, and quit the editor.

    This will instruct the docker daemon to trust any docker registry on the 172.30.17.0/24 subnet.

Check out OpenShift v3 and Java EE 7 Sample

  1. Download and Install Go and setup GOPATH and PATH environment variable. Check out OpenShift origin directory:

    Note the directory where its checked out. In this case, its ~/workspaces/openshift.

    Build the workspace:

  2. Check out javaee7-hol workspace that has been converted to a Kubernetes application:

    This is also done in ~/workspaces/openshift directory.

Start OpenShift v3 Container

  1. Start OpenShift Origin as Docker container:

    Note ~/workspaces/openshift directory is mounted as /workspaces/openshift volume in the container. Some additional volumes are mounted as well.

    Check that the container is running:

  2. Log into the container as:

  3. Install Docker registry in the container by giving the following command:

  4. Confirm that the registry is running by getting the list of pods:

    osc is OpenShift Client CLI and allows to create and manage OpenShift projects. Some of the kubectl commands can also be using this script.

  5. Confirm the registry service is running. Note the actual IP address may vary:

  6. Confirm that the registry service is accessible:

    And look for the output:

Access OpenShift v3 Web Console

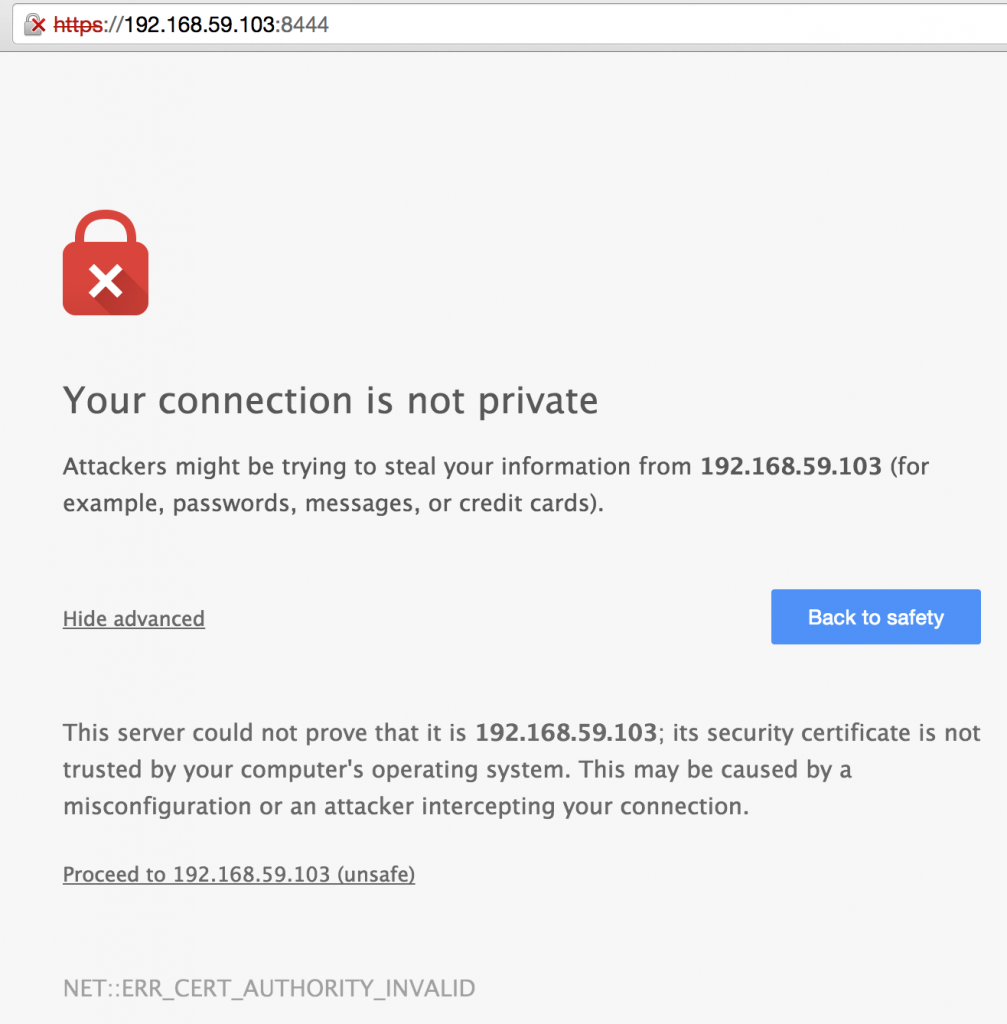
  1. OpenShift Origin server is now up and running. Find out the host’s IP address using boot2docker ip and open http://<IP addresss of boot2docker host>:8444 to view OpenShift Web  Console in your browser.For example, the console is accessible at https://192.168.59.103:8444/ on this machine.
    OpenShift Origin Browser Certificate

    You will need to have the browser accept the certificate at https://<host>:8444 before the console can consult the OpenShift API. Of course this would not be necessary with a legitimate certificate.

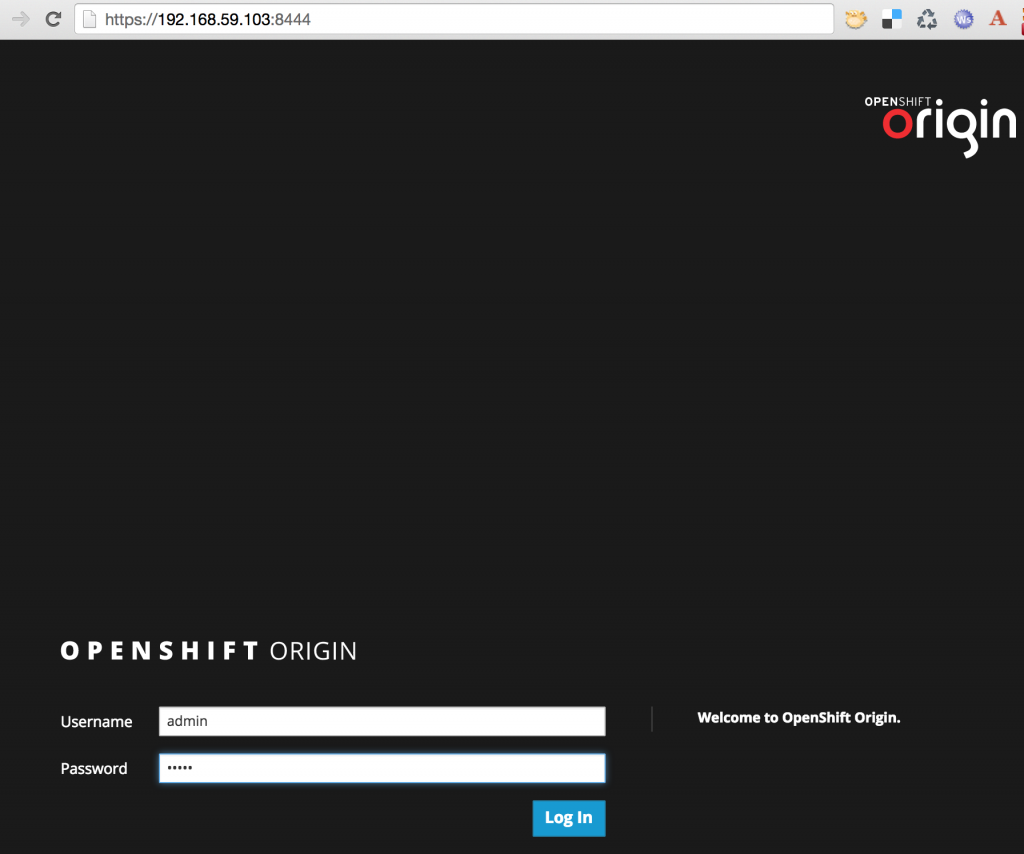
  2. OpenShift Origin login screen shows up. Enter the username/password as admin/admin:
    OpenShift Origin Login Screen

    and click on the “Log In” button. The default web console looks like:

    OpenShift v3 Web Console Default

Create OpenShift v3 Project

  1. Use project.json from github.com/openshift/origin/blob/master/examples/sample-app/project.json in the OpenShift v3 container and create a test project as:

    Refreshing the web console now shows:

    OpenShift Origin Test Project

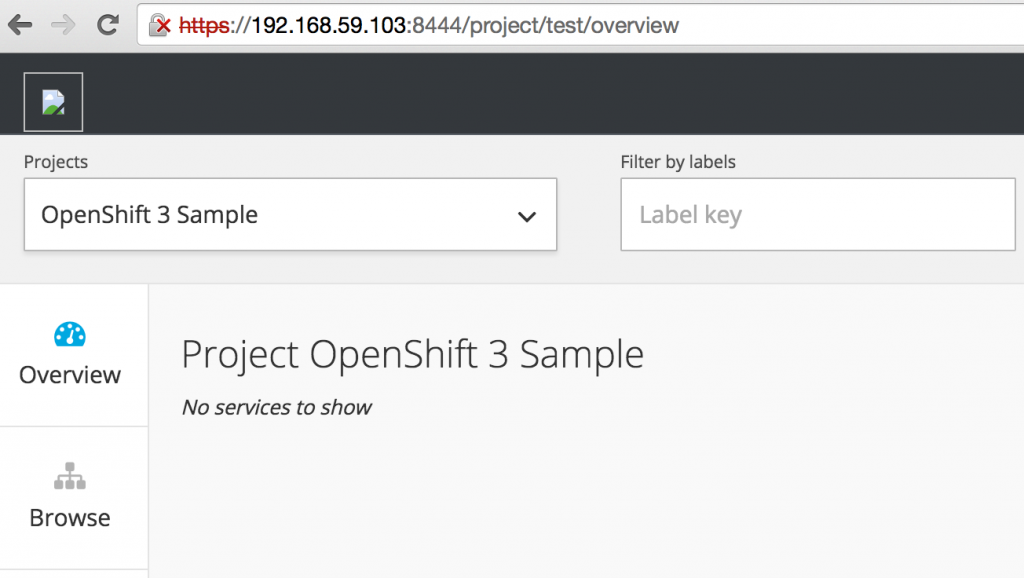
    Clicking on “OpenShift 3 Sample” shows an empty project description:

    OpenShift v3 Empty Project

  2. Request creation of the application template:

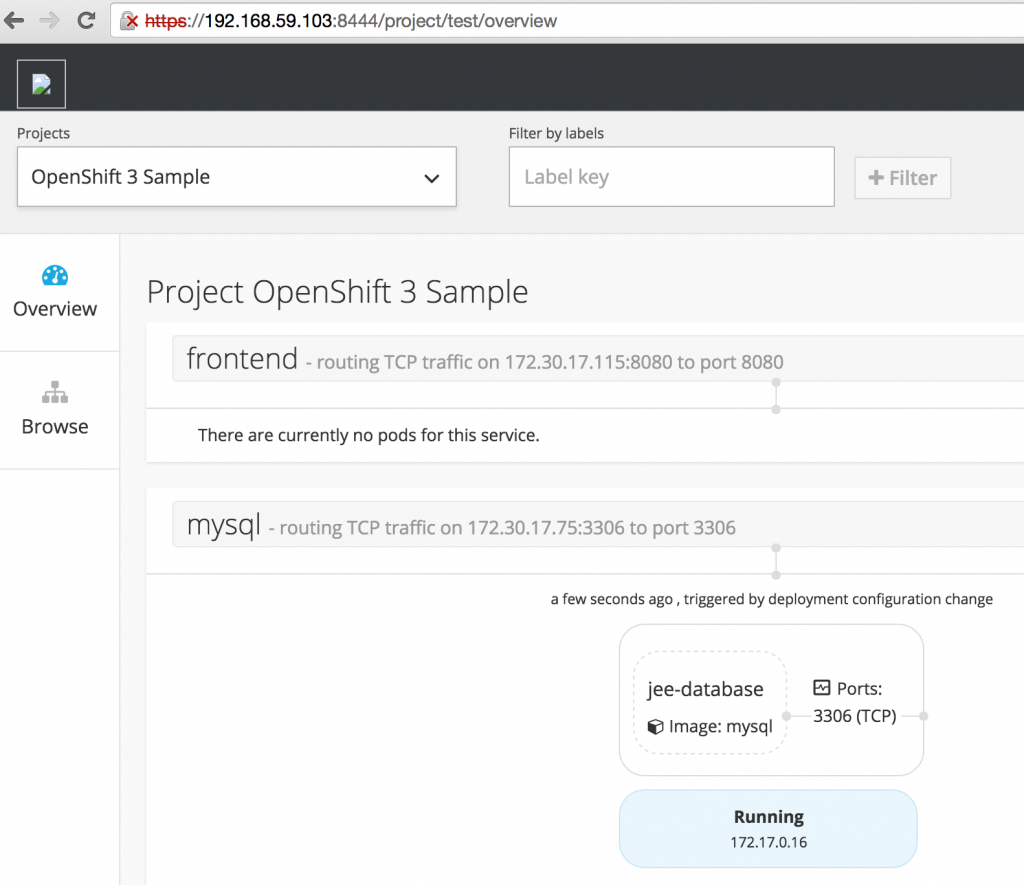
  3. Web Console automatically refreshes and shows:

    OpenShift v3 Java EE 7 Default Project

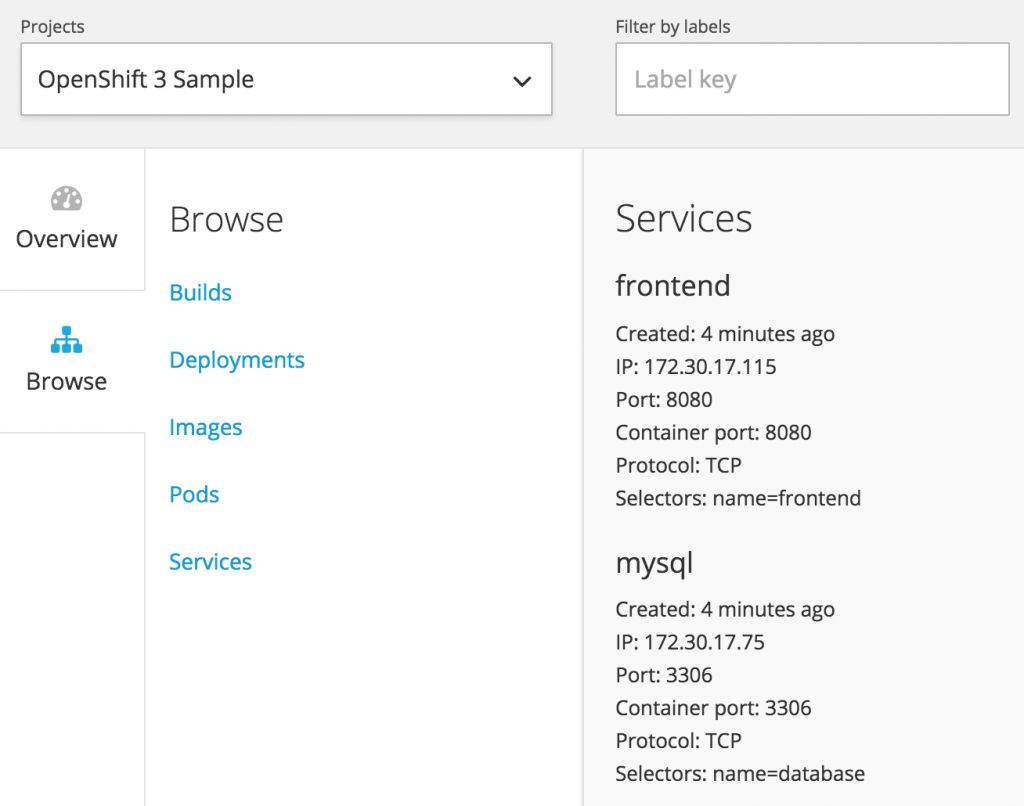
    The list of services running can be seen as:

    OpenShift v3 Java EE 7 Project Services

Build the Project

  1. Trigger an initial build of your project:

  2. Monitor the builds and wait for the status to go to “complete” (this can take a few minutes):

    You can add the –watch flag to wait for updates until the build completes:

    Wait for the STATUS column to show Complete. It will take a few minutes as all the components (WIldFly, MySQL, Java EE 7 application) are provisioned.  Effectively, their new Docker images are created and pushed to the local registry that was started earlier.

    Hit Ctrl+C to stop watching builds after the status changes to Complete.

  3. Complete log of the build can be seen as:

  4. Check for the application pods to start:

    Note, that the “frontend” and “database” pods are now running.

  5. Determine IP of the “frontend” service:

  6. Access the application at http://<IP address of “frontend”>:8080/movieplex7-1.0-SNAPSHOT should work. Note the IP address may (most likely will) vary. In this case, it would be http://172.30.17.115:8080/moviexplex7-1.0-SNAPSHOT.The app would not be accessible yet, as some further debugging is required to configure firewall on Mac when OpenShift v3 is used as Docker container. Until we figure that out, you can do docker ps in your boot2docker VM to see the list of all the containers:

    And then login to the container associated with frontend as:

    This will log in to the Docker container where you can check that the application is deployed successfully by giving the following command:

    This will print the index.html page from the application which has license at the top and rest of the page after that.

    Now once the firewall issue is resolved, this page will then be accessible on host Mac as well.

Lets summarize:

  • Cloned the OpenShift Origin and Java EE 7 sample repo
  • Started OpenShift v3 as Docker container
  • Loaded the OpenShift v3 Web Console
  • Create an OpenShift v3 project
  • Loaded Java EE 7 application template
  • Triggered a build, which deployed the application

Here are some troubleshooting tips if you get stuck.

Enjoy!

MySQL as Kubernetes Service, Access from WildFly Pod (Tech Tip #72)

Java EE 7 and WildFly on Kubernetes using Vagrant (Tech Tip #71) explained how to run a trivial Java EE 7 application on WildFly hosted using Kubernetes and Docker. The Java EE 7 application was the hands-on lab that have been delivered around the world. It uses an in-memory database that is bundled with WildFly and allows to understand the key building blocks of Kubernetes. This is good to get you started with initial development efforts but quickly becomes a bottleneck as the database is lost when the application server goes down. This tech tip will show how to run another trivial Java EE 7 application and use MySQL as the database server. It will use Kubernetes Services to explain how MySQL and WildFly can be easily decoupled.

Lets get started!

Make sure to have a working Kubernetes setup as explained in Kubernetes using Vagrant.

The complete source code used in this blog is available at github.com/arun-gupta/kubernetes-java-sample.

Start MySQL Kubernetes pod

First step is to start the MySQL pod. This can be started by using the MySQL Kubernetes configuration file:

The configuration file used is at github.com/arun-gupta/kubernetes-java-sample/blob/master/mysql.json.

Check the status of MySQL pod:

Wait till the status changes to “Running”. It will look like:

It takes a few minutes for MySQL server to be in that state, so grab a coffee or a quick fast one miler!

Start MySQL Kubernetes service

Pods, and the IP addresses assigned to them, are ephemeral. If a pod dies then Kubernetes will recreate that pod because of its self-healing features, but it might recreate it on a different host. Even if it is on the same host, a different IP address could be assigned to it. And so any application cannot rely upon the IP address of the pod.

Kubernetes services is an abstraction which defines a logical set of pods. A service is typically back-ended by one or more physical pods (associated using labels), and it has a permanent IP address that can be used by other pods/applications. For example, WildFly pod can not directly connect to a MySQL pod but can connect to MySQL service. In essence, Kubernetes service offers clients an IP and port pair which, when accessed, redirects to the appropriate backends.

Kubernetes Services

Lets start MySQL service.

The configuration file used is at github.com/arun-gupta/kubernetes-java-sample/blob/master/mysql-service.json. In this case, only a single MySQL instance is started. But multiple MySQL instances can be easily started and WildFly Pod will continue to refer to all of them using MySQL Service.

Check the status/IP of the MySQL service:

Start WildFly Kubernetes Pod

WildFly Pod must be started after MySQL service has started. This is because the environment variables used for creating JDBC resource in WildFly are only available after the service is up and running. Specifically, the JDBC resource is created as:

$MYSQL_SERVICE_HOST and $MYSQL_SERVICE_PORT environment variables are populated by Kubernetes as explained here.

This is shown at github.com/arun-gupta/docker-images/blob/master/wildfly-mysql-javaee7/customization/execute.sh#L44.

Start WildFly pod:

The configuration file used is at github.com/arun-gupta/kubernetes-java-sample/blob/master/wildfly.json.

Check the status of pods:

Wait until WildFly pod’s status is changed to Running. This could be a few minutes, so may be time to grab another quick miler!

Once the container is up and running, you can check /opt/jboss/wildfly/standalone/configuration/standalone.xml in the WildFly container and verify that the connection URL indeed contains the correct IP address. Here is how it looks on my machine:

The updated status (after the container is running) would look like as shown:

Access the Java EE 7 Application

Note down the HOST IP address of the WildFly container and access the application as:

to see the output as:

Or viewed in the browser as:

Java EE 7 Application using WildFly, MySQL, and Kubernetes

Debugging Kubernetes and Docker

Login to the Minion-1 VM:

Log in as root:

Default root password for VM images created by Vagrant is “vagrant”.

List of Docker containers running on this VM can be seen as:

Last 10 lines of the WildFly log (after application has been accessed a few times) can be seen as:

Similarly, MySQL log is seen as:

Enjoy!


Continuous Integration, Delivery, Deployment and Maturity Model

Continuous Integration, Continuous Deployment, and Continuous Delivery are all related to each other, and feed into each other. Several articles have been written on these terms. This blog will attempt to explain these terms in an easy-to-understand manner.

What is Continuous Integration?

Continuous Integration (CI) is a software practice that require developers to commit their code to the main workspace, at least once, possibly several times a day. Its expected that the developers have run unit tests in their local environment before committing the source code. All developers in the team are following this methodology. The main workspace is checked out, typically after each commit, or possibly at a regular intervals, and then verified for any thing from build issues, integration testing, functional testing, performance, longevity, or any other sort of testing.

Continuous Integration

The level of testing that is performed in CI can completely vary but the key fundamentals are that multiple integrations from different developers are done through out the day. The biggest advantage of following this approach is that if there are any errors then they are identified early in the cycle, typically soon after the commit. Finding the bugs closer to commit does make them much more easier to fix. This is explained well by Martin Fowler:

Continuous Integrations doesn’t get rid of bugs, but it does make them dramatically easier to find and remove.

There are lots of tools that provide CI capabilities. Most common ones are Jenkins from CloudBees, Travis CI, Go from ThoughtWorks, and Bamboo from Atlassian.

What is Continuous Delivery?

Continuous Delivery is the next logical step of Continuous Integration. It means that every change to the system, i.e. every commit, can be released for production at the push of a button. This means that every commit made to the workspace is a release candidate for production. This release however is still a manual process and require an explicit push of a button. This manual step may be essential because of business concerns such as slowing the rate of software deployment.

Continuous Delivery

At certain times, you may even push the software to production-like environment to obtain feedback. This allows to get a fast and automated feedback on production-readiness of your software with each commit. A very high degree of automated testing is an essential part to enable Continuous Delivery.

Continuous Delivery is achieved by building Deployment Pipelines. This is best described in Continuous Delivery book by Jez Humble (@jezhumble).

A deployment pipeline is an automated implementation of your application’s build, deploy, test, and release process.

The actual implementation of the pipeline, tools used, and processes may differ but the fundamental concept of 100% automation is the key.

What is Continuous Deployment?

Continuous Deployment is often confused with Continuous Delivery. However it is the logical conclusion of Continuous Delivery where the release to production is completely automated. This means that every commit to the workspace is automatically released to production, and thus leading to several deployments of your software during a day.

Continuous Deployment

Continuous Delivery is a basic pre-requisite for Continuous Deployment.

Continuous Delivery Maturity Model

Maturity Models allow a team or organization to assess its methods and process against a clearly defined benchmark. As defined in Capability Maturity Model – The term “maturity” relates to the degree of formality and optimization of processes, from ad hoc practices, to formally defined steps, to managed result metrics, to active optimization of the processes.

The model explains different stages and helps teams to improve by moving from a lower stage to a higher one. Several Continuous Delivery Maturity Models are available, such as InfoQ, UrbanCode, ThoughtWorks, Bekk, and others.

Capability Maturity Model Integration (CMMI) is defined by Software Engineering Institute at Carnegie Mellon University.  CMMI-Dev particularly defines model that provides guidance for applying CMMI best practices in a development organization. It defines five maturity levels:

  • Initial
  • Managed
  • Defined
  • Quantitatively Managed
  • Optimizing

Each of these Continuous Delivery maturity models mentioned define their own maturity levels. For example, Base, Beginner, Intermediate, Advanced, Expert are used by InfoQ. Expert is changed to Extreme for UrbanCode. ThoughtWorks uses CMMI-Dev maturity levels but does not segregate them into different areas.

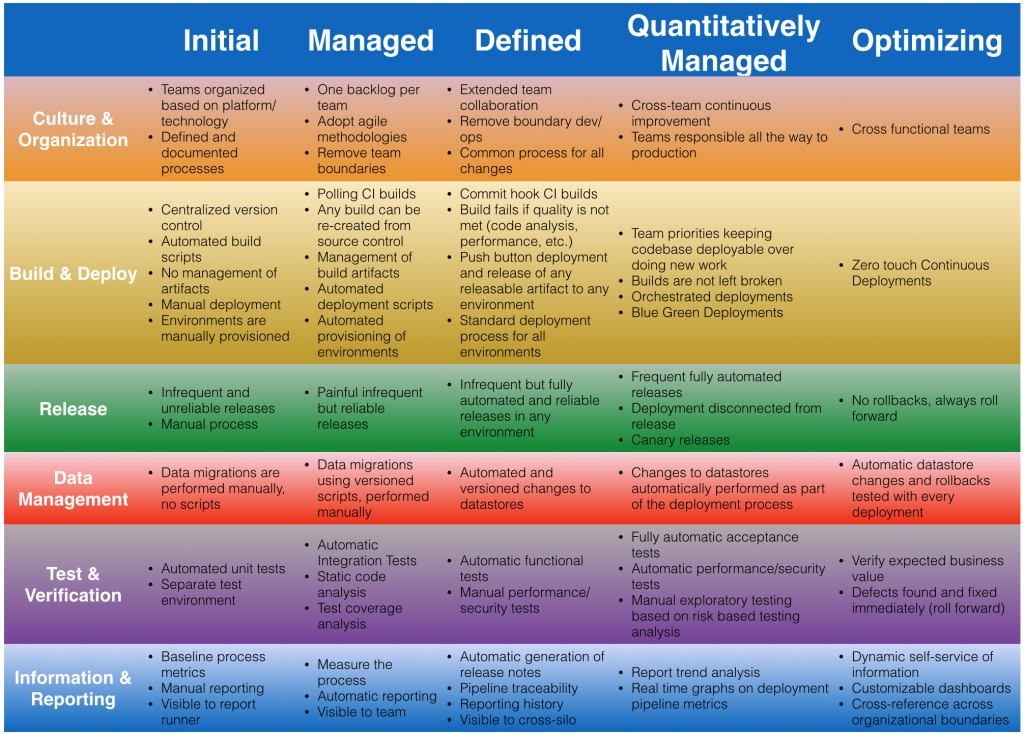
Here is another attempt to the maturity model that picks the best pieces from each of those.

Continuous Delivery Maturity Model v1.0

As a team/organization, you need to look at where do you fit in this maturity model. And once you’ve identified that, more importantly, figure how do you get to the next level. For example, if your team does not have any data management or migration strategy then you are at “Initial” level in “Data Migration”. Your goal would be to move from Initial -> Managed -> Defined -> Quantitatively Managed -> Optimizing. The progression from one level to the next is not necessarily sequential. But any changes in the organization is typically met with an inertia and so these incremental changes serve as guideline to improve.

Leave a comment on this blog to share your thoughts on the maturity model.

Java EE 7 and WildFly on Kubernetes using Vagrant (Tech Tip #71)

This tip will show how to run a Java EE 7 application deployed in WildFly and hosted using Kubernetes and Docker. If you want to learn more about the basics, then this blog has already published quite a bit of content on the topic. A sampling of some of the content is given below:

Lets get started!

Start Kubernetes cluster

Kubernetes cluster can be easily started on a Linux machine using the usual scripts. There are Getting Started Guides for different platforms such as Fedora, CoreOS, Amazon Web Services, and others. Running a Kubernetes cluster on Mac OS X require to use the Vagrant image which is also explained in Getting Started with Vagrant. This blog will use the Vagrant box.

  1. By default, Kubernetes cluster management scripts assumes you are running on Google Compute Engine. Kubernetes can be configured to run with a variety of providers: gce, gke, aws, azure, vagrant, local, vsphere. So lets set our provider to vagrant as:
    This means, your Kubernetes cluster is running inside a Fedora VM created by Vagrant.
  2. Start the cluster as:
    Notice, this command is given from the kubernetes directory where it is already compiled as explained in Build Kubernetes on Mac OS X.

    By default, the Vagrant setup will create a single kubernetes-master and 1 kubernetes-minion. This involves creating Fedora VM, installing dependencies, creating master and minion, setting up connectivity between them, and a whole lot of other things. As a result, this step can take a few minutes (~10 mins on my machine).

Verify Kubernetes cluster

Now that the cluster has started, lets make sure we verify it does everything that its supposed to.

  1. Verify the that your Vagrant images are up correctly as:
    This can also be verified by verifying the status in Virtual Box console as shown:

    Kubernetes Virtual Machines in Virtual Box
    Kubernetes Virtual Machines in Virtual Box

    boot2docker-vm is the Boot2Docker VM. Then there is Kubernetes master and minion VM. Two additional VMs are shown here but they not relevant to the example.

  2. Log in to the master as:

    Verify that different Kubernetes components have started up correctly. Start with Kubernetes API server:

    Then Kube Controller Manager:

    Similarly you can verify etcd and nginx as well.

    Docker and Kubelet are running in the minion and can be verified by logging in to the minion and using systemctl scripts as:

  3. Check the minions as:

    Only one minion is created. This can be manipulated by setting an environment variable NUM_MINIONS variable to an integer before invoking kube-up.sh script.

    Finally check the pods as:

    This shows a single pod is created by default and has three containers running:

    • skydns: SkyDNS is a distributed service for announcement and discovery of services built on top of etcd. It utilizes DNS queries to discover available services.
    • etcd: A distributed, consistent key value store for shared configuration and service discovery with a focus on being simple, secure, fast, reliable. This is used for storing state information for Kubernetes.
    • kube2sky: A bridge between Kubernetes and SkyDNS. This will watch the kubernetes API for changes in Services and then publish those changes to SkyDNS through etcd.

    No pods have been created by our application so far, lets do that next.

Start WildFly and Java EE 7 application Pod

Pod is created by using the kubectl script and providing the details in a JSON configuration file. The source code for our configuration file is available at github.com/arun-gupta/kubernetes-java-sample, and looks like:

The exact payload and attributes of this configuration file are documented at kubernetes.io/third_party/swagger-ui/#!/v1beta1/createPod_0. Complete docs of all the possible APIs are at kubernetes.io/third_party/swagger-ui/. The key attributes in this fie particularly are:

  • A pod is created. API allows other types such as “service”, “replicationController” etc. to be created.
  • Version of the API is “v1beta1”.
  • Docker image arungupta/javaee7-hol used to run the container.
  • Exposes port 8080 and 9090, as they are originally exposed in the base image Dockerfile. This require further debugging on how the list of ports can be cleaned up.
  • Pod is given a label “wildfly”. In this case, its not used much but would be more meaningful when services are created in a subsequent blog.

As mentioned earlier, this tech tip will spin up a single pod, with one container. Our container will be using a pre-built image (arungupta/javaee7-hol) that deploys a typical 3-tier Java EE 7 application to WildFly.

Start the WildFly pod as:

Check the status of the created pod as:

The WildFly pod is now created and shown in the list. The HOST column shows the IP address on which the application is accessible.

The image below explains how all the components fit with each other:

Java EE 7/WildFly in Kubernetes on Mac OS X

As only one minion is created by default, this pod will be created on that minion. The blog will show how multiple minions can be created. Kubernetes of course picks the minion where the pods are created.

Running the pod ensures that the Java EE 7 application is deployed to WildFly.

Access Java EE 7 Application

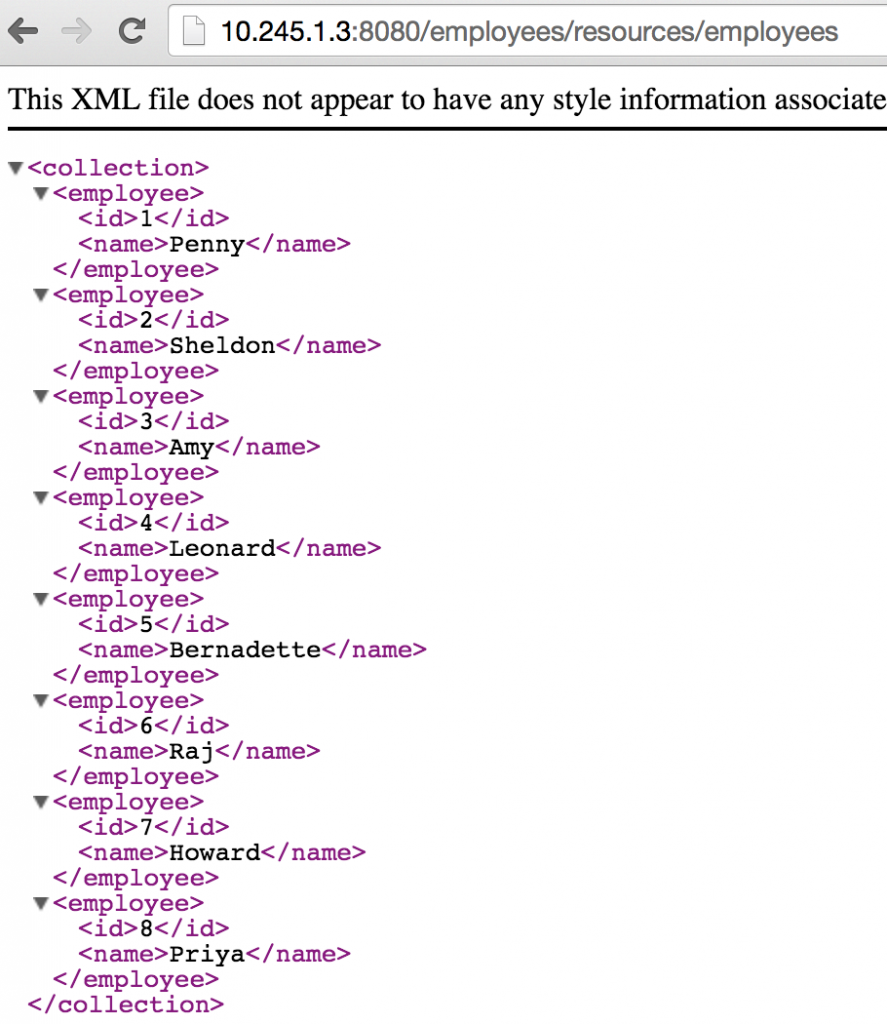
From the kubectl.sh get pods output, HOST column shows the IP address where the application is externally accessible. In our case, the IP address is 10.245.1.3. So, access the application in the browser to see output as:

Java EE 7 Application on Kubernetes


This confirms that your Java EE 7 application is now accessible.

Kubernetes Debugging Tips

Once the Kubernetes cluster is created, you’ll need to debug it and see what’s going on under the hood.

First of all, lets log in to the minion:

List of Docker containers on Minion

Lets take a look at all the Docker containers running on minion-1:

The first container is specific to our application, everything else is started by Kubernetes.

Details about each Docker container

More details about each container can be found by using their container id as:

In our case, the output is shown as:

Logs from the Docker container

Logs from the container can be seen using the command:

In our case, the output is shown as:

WildFly startup log, including the application deployment, is shown here.

Log into the Docker container

Log into the container and show WildFly logs. There are a couple of ways to do that.

First is to use the container id and use “exec”:

In our case, log into the container as:

Other, more classical way, is to get the process id of the container as:

In our case, the output is:

And now log into the container as:

And now the complete WildFly distribution is available at:

Clean up the cluster

Entire Kubernetes cluster can be cleaned either using Virtual Box console, or using the command line as:

So we learned how to run a Java EE 7 application deployed in WildFly and hosted using Kubernetes and Docker.

Enjoy!

Domain Driven Design using Java EE (Hanginar #5)

Domain Driven Design


Domain Driven Design (DDD) is very well suited for typical three-tier Java EE applications and allows a close collaboration between technical and domain experts to iteratively define a model. Learn all about the basics of DDD and how to create a non-trivial Java EE application using DD in this webinar with Reza Rahman (@reza_rahman).

The source code shows:

  • Well established architectural patterns/blueprints for enterprise development with Java EE using pretty close to a real world application.
  • Demonstrate a concrete implementation of DDD concepts.
  • Showcase some core Java EE technologies (JSF, CDI, WebSocket, Batch, JAX-RS, JMS, Bean Validation, and others)
  • Select set of representative tools that complement Java EE well such as Maven, JUnit, Cargo, JMeter, soapUI, Arquillian, PrimeFaces and DeltaSpike

Enjoy!