Category Archives: techtip

Automatic Restarting of Pods inside Replication Controller of Kubernetes Cluster

kubernetes-logo

A key feature of Kubernetes is its ability to maintain the “desired state” using declared primitives. Replication Controllers is a key concept that helps achieve this state.

A replication controller ensures that a specified number of pod “replicas” are running at any one time. If there are too many, it will kill some. If there are too few, it will start more.

Replication Controller

Lets take a look on how to spin up a Replication Controller with two replicas of a Pod. Then we’ll kill one pod and see how Kubernetes will start another Pod automatically.

Start Kubernetes Cluster

  1. Easiest way to start a Kubernetes cluster on a Mac OS is using Vagrant:
  2. Alternatively, Kubernetes can be downloaded from github.com/GoogleCloudPlatform/kubernetes/releases/download/v1.0.0/kubernetes.tar.gz, and cluster can be started as:

Start and Verify Replication Controller and Pods

  1. All configuration files required by Kubernetes to start Replication Controller are in kubernetes-java-sample project.  Clone the workspace:
  2. Start a Replication Controller that has two replicas of a pod, each with a WildFly container:
    The configuration file used is shown:
    Default WildFly Docker image is used here.
  3. Get status of the Pods:
    Notice -w refreshes the status whenever there is a change. The status changes from Pending to Running and then Ready to receive requests.
  4. Get status of the Replication Controller:
    If multiple Replication Controllers are running then you can query for this specific one using the label:
  5. Get name of the running Pods:
  6. Find IP address of each Pod (using the name):
    And of the other Pod as well:
  7. Pod’s IP address is accessible only inside the cluster. Login to the minion to access WildFly’s main page hosted by the containers:

Automatic Restart of Pods

Lets delete a Pod and see how a new Pod is automatically created.

Notice how the Pod with name wildfly-rc-15xg5 was deleted and a new Pod with the name wildfly-rc-0xoms was created.

Finally, delete the Replication Controller:

The latest configuration files and detailed instructions are at kubernetes-java-sample.

In real world, you’ll typically wrap this Replication Controller in a Service and front-end with a Load Balancer. But that’s a topic for another blog!

Enjoy!

Multi-container Applications using Docker Compose and Swarm

Docker Compose to Orchestrate Containers shows how to run two linked Docker containers using Docker Compose. Clustering Using Docker Swarm shows how to configure a Docker Swarm cluster.

This blog will show how to run a multi-container application created using Docker Compose in a Docker Swarm cluster.

Updated version of Docker Compose and Docker Swarm are released with Docker 1.7.0.

Docker 1.7.0 CLI

Get the latest Docker CLI:

and check the version as:

Docker Machine 0.3.0

Get the latest Docker Machine as:

and check the version as:

Docker Compose 1.3.0

Get the latest Docker Compose as:

and verify the version as:

Docker Swarm 0.3.0

Swarm is run as a Docker container and can be downloaded as:

You can learn about Docker Swarm at docs.docker.com/swarm or Clustering using Docker Swarm.

Create Docker Swarm Cluster

The key components of Docker Swarm are shown below:

and explained in Clustering Using Docker Swarm.

  1. The easiest way of getting started with Swarm is by using the official Docker image:
    This command returns a discovery token, referred as <TOKEN> in this document, and is the unique cluster id. It will be used when creating master and nodes later. This cluster id is returned by the hosted discovery service on Docker Hub.

    It shows the output as:

    The last line is the <TOKEN>.

    Make sure to note this cluster id now as there is no means to list it later. This should be fixed with#661.

  2. Swarm is fully integrated with Docker Machine, and so is the easiest way to get started. Let’s create a Swarm Master next:

    Replace <TOKEN> with the cluster id obtained in the previous step.

    --swarm configures the machine with Swarm, --swarm-master configures the created machine to be Swarm master. Swarm master creation talks to the hosted service on Docker Hub and informs that a master is created in the cluster.

  3. Connect to this newly created master and find some more information about it:

    This will show the output as:

  4. Create a Swarm node

    Replace <TOKEN> with the cluster id obtained in an earlier step.

    Node creation talks to the hosted service at Docker Hub and joins the previously created cluster. This is specified by --swarm-discovery token://... and specifying the cluster id obtained earlier.

  5. To make it a real cluster, let’s create a second node:

    Replace <TOKEN> with the cluster id obtained in the previous step.

  6. List all the nodes created so far:

    This shows the output similar to the one below:

    The machines that are part of the cluster have the cluster’s name in the SWARM column, blank otherwise. For example, “lab” and “summit2015” are standalone machines where as all other machines are part of the “swarm-master” cluster. The Swarm master is also identified by (master) in the SWARM column.

  7. Connect to the Swarm cluster and find some information about it:

    This shows the output as:

    There are 3 nodes – one Swarm master and 2 Swarm nodes. There is a total of 4 containers running in this cluster – one Swarm agent on master and each node, and there is an additional swarm-agent-master running on the master.

  8. List nodes in the cluster with the following command:

    This shows the output as:

Deploy Java EE Application to Docker Swarm Cluster using Docker Compose

Docker Compose to Orchestrate Containers explains how multi container applications can be easily started using Docker Compose.

  1. Use the docker-compose.yml file explained in that blog to start the containers as:
    The docker-compose.yml file looks like:
  2. Check the containers running in the cluster as:
    to see the output as:
  3. “swarm-node-02” is running three containers and so lets look at the list of containers running there:
    and see the list of running containers as:
  4. Application can then be accessed again using:
    and shows the output as:

Latest instructions for this setup are always available at: github.com/javaee-samples/docker-java/blob/master/chapters/docker-swarm.adoc.

Enjoy!

Docker 1.7.0, Docker Machine 0.3.0, Docker Compose 1.3.0, Docker Swarm 0.3.0

Docker 1.7.0 is released (change log) and so time to update Docker Hosts, CLI, and other tools.

Docker 1.7.0

Docker Host is running inside a Docker Machine and so the machine needs to be upgraded. The machine must be stopped otherwise you get an error as:

So start the machine as:

And then upgrade the machine as:

The machine is anyway stopped to perform an upgrade, and so the need to start the machine seems superfluous (#1399).

Upgrading the host updates .docker/machine/cache/boot2docker.iso. Any previously created machines cache the boot2docker.iso in .docker/machine/machines/<MACHINE-NAME> and so they’ll continue to boot using the same version.

Docker CLI

Update the Docker CLI as:

Now docker version shows the following output:

Note, the client API version (1.7.0) and the server API version (1.7.0) are both shown here.

If you update only the CLI and not the Docker Host, then the following error message is shown:

This error messages shows a version mismatch between the client CLI and the Docker Host running in the machine. The will typically happen if the active machine was created a few days ago using an older boot2docker.iso. There seems to be no way straight forward way to find out the exact version currently being used (#1398).

There seems to be no way for a new client to talk to the old server (#14077), and thus the host needs to be upgraded. There is a proposal to override the API version of client (#11486), but at this time there is no ETA for the fix. So the only option is to upgrade the docker machine, which will then then upgrade to the latest version of Docker.

So upgrading the CLI requires to upgrade the machine as well.

Here are the options supported by Docker CLI :

Docker Machine 0.3.0

This was rather straight forward:

There are a lots of new features, including an experimental provisioner for Red Hat Enterprise Linux 7.0.

The version is shown as:

Complete list of commands are:

Docker Compose 1.3.0

Docker Compose can be updated to 1.3.0 as:

The version is shown as:

Two important points to note:

  • At least Docker 1.6.0 is required
  • There are breaking changes from Compose 1.2 and so you either need to remove and recreate your containers, or migrate them.Fortunately docker-compose migrate-to-labels can be used to migrate pre-Compose 1.3.0 containers to the latest format. This will recreate the containers with labels added.

Learn more in Docker Compose to Orchestrate Containers.

Docker Swarm 0.3.0

As of this blog, Docker Swarm 0.3.0 RC3 is available. Clustering Using Docker Swarm provide a good introduction to Docker Swarm and can be used to get started with the latest Docker Swarm release.

34 issues have been fixed since 0.2.0 but the commit notifications since 0.2.0 for Release Candidates seem to show no significant changes.

More detailed blogs on each Docker component will be shared in subsequent blogs.

Enjoy!

ZooKeeper for Microservice Registration and Discovery

In a microservice world, multiple services are typically distributed in a PaaS environment. Immutable infrastructure is provided by containers or immutable VM images. Services may scale up and down based upon certain pre-defined metrics. Exact address of the service may not be known until the service is deployed and ready to be used.

This dynamic nature of service endpoint address is handled by service registration and discovery. In this, each service registers with a broker and provide more details about itself, such as the endpoint address. Other consumer services then queries the broker to find out the location of a service and invoke it. There are several ways to register and query services such as ZooKeeper, etcd, consul, Kubernetes, Netflix Eureka and others.

Monolithic to Microservice Refactoring showed how to refactor an existing monolith to a microservice-based application. User, Catalog, and Order service URIs were defined statically. This blog will show how to register and discover microservices using ZooKeeper.

Many thanks to Ioannis Canellos (@iocanel) for all the ZooKeeper hacking!

What is ZooKeeper?

Apache ZooKeeperZooKeeper is an Apache project and provides a distributed, eventually consistent hierarchical configuration store.


ZooKeeper is a centralized service for maintaining configuration information, naming, providing distributed synchronization, and providing group services. All of these kinds of services are used in some form or another by distributed applications.

Apache ZooKeeper

So a service can register with ZooKeeper using a logical name, and the configuration information can contain the URI endpoint. It can consists of other details as well, such as QoS.

Apache Curator ZooKeeper has a steep learning curve as explained in Apache ZooKeeper Made Simpler with Curator. So, instead of using ZooKeeper directly, this blog will use Apache Curator.

Curator n ˈkyoor͝ˌātər: a keeper or custodian of a museum or other collection – A ZooKeeper Keeper.

Apache Curator

Apache Curator has several components, and this blog will use the Framework:

The Curator Framework is a high-level API that greatly simplifies using ZooKeeper. It adds many features that build on ZooKeeper and handles the complexity of managing connections to the ZooKeeper cluster and retrying operations.

Apache Curator Framework

ZooKeeper Concepts

ZooKeeper Overview provides a great overview of the main concepts. Here are some of the relevant ones:

  • Znodes: ZooKeeper stores data in a shared hierarchical namespace that is organized like a standard filesystem. The name space consists of data registers – called znodes, in ZooKeeper parlance – and these are similar to files and directories.
  • Node name: Every node in ZooKeeper’s name space is identified by a path. Exact name of a node is a sequence of path elements separated by a slash (/).
  • Client/Server: Clients connect to a single ZooKeeper server. The client maintains a TCP connection through which it sends requests, gets responses, gets watch events, and sends heart beats. If the TCP connection to the server breaks, the client will connect to a different server.
  • Configuration data: Each node in a ZooKeeper namespace can have data associated with it as well as children. ZooKeeper was originally designed to store coordination data, so the data stored at each node is usually small, in less than KB range).
  • Ensemble: ZooKeeper itself is intended to be replicated over a sets of hosts called an ensemble. The servers that make up the ZooKeeper service must all know about each other.
  • Watches: ZooKeeper supports the concept of watches. Clients can set a watch on a znode. A watch will be triggered and removed when the znode changes.

ZooKeeper is a CP system with regards to CAP theorem. This means if there is a partition failure, it will be consistent but not available. This can lead to problems that are explained in Eureka! Why You Shouldn’t Use ZooKeeper for Service Discovery.

Nevertheless, ZooKeeper is one of the most popular service discovery mechanisms used in microservices world.

Lets get started!

Start ZooKeeper

  1. Start a ZooKeeper instance in a Docker container:
  2. Verify ZooKeeper instance by using telnet as:
    Type the command “ruok” to verify that the server is running in a non-error state.The server will respond with “imok” if it is running:
    Otherwise it will not respond at all. ZooKeeper has other similar four-letter commands.

Service Registration and Discovery

Each service, User, Catalog, and Order in our case, has an eagerly initialized bean that registers and unregisters the service as part of lifecycle initialization methods as. Here is the code from CatalogService:

The code is pretty simple, it injects ServiceRegistry class, with @ZooKeeperRegistry qualifier. This is then used to register and unregister the service. Multiple URIs, one each for a stateless service, can be registered under the same logical name.

At this time, the qualifier comes from another maven module. A cleaner Java EE way would be to move the @ZooKeeperRegistry qualifier to a CDI extension (#20). And when this qualifier when specified on any REST endpoint will register the service with ZooKeeper (#22). For now, service endpoint URI is hardcoded as well (#24).

What does ZooKeeper class look like?

  1. ZooKeeper class uses constructor injection and hardcoding IP address and port (#23):
    It does the following tasks:

    1. Loads ZooKeeper’s host/port from a properties file
    2. Initializes Curator framework and starts it
    3. Initializes a hashmap to store the URI name to zNode mapping. This node is deleted later to unregister the service.
  2. Service registration is done using registerService method as:
    Code is pretty straight forward:

    1. Create a parent zNode, if needed
    2. Create an ephemeral and sequential node
    3. Add metadata, including URI, to this node
  3. Service discovery is done using discover method as:
    Again, simple code:

    1. Find all children for the path registered for the service
    2. Get metadata associated with this node, URI in our case, and return.The first such node is returned in this case. Different QoS parameters can be attached to the configuration data. This will allow to return the appropriate service endpoint.

Read ZooKeeper Javadocs for API.

ZooKeeper watches can be setup to inform the client about the lifecycle of the service (#27). ZooKeeper path caches can provide an optimized implementation of the children nodes (#28).

Multiple Service Discovery Implementations

Our shopping cart application has two two service discovery implementations – ServiceDisccoveryStatic and ServiceDiscoveryZooKeeper. The first one has all the service URIs defined statically, and the other one retrieves them from ZooKeeper.

Other means to register and discover can be easily added by creating a new package in services module and implementing ServiceRegistry interface. For example, Snoop, etcd, Consul, and Kubernetes. Feel free to send a PR for any of those.

Run Application

  1. Make sure the ZooKeeper image is running as explained earlier.
  2. Download and run WildFly:
  3. Deploy the application:
  4. Access the application at localhost:8080/everest-web/. Learn more about the application and different components in Monolithic to Microservices Refactoring for Java EE Applications blog.

Enjoy!

Docker Tools in Eclipse

Upcoming Docker Tooling for Eclipse gave a preview of Docker Tooling coming in Eclipse. This Tech Tip will show how to get started with it.

docker-logoeclipse-logo

NOTE: This is pretty bleeding edge and so some of the features may be half baked. But we are looking for all the feedback!

The Docker tooling is aimed at providing at minimum the same basic level features as the command-line interface, but also provide some advantages by having access to a full fledged UI.

Install Docker Tools Plugins

  • Download and Install JBoss Developer Studio 9.0 Nightly, take defaults through out the installation. Alternatively, download Eclipse Mars latest build and configure JBoss Tools plugin from the update site http://download.jboss.org/jbosstools/updates/nightly/mars/.
  • Open JBoss Developer Studio 9.0 Nightly or Eclipse Mars.
  • Add a new site using the menu items: Help > Install New Software… > Add…. Specify the Name: as “Docker Nightly” and Location: as http://download.eclipse.org/linuxtools/updates-docker-nightly/.Eclipse Docker Tooling
  • Expand Linux Tools, select Docker Client and Docker Tooling:Eclipse Docker Tooling
  • Click on Next >, Next >, accept the license agreement, and click on Finish. This will complete the installation of plugins.Restart the IDE for changes to take effect.

Docker Explorer

The Docker Explorer provides a wizard to establish a new connection to a Docker daemon. This wizard can detect default settings if the user’s machine runs Docker natively (such as in Linux) or in a VM using Boot2Docker (such as in Mac or Windows). Both Unix sockets on Linux machines and the REST API on other OSes are detected and supported. The wizard also allows remote connections using custom settings.

  • Use the menu Window, Show View, Other…. Type “docker” to see the output as:Docker Eclipse Tools
  • Select Docker Explorer to open the explorer.Docker Eclipse Tools
  • Click on the link in this window to create a connection to Docker Host. Specify the settings as shown:Docker Eclipse ToolsMake sure to get IP address of the Docker Host using docker-machine ip command.Also, make sure to specify the correct directory for .docker on your machine.
  • Click on Test Connection to check the connection. This should show the output as:Docker Eclipse ToolsClick on OK and Finish to exit out of the wizard.
  • Docker Explorer itself is a tree view that handles multiple connections and provides users with quick overview of the existing images and containers.Docker Eclipse Tools
  • Customize the view by clicking on the arrow in toolbar:Docker Eclipse Tools
  • Built-in filters can show/hide intermediate and dangling images, as well as stopped containers.Docker Eclipse Tools

Docker Images

The Docker Images view lists all images in the Docker host selected in the Docker Explorer view. This view allows user to manage images, including:

  • Pull/push images from/to the Docker Hub Registry (other registries will be supported as well, #469306)
  • Build images from a Dockerfile
  • Create a container from an image

Lets take a look at it.

  • Use the menu  Window, Show View, Other…, select Docker Images. It shows the list of images on Docker Host:Docker Eclipse Tools
  • Right-click on the image ending with wildfly:latest and click on the green arrow in the toolbar. This will show the following wizard:Docker Eclipse ToolsBy default, all exports ports from the image are mapped to random ports on the host interface. This setting can be changed by unselecting the first checkbox and specify exact port mapping.Click on Finish to start the container.
  • When the container is started, all logs are streamed into Eclipse Console:Docker Eclipse Tools

Docker Containers

Docker Containers view lets the user manage the containers. The view toolbar provides commands to start, stop, pause, unpause, display the logs and kill containers.

  • Use the menu Window, Show View, Other…, select Docker Containers. It shows the list of running containers on Docker Host:Docker Eclipse Tools
  • Pause the container by clicking on the pause button in the toolbar (#469310). Show the complete list of containers by clicking on the View Menu, Show all containers.

    Docker Eclipse Tools

  • Select the paused container, and click on the green arrow in the toolbar to restart the container.
  • Right-click on any running container and select Display Log to view the log for this container.

    Docker Eclipse Tools

Information and Inspect on Images and Containers

Eclipse Properties view is used to provide more information about the containers and images.

  • Just open the Properties View and click on a Connection, Container, or Image in any of the Docker Explorer View, Docker Containers View, or Docker Images View. This will fill in data in the Properties view.
  • Info view is shown as:

    Docker Eclipse Tools

  • Inspect view is shown as:

    Docker Eclipse Tools

The code is hosted in Linux Tools project.

File your bugs at: bugs.eclipse.org/bugs/enter_bug.cgi?product=Linux%20Tools and use “Docker” component. Talk to us on IRC.

Enjoy!

Java EE, Docker and Maven (Tech Tip #89)

Java EE applications are typically built and packaged using Maven. For example, github.com/javaee-samples/javaee7-docker-maven is a trivial Java EE 7 application and shows the Java EE 7 dependency:

And the two Maven plugins that compiles the source and builds the WAR file:

This application can then be deployed to a Java EE 7 container, such as WildFly, using the wildfly-maven-plugin:

Tests can be invoked using Arquillian, again using Maven. So if you were to package this application as a Docker image and run it inside a Docker container, there should be a mechanism to seamlessly integrate in the Maven workflow.

Docker Maven Plugin

Meet docker-maven-plugin!

This plugin allows you to manage Docker images and containers from your pom.xml. It comes with predefined goals:

Goal Description
docker:start Create and start containers
docker:stop Stop and destroy containers
docker:build Build images
docker:push Push images to a registry
docker:remove Remove images from local docker host
docker:logs Show container logs

Introduction provides a high level introduction to the plugin including building images, running containers and configuration.

Run Java EE 7 Application as Docker Container using Maven

TLDR;

  1. Create and Configure a Docker Machine as explained in Docker Machine to Setup Docker Host
  2. Clone the workspace as: git clone https://github.com/javaee-samples/javaee7-docker-maven.git
  3. Build the Docker image as: mvn package -Pdocker
  4. Run the Docker container as: mvn install -Pdocker
  5. Find out IP address of the Docker Machine as: docker-machine ip mydocker
  6. Access your application

Docker Maven Plugin Configuration

Lets look little deeper in our sample application.

pom.xml is updated to include docker-maven-plugin as:

Each image configuration has three parts:

  • Image name and alias
  • <build> that defines how the image is created. Base image, build artifacts and their dependencies, ports to be exposed, etc to be included in the image are specified here.Assembly descriptor format is used to specify the artifacts to be included and is defined in src/main/docker directory. assembly.xml in our case looks like:
  • <run> that defines how the container is run. Ports that need to be exposed are specified here.

In addition, package phase is tied to docker:build goal and install phase is tied to docker:start goal.

There are four docker-maven-plugin and you can read more details in the shootout on what serves your purpose the best.

How are you creating your Docker images from existing applications?

Enjoy!


Deploying Java EE Application to Docker Swarm Cluster (Tech Tip #88)

What is Docker Swarm?

Docker Swarm provides native clustering to Docker. Clustering using Docker Swarm 0.2.0 provide a basic introduction to Docker Swarm, and how to create a simple three node cluster. As a refresher, the key components of Docker Swarm are shown below:

In short, Swarm Manager is a pre-defined Docker Host, and is a single point for all administration. Additional Docker hosts are identified as Nodes and communicate with the Manager using TCP. By default, Swarm uses hosted Discovery Service, based on Docker Hub, using tokens to discover nodes that are part of a cluster. Each node runs a Node Agent that registers the referenced Docker daemon, monitors it, and updates the Discovery Service with the node’s status. The containers run on a node.

That blog provide complete details, but a quick summary to create the cluster is shown below:

Listing the cluster shows:

It has one master and two nodes.

Deploy a Java EE application to Docker Swarm

All hosts in the cluster are accessible using a single, virtual host. Swarm serves the standard Docker API, so any tool that communicates with a single Docker host communicate can scale to multiple Docker hosts by communicating to this virtual host.

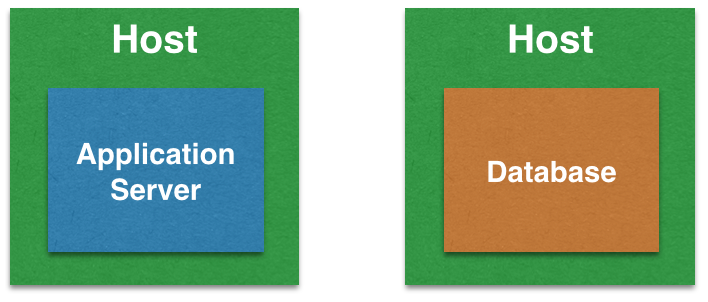
Docker Container Linking Across Multiple Hosts explains how to link containers across multiple Docker hosts. It deploys a Java EE 7 application to WildFly on one Docker host, and connects it with a MySQL container running on a different Docker host. We can deploy both of these containers using the virtual host, and they will then be deployed to the Docker Swarm cluster.

Lets get started!

MySQL on Docker Swarm

  1. Start the MySQL container
  2. Status of the container can be seen as:
    It shows the container is running on swarm-node-01.

    Make sure you are connected to the Docker Swarm cluster using eval $(docker-machine env --swarm swarm-master).

  3. Find IP address of the host where this container is started:

    Note IP address of the node where MySQL server is running. This will be used when starting WildFly application server later.

    ps: Filtering by name seem to not return accurate results (#10897).

WildFly on Docker Swarm

  1. Start WildFly application server by passing the IP address of the host and the port on which MySQL server is running:

  2. Status of the container can be seen as:

    It shows the container is running on swarm-node-02. IP address of the host is also shown in the PORTS column.

    As explained in Tech Tip #69, JDBC URL of the data source uses the specified IP address and port for connecting with the MySQL server. However passing IP address is very brittle as the MySQL server may restart on a different Docker host. This is filed as #773.

  3. Access the application at:

    This is using the IP address of the host where the container is started.

Enjoy!


JDK 9 REPL: Getting Started (Tech Tip #87)

Conferences are a great place to meet Java luminaries. Devoxx France was one such opportunity to meet Java language architect, ex-colleague and an old friend – Brian Goetz (@briangoetz). We talked about JDK 9 and he was all raving about REPL. He mentioned that even though there are a lot of significant features, such as modularity and HTTP2 client, in Java SE 9, but this tool is going to be talked about the most often. The statement makes sense since it will really simplify exploration of Java APIs, prototyping, demos in conferences, and similar tasks a lot simpler. This blog is coming out of our discussion there and his strong vote on REPL!

Read-Evaluate-Print-Loop has been there in Lisp, Python, Ruby, Groovy, Clojure, and other languages for a while. Unix shell is a REPL which can read shell commands, evaluate them, print the output, and goes back in the loop to do the same thing.

JDK 9 REPL

You can read all about REPL in JDK 9 in JEP 222. Summary from the JEP is:

Provide an interactive tool which evaluates declarations, statements, and expressions of the Java Programming Language: that is, provide a Read-Evaluate-Print Loop (REPL) for the Java Programming Language. Also, provide an API on which the tool is built, enabling external tools to supply this functionality.

JEP 222

The motivation is also clearly spelt out in the JEP:

Without the ceremony of class Foo { public static void main(String[] args) { … } }, learning and exploration is streamlined.

JEP 222

JEP 222 targets to ship REPL with JDK 9 but openjdk.java.net/projects/jdk9 does not list it is as “targeted” or “proposed to target”. Seems like a documentation bug 😉


As of JDK 9 build 61, REPL is not integrated, and needs to be built separately. Eventually, at some time before JDK 9 is released, this tool will be integrated in the build.

Lets see what does it require to have it running on OSX. This blog followed Java 9 REPL – Getting Started Guide to build and run REPL. In addition, it provides complete log output from the commands which might be helpful for some.

Lets get started!

Install JDK 9

  1. Download the latest build, 61 at the time of this writing.
  2. Setup JAVA_HOME as:
    More details on setting JAVA_HOME on OSX are here.
  3. Verify the version:

Checkout and Install jline2

jline2 is a Java library for handling console input. Check it out:

And then build it:

Clone and Build JDK 9 REPL

OpenJDK codename for the project is Kulla which means “The God of Builders”. Planned name for the tool is jshell.

  1. Check out the workspace:
  2. Get the sources:
  3. Edit langtools/repl/scripts/compile.shscript such that it looks like:
    Notice, the only edits are #!/bin/sh for OSX and adding JLINE2LIB to the location of your previously compiled jline2 workspace. javac is picked from JAVA_HOME that is referring to JDK 9.
  4. Compile the REPL tool by invoking the script from langtools/repl directory:

Run JDK 9 REPL

  1. Edit langtools/repl/scripts/run.sh script such that it looks like:
    Notice, the only edits are !/bin/sh for OSX and adding JLINE2LIB.
  2. Run REPL as:

JDK 9 REPL Hello World

Unlike the introduction of bouncing ball or dancing Duke that was used to introduce Java, we’ll just use the conventional Hello World for REPL

Run “Hello World” as:

Voila!

No public static void main, no class creation, no ceremony, just clean and simple Java code. The entered text is called as “snippet”.

The complete Java code can be seen using /list all and looks like:

This snippet can be saved to a file as:

Note this is not a Java file. Saved snippet is exactly what was entered:

And the tool can be exited as:

Or you can just hit Ctrl+C.

Complete list of commands can be easily seen:

JDK 9 REPL Next Steps and Feedback

Follow the REPL Tutorial to learn more about the tool’s capability. Here is a quick overview:

  • Accepts Java statements, variable, method, and class definitions, imports, and expressions
  • Commands for settings and to display information, such as /list to display the list of snippets, /vars to display the list of variables, /save to save your snippets, /open to read them back in.
  • History of snippets is available, snippets can be edited by number,